Transcription
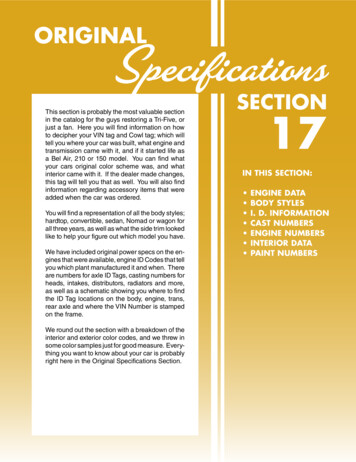
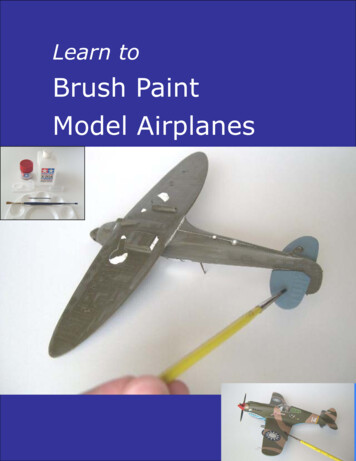
Learn toBrush PaintModel Airplanes
Table of ContentsModel Paints.4Brushes.6Workspace Setup.7Surface Preparation .9Painting Procedure .10Paintbrush Cleanup.14Masking.15Dry-brushing.17Clear Coats.182
Copyright 2005-2011www.modelairplanebuilding.com3
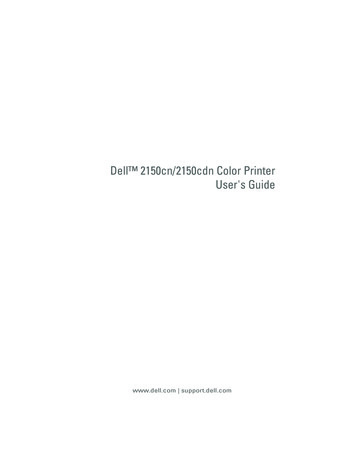
Model PaintsEvery paint has three main components: the pigment which is the color containingpart, the resin which binds the pigment to the surface, and the solvent which holdseverything together in the liquid form. There are two broad classes of paint,enamels and lacquers. Enamels undergo a chemical reaction (curing) as thesolvent evaporates. In lacquers, the solvent evaporates without any curing.Now hobby paints are generally (oil-based) enamels, or aqueous (water-based)acrylic lacquers. The hobby enamels (e.g. Testors, Model Masters, Humbrol) thinwith mineral spirits, dry slowly and harden beautifully to a glossy finish. The hobbyacrylics (e.g. Tamiya, PollyScale, Floquil, Vallejo) thin with water or alcohol, dryfaster, and clean up easier. People tend to develop a preference for one or theother, so try both and see which you prefer.Above: Assortment of enamel paints.Above: Assortment of acrylic paints.4
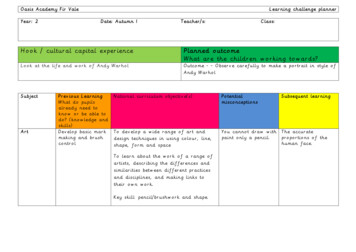
Right: Thinned alcohol for cleaning acrylic paints. Left: Future floor wax, for glosscoats over acrylic.Another good solvent to know about is Future Floor Wax. Yes, Floor Wax. It’s aliquid acrylic designed for floors. It works great as a gloss coat, and can be brushedstraight from the bottle without thinning.5
BrushesThe paintbrush is the simplest method of applying paint. They come in differentshapes, flat and round being the most common. They also come in different sizesand materials. You'll need at least: a broad flat brush for large area coverage (1/4inch or larger), a medium width round brush for general use (#1 or 2), and a finepoint brush for detail work (10/0).Above: An assortment of model paintbrushes, acquired over time.Below: You can get most models done with three brushes: a wide flat, a mediumround, and a fine tip "spotter".6
Workspace SetupHaving a convenient work area for painting will make your like much simpler.It’s best to use a sturdy workbench or table. Something that can be accidentallycollapsed by a pet or child will not do. Make sure you have adequate ventilation inthe room, especially if using enamel paints. Open a window and use a fan to helpmove air through the room.One convenient accessory is a turntable for crafts, available from Target or others.It’s basically a round stand that can rotate on its base. The one in the photo below isglued to a cheap stool for outdoor work, but you could just as easily place it on yourworktable. This is convenient for painting with one hand while rotating the table withthe other, so that all sides of the part get painted. I also have all the “bits” neededfor painting in a plastic box “caddy” beneath the turntable. That way I can get allthe necessary stuff to my paint area without making a large number of trips backand forth.Above: Cheap stool and craft “turntable” make convenient painting stand.7
Above: Plastic caddy. Got paint, thinner, cups for mixing, toothpicks for mixing,sticks, and plastic droppers to get paint or thinner.You will also need adequate lighting. A good desk lamp with a swing arm will helpprevent eyestrain. If you can get one with a built-in magnifier, so much the better.Keep any reference photos of the model close by, you will refer to these very oftenduring the painting process. Taping a diagram of the paint scheme on the wall overthe worktable will help prevent lots of folding and unfolding later on.8
Surface PreparationThe paint job will be only as good as the surface that it goes on. You will not hideunevenness, cracks, wood grain or anything else with the paint.The most critical ingredient in getting a good surface is sandpaper. Use variousgrades from coarse (400 grit or so) down to fine (as small as 2000 grit). Do not usethe bare sandpaper with only your hand over large surfaces, as this will leaveunevenness in the surface. Get small sanding blocks for the hardware store: I likethe ones that allow you to remove and change the paper. The open grit drysandpaper works well for most of our purposes, although I also like to wet sand afterprimer coats.If necessary, apply fillers to close up bigger gaps or holes. Use 400 grit paper on thefilled area to remove excess filler.Sand with 3 or more grades, each finer than thelast, until the surface is smooth to the touch. Look at the surface by angling itupwards to a light. When you think you are done, sand some more. On some of thebetter quality kits, the fit is so good that no filler is necessary; in those cases, youcan still roughen the surface slightly with 2000 grit paper to help the paint stick.Be careful not to sand too aggressively, especially on kits with raised panel lines, asthis detail is easily removed. In spite of your best efforts, some detail may beremoved in areas where you had to correct the fit with filler. In those cases, use ahobby knife to re-scribe the surface detail. Use a flexible metal ruler, or thin card, asa guide for your knife.When the surface is smooth, it will need to be cleaned before painting. At this point,you should only handle the model with disposable plastic gloves (wear these whenyou paint also). The dirt and oils from your hands can affect the paint quality.Change your gloves from time to time; wash and dry your hands before pulling onnew gloves.Wash the model with soap and water, and air dry on paper towels. Use a hair dryerat medium setting to remove stubborn droplets and prevent watermarks.9
Painting ProcedureThese are the steps to take when brush painting a model airplane:1. Make sure the parts are smooth, clean and dry. Paint will not cover upsurface defects. See the section on Surface Prep.2. Make sure the brush is clean. See the section on Brush Cleanup.3. Secure the part to be painted. Mount it to scrap material with tape, a dabof hot glue, or blu-tack. This gives you both hands free to work with, and willallow you to paint more than one side of the part in one go.4. Stir the paint thoroughly with a toothpick.5. Using a straw or dropper, add some paint to a clean small container orpalette.6. If required, add a few drops of thinner and stir with a toothpick.10
7. Dip the brush in thinner, and shake or drip most of it off.8. Dip the brush in the paint mixture. Load up the bristles, wipe of excess onthe side of the container/palette. The paint should not be dripping out of thebristles.9. Brush the model with smooth even strokes.10. Use as little overlap as possible between strokes.Below: Horizontal stab painted with 4 vertical strokes. Paint in a consistent direction forbest results.11. Do not try to re-brush areas already brushed. Give the paint a chance tolevel on its own.Above: First coat of light-colored paint resulted in uneven coverage of the dark-colored plastic(left).After drying, second coat applied with perfect result (right).12. Do not worry if you don’t get complete coverage or paint thickness in one try.Wait till the paint is dry, then do a second coat if necessary. Some colors(e.g. white or yellow) may require 3 or more coats for complete coverage.13. Clean the brush and put it away. See the section on Brush Cleanup.11
The keys to getting a nice smooth paint job with a brush are: Use a brush with soft bristles. Sable is best; although expensive, if caredfor it will last a long time and perform well. For a rough surface (e.g. wall ortire) a camel hair or synthetic brush is fine. Enamels tend to brush better than acrylics as they dry slower. If your acrylicpaint is not brushing well, try adding a small amount of thinner, or liquidacrylic paint retarder (from the art supply store). Also, periodically dippingthe brush in a container of water helps when brushing acrylics. Practice on scrap plastic before painting your first model. Recycled wateror milk bottles work well for this, as well as excess sprue material from thekit. See example below.Above: Test paint using Tamiya acrylic Red (X-7). The paint was thinned with just acouple of drops of Tamiya’s acrylic thinner (about 10:1 paint:thinner). This wasbrushed onto a plastic water bottle with a ¼ inch flat sable brush. The brush wasfirst dipped into a small container of pure thinner (excess shaken off), then into thepaint mixture. The width of the area shown represents 3 vertical brush strokes.Note the smoothness of the paint job.12
Above: Horizontal stabilizer painted with Model Master Acrylic (U.S. Navy Blue Gray).Same painting procedure as previous photo, two coats. Again, note the smooth evencoverage, absence of brush marks, and no loss of surface detail.13
Paintbrush CleanupAfter using the brush, clean up with the recommended thinner.For acrylics, you can use dishwashing detergent and water.Run the brush underthe tap, rubbing out the paint with your fingers.For enamels, it’s helpful to have two small containers with thinner. The first will berelatively dirty thinner, the second will be very clean thinner. Dip the brush in thefirst, swish it around, then dip in the second. Change the thinner in the secondcontainer with each change of colors.After removing the paint, shape the bristles of the brush with your fingers so thatthey are not distorted (e.g. flatten the bristles on a flat brush). Store with thebrushes in a cup-like container with bristles pointing upward and into the air.14
MaskingPainting of scale models will often involve the use of masks. These masks simplyblock paint from areas were it doesn't belong. Models with military camouflage willoften need masking.Using the right masking materials will help ensure success. The mask materialneeds to stick well to the surface, but must be removable without pulling up any ofthe underlying base paint. Masks can be made with tape, film, or liquid.Not all tapes are created equal. Of all the brands we've tried (many!), Tamiyamasking tape is the best. This is yellow tape, available at the hobby shop in variouswidths, see below.This might be a little more expensive than regular whitemasking tape, but it will go down and come off without damaging your paint job.You can burnish down the edges to prevent paint creeping under. The extra expenseis worth it. We've also had good luck with blue house-painter's masking tape.Above: It can be difficult to get good coverage with yellow paint, especially over darkcolors. Solution: paint the propeller tips yellow first, then after drying mask withtape, then paint the blades black.Frisket film is another great masking material (see photo below). It's generallyavailable in art supply stores, sometimes in the local drug store. It's a low-tack,clear film with a backing. It can easily be cut with a hobby knife to the required15
shape. Since it comes in a large sheet, you can cover larger areas faster than with aroll of masking tape. The only disadvantage is that it doesn't go around compoundcurves really well, so at those points you can supplement it with masking tape.Liquid masking films are very convenient. The bottle shown below is Micro Mask,available at your local hobby shop. Simply paint the liquid onto the surface needinga mask. When dry it forms a thin rubbery coating. Use a sharp knife to cut alongthe pattern, and remove the excess. This is obviously great for compound curvesand surface detail. We use it all the time for masking off canopies (to paint thecanopy frame).Above: Frisket Film, Micro Mask liquid mask, and Tamiya masking tape.To make the masks, use a photo of the camouflage pattern of the real airplane as aguide. A full-size painting guide is included in the better kits. Secure a photocopy ofthe camouflage pattern that came with the kit to the top of the Frisket film, then cutwith an X-acto knife. Another option is to get a sheet of glass (e.g. cheap pictureframe glass), and cover it with overlapping strips of wide masking tape. Lay thepattern on top and cut out the masks as before.16
Dry-brushingDry-brushing highlights the raised detail, or high-points. This is done by dipping thebrush in paint, but then removing almost all of it by painting onto scrap material.When the brush seems fully dry or empty of paint, you are ready. Draw the brushacross the raised detail, and it will leave just enough paint behind to createhighlights.Above: Instrument Panel from a Spitfire kit. Top photo, panel painted with basecolor (interior green) and instruments painted black. Bottom photo, blackinstruments highlighted with silver dry-brushing. Notice the huge improvement incontrast.To create the right effect, you'll need to use the right dry-brush color with your basecolor. Here are some suggestions:Base ColorInterior Green(U.S.)Interior Green(U.K.)BlackDark GrayDry-brush ColorFlat YellowFlat WhiteSilverSilver17
Clear CoatsA clear coat is a transparent coat of paint, generally applied as one of the later stepsin the paint job. The clear coat could be glossy or flat. Seen through a magnifyingglass, the surface of a flat coat looks rough compared to a gloss coat. This isgenerally accomplished by adding fine particles to a basic clear coat.Now you may be asking yourself, why put on a coat of paint if you can see rightthrough it? Actually, there are several good reasons for doing this.The clear coat acts a final protective layer for the paint underneath it. In manycases, there may be several different colors applied to the piece, and each color canhave a different level of gloss or shine. A uniform clear coat on top of all that gives auniform shine to the finish. A gloss clear coat can make add “depth” and brilliance tothe paint job, as commonly seen on real automobile finishes. With a model warplaneor other service vehicle, the actual paint finish of the real thing might be flat, i.e.non-reflective (glossy airplanes are too easily found by the opposing forces). In thatcase, a flat clear coat gives a uniform (and controllable) level of dullness. Gloss andflat paints can be mixed to give semi-gloss finishes.There is a specific application for gloss clear coats in model building, and that is forthe decals used for the painted markings (e.g. national insignia). These decals arelayers of paint on a plastic backing film. If applied over a flat-finished surface,reflected light gets randomly scattered through the clear plastic film, making it highlyvisible. The effect is called “silvering”. However, a clear gloss coat sprayed on themodel before the decals are applied reduces the scattering of light, making theplastic backing film less visible. Another coat of clear gloss after decal applicationhelps seal them. If the real article has a flat finish, a flat clear coat is applied as thelast step.18
Above: Decal on glossy versus flat surface finish.Future floor wax is an excellent clear coat for brush application. Apply with a widebrush, straight from the bottle. The Future will level itself very well. Clean up withWindex.-End-Copyright 2005-2011www.modelairplanebuilding.com19
Painting Procedure These are the steps to take when brush painting a model airplane: 1. Make sure the parts are smooth, clean and dry. Paint will not cover up surface defects. See the section on Surface Prep. 2. Make sure the brush is clean. See the section on Brush Cleanup. 3. Secure the par