Transcription
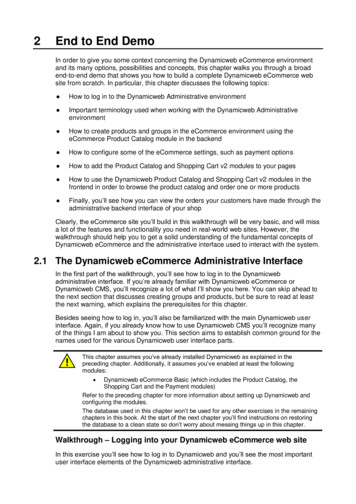
2End to End DemoIn order to give you some context concerning the Dynamicweb eCommerce environmentand its many options, possibilities and concepts, this chapter walks you through a broadend-to-end demo that shows you how to build a complete Dynamicweb eCommerce website from scratch. In particular, this chapter discusses the following topics: How to log in to the Dynamicweb Administrative environment Important terminology used when working with the Dynamicweb Administrativeenvironment How to create products and groups in the eCommerce environment using theeCommerce Product Catalog module in the backend How to configure some of the eCommerce settings, such as payment options How to add the Product Catalog and Shopping Cart v2 modules to your pages How to use the Dynamicweb Product Catalog and Shopping Cart v2 modules in thefrontend in order to browse the product catalog and order one or more products Finally, you’ll see how you can view the orders your customers have made through theadministrative backend interface of your shopClearly, the eCommerce site you’ll build in this walkthrough will be very basic, and will missa lot of the features and functionality you need in real-world web sites. However, thewalkthrough should help you to get a solid understanding of the fundamental concepts ofDynamicweb eCommerce and the administrative interface used to interact with the system.2.1 The Dynamicweb eCommerce Administrative InterfaceIn the first part of the walkthrough, you’ll see how to log in to the Dynamicwebadministrative interface. If you’re already familiar with Dynamicweb eCommerce orDynamicweb CMS, you’ll recognize a lot of what I’ll show you here. You can skip ahead tothe next section that discusses creating groups and products, but be sure to read at leastthe next warning, which explains the prerequisites for this chapter.Besides seeing how to log in, you’ll also be familiarized with the main Dynamicweb userinterface. Again, if you already know how to use Dynamicweb CMS you’ll recognize manyof the things I am about to show you. This section aims to establish common ground for thenames used for the various Dynamicweb user interface parts.This chapter assumes you’ve already installed Dynamicweb as explained in thepreceding chapter. Additionally, it assumes you’ve enabled at least the followingmodules: Dynamicweb eCommerce Basic (which includes the Product Catalog, theShopping Cart and the Payment modules)Refer to the preceding chapter for more information about setting up Dynamicweb andconfiguring the modules.The database used in this chapter won’t be used for any other exercises in the remainingchapters in this book. At the start of the next chapter you’ll find instructions on restoringthe database to a clean state so don’t worry about messing things up in this chapter.Walkthrough – Logging into your Dynamicweb eCommerce web siteIn this exercise you’ll see how to log in to Dynamicweb and you’ll see the most importantuser interface elements of the Dynamicweb administrative interface.
Dynamicweb eCommerce 81.Chapter 2End to End DemoStart by browsing to the /Admin folder of your web site. If you followed the instructions inthe preceding chapter, you should browse tohttp://ecommerce8.local.dynamicweb.dk/Admin. The Dynamicweb Login screenappears as shown in Figure 2-1:Figure 2-12.Enter you user name and password and click the Login button. If you followed theinstructions in the preceding chapter on creating a Favorite to log in, you can simply clickthe DW Login item on the toolbar to enter your user name and password and click the SignIn button. Once you’re logged in you’ll see the main Dynamicweb administrative interfaceappear.Main ToolbarPageNavigationPanelMain ContentAreaMainMenuItemsMain MenuFigure 2-2 2011 – Imar Spaanjaars – De Vier KoedenPage 2 of 18
Dynamicweb eCommerce 8Chapter 2End to End DemoThis screen features the following important UI elements:Main ToolbarThis toolbar is always present and provides quick access to the “My Page” of Dynamicweb– your personalized homepage of the administrative interface. In addition it has buttons tolog out, view the site’s statistics, open the homepage of your web site (using Open website)and to go to the on-line manual.Main Content AreaDirectly below the main toolbar you’ll see the main content area. This area will changedepending on which task you’re working on.Main MenuIn the bottom left corner you’ll see the Main Menu, which may show more or fewer buttonsdepending on the number of modules that are installed. The most commonly used itemsinclude:Menu ItemDescriptionContentOpens the Page Navigation Panel – referred to as the NavigationPanel - so you can see the site’s structure.File ManagerOpens the File Manager, which you use to manage files (includingtemplates and other files such as PDF and Word documents) in aWindows Explorer-like interface.eCommerceOpens the eCommerce environment, which enables you to managegroups, products, orders and statistics. You’ll see a lot more of thismodule in the remainder of this book.ModulesThis menu item provides access to the currently installed modules, forboth Dynamicweb CMS and Dynamicweb eCommerce.Management CenterYou use the Management Center to configure a wide variety ofDynamicweb settings. You’ll use the eCommerce and other sections ofthe Management Center throughout this book.The Ribbon BarAnother important user interface element in Dynamicweb is the Ribbon bar, which appearsin many screens in the administrative interface. The Ribbon is not visible in Figure 2-2 butyou can bring one up by clicking the New page link at the top of the Navigation Panel. Youshould see something like Figure 2-3:Figure 2-3A Ribbon bar is often divided into multiple tabs (Menu item, Options, Advanced, and Layoutin Figure 2-3) and each tab in turn is often divided into multiple categories (Tools, Page,Accessibility and Help in the above figure). Throughout this book you’ll find instructions thathave you work with the many controls and options on the Ribbon bar. For example, you’llcome across instructions such as: “switch to the Menu item tab, and in the Page categoryclick the Show button”. Keep the above figure in mind when you come across these termslater in the book.Now that you’ve seen the most important Dynamicweb UI elements and their officialnames, it’s time to look at one of them in more detail: the Product Catalog Module. 2011 – Imar Spaanjaars – De Vier KoedenPage 3 of 18
Dynamicweb eCommerce 8Chapter 2End to End Demo2.2 Managing Products and Product GroupsDynamicweb eCommerce offers a lot of functionality for different types of users. Obvious, alarge part of the action takes place at the front end, where customers interact witheCommerce in order to find and order products. But there’s also a lot to manage andconfigure for store owners, site administrators, and developers. In this section I’ll show youhow to manage product groups and products using the Product Catalog module. Latersections dig deeper into the configuration options in the Management Center and how touse the eCommerce modules in front end pages. Later chapters in this book then show youhow to work with all these options from both a shop manager’s and a developer’sperspective.When you set up a brand new web site in Dynamicweb, you’ll notice some of thecontent is in Danish. For example, the default group in the eCommerce module iscalled Gruppe1 which is Danish for Group1. In the following, and later exercises,you’ll see how to localize this in English, or to your own language.Walkthrough – Creating Product Groups and Products1.Log in to your Dynamicweb site and click the eCommerce item in the Main Menu.2.Expand the Product catalog item and then SHOP1 until you see the default group calledGruppe1.3.Right-click this group and choose Delete group. Click OK when you’re asked forconfirmation. The group and the only product it contained will be deleted from the database.4.Right-click SHOP1 and click New group. Enter a Name such as Mountain Bikes. You canleave all other fields set to their default values.5.Click Save and Close on the Ribbon bar.6.Repeat steps 4 and 5 and create another group called Road Bikes.7.The Product Catalog should now look like Figure 2-4:Figure 2-48.Right-click the Mountain Bikes group and choose New product. The New product dialogenables you to enter a lot of data about a product such as its title, number, manufacturer,description, images, prices and more. For now, just go ahead and enter a Name (such asMongoose Canaan Comp), a Number (such as 10017) and a Price (such as 1,199Kroner). Don’t worry about the current settings for currencies, selected language or any ofthe other fields you’re leaving blank for now. The remainder of this book will show you in 2011 – Imar Spaanjaars – De Vier KoedenPage 4 of 18
Dynamicweb eCommerce 8Chapter 2End to End Demodetail how to set things up to match your country, currency and other environmentvariables.9.Click Save and close on the Ribbon bar.10. Repeat steps 8 and 9 but this time create the following products:Product nameProduct numberPriceGT Transeo 1.0 Comfort Bike10009549Mongoose Ritual Street Mountain Bike10096100Mongoose Tyax Comp Disc1000129911. Next, add a few products to the Road Bikes group. However, rather than creating eachproduct separately, you can leverage the Create Multiple Products feature to insert multipleproducts at the same time. To access this feature, click the Road Bikes group in the treeon the left and then click Create multiple products on the Ribbon bar. Then enter thefollowing details and when you’re done, click Save and close. Click the gray link below theproduct fields to create a new product. You can leave the stock field set to 0, as it’s notused in this exercise.Product numberProduct namePrice10004Scattante X-560 Cyclocross84910102K2 Enemy Cyclocross Bike 2008999In case you wonder how you can enter other details for the product in thisMultiple Products mode, you can define the columns you see here by altering theview for the product list. To do this, click the Road Bikes group in the tree again.Then right-click on a column name such as Number, and select more or fewercolumns from the list. You can change the order the columns appear in byclicking the More. option in the context menu as shown in the following screenshot:The columns you choose here are now also available when you create multipleproducts. 2011 – Imar Spaanjaars – De Vier KoedenPage 5 of 18
Dynamicweb eCommerce 8Chapter 2End to End Demo12. To see a list of all the products you just created, click the All products link below the grouplist in the eCommerce tree. You should see something similar to Figure 2-5:Figure 2-5Now that your product catalog has some products, the next step is to configure some basicsettings needed to let users in the front end order these products.2.3 Configuring a Payment MethodAs you’ll see in later chapters of this book, you can configure a tremendous amount ofsettings using the eCommerce area of the Management Center. Some of these settingsinclude: Countries, Languages and Currencies (See Chapter 14) Tax, rounding and other price related settings (See Chapter 9) Discounts (see Chapter 9) Payment, Shipping and Track & Trace providers (see Chapter 8) Custom order, order line, product and product group fields (see Chapter 10)For now, I’ll ignore most of the settings and only show you how to create a “No Pay”payment method that lets users complete an order without the need to go to a (dummy)payment method site.Walkthrough – Configuring a Payment Method1.Once again, make sure you’re logged in to the Dynamicweb administrative interface.2.Click the Management Center in the Main Menu.3.Expand the path eCommerce Orders and click the Payment option.4.Open the existing Giro option by clicking its name and then click the Delete paymentbutton on the toolbar. Click OK when you’re asked to confirm the deletion of the paymentmethod. 2011 – Imar Spaanjaars – De Vier KoedenPage 6 of 18
Dynamicweb eCommerce 85.Chapter 2End to End DemoClick New payment and enter the following details:Figure 2-66.Switch to the Country fees tab shown in Figure 2-6 and place a checkmark in front of thecountry Denmark. Again, you’ll see later how to change these Danish defaults into yourown. This makes the method available for orders that are to be shipped to Denmark(although you can also hook up the method to the billing address if you prefer, as you’ll seelater in this book). Again, don’t worry about the actual country for the Shipping and Billingaddresses; you’ll see later how to create and configure your own countries.7.Click Save and close to apply the changes.For now, this is all you need to do to configure Dynamicweb eCommerce. You now have abunch of products placed in product groups and an option to let customers order theseproducts and be billed later. The next logical step is to create a few frontend pages in yourweb site that present the products and guide the user through the checkout process.2.4 Creating Frontend PagesAlthough Dynamicweb eCommerce consists of a large number of modules (more than 20 ifyou count the extended versions as well), only three of them can be added to frontendpages. These three modules are: Product Catalog Shopping Cart Customer CenterIn this section you’ll see how to add and configure the first two, while the Customer Centeris discussed in Chapter 11.2.4.1 Configuring the Product Catalog ModuleIn order to let users browse the products you created in an earlier exercise, you need touse the Product Catalog module. At the front end, this module lets users see the entire listof products, view groups, search for products, view individual products and add them totheir shopping cart. In the next exercise you’ll set up the module accepting most of thedefault settings that Dynamicweb offers you. The Product Catalog module is discussed indetail in Chapter 4. 2011 – Imar Spaanjaars – De Vier KoedenPage 7 of 18
Dynamicweb eCommerce 8Chapter 2End to End DemoWalkthrough – Creating the Product Catalog Page1.Log in to your Dynamicweb site and make sure the Navigation Panel is open. If it isn’t, clickContent in the Main Menu. Click the New page link in the Navigation Panel, enter ProductCatalog as the Page name and click Save and close. Normally, you would enter moreinformation here, such as the page’s title and keywords in order to optimize the page forsearch engines but for this demo a simple page name is sufficient.2.On the new Ribbon bar that has appeared click New paragraph. For the Paragraph name,enter Product Catalog again. Then click the Module button on the Ribbon bar (with thejigsaw icon), switch to the eCom tab and click the Product Catalog (eCom) module,shown in Figure 2-7:Figure 2-73.Leave the Show item of the Settings category set to Product groups and then in theDisplay category of the module settings, click the Add button for the Product groups item.A popup window appears that enables you to select one or more eCommerce groups.Expand SHOP1 and then check off both the groups that you created earlier. Once you clickSave and close, your settings are saved and you’ll see the two groups appear in themodule settings dialog shown in Figure 2-8: 2011 – Imar Spaanjaars – De Vier KoedenPage 8 of 18
Dynamicweb eCommerce 8Chapter 2End to End DemoFigure 2-84.For now you can leave all other module settings set to their default. 2011 – Imar Spaanjaars – De Vier KoedenPage 9 of 18
Dynamicweb eCommerce 8Chapter 2End to End Demo5.Click Save and close on the Ribbon bar to apply the changes to the module settings andthe paragraph you added to the page.6.To test your page, right-click it in the Navigation Panel and choose Show page. Your pageshould look similar to the one shown in Figure 2.9:Figure 2-97.Click the Add to cart button for one of the products. You won’t be able to proceed to thecheckout as you haven’t created a page with the Shopping Cart module yet. You’ll see howto do that next.2.4.2 Adding the Shopping Cart ModuleThe Shopping Cart module is the user’s main entry point to the checkout process. It collectsuser data, enables the user to enter a billing and shipping address, select a payment andshipping provider, finalize the order, subscribe to newsletters and more. In addition, the cartcan be configured to enforce validation rules that you can define yourself to avoidincomplete orders from appearing in your system. All of this functionality is discussed indetail in Chapter 5.The Shopping Cart module you’ll create in the next exercise will be pretty simple, with mostsettings left to their defaults. This way, you can get a good feel of the overall functionality ofthe cart without getting caught up in lots of details.Walkthrough – Creating the Shopping Cart Page 2011 – Imar Spaanjaars – De Vier KoedenPage 10 of 18
Dynamicweb eCommerce 8Chapter 2End to End Demo1.Make sure the Navigation Panel is open. (If it isn’t, click Content in the Main Menu first).Click the New page link in the Navigation Panel, enter Cart as the Page name and clickSave and close.2.On the new Ribbon bar that has appeared click New paragraph. For the Paragraph name,enter Cart again. Then click the Module button on the Ribbon bar, switch to the eCom taband click the Shopping Cart v2 (eCom) module. You’ll see the screen shown in Figure 210 appear: 2011 – Imar Spaanjaars – De Vier KoedenPage 11 of 18
Dynamicweb eCommerce 8Chapter 2End to End DemoFigure 2-103.In the Shop drop-down, choose SHOP1. If you don’t choose a shop explicitly here,Dynamicweb will select the default shop for the solution. In the next chapter you’ll see howto configure a default shop.4.In the Steps section you can configure the steps (and the order in which they appear) theuser has to go through to complete an order. The default steps in Figure 2-10 first show thecontents of the cart, then ask the user for a billing and shipping address and a payment anddelivery provider. Depending on the configured provider, the “Checkout” step thenoptionally takes the user to the payment method, where they can complete the payment. Inthis demo this step is skipped since the payment method you defined earlier simply skipsthis step and marks the order as paid immediately. The final step – Receipt – provides areceipt with the order, payment, and delivery information that the user can print.5.Leave all other options set to their defaults and click Save and close on the Ribbon bar tosave the paragraph and the module settings.6,Now that you’ve saved the page with the cart, the next step is to update the Checkout linkthat appears below the summary of the Shopping Cart in the left column in the frontendsite. To update the link, you have two options: you can either point to a hardcoded ID of apage with your shopping cart, or you can use the handy DwAreaCartPageID template tag,which points to the first page with the Shopping Cart module attached in the current area.This latter option is preferred as it’s easier to configure and is updated automatically if youmove your Shopping Cart module. But, for cases where you want a direct link, I’ll show youhow to use a hard coded ID as well.You need to start off by finding the page’s ID, which you can do by hovering your mouseover the page in the Navigation Panel. You’ll see the page’s ID appear in the upper-rightcorner of the Navigation Panel, as shown in Figure 2-11:Figure 2-117.Next, open the Design called Main.html from its location at/Files/Templates/Designs/Dynamicweb. You can use the File Manager to locatethe file and then right-click the file and choose Edit to bring up the Template Editor.Alternatively, you can open the file in Visual Studio, Notepad or any other text editor directlyfrom your hard drive.8.Scroll down to around line 102 and locate the following link: a href "Default.aspx?ID 52" Check out /a 9.Change the ID from 52 to the ID you found in step 6 and save the changes to yourtemplate. Your template now contains a hard coded link to the page with the Shopping Cart(which Dynamicweb will change to Cart.aspx when you have the Customized URLs moduleconfigured correctly). If, instead, you want to use the dynamic template tag, alter the link asfollows: 2011 – Imar Spaanjaars – De Vier KoedenPage 12 of 18
Dynamicweb eCommerce 8Chapter 2End to End Demo a href "Default.aspx?ID !--@DwAreaCartPageID-- " Check out /a With this template tag, the link is expanded to something like /Cart.aspx automatically in thebrowser, providing you with a convenient way to link to the Cart page from anywhere inyour site without the need to hardcode IDs.The ID is cached by Dynamicweb, so if the link doesn’t end up correctly, you mayneed to recycle IIS to clear the cache.That’s it. You just created a complete Dynamicweb eCommerce web site – albeit a verysimple one - which is now ready to start serving customers. In the next section you’ll seehow to order one or more products as an end user and complete the purchase process.The section after that explains how you can view orders and create a printable version ofthe order details.2.5 Ordering Products as a Frontend UserIn the next exercise you’ll see how to browse the product catalog, add one or moreproducts to your cart and complete the order process by entering your personal data andchoosing shipping and payment options. It’s important to realize that the process, steps anddesign you’ll see are completely customizable. You can implement a different checkoutprocess in your site by properly configuring the appropriate order steps and templates.However, the process that Dynamicweb uses by default is a common one (show cart, enteruser details, make payment and show receipt) and as such is a good starting point for yourown eCommerce sites.Walkthrough – Making your First Purchase1.In the Navigation Panel, right-click the Product Catalog page and choose Show page.The main page of your eCommerce site appears with a list of the products you createdearlier. Click Add to cart for one or more products.2.In the main menu of the site, click the Cart link. If you get the generic Dynamicweb “pagenot found” error page, make sure you changed the correct layout file and applied the rightpage ID in the Checkout link as you saw earlier.3.In the screen that appears, you’ll get an overview of the products you ordered as shown inFigure 2-12:Figure 2-12Don’t worry if the currency symbols don’t match yours. You’ll learn later how to configureDynamicweb eCommerce for your country, language and currency. 2011 – Imar Spaanjaars – De Vier KoedenPage 13 of 18
Dynamicweb eCommerce 8Chapter 2End to End Demo4.Notice how the Delivery fee is still zero, as you haven’t selected a country yet. You can usethe Plus ( ) and Minus (-) symbols to change the quantity of the products in the cart. Youcan delete an item from the cart completely by clicking the delete button (the red X) at thefar right of each product.5.Click Next to proceed to the “Customer Information” page and enter your personal details.You can leave the Delivery Address empty if you wish, in which case Dynamicweb copiesthe details from the Billing Address. Click Buy on account as the payment method andPost Denmark as the Delivery method and then scroll down to the bottom of the page,where you need to place a checkmark in the checkbox for the terms and conditions. Finally,click Create order.6.The final page in the order process – the receipt – is shown. You can see a copy of myorder in Figure 2-13: 2011 – Imar Spaanjaars – De Vier KoedenPage 14 of 18
Dynamicweb eCommerce 8Chapter 2End to End DemoFigure 2-137.Notice how the fee for delivery (1000 Kroner) has now correctly been added to the totalprice. Since you didn’t assign a fee to the payment method you configured earlier, noadditional charges are added to the order.8.Repeat this process a few more times, each time ordering different products and quantitiesand for different users. This way you have some orders in the system, which are used inthe next section: this shows you how you can view the orders in the backend system. 2011 – Imar Spaanjaars – De Vier KoedenPage 15 of 18
Dynamicweb eCommerce 8Chapter 2End to End Demo2.6 Viewing Orders in the BackendClearly, as a shop manager you want to see the orders that have been submitted to thesystem, so that you know how much money you’re making and which goods you need toship to which customer. Dynamicweb eCommerce has an extensive order view that lets youdo just that. The Order list lets you view all orders, filter them on properties such as state,progress, and order date, lets you search the orders, view their details and provide printerfriendly receipts. In the next walkthrough you’ll see how to use some of these features.Chapter 10 digs deeper into the complete functionality of the Orders view.Walkthrough – Managing Orders1.Return to the Dynamicweb administrative interface and click the eCommerce item in theMain Menu. The main content area shows the available orders in a paged list as shown inFigure 2-14:Figure 2-142.Right below the Ribbon bar you’ll see a number of filters that you can use to find specificorders. You can choose an item from one of the drop-downs and then click the large Applybutton on the Ribbon bar to have the filter take effect. Additionally, you can enter some freetext in the Search box and hit enter to search for orders that match the text you entered. Ifyou want to delete one or more orders, select the order you wish to delete using thecheckbox at the left of each order and then click the Delete button on the Ribbon bar. Youcan also access some of the functionality of the Ribbon bar using the context menu for thelist of orders. Just right-click an order to see the available options.3.If you want to have a printable copy of one or more orders, select them and then click thePrint button. You’ll see a screen similar to Figure 2-15: 2011 – Imar Spaanjaars – De Vier KoedenPage 16 of 18
Dynamicweb eCommerce 8Chapter 2End to End DemoFigure 2-154.You can view an order’s details by clicking it within the list of orders. You’ll see a screensimilar to Figure 2-16: 2011 – Imar Spaanjaars – De Vier KoedenPage 17 of 18
Dynamicweb eCommerce 8Chapter 2End to End DemoFigure 2-165.Using the Ribbon bar, you can view different sections of information within the order. Themain view – labeled Details – provides information on the customer, the address detailsand the actual products that have been ordered. To jump directly to an article in the ProductCatalog, right-click the product in the order lines list and choose Go to product, as you seein Figure 2-17:Figure 2-17If you click the Miscellaneous button on the toolbar, you can find information such as theuser’s IP address, order, customer comments and more.6.The Track & Trace button enables you to enter data such as a tracking code you may havereceived from your shipping provider. You can show this tracking code in the front end forthe customer so she can trace her package. You need to set up the Track & Trace featurefirst in the Management Center. You’ll see how to do this in Chapter 8.When using an external payment gateway, the Transaction button on the Ribbon barprovides you with more information such as a transaction code and status.7.To Print an order, click the Print button. You’ll see a screen similar to what you saw inFigure 2-15, but for a single order only. Using the drop down list in the Template section ofthe Ribbon bar you can influence the layout of the printed order to suit your needs. This canbe useful if you need different copies of the same order for, say, the warehouse and thefinancial department. Clicking the Print button again pops up another window with a printerfriendly version of the order with the template you selected applied, ready to be printed.2.7 SummaryThis chapter introduced you to Dynamicweb eCommerce. In a number of walkthroughs youbuilt a complete and functional – although quite simple – eCommerce environment. Inparticular, you learned how to do the following: Login to and work with the Dynamicweb administrative interface Manage product groups and products using the Product Catalog module Configure a simple Payment method in order to let customers complete their orders Add and configure the Product Catalog and Shopping Cart v2 modules to your frontend pages Order products as a customer in the front end Work with the completed orders in the backendSince this is an introductory chapter to Dynamicweb eCommerce, I haven’t discussed a lotof functionality in great detail. Instead, the focus of this chapter was to give you a good firstlook at the complete eCommerce process, from creating products and groups, to placingorders and viewing those orders in the backend. The remainder of this book will look atmany of these features in much more detail, starting with the next chapter, which dives intoconfiguring a brand new Dynamicweb eCommerce site. 2011 – Imar Spaanjaars – De Vier KoedenPage 18 of 18
templates and other files such as PDF and Word documents) in a Windows Explorer-like interface. eCommerce Opens the eCommerce environment, which enables you to manage groups, pr
