Transcription
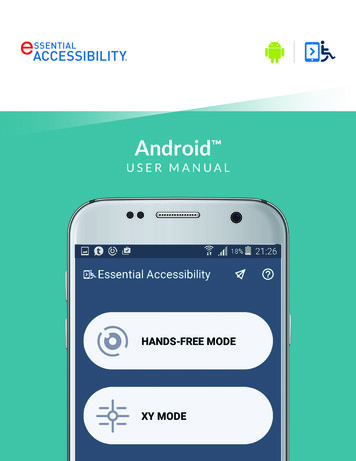
Android USER MANUAL
TABLE OF CONTENTS1. SYSTEM REQUIREMENTS.12. GETTING STARTED.13. USING THE ACCESSIBILITY MODES.13.1. Using Hands-free Mode. 13.1.1 Performing Swipe Action. 23.1.2 Performing Long Click Action. 33.2. Using XY Mode. 53.2.1 Performing Swipe Action. 73.2.2 Performing Long Click Action. 83.3. Using Easy Grid Mode. 103.4. Using Tag Mode. 123.5. Sending Feedback. 134. SETTINGS. 144.1. General. 144.1.1 About Application. 144.1.2 Activate on Launch. 144.2. Hands-free mode. 144.2.1 Cursor Sensitivity. 144.2.2 Auto-tap. 154.2.3 Auto-swipe. 154.2.4 Auto Switch-off. 164.2.5 Viewfinder. 164.2.6 Floating Menu. 174.2.7 Custom Cursor. 184.3. XY Mode. 194.3.1 Device Type. 194.3.2 Scanning Speed. 234.3.3 Size. 234.3.4 Lines Colour. 244.4. EASY GRID MODE. 244.4.1 Cursor Speed. 244.4.2 Grid Color. 254.4.3 Grid Opacity. 254.4.4 Grid Thickness. 264.4.5 Grid Cells. 264.4.6 Grid Type. 27eSSENTIAL Accessibility for Android User Manual
1. SYSTEM REQUIREMENTSPrerequisites Android v. 7.0 or higher2. GETTING STARTEDeSSENTIAL Accessibility for Android checks to see if Android EventInjection service is enabled. If it is disabled, you will be prompted toenable it. Enabling this lets you turn on and use major applicationfeatures and functions.3. USING THE ACCESSIBILITY MODES3.1. Using Hands-free ModeHands-free mode lets you controlyour mobile device without usingyour hands. Instead, you can controlthe cursor by moving your head.Moving your head in any directionlets you to navigate to any point onthe screen. Hands-free mode alsolets you perform tap, swipe, andscroll actions where the cursor stops.Figure 1: Hands-free mode buttonTo enter hands-free mode, tapthe hands-free mode button(see Figure 1).To perform a tap action, movethe cursor until its stops on thescreen where you want to tap.A loader appears on the cursorindicating the amount of timeremaining to perform the action.Loader disappears as soon as theset amount of time is complete andaction is performed.Figure 2: Hands free special menu buttonTo perform a scroll action, swipeaction or to access other functions(such as open recent apps, home,back, volume up, and volume down),open the special menu. To open thespecial menu, hover over the specialmenu button (see Figure 2).eSSENTIAL Accessibility for Android User Manual1
Default special menu (see Figure 3).The action buttons available inthis are: Lock cursor Drag Long click Volume up Volume down Back Home Recent appsFigure 3: Showing Default Special menu3.1.1 Performing Swipe Action1. To start Swipe mode and performswipe gesture, click on the Dragicon in the Default Special menu.Default cursor icon (see Figure 7)will change to Drag cursor icon(see Figure 6) and Default Specialmenu will change to Swipegesture menu (see Figure 4).2. To start swipe gesture, locate thestarting point of the swipe gestureon screen and hover over thatpoint for a set amount of timeindicated by loader. This recordsthe starting point of the gesturewhich is indicated by the changein the color of the drag cursor icon(see Figure 5).Figure 4: Swipe gesture menuFigure 5: Tinteddrag cursorFigure 6: DragcursorFigure 7: Default cursoreSSENTIAL Accessibility for Android User Manual2
3. To complete the gesture, locatethe ending point of the swipegesture on screen and hover overthat point for a set amount oftime indicated by the loader. Thisperforms the swipe gesture. Swipemode is automatically disabled andDrag cursor icon changes back tothe Default cursor icon.4. Inorder to prevent automaticdisabling of the swipe gesturemode after performing swipe, youhave to start Lock swipe mode.To start Lock swipe mode clickon the Drag icon twice. Defaultspecial menu changes to the Lockswipe gesture menu (see Figure8) indicating that the Lock swipemode is started.Figure 8: Lock swipe gesture menu3.1.2 Performing Long ClickAction1. To start Long click mode andperform long click gesture, click onthe Long click icon in the Defaultspecial menu. Default cursor icon(see Figure 10) will change to Longclick cursor icon (see Figure 11) andDefault special menu will change toLong click gesture menu (see Figure9).2. To perform long click gesture,locate the point on screen whereyou wish to perform long clickgesture and hover over that pointfor a set amount of time indicatedby loader. This performs the longclick action on that point. Long clickmode is automatically disabled andLong click cursor icon changes backto the default cursor icon.eSSENTIAL Accessibility for Android User ManualFigure 9: Long click gesture menuFigure 10: DefaultcursorFigure 11: Longclick cursor3
3. Inorder to prevent automaticdisabling of the Long click modeafter performing long click, youhave to start Lock long click mode.To start Lock long click mode,click on the Long click icon twice.Default special menu changes tothe Lock long click gesture menu(see Figure 12) indicating that theLock long click mode is started.Figure 12: Lock long click gesture menuTo lock the cursor, tap the lockcursor button of the special menu.When the cursor is locked, thecursor cannot move and you cannotperform a tap action (see Figure 13).Figure 13: Cursor is lockedTo unlock the cursor, tap the unlockbutton at the bottom left corner ofthe screen (see Figure 14).Figure 14: Unlock buttoneSSENTIAL Accessibility for Android User Manual4
3.2. Using XY ModeXY mode lets you control yourdevice using on-screen coordinates.Every point on the screen haslatitude and longitude coordinates,like points on a map. Each pointhas “XY” coordinates, like the graphbelow (see Figure 15).Figure 15: XY graphXY mode lets you target a specificpoint on the screen. It helps youpinpoint the latitude and longitudecoordinates where you want yourcursor to target.For example, your cursor targetsthe point where two XY modelines intersect.When XY mode is active, this ishow it works:1. A horizontal line moves downfrom the top of the screen. Tapwhen you want the horizontalline to stop.2. A vertical line moves from theleft to the right of the screen.Tap when you want the verticalline to stop.3. The spot where the two linesintersect acts as your cursorand performs a specifiedaction (see Figure 16).Figure 16: XY mode coordinateTo start XY mode, tap theXY mode button (see Figure 17).Figure 17: XY mode buttoneSSENTIAL Accessibility for Android User Manual5
Using XY mode with a switch deviceYou can pair eSSENTIAL Accessibility for Android to work with a switchdevice. To work as a pair, your mobile device and switch device must beconfigured. They can be synced for one-button or two-button control. Youwill be able to navigate to any position on the screen and perform mobiledevice actions, like tapping, scrolling, swiping, go back, go home, openrecent apps, turn volume up, and turn volume down. In two-button mode,you can also assign switch device button to perform a direct action.Controlling your devicein one-button modeIn one-button mode, you canconfigure your switch devicebutton to: start moving the XY modehorizontal line start moving the XY modevertical line perform a tap action whereyour cursor intersects thehorizontal and vertical lines open eSSENTIAL Accessibilityfor Android application’sspecial menu, which is located inthe top left corner of the screen(see Figure 18) perform a tap action on anitem in the special menuFigure 18: One-button mode special menueSSENTIAL Accessibility for Android User Manual6
The eSSENTIAL Accessibility forAndroid application’s specialmenu makes the phone’s hardwarebuttons accessible. Hardwarebuttons such as home, back, menu,volume up, and volume downcan be accessed in this menu (seeFigure 19). A navigational item,“Inverse”, is also available in thismenu. “Inverse” lets you changethe directions that the lines move.Figure 19: One-button modespecial menu items3.2.1 Performing Swipe Action1. To start Swipe mode and performswipe gesture, click on the Dragicon in the One-button modespecial menu. One-button modespecial menu will change to Swipegesture menu (see Figure 20).2. To start swipe gesture, locate thestarting point of the swipe gestureon screen and perform tap action.This records the starting point ofthe gesture.Figure 20: Swipe gesture menu3. To complete the gesture,locate the ending point of theswipe gesture on screen andperform tap. This performs theswipe gesture. Swipe mode isautomatically disabled.4. Inorder to prevent automaticdisabling of the swipe gesturemode after performing swipe, youhave to start Lock swipe mode.To start Lock swipe mode click onthe Drag icon twice. One-buttonmode special menu changes tothe Lock swipe gesture menu (seeFigure 21) indicating that the Lockswipe mode is started.Figure 21:Lock swipe gesture menueSSENTIAL Accessibility for Android User Manual7
3.2.2 Performing Long ClickAction1. To start Long click mode andperform long click gesture, click onthe Long click icon in the Onebutton mode special menu. Defaultspecial menu will change to Longclick gesture menu (see Figure 22).2. To perform long click gesture,locate the point on screen whereyou wish to perform long clickgesture and perform tap. Thisperforms the long click actionon that point. Long click mode isautomatically disabled.Figure 22: Long click gesture menu3. Inorder to prevent automaticdisabling of the Long click modeafter performing long click, youhave to start Lock long click mode.To start Lock long click mode clickon the Long click icon twice. Onebutton mode special menu changesto the Lock long click gesture menu(see Figure 23). indicating that the Figure 23: Lock long click gesture menuLock long click mode is started.By pressing and holding your switchdevice button for one second,you can access a menu with thesenavigational items (see Figure 24): scroll up scroll down swipe left swipe rightAt any time when scrolling andswiping actions are not available,you will receive a messagenotifying you that scrolling andswiping actions are unavailable.eSSENTIAL Accessibility for Android User ManualFigure 24: Navigational items8
Controlling your mobile device in two-button modeIn two-button mode, you can assign direct actions for your switchdevice buttons.Two examples:Scenario 1: The first button is assigned to “Select” action. The second buttonis assigned to “Reverse direction” action.Scenario 2: The first button is assigned to “Select” action. The second buttonis assigned to “Show menu” action.CONTROLLING YOUR MOBILEDEVICE IN SCENARIO 1 INTWO-BUTTON MODECONTROLLING YOUR MOBILEDEVICE IN SCENARIO 2 INTWO-BUTTON MODEIn two-button mode, youcan press the first button onyour switch device to:In two-button mode, youcan press the first button onyour switch device to: start moving the horizontal line start moving vertical linestart moving the XY modehorizontal line perform a tap action on theelement that intersects thehorizontal and vertical lines start moving the XY modevertical line Perform a tap action on anitem in the special menus ofthe eSSENTIAL Accessibilityfor Android application open eSSENTIAL Accessibilityfor Android application’sspecial menu, which is situatedin the top left corner of thescreen (see Figure 18) perform a tap action on anitem in the special menu tap and hold the button for onesecond to access a menu withnavigational items (see Figure 24)Then, press the second buttonon the switch device to: change the movement directionof the horizontal and vertical lineBy pressing and holding your switchdevice button for one second,you can access a menu with thesenavigational items (see Figure 24): scroll up scroll down swipe left swipe rightThen, press the second buttonon the switch device to: eSSENTIAL Accessibility for Android User Manualopen the special menuwhere the phone’s hardwarebuttons (such as home, back,menu, volume up, and volumedown) as well as “Inverse” areaccessible (see Figure 19)9
3.3. Using Easy Grid ModeEasy Grid mode lets you control your device using voice commands.You can move the cursor to any point on the screen and perform an actionwith the cursor.In this mode you can see a translucent grid on the screen and can move thecursor to the centre of any cell on the grid. The cells in this grid are labeledmuch like cells in a spreadsheet: columns are labeled with letters and rowsare labeled with numbers. Each cell’s label consists of a letter and a number.For instance, you can move the cursor to the second cell in the third row bysaying “Go to B3.”See the table below for a list of voice commands.Voice CommandsActionMove leftCursor moves leftMove rightCursor moves rightMove upCursor moves upMove downCursor moves downStop movingCursor stops movingJump leftCursor jumps to the left and stopsJump rightCursor jumps to the right and stopsJump upCursor jumps up and stopsJump downCursor jumps down and stopsHide cursorCursor becomes invisibleShow cursorCursor becomes visibleGo to A1 F7Moves cursor to the specified celleSSENTIAL Accessibility for Android User Manual10
Action CommandsActionAction tapPerforms a tap actionShow appsOpens the page with all AppsAction long tapPerforms a long tap actionScroll downPerforms a scroll down actionScroll upPerforms a scroll up actionScroll leftPerforms a scroll left actionScroll rightPerforms a scroll right actionSwipe downPerforms a swipe down actionSwipe upPerforms a swipe up actionSwipe leftPerforms a swipe left actionSwipe rightPerforms a swipe right actionHardware Button CommandsButton homePerforms a home button clickButton menuPerforms a recent apps button clickButton backPerforms a back button clickVolume upPerforms a volume up button clickVolume downPerforms a volume down button clickOther CommandsHide gridGrid becomes invisibleShow gridGrid becomes visibleeSSENTIAL Accessibility for Android User Manual11
3.4. Using Tag ModeTag mode lets you control your device using voice commands. It firsthighlights all the clickable points on a screen by letters and numbers, andyou can use the voice commands, as described above in the Easy Gridmode, to move to these points and perform further actions using voicecommands only. (see Figure 25 and 26).Figure 25: Showing Tag modeFigure 26: Showing Tag modeThere are restrictions on the clickable elements that are shown. Only theelements that are reported as clickable from an accessibility service point ofview are shown. There may be more clickable points that can then be reachedby moving the cursor with voice commands.This mode is an enhancement to Easy Grid mode, to provide quicker accessto the clickable points on your device screen.eSSENTIAL Accessibility for Android User Manual12
3.5. Sending FeedbackYou can send feedback aboutthe eSSENTIAL Accessibility forAndroid application. To sendfeedback, tap the “Send feedback”button from the start screen (seeFigure 27). A form will open whereyou can type in your questionsor concerns (see Figure 28).Figure 27: Send feedback buttonType in your feedback and tap the“Send” button to send us feedback.Tap the “Cancel” button toclose the feedback form.Figure 28: Feedback formeSSENTIAL Accessibility for Android User Manual13
4. SETTINGS4.1. General4.1.1 About ApplicationIn the about application section, you can check the eSSENTIAL Accessibilityfor Android version or send us feedback.4.1.2 Activate on LaunchYou may set eSSENTIAL Accessibility for Android to activate on launch. Ifactivated, eSSENTIAL Accessibility for Android will automatically run inaccessibility mode on your device. It retains the mode last used the last timeit was open. Toggle the switch to turn on or turn off activate on launch. Thisfunction is turned on by default.4.2. Hands-free mode4.2.1 Cursor SensitivityYou can adjust the cursor speedusing the sliders (see Figure 29).Tapping the “Apply” button saveschanges to the cursor settings.Tapping the “Cancel” buttondiscards all changes.Figure 29: Cursor sensitivity settingeSSENTIAL Accessibility for Android User Manual14
4.2.2 Auto-tapAuto-tap is a feature that allowsyou to set conditions for automatictapping. The application performs atap action automatically when thecursor stops for a set amount oftime. You can adjust the slider to setthe number of seconds the cursorhas stopped before it performs anautomatic tap action (see Figure 30).This screen also allows you to toggleon or off the repeat tap action. Whenturned on, the repeat tap actionperforms automatic taps in intervalswhen the cursor has stopped for aset amount of time. When turnedoff, a tap action is performed onlyonce when the cursor has stopped.Toggle repeat tap switch to turn onor turn off auto-tap (see Figure 30).Figure 30: Auto-tap settingsTapping the “Apply” button saveschanges to the auto-tap settings.Tapping the “Cancel” buttondiscards all changes.4.2.3 Auto-swipeAuto-swipe is a feature that allowsyou to set conditions for automaticswiping. The application performsa swipe action when the cursorstops at the left or right edgesof the screen for a set amountof time which is indicated by theloader. You can adjust the sliderto set the number of seconds thecursor needs to stop at the edgeof the screen before it performsa swipe action (see Figure 31).Figure 31: Auto-swipe settingsTapping the “Apply” button saveschanges to the auto-swipe settings.Tapping the “Cancel” buttondiscards all changes.Figure 32: Auto switch-off settingsToggle the switch to turn on or turnoff auto-swipe (see Figure 32).eSSENTIAL Accessibility for Android User Manual15
4.2.4 Auto Switch-offAuto-switch off is a feature thatallows you to set conditions forhands-free mode to turn offautomatically (see Figure 33).You may want to turn this on tosave battery or to during periodsof cursor inactivity. After a setamount of time, hands-freemode automatically turns off.Figure 33: Auto switch-off settingsTapping the “Apply” button saveschanges to the auto switch-off settings.Tapping the “Cancel” buttondiscards all changes.Toggle the switch to turn on or turnoff auto switch-off (see Figure 34).Figure 34: Auto switch-off toggle4.2.5 ViewfinderViewfinder is a feature that detectsyour face position and assistsin operating hands-free mode.You can set the application toautomatically hide the viewfinderwhen your face is in focus. If turnedon, the viewfinder automaticallyappears when your face is outof focus (see Figure 35).You may set the position of theviewfinder on the screen.These are the options: top left top middle top rightFigure 35: Viewfinder settingsTapping the “Apply” button saveschanges to the viewfinder settings.Tapping the “Cancel” buttondiscards all changes.eSSENTIAL Accessibility for Android User Manual16
4.2.6 Floating MenuFloating menu is a feature that makes the phone’s hardware buttonsaccessible. Hardware buttons such as home, back, menu, volume up, andvolume down can be accessed in the floating menu.The floating menu settings let you adjust the opacity of the floating menu.Opacity sets the visual transparency of the floating menu. You may adjustthe opacity of the floating menu using the opacity slider (see Figure 36).The floating menu also lets you set a fixed or unfixed position for the floatingmenu. Position of the floating menu can be: fixed, in one of the three unfixed screen positions unfixed, where the floating menu displays automatically beside thecursor when the cursor remains still for a set amount of timeTo set a fixed position on the screen:1. Toggle the “Follow cursor”slider to “off”.2. Select one of the three fixedscreen positions: bottom left,bottom middle, or bottom right.To set an unfixed position onthe cursor:1. Toggle the “Follow cursor”slider to “on”.2. Tap “Apply” button tosave changes.3. Tap “Apply” button tosave changes.Tapping the “Apply” button saves changes to the floating menu settings.Tapping the “Cancel” button discards all changes.Figure 36: Floating menu settingseSSENTIAL Accessibility for Android User Manual17
4.2.7 Custom CursorCustom cursor is a feature that letsyou change the shape of the cursor.Select your preferred cursor shape.Tapping the “Apply” button saveschanges to the cursor settings.Tapping the “Cancel” button discardsall changes.Figure 37: Custom cursor settingseSSENTIAL Accessibility for Android User Manual18
4.3. XY Mode4.3.1 Device TypeTo use an Android device in XYmode, your switch device mustbe synced for one-button or twobutton mode configuration.Connect your switch deviceto your mobile phone (see yourswitch device user manual).Configure switch devicein a few stepsFigure 38: One-button or twobutton mode configurationStep 1: Choose the numberof buttons you intend to use.FOR ONE-BUTTON USAGEStep 2: Tap the one-button optionon your switch device(see Figure 39).Figure 39: One-button mode selectedeSSENTIAL Accessibility for Android User Manual19
Step 3: Apply settings, cancelsettings, or reconfigure andstart again (see Figure 40).Tapping the “Apply” buttonsaves changes to the buttonmode configuration settings.Tapping the “Cancel” buttondiscards all changes.Tapping “Reconfigure” buttonrestarts XY mode configuration.Figure 40: Apply, cancel, or reconfigureFOR TWO-BUTTON USAGEStep 1: Choose the number of buttons you intend to use (see Figure 38).Step 2: Press the first button on your switch device.If the application recognizes the button, then the application will displaya confirmation message (see Figure 41).Figure 41: First button recognized for two-button modeeSSENTIAL Accessibility for Android User Manual20
Step 3: Assign an action forthe first switch device buttonamong these options: Select Reverse direction Show menuFigure 42: Assign an actionStep 4: Press the second buttonon your switch device.If the application recognizes thebutton, then the application willdisplay a confirmation message.Figure 43: Instruction to pressthe second buttoneSSENTIAL Accessibility for Android User Manual21
Step 5: Assign an action for thesecond switch device buttonamong these options: Select Reverse direction Show menuFigure 44: Action assignedStep 6: Apply settings, cancelsettings, or reconfigure andstart again (see Figure 45).Tapping the “Apply” buttonsaves changes to the buttonmode configuration settings.Tapping the “Cancel” buttondiscards all changes.Tapping “Reconfigure” buttonrestarts XY mode configuration.Figure 45: Two-button mode configuredeSSENTIAL Accessibility for Android User Manual22
4.3.2 Scanning SpeedScanning speed is a feature that allows you to set the speed of thehorizontal and vertical lines in XY mode (see Figure 46).You can set the movement speed for the vertical bar and horizontal bar. Youmay also set the scanning speed, which is how quickly the focus changesbetween items in the floating menu.Tapping the “Apply” button saves changes to the scanning speed settings.Tapping the “Cancel” button discards all changes.Figure 46: Scanning speed settingsFigure 47: Line size setting4.3.3 SizeSize is a feature that allows you to set size of XY mode lines. You can setthe thickness of the vertical and horizontal lines and the size of the sightview radius using sliders (see Figure 47).Tapping the “Apply” button saves changes to the settings.Tapping the “Cancel” button discards all changes.eSSENTIAL Accessibility for Android User Manual23
4.3.4 Lines ColourSet the colour of the verticaland horizontal lines and axis.Select the colour you prefer.Tapping the “Apply” button saveschanges to the lines colour.Tapping the “Cancel” buttondiscards all changes.Figure 48: Line colour settings4.4. EASY GRID MODE4.4.1 Cursor SpeedYou can adjust the cursor speedusing the sliders (see Figure 49).Tapping the “Apply” button saveschanges to the cursor settings.Tapping the “Cancel” buttondiscards all changes.Figure 49: Cursor speed settingseSSENTIAL Accessibility for Android User Manual24
4.4.2 Grid ColorSet the colour of the grid. Selectyour preferred colour.Tapping the “Apply” button saveschanges to the lines colour.Tapping the “Cancel” buttondiscards all changes.Figure 50: Grid color setting4.4.3 Grid OpacityYou may adjust the opacityof the Grid using the opacityslider (see Figure 51).Tapping the “Apply” button saveschanges to the cursor settings.Tapping the “Cancel” buttondiscards all changes.Figure 51: Grid opacity settingeSSENTIAL Accessibility for Android User Manual25
4.4.4 Grid ThicknessYou may adjust the thicknessof the Grid using the barsthickness slider (see Figure 52).Tapping the “Apply” button saveschanges to the lines colour.Tapping the “Cancel” buttondiscards all changes.Figure 52: Grid thickness setting4.4.5 Grid CellsYou may adjust the numberof rows and columns in thegrid (see Figure 53).Tapping the “Apply” button saveschanges to the cursor settings.Tapping the “Cancel” buttondiscards all changes.Figure 53: Grid cells settingseSSENTIAL Accessibility for Android User Manual26
4.4.6 Grid TypeYou may adjust the type of rows and columns in the grid.Figure 54: Ruler gridFigure 55: Mesh gridTapping the “Apply” button saveschanges to the cursor settings.Tapping the “Cancel” buttondiscards all changes.Figure 56: Cursor speed settingseSSENTIAL Accessibility for Android User Manual27
4.4.7 Hide Grid TimeoutYou can adjust the time after whichthe grid will automatically hide.Figure 57: Enable/disablehiding grid by timeoutTapping the “Apply” button saveschanges to the cursor settings.Tapping the “Cancel” buttondiscards all changes.Figure 58: Hide grid timeout settings4.5. TAG MODE4.5.1 Cursor SpeedYou can adjust the cursor speedusing the sliders (see Figure 59).You can use commands like“Go to B6”, which will movethe cursor to this position, thenuse command “Action tap”, tochange the cursor speed.Figure 59: Cursor speed settingseSSENTIAL Accessibility for Android User Manual28
Android USER MANUALwww.essentialaccessibility.com
the cursor by moving your head. Moving your head in any direction lets you to navigate to any point on the screen. Hands-free mode also lets you perform tap, swipe, and scroll actionswhere the cursor stops. To enter hands-free mode, tap the hands-free mode button (see Figure 1). To per


