Transcription
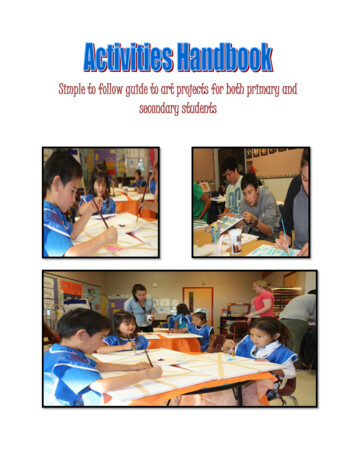
Simple to follow guide to art projects for both primary andsecondary students
Dance FanSuppliesPatternTan Craft FoamFoamie Shapes and/or Craft Foam ScrapsTwo Jumbo Craft SticksOne Yard #20 HempTurkey FeathersTacky Glue1/8" Hand Hole PunchScissorsInstructionsClick on Printables and cut two fans from pattern outof tan craft foam.Place one on your work surface and arrange feathers to stick out of the top. Glue in place.Glue second fan piece on top.Glue a jumbo craft stick to each side to make a handle, lining them up and gluing the bottomstogether. Let dry. punch holes along both side of the handle and lace with a piece of hemp.Decorate fan with foamie shapes or scraps.
Birch Bark Basket"How to Make Immitation Birchbark"Title/Technique: How to make Imitation Birch BarkThis lesson was created to enrich a read aloud story in my school. The homeroom teacher was reading“The Birch Bark House” by Louise Erdrich to his 4th grade class. The story is a culturally accurateportrayal of life on Madeline Island. Madeline Island is located in Lake Superior and is a traditional homefor the Ojibwe people. It is not necessary to read the story, I share it with you because it is one of myfavorite children’s books and I highly recommend reading it!Tribe (s): Ojibwe Region: WoodlandCross curricular connections: Lang. Arts, ScienceGrade(s): 4-5Elements/Principles of art: Visual TextureMaterials Needed:Heavy brown craft paper, white tempera, big brushes, black colored pencil or oil pastelDescription:Dilute the tempera to create a wash. Using a large brush wash over the brown paper in broadhorizontal strokes. It is fine to be uneven or blotchy. Take a look at a real tree and you will seethe variations. While the paint is still wet, use the end of your paint brush to scratch horizontallines into the faux birch bark. When the paint is dry you can also add horizontal lines with a blackpencil or oil pastel. Use your finger to smooth and blend the oil pastel for great results!When the paper is dry you can cut out variety of items to create a poster showing the uses ofBirch Bark.
"Birch Bark Basket" Lesson PlanTribe (s): Multi Tribal useRegion: Throughout the USCross curricular connections: Science, Social StudiesGrade(s): 4-5Elements/Principles of art: TextureMaterials Needed:See lesson on How to Make Birch BarkBasket templateSinew, yarn or stringPlastic needles (optional)Small hole punchLesson Description:Information on the White Birch and it’s iteb.htmlRefer to the lesson on “How to Make Birch Bark Paper”For the Basket, I like to double the weight of the brown craft paper by gluing 2 layers togetherbefore painting the faux finish.Let it dry overnightOnce paper is made students can use if for a variety of projects.To make the basket I have my students trace the template on the back of their birch bark and cutit out.
The ends are gently folded to overlap. You can staple it (easiest) or use the hole bunch to punchthru all 3 folded layers. You will need 2 holes to stitch. See photos. I like to use artificial sinew tostitch. It does not require a needle and is fairly stiff. You can also use yarn or string and aneedle.When the ends are secure, use the hole punch and punch holes ½ inch all the way around thetop. Use sinew, yarn or string to whip stitch around the top to give it a finished look.
PapooseSupplies: Brown grocery bag, Tan construction paper, baby (with sleepy face) (Pattern), baby (blank face)(pattern),Colored markers or crayons,Black marker,Yarn, two pieces measuring 36” long,PonyBeads,Scissors,Stapler,Hole punch,TapePre-Class Preparation: Making brown paper bag look like “leather”1.Tear off the handles of the brown grocery bag, glue or tape them together and cut to an 18” length.This will be the papoose strap.2. Cut down the seam of the paper bag and cut the bottom out of the bag. Keep this bottom piecebecause it becomes the board of the papoose.3. Dunk the bag paper into a sink of warm water. Scrunch the paper together and squeeze out as muchwater as you can. Do not try to wring the water out of the paper .the paper will rip. Unfold the paperand lay flat to dry.For Each Papoose: From the dry “leather” cut: One piece of “leather” cut at 6 ½” x 9” and one piece of “leather” cut at 9½” x 16” 18” handle (for strap) Brown grocery bag bottom Yarn, two pieces cut at 36” length 8-10 colored pony beads Copy of baby
Making the Papoose:1.Tear about one inch off a short (6 ½”) side of the 6 ½” x 9”piece.2.Using the side of a black marker, run over the torn edge of the “leather” piece. Lay this piece on the bag bottom(board) with the straight bottoms and sides even. Staple the two together at the sides. Make a mark 1½” fromthe side toward the middle on the top side ofthe “board,” and 2 ½ “ down from the top along the sides ofthe“board.” Draw an arc between the two marks and cut to round off the top corners of the board. Using the side ofa black marker, run over the top edges of the “board.” Staple the “strap” to the back of the board.3.Tear about one inch off all sides of the 9 ½”x16” piece of“leather.” Center the “board” over the large piece of“leather” with the bottoms even. Fold the sides of the “leather” to the front they shouldn’t quite meet at thecenter. Slightly crease the sides so you know how much of the “leather” will show on the front. Draw and colorIndian symbols on the front of the “leather” and on the top part of the “board.” Outline the drawings and runalong the torn edges with the side of a black marker.4.With the “leather” placed around the board, with the bottoms even, and using a paper punch, punch holes alongthe sides of the “leather” fronts and through all layers along the bottom of the “board.”1)5)2)6)3)4)7)
Lacing the Papoose:Place a small piece of tape at one end of each piece of yarn. Roll to make a needle-like end with the tape. Start byinserting the yarn/needle through the back, side bottom hole. Pull the yarn through to the front, but leave a coupleof inches on the back side. Tape the end on the back side down. Repeat with the second piece of yarn on the otherside of the “board” bottom. Then lace the yarn through the bottom and then up the middle of the “leather” piece. Tiea bow and then knot the bow. Thread pony beads on the yarn, make a knot in the yarn and cut off the excess.Draw clothes on the Indian baby and carefully cut him/her out. Slide the baby into the papoose, between the “board”and the back “leather” piece.1)2)3)4)patterns:sleepy k face: w-face.pdf
PaintingGrade LevelsSecond GradeTime Required: Three 45 minute lessonsBuffalo Hides Lesson PlanReview of Native American Indian Culture. 2000 years ago, the Anasazi Indians inhabited the cliffs of theSouthwest. They were the ancestors of the Pueblo Indians who live there today. There are 20 pueblo villagesleft; at one time there were 200! These ancient villages are built from adobe bricks. These natural homes arewarm in winter and cool in summer; it rarely rains in the Southwest, so they won't melt.The Anasazi Indians left Petroglyph drawings on rocks and cliffs. Some were chiseled into the rock with animalantlers, some were etched with the acid juices from cactus plants. They are pictures of Indian symbols.Symbols are pictures drawn very simply of things in nature, such as animals, plants, stars, people, etc.The Indians were very spiritual people. They respected the earth, never wasted resources, and were ingeniousat using the things in nature around them.Lesson 1 Procedure1. Each student is passed a piece of dark brown roll paper approximately 36" 26". Crumbleand unfold. Repeat to look like an aged animal hide.2. Tear an interesting shape around your hide, but be careful not to tear TOO much off.3. Take a minute to feed our brains with visual images of symbols, looking through examples ofsymbols, and then drawing a variety of symbols on the large "hide" in white charcoal pencil.Stress creating an edge of border design.4. Names on back in white pencil.
Lesson 2 Procedure1. Review paint manners. No tapping on water bucket. To clean, swish, rub, dry, twirl on papertowel. CLEAN before each new color.2. Choose 3 colors. Paint some shapes each color. Think about painting a shape on either endand in the middle a same color. When your eye sees a color repeated in a path, the paintingis more pleasing to look at. Don’t paint the border design. Be careful not to touch a wetshape.Lesson 3 Procedure-Go back into the designs and outline the painted designs with black marker.-Outline the shapes you did not get a chance to paint.-Do your border design in black marker.-If you have extra time, create some new designs by just drawing them with marker in areasare empty.that
CarvingThe IdeaBarbara Hepworth was a key figure in the British abstract art movement in the 20th century. She oftencreated sculptures which were inspired by nature. She loved to work with wood and stone and, later on, inbronze. Her sculptures seem to grow and look very natural.The PlanYour going to create a simple and natural sculpture using a bar of white soap. You do not have to finishyour sculpture in one go. Take your time and really enjoy what you are doing.You NeedSome cheap bars of white soap.Scrapers and peelers – Use lolly sticks, teaspoons, potato peelers and similar objects.Do it!Think about the way you would like your sculpture to look then sketch a simple shape onto wide sideof your bar of soap."Mirror" your design on the other side.Carefully use your scrapers and peelers to carve your design. Scrape away at the edges and twistonto the surface to make holes.Keep turning your soap over and over in your hands as you work. Then your finished sculpture will berounded rather than flat.Top TipsWhen you are thinking about how you would like your sculpture to look, think about how it will feel tohold as well. Touch is very important in sculpture.Remember you cannot put something back when you have carved it off! Plan your sculpture carefully.Think about what you are doing. You may not be using knives but you can still hurt yourself if you arenot careful.More Information on carving including a beginner video can be found here:
-soap-carving/Printmaking (primary ages)Materials: jar lids, elastic bands, paper, paint OR wood blocks, yarn, paper, paintWhat to do:1)2)3)4)Simply stretch elastics over lids, or wrap yarn around blocksDip in paintStamp on paperGet creative with different color combos and patterns! Create animals ordraw back into it after the paint dries!
Printmaking (secondary ages)Materials:Styrofoam, DULL pencil or something without a blunt end (end of a paintbrush,end of a hair comb etc., ruler, paint, paper, paint roller1) With your piece of Styrofoam in frontof you take your ruler and create aborder using your DULL pencil to carvea groove in your Styrofoam.2) Next draw your picture lightly in pencilfirst in case you make mistakes. Whenyou are finished your drawing onceagain take your pencil to create agroove on all your lines. Be careful noto work to fast and rip holes in yourStyrofoam.3) Now you will take the foam roller, dip itin whatever color of paint you want,make sure there is not too much painton your roller or it will sink into thegrooves and you will have to wash yourboard and try again.4) Once it is inked up in paint you canstamp it on your paper. You canattempt this two ways, picking up theStyrofoam board and laying it downcarefully on the paper, making sure notto move it once it’s down. Or you cansimply lay the paper on top of theinked board and lift off again. Voila!Sign your picture after the paint is dry.
ion board, sharpie, exacto knife or cutting tool ( can be found in the printmaking section of art stores), paint, spongeroller/brayer roller, paper, pencil, ruler1)First, decide on what you want to create. For beginners, use something with simple lines. You will also want to work froman image that is in black and white so it is easier to define what needs to be cut out or left.2) Next you will make a grid over top of your chosen picture using a ruler and pencil.3) Next buy insulation board. A huge sheet costs approx 10 at a hardware store. This will allow for many printmakingprojects.I cut out a small piece from the entire board. I created a grid on my printout and drew the same grid proportional to thesize of my board. For example, there are 7 columns on the printout, so I measure to create 7 equal columns on my boardas well. This is to make it easier to draw your image.
4) After the image is drawn onto the insulation board go over the pencil with a sharpie. Next you will usethe exact knife to cut everything BUT the sharpie lines. This could take a long time depending on howintricate your drawing is. You are removing what you don't want paint to go on during the transfer.5)After removing everything that you don’t want printed comes the last step. You will take a sponge rolleror a brayer roller and cover your image in paint. You will continue to roll your image with paint and like agiant stamp you will press the image onto the paper. Get creative. Try stamping with different colors anddifferent directions.Tips: You can also use different supports such as linocut pads found at art supply stores, erasers,or try printing on cloth like in the above sample.
Drum MakingDrums have always been an important part of native culture. Drums are played during ceremonies andaccompany singing and dancing. The beat of the drum symbolizes the beating of the heart.Materialstwo balloonsa round plastic containertwo elastic bandsart supplies to decorate the drum (optional)piece of material for stuffingstick or tree branch measuring about ½ inch in diameter, and 12 inches longstring or wool (optional)InstructionsSourceSourceMaterials needed for handdrum and beaterStep 1. Cut the bottom off around balloon (before it’sblown up).
SourceSourceStep 2. Stretch the balloonover the plastic container.Secure the balloon with arubber band.Step 3. Decorate your handdrum if you wish.SourceSourceStep 4. Cut the bottom offanother round balloon. Stuffscraps of fabric into the endof the balloon to make asmall ball.Step 5. Poke the stick intothe stuffed balloon. Gatherthe opening of the balloonaround the stick and fastenwith a rubber band. If youlike, you can cover therubber band with string orwool.
Totem PoleMaterials:Hot glue gunCardboardScissorsMarkers/ crayonsPaper towel tubes (long) or two short tubesGlue stickLesson:Look at a picture of a totem pole and discuss the meaning of the figures carved.Next either give the students sets of totem pole figures printed from ScissorCraft.com onto brown craftpaper (I cut postal mailing paper into 8 ½- by 11-inch rectangles and fed it through our printer toreplicate the look of wood). Or if your students are a bit older get them to draw their own figures andcolor them.Now ask students to look at the picture of the totem pole to see how the figures stack on top of eachother to help them decide how theirs will stack well. Next cut several ½-inch vertical slits in thebottom of a paper towel tube and placed this end of the tube inside another tube, so they would look
like one long pole( you may have to do this depending on the age of your students) Next, get studentsto apply glue to the back of each figure and place them on the pole.You can look at pictures of actual pole and discuss how they will raise theirs. To secure in its uprightposition, I applied a bead of hot glue to the bottom of the pole and set it on a small piece ofcorrugated cardboard.Lastly, ask students to write and tell the story of their pole.Additional Information:PDF file for the “The Story of my Totem Pole” can be found 1/11/making-miniature-totem-pole.htmlGreat additions:Diane Hoyt-Goldsmith’s book Totem Pole
Pattern making with stickersMaterials:Sticker dotsPaper( freehand initial drawing)Patterned paper ( younger students)Lesson: Hints and tips:You might like to show your children some examples of indigenous dotpaintings for inspiration.Take a cue from Aboriginal artists by creating aerial maps with the dots: youcould do the sea blue, the coast yellow, rainforests green and the red centrered.For older students you may want to introduce Moccasin patterns and getstudents to follow patterns , or possibly create their own designs (floral orgeometric)
Pattern Making with BeadsMaterialsMagnetic Buttons,Pony beads,Wooden craft sticks,Craft Glue,Construction Paper –brown, Scissors, Pencil,TemplateTemplate can be found nmagnet*this activity can be altered to include different patterns. Simply make a grid template for your studentsand have them glue it to a piece of cardboard or Styrofoam to stiffen your support. Have a few beadworkpatterns available and students can follow the pattern and glue their beads into the appropriate squares.
Step 1Lay down (7) Craft Sticks verticallycreating the arrow shape as shown.Step 2Glue (2) Mini Craft Stickshorizontally on the sticks to securethe shape. This will be the base ofyour Indian Corn Magnet.Step 3You will need (2) brown huskshapes. We have included atraceable PDF template on ourwebsite for this project. At the top ofthe screen, under the project image,you will find a "template" buttonwhere you can download thistemplate. Cut out the shapesprovided then trace onto brownconstruction paper.
Step 4Glue brown husk shapes on yourIndian Corn Magnet base in a “v”shape as shown.Step 5Glue different colored Pony Beadsonto the Craft Sticks.Step 6Once dry, flip over project and glue(2) Magnet Buttons to the back.Hang on your fridge or magneticsurface and decorated for theautumn season!
DreamcatcherMaterials:A thin & snack size paper plate,Yarn(about 3 feet long),Paint/ crayons or markers,Beads,Feathers,Tape,Hole puncher, ScissorsHow-to:First, cut the middle portion of the plate and decorate with paints or whatever medium you favor.Once your paint is dry, punch some holes around the plate. Wrap some tape around one end of the yarnand feed through the holes in the plate. Leave about 4-5 inches of the yarn at each end.Then thread some beads onto both ends of the yarn. Finally tie or tape some feathers onto the ends.Tips: Dreamcatchers can be a lot of fun to create for any age group. If working with older students, think aboutdesigning using different materials such as willow (maybe you would get students to gather their own willow pieces),perhaps you want to try a different approach and use wire instead of threads. Get creative!Wire Dreamcatcher how to: http://www.instructables.com/id/Wire-Dreamcatcher/
Painting with DotsMaterials:Paint palette( Styrofoam trays/ ice cream lids/ paper plates), wooden dowels, one per student, Paint,PaperHow to video: http://www.youtube.com/watch?v xIRSRzmfVnw&feature shareTips: Older Students: may want to try this same process on different supports such as a rock and usesmaller tools such as toothpicks and small paintbrushes, end of an unsharpened pencil, etc.
Storytelling:Mask MakingGrade Level:Elementary (with assistance) through High SchoolMaterials:Craft Plaster Gauze Strips , cut into strips of varying lengths and widths( available at Michaels craft store)Posterboard( if making these using plastic wrap)ScissorsPencilBowl, water (warm water is best, but cold works, too)Paper towelsvaseline or plastic wrap(see note below)NewspaperAcrylic paint, brushesLesson: Introduce masks that were used by different tribes and their reasons for mask making. Getstudents to design or discuss their own mask ideas and the reasons behind wanting to make that type ofmask.Procedure:1. Prepare plaster gauze strips and water in an area covered by newspaper.3. Cover the student's face with large amounts of vaseline, leaving the areas around the eyes andnostrils open.4. Position student comfortably on the floor or a table with newspaper underneath their head. Studentmust be able to stay completely still in order for the mask to set well and for the facial features to beaccurate.
5. Once this is in place, begin applying plaster gauze strips.6. Wet strips in water, use fingers to remove excess moisture, and apply to face. Start by forming an Xright inbetween the eyes and over the top of the bridge of the nose. Make an X at least 3 times during theprocess for extra support in the mask.7. Continue to apply strips of appropriate sizes until entire face is covered with two-3 layers of gauzestrips.9. Use tiny strips of gauze on area between nostrils. Be sure to smooth gauze as much as possible toavoid a rough textured surface.10. Once the layers of strips have been applied to face, allow the cast to harden for approximately 5-10minutes. Do not leave student alone during this time, and encourage him or her to relax and stay still.(Warm water speeds the hardening process and the new gauze we're using hardens much more quicklythan the gauze we used to use.)11. When mask has hardened (it will be warm to the touch), carefully remove it from the student's faceand discard the plastic wrap.12. After the mask has been removed, have the student use left over plaster gauze strips to cover anyweak areas in the mask.13. When mask is completely dry (the next day), have student paint their mask.This project took about three days for most of my students, one day for the casting and two days for thepainting. Older students may take longer if they choose to add more details to their masks.Notes:When I first did this project, I had students use Vaseline on their faces. I've since researched that plasticwrap works MUCH better than Vaseline and paper towels. It's far less messy, it protects their hair fromgetting wet if large pieces of plastic wrap are used, and it speeds up the casting process due to less prepand clean up time! We do a lot of different types of masks and plastic wrap is definitely the way to go!
Group Projects/ School ProjectsMaterials:Black paper, black paint to draw outline or glue that dries clear, soft pastels (blend well)Process:Teachers can draw the initial design using glue or paint and students fill in the different areas/shapes by blending colors orcreating patterns within each section
Woven MuralMaterials:long strips of colored paper (streamers), white paper, exacto knife, meter rulers,double sided tape (easily removable off walls) or sticky tackProcess:Teachers would make vertical slits in sheets of long white paper using a ruler andexacto knife( approx 2 inches in width) Next, tack large white paper to wall allaround the sides.Using streamers get students to weave in and out, making sureto alternate to get the woven effect.
Inspirational QuoteProcess:Brainstorm inspirational quotes with students and vote on which one to use,keeping in mind the number of letters if allowing each student design a letter forthe quote. If you are short some letters, allow other students to create their owncanvas with designs or symbols that can be added at either end of the quote.Suggestions:This project can be created using any medium.:heavier paper using markers or acrylic paper and acrylic paint or watercolorpaper and watercolor paints (using pen or sharpie to work back into them afterthey dry)
Emerging Aboriginal ArtistsLong before Idle No More, a new generation of Aboriginal artists began embracing itsheritage and power in society. Working in different mediums that allow them tocommunicate their visions and inspire young and old, these artists have embraced theirsense of self and reflected that in their art. Here is a profile of only six of the manyemerging aboriginal artists working in Canada today.JB The First Lady (Vancouver, B.C.)HandoutJB the First LadyBorn and raised in Bella Coola, B. C., Jerilynn Webster (JB The First Lady) is a Canadian hip-hop artist,performer and member of the Nuxalk and Cayauga Nations. Discouraged by urban racism when she was14 and new to Vancouver, her mother encouraged her to visit Vancouver’s Friendship Centre. There,Webster soon discovered hip-hop singers like Kinni Starr who performed rhymes about nativepride. Webster began documenting personal challenges, like her experience with residential schools andpoverty, finally jumping at the opportunity to record her music at KAYA, a free recording studio foraboriginal youth, where she is now an executive producer.Webster says hip-hop allows her to communicate her culture. “Hip-hop has common features of FirstNations culture,” she says. “It has dance, singing, art and oral history which are already built in me.Her soulful voice and empowering lyrics aim to capture social and political issues from a young woman’sperspective. “Hip hop is male-dominated, but this means we’re missing the other half of the story. As ayoung female artist, I want to represent that,” Webster says. “In Canada, young aboriginal women arefalling through the cracks into the shadows, so I want to bring that story forward in a positive way andencourage women.”
In addition to being a single mom, Webster is deeply involved in the community. Many hip-hop artists arebeing asked to lead chants for Idle No More, and she is one of them. She is a motivational speaker at IdleNo More events, Assembly General Meetings and the Indian Residential School Survivor Society. Sheperforms in plays and conducts beading and creative writing workshops with elders and youth. The City ofVancouver recently asked her to perform spoken word about reconciliation for the city’s Year ofReconciliation ceremony on June 20.Since releasing her debut album Indigenous Love in 2008, Webster has become a fan favourite, earningthree Aboriginal Peoples Choice Award nominations that include Best New Hip Hop Album and FemaleEntertainer of the Year in 2011 and Best New Album in 2012. She is currently finishing her third albumexpected to be released in late August.
Jesse Gouchey (Calgary, Alberta)HandoutJesse GoucheyGouchey is a Cree artist from Red Deer, Alberta, focusing on painting, drawing, animation, film andphotography. He also created a graphic novel about Blackfoot in Blackfoot language. His preferredmedium is spray paint, which he normally uses to create public murals commissioned by the communitiesof Alberta.But Gouchey is perhaps best known for his films that feature stop animation, which are based on hismurals. His first film, Spirit of the Bluebird, was created with his friend Xstine Cook. The film, which wasofficially selected for the Toronto International Film Festival in 2011, explores the murder of GloriaPlume, an aboriginal woman and mother of six who was stomped to death in an alleyway in 1999 by twomen who avoided conviction. It was screened at more than 70 film festivals and led to Gouchey’sparticipation in imagineNATIVE’s Stolen Sisters Digital Initiative in 2012. The mural he painted for Spiritof the Bluebird is located in the same alleyway where Plume’s body was found.Gouchey studied at workshops in the Aboriginal Youth Animation Program. “My Cree heritage becamepart of my life again through doing artwork. Being around the culture again, I remembered things frommy childhood that I was taught,” he says.Graffiti appealed to him because of the music he listened to as a youth — hip-hop and punk. Since then,he’s been able to create awareness about the discrimination of Aboriginal people through films aboutmurdered and missing women, leading to an apprenticeship with the National Film Board of Canada atHothouse 8 films. “I’ve been very fortunate to help families of missing loved ones,” he says. With a grantfrom the Canada Council for the Arts, he is currently working on another mural animation this summerfor a short film about the role of the inner warrior in today’s society. It’s based on a poem Cook wroteabout an Aboriginal man who ends up in jail, leaving behind a young son.
Caroline Monnet (Outaouais, Quebec)Kevin Lee BurtonMonnet is a contemporary artist working in film and video, while exploring other mediums such asinstallation, printmaking and painting. She experiments with ideas not defined by the medium. “Ideasdetermine the medium in which they are to be expressed,” she says. “My work resides in strongexperimental exploration, using vulnerability as a starting point.”Much of her art explores her Algonquin (Quebec) and French (France) duality. “Identity is often linked toterritory, but I’m interested in what happens when this attachment is divided between two cultures, twocontinents,” she says. She began using art to reclaim her aboriginal identity, something that she said hadbeen suppressed in her family. In 2009, she won a Woman’s Mosaic project grant by the Winnipeg FilmGroup that helped her make her first independent film Ikwé — a film that weaves the narrative of awoman’s intimate thoughts with the teachings of her grandmother, the Moon. Since then she has beenfeatured at numerous galleries and film festivals.In 2010, using a grant from the Canada Council for the Arts, she wrote a trilogy of experimentaldocumentary films that explore youth who leave their Northern homes to access urban education. Onefilm, Warchild, premiered at TIFF. Her multimedia installation Amik(waa) exhibited at the OBOROGallery in Montreal. In 2012, her filmGephyrophobia premiered at Cannes Film Festival.“I believe indigenous artists of my generation have the responsibility to break away from the cycles ofvictimization and create a positive change for our communities,” she says. “I respect the ways of myancestors without approachin
Pre-Class Preparation: Making brown paper bag look like “leather” 1. Tear off the handles of the brown grocery bag, glue or tape them together and cut to an 18” length. This will be the papoose strap. 2. Cut down the seam of the paper bag and cut the bottom out of the bag. Keep this bot