Transcription
Interdisciplinary Unit Plan forAncient EgyptAustin Davis
Lesson Plan #1Lesson: Ancient Egypt IntroductionLength: 60 minsAge or Grade Level Intended: 7th GradeContent Area: HistoryAcademic Standard(s):7.1.2 Describe the achievements of ancient Egypt in art, architecture, religion andgovernment and the development of the concept of theocracy*. (Individuals,Society and Culture)Performance Objective(s):The students will simulate being in a bureaucracy by completing the 3 assigned tasks with 90%accuracy.Assessment:Students will be assessed on the completion and accuracy of the Bureaucracy ActivityAdvance Preparation by Teacher:Creation of Ancient Egypt introduction PowerPointCreate Ancient Egypt note handoutCreate bureaucracy activityProcedure:Introduction/Motivation:Start class off by informing them that the theme of the unit is going to be teamwork and how ithelps build successful civilizations. Begin by asking the students what they know about ancientEgypt and what they want to know. Make a chart on the Chalk board so that the students can seewhat their peers know and what they want to learn. When they bring up the pyramids, be sure totalk about how important teamwork was to their creation and how teamwork will affect nearlyevery aspect of Egyptian life.Step-by-Step Plan:1. Start off by passing out the note handouts so that the students can follow along with thePowerPoint.2. Go through the PowerPoint and answer any questions that come up during thelecture.(Gardner’s: Visual-Spatial)3. Divide the class into groups of three. ( if there is an odd number, either make a group offour or a group of two depending on if there is one extra student or two)4. Read the instructions for the Bureaucracy Activity to the class (Gardner’s: VerbalLinguistic) and go through how you want each activity done, answering any questions thestudents have.5. Allow the students time in class to complete the Bureaucracy Activity (Gardner’s:Interpersonal, Logical-Mathematical, Visual-Spatial) (Blooms: Knowledge, Application,Analysis, Synthesis & Evaluation)Closure:1. If there is time when every group finishes the activity, go over the follow up questions as a classand compare the results of each group to their peers. If the class does not finish, give them timethe next day at the beginning of class and then discuss the follow up questions. Focus on question
#3. “How does the theme of Teamwork play into this activity?” Be sure to go into as much detailas possible about how teamwork in the bureaucracy kept the Government functioning. Have thestudents turn in their packets as a group at the end of the discussion to be graded.Adaptations/Enrichment:Student with Learning disability in reading comprehension:Modify the students activity packet so that the questions presented to them would bemultiple choice in activity 2 or 3. Also reduce the number of additional questions thestudent has to answer at the end of their activity.Student with ADHD:Have the students write in what they know and want to know on the board themselves sothat they can get out of their seat and move as well as encourage the groups to locatethemselves somewhere away from their original seats. These will provide multipleopportunities to move around in between periods of sitting.Self-Reflection:Do the students appear to grasp the concept of a Bureaucracy?Are there any ways to incorporate more intelligences into this lesson?Did the students have enough time to complete the activity without feeling rushed?
Intro to Ancient EgyptName:Government Egypt was a Theocracy( A government by priests or a monarch presumed to be divine) The leader was called the Pharaoh Pharaoh was believed to be a God on earth Egypt was merged into one kingdom with the merger of Upper and Lower Egypt around 3000 B.C. Large kingdom was ran by a complex Bureaucracy ( A large group of people who do government work) Pharaoh Menes who united Egypt created a Dynasty (succession of rulers by family)Social Structure Royal Family Nobles Middle Class Lower Class SlavesWriting System Egyptians wrote using a system of pictures called Hieroglyphics Consisted of about 600 symbols Was able to be translated using a stone known as the Rosetta StoneArchitecture The capital of Egypt, Memphis, had two palaces for the royal family Egypt mad many stone quarries and so they were able to use large amounts of stone to create greatmonuments/tombs called PyramidsScience Egyptians believed that a person’s Ka (spirit) could return to the body so they mummified a person to allowit to return Mummifying a person was a complex process that involved treating the body with a special combination ofherbs and oils To this day, scientists do not know what this mixture was Egyptians had a calendar that was 12 months, 365 days just like ours
Bureaucracy ActivityNames: ,,,Directions: The following pages will have scenarios that would be solved by members of theEgyptian Bureaucracy. Each of you are members of at least the middle class ranging from scribesto high ranking noblemen. Your jobs here today are very important as to how the governmentwill function and how the people will be treated.Be sure to follow the instructions on each page carefully and complete the questions connectedto each activity. Be sure to answer the group follow up questions at the end after you have allfinished with your individual task.
Activity #1You have been given the task of dividing up the land so that the peasants will be satisfied. Youneed to divide the land into sections that allow each peasant to have access to the river and roomto grow their crops. You will have to include room for a home on each section of property. Youwill need to make plots for a total of 8 peasants.The black squares on the map are wells and the black circles are larger rocks that cannot bemoved. Each property must contain at least one well and cannot have more than two of theselarge rocks. You must also mark where the house will be located by drawing a small house oneach property.Questions: (use the back of this page to answer the questions)Did you divide the land up equally or are some properties larger than others?Was it difficult to equally divide the properties while making sure each had at least one well?Explain your answer.
Activity #2You have been assigned the task of collecting taxes from the peasants. Each peasant is to offerup 20% of their wheat harvest as a tribute to the Pharaoh. Some will say that they will not beable to pay the tax this year but they are most likely not being good citizens so you must takeexactly 20% anyway. Use a calculator to figure out the exact amounts needed to meet the tax andround to the nearest whole pound.Peasant #1:400 lbs.Peasant #2:35 lbs.Peasant #3: 74 lbs.Peasant #4: 112 lbs.Peasant #5: 354 lbs.Peasant #6: 287 lbs.Peasant # 7: 23 lbs.Peasant #8: 17 lbs.Peasant #9: 59 lbs.Peasant #10: 135 lbs.What is the total number of pounds of wheat collected from the taxes?After doing these numbers, do you think it is better that each person gives an amount based on apercent or should every have to give a certain number (say 60 lbs. every year)? Explain yourchoice.
Activity #3You are in charge of deciding how this year’s tax money will be spent. You need to ensure thatthe pharaoh will have enough money to continue construction on his pyramid so that will makeup at least 50% of the total taxes. With the rest of the money, decide how much you feel wouldbe appropriate for the following items and complete the pie chart at the bottom followed by thequestions. Label your pie chart and feel free to use colors for each slice.Pyramid:50%Building of other religious temples:Welfare for the poor:Supplies for the Military:Wages for the Bureaucracy:After the pyramid costs, what item received the most funding?Why did you decide that this item needed to be the next highest priority?Which item received the least funding? Explain why you decided this.
Follow up Questions:1. Which activity do you as a group feel was the most challenging?2. Why do you think it is important that a bureaucracy handles this kind of task instead of thePharaoh?3. How does the theme of Teamwork play into this activity?
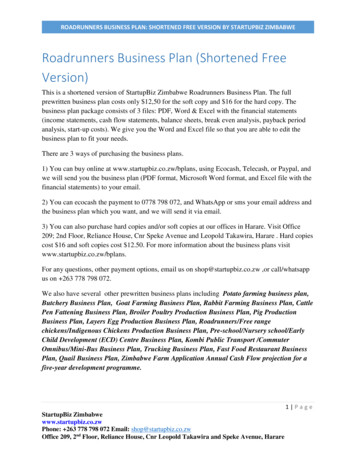
Lesson Plan #2Lesson: Egyptian HieroglyphsLength: 60 minsAge or Grade Level Intended: 7thContent Area: HistoryAcademic Standard(s):7.1.3Trace steps in the development of written language, including the evolution ofSumerian cuneiform, Egyptian hieroglyphics and Chinese calligraphy. (Individuals,Society and Culture)Performance Objective(s):The students will write their names in hieroglyphics using the given “Rosetta Stone” with 100%accuracy.Assessment:Students will be assessed by the completion and correctness of a translation of their names intohieroglyphics.Advance Preparation by Teacher:Print off a worksheet with letter translations for hieroglyphs to EnglishPrint off the story, “The Old Master Scribe”Create worksheet to follow along with the storyCreate a PowerPoint about the real Rosetta StoneProcedure:Introduction/Motivation: Discuss as a class, the follow up questions from thebureaucracy activity from the day before if there was no time the previous day.Start the lesson by asking your students to think about the English language. Ask themhow many letters are in the alphabet and what languages our language was developed from(Blooms: Knowledge). Ask them how writing effect teamwork? Writing helps others tounderstand how things were done in the past and written instructions can help get somethingdone when the person giving directions cannot physically be there. Use this thinking to transitioninto how it is a privilege to be able to read and write and that in ancient Egypt, only a selectgroup of people ever learned.1. Divide the class into groups of two. If you trust the class to pick their own partners that isfine, otherwise come up with another way to create groups.2. Pass out a copy of “The Old Scribe” to each person and have them read it silently tothemselves. (Gardner’s: Verbal-Linguistic)3. As groups begin to finish reading the story, pass out the follow-up questions for the story.( Gardner’s: Interpersonal) (Blooms: Knowledge, Application)4. After completing the worksheet, have them return to their seats5. Show a PowerPoint on the real Rosetta Stone (Gardner’s: Visual-Spatial)6. After the PowerPoint, pass out a blank piece of computer paper as well as a copy of theRosetta Stone handout. Tell the students that they will each get to write their name inhieroglyphics. (Gardner’s: Visual-Spatial) ( Blooms: Application)
Closure: As each student is finishing, have everyone hold their name above their headone at a time so that the rest of the class can see how their name is written. Ask them if they haveany questions and dismiss class. Have them turn in their names as they leave.Adaptations/Enrichment:Student with Learning disability in reading comprehension:Create a set of premade notes to go along with the PowerPoint so that they can focus onlistening instead of trying to read the slides.Student with ADHD:Have the students act out the story of the “Old Master Scribe”Student with Gifts and Talents in Creativity:Encourage the students to become creative with their hieroglyphic name, have them colorthem in and create designs to add to the hieroglyphs.Self-Reflection: Do the students seem to grasp the concept of what Hieroglyphics are?Is there any way to include more of Gardner’s intelligences?Was there enough material in this lesson to fill the period?Did the students enjoy the material?How can I improve this lesson?
Rosetta Stone
The Old Master ScribeThe old master scribe settled onto his reed mat and looked at the boysitting in front of him. 'Why have you come here?' he asked. 'I have cometo learn how to be a scribe like my father was,' the boy said.Click on the picturesThe old man smiled, 'If you want to be a scribe, you must first learn about the scriptsused to record the language of the Egyptian people. Then, you will learn to read andwrite these scripts.' He paused, then closed his eyes. A minute passed. Then he beganto speak in a low voice. 'I will start at the beginning.''A long, long time ago, Thoth, the great god of writing andknowledge brought the gift of Medu Netjer ('God's words')to the land. For hundreds of years this sacred script hasbeen used to record the words and deeds of the pharaohsand the gods and goddesses.''If the script was sacred, what did scribes use for writingletters?' the boy asked.The old master scribe continued .'Some years later, another scriptwas developed so that everyday information could be written down quickly andeasily. It was used by scribes working in the temples and palaces who need to keeprecords and write letters.' He paused.'The signs for the new script were based on those of the sacred script. However,they were drawn with fewer lines and decoration. That made it easier and faster towrite the signs.'The old master scribe picked up a reed pen and carefully drew the hieroglyphic signon a piece of limestone. Next to it, with a quick sweep of his hand, he drew thesame sign in hieratic.He showed it to the boy. 'Do you see the difference?' he asked.The boy studied the signs and nodded his head.
'Today, in the reign of Wehemibra (Nekau II), we do not use thehieratic script that much anymore. Our common script is sekh shat,('writing for documents'). The signs are based on hieratic signs, butthey are even simpler. This makes them faster and easier to write.'The old master scribe paused and wiped his brow. 'As a scribe youare given the power and knowledge of writing. First, you must learnthe common script of the land so you can perform everyday tasks.After that, if you are lucky and talented, you will also learn the sacredscript. Those who learn the sacred script will learn the secrets of the gods and themysteries of the land.'The old master scribe reached behind him and brought out a small wooden palette. Heheld it out to the boy. 'This is for you. Once you have learned to read and write, you willhave many opportunities in the world. Practice your signs well and you will go far.' Then,he stood up.The boy said goodbye to the old master scribe and left his home. For many years hestudied to be a scribe, practicing his signs for hours every day. It was difficult work, andsometimes he hated school. But he worked hard.Finally, he was ready to leave scribe school. He had done well and wasoffered a position as a priest in a temple.Long after the old master scribe had died, the young man still thoughtabout their meeting. He never forgot what the old man had taught himabout the importance of learning the scripts, and the honor of being ascribe.The EndWorks CitedThe British Museum. (2007, Februrary 7). Ancient Egypt. Retrieved November 7, 2011, .html
The Old Master ScribeName:1. Who brought “God’s Words” to the Egyptians according to the old scribe?2. What was this original script used for?3. Why was a second script created for everyday information?4. According to the Old Scribe, what was the modern script?5. What was the boy’s first task in becoming a Scribe?6. Once the boy graduated from Scribe school, what job did he take up?7. Based on your reading of this story, define in your own words what a Scribe is and what they do.
Lesson Plan # 3Lesson: Egyptian PyramidsLength: 60 minsAge or Grade Level Intended: 7th gradeSubject: World HistoryAcademic Standard(s): 7.1.2Describe the achievements of ancient Egypt in art,architecture, religion and government and the development of the concept oftheocracy*. (Individuals, Society and Culture)Performance Objective(s): The students will complete the worksheet complimenting theancientegypt.co.uk pyramid webpage with 90% accuracyAssessment: Students will complete the given pyramid webpage worksheet with 100% accuracyAdvance Preparation by Teacher: Secure computer lab or a mobile laptop station cart Create worksheet to compliment ancientegypt.co.uk webpage In the event that I cannot secure a lab or mobile laptop station, I will need to create apacket with all of the same information as the webpage Create a pyramid cut outProcedure:Introduction/Motivation: tell the students that today they will be learning about thepyramids. The pyramids are some of the largest structures on the planet and were all made byhand. They are the ultimate product of teamwork. Engineers, laborers and craftsmen would worktogether for 20 years to build a massive pyramid to remember their Pharaoh. Hand out to all ofthe students the Pyramid cut out paper. Tell the students that they will all get to create their ownpyramids for the world to remember them by but first they have to learn why pyramids werecreated and how.Step-by-Step Plan:1. Either go to reserved computer lab or distribute laptops within class. If neither is possible,use a pre-made packet with all of the same information within it for the students to use.2. Allow the students to pair up to work on this assignment3. Tell them that they will be learning about the pyramids through an interactive onlinewebpage. Guide them to www.ancientegypt.co.uk4. Instruct them to click on the pyramids section on the left side of the page as you pass outthe questions to go along with the webpage.5. The students will be guided through multiple sections of this website that will include thehistory and dimensions of pyramids, specifically the “Great Pyramid” of Giza.6. As the students are working on the guided questions (Bloom’s: knowledge, Application)(Gardner’s: Interpersonal, Visual-Spatial, Logical-Mathematical)7. Instruct the students to turn in the assignment as they finish and to get a pair of scissors,tape and some colored pencils.
8. Instruct the students to cut out the pyramid outline they were given and then draw theirnames in Hieroglyphics as well draw symbols that they feel represent them as a personand what they should be remembered for. Color the pyramid any color you like and thenfold it into a three dimensional shape, holding it together with either glue or tape.(Gardner’s: Visual-Spatial, Intrapersonal)Closure: Close by allowing students to share their pyramids with the class and explainwhat each symbol represents to them. Have the students turn in the worksheet for a grade beforethey leave.Adaptations/Enrichment:Student with Learning disability in reading comprehension: For this students, createthe worksheet with multiple choice answers in order to help guide the student towards thespecific answer he/she should be looking for.Student with ADHD: For this student, create different stations at different points in theroom that require the student to more to these stations in order to gather the information neededto finish the worksheet. This would also be a good idea if a computer lab was unavailable.Student with Gifts and Talents in Creativity: Invite these students to bring in legos orclay in order to create more creative pyramids that are more like the ones they read about. Havethem build the “skeleton” of the pyramid with the legos and cover it with clay for the finalsmooth look.Self-Reflection: Did the students seem to enjoy this lesson? Did the interact website encourage deeper learning of the material? How can I incorporate other learning styles into this lesson? What went well and what could be changed?
Pyramids, Houses of Eternity WorksheetName:1. Why were Pyramids built in ancient Egypt?2. About how many pyramids are there in Egypt?3. Where are the three largest pyramids located?4. What is the name of the Pharaoh that the “Great Pyramid” was built for?Story5. Why were cemeteries located on the west side of the Nile in ancient Egypt?6. During what season of the year did the farmers help with the construction of the “GreatPyramid”?7. Who did the workers drag the stones to the next level of the pyramid after the lower level wasfinished?8. About how many years did it take to complete the pyramid?9. What was special about the final piece placed on top of the pyramid?10. Draw a basic outline of Khufu’s complex, be sure to label all the buildings described.
Challenge11. What year was the “Great Pyramid” built?HeightWrite your guess here:Actual answer:How many meters high is that?If a meter is 3.28 ft. how many feet is the above answer?How much money would it cost to build that stack of buses? If a Euro is equal to 1.35 U.S. dollars, how much money in dollars would that same stack cost? AreaWrite your guess here:Actual answer:About how many square meters is this?How many people would that be?WeightWrite your Guess here:Actual answer:How many million tons is this?How many tons of rocks were left over?
Lesson Plan # 4Lesson: MummificationLength: 60 minsAge or Grade Level Intended: 7thAcademic Standard(s): 7.1.2Describe the achievements of ancient Egypt in art,architecture, religion and government and the development of the concept oftheocracy*. (Individuals, Society and Culture)Performance Objective(s): Students will understand the process of mummifying a person bycompleting the “How to make a mummy” packet in groups with 100% accuracy.Assessment: The students will complete the “How to make a mummy” packet with 100%accuracy.Advance Preparation by Teacher: Create a brief PowerPoint visual to introduce the concepts of mummies. Create the How to make a mummy packet Have the link to the mummy explore game ready to go and tested.Procedure:Introduction/Motivation: Start off by asking the students how we as Americans buryour dead. Explain the processes involved with burials and cremation. Ask if they know anyonethat’s ever been cremated but be sure that no one in the class has had a recent death in the familyas this may be too close to home for the student. As you discuss modern burials, use it tointroduce ancient burials and how the Egyptians buried their dead like us, just in different waysand how much specialization and teamwork was required to make the mummification process gosmoothly.Step-by-Step Plan:1. Begin the lesson after the hook by briefly introducing the history of Egyptian burials.Inform the students of how the process evolved over time.2. Next, give the students the “How to make a mummy” packet and allow them to work inpairs as they go through the handout. ( Gardner’s: Visual-Spatial, Mathematic-Logical,Interpersonal) (Bloom’s: Knowledge, Application, Evaluation)3. Give students assistance as they need it throughout the packets completion. After thestudents have finished the packet, show the students the exploration into the afterlifefound on n.html.4. Read the prompts to the class as you move through the webpage. Let the students vote onthe interactive portions of the game and let them see what will happen. (Gardner’s:Visual spatial, Logical-Mathematical, Verbal-Linguistic)Closure: Finish the lesson by drawing a picture of a scale balancing the heart of a personand a feather, just as the Egyptian gods would do upon a person’s death. Explain this story to theclass before they go.
Adaptations/Enrichment:Student with Learning disability in reading comprehension: Make the answers to thepacket multiple choice and reduce the amount of actual reading required in the packet tofind each answer.Student with ADHD: Modify the activity so that the student with ADHD is the one thatstands at the computer or smart board and clicks in the classes choices. This will allow thestudent to get out of their seat and move around.Student with Gifts and Talents in Creativity: Allow the students to draw and colortheir own sarcophaguses at the end of the packet in order to deepen their connection to thematerial.Self-Reflection: Did the students grasp the material? Were my instructions clear and easy to follow? Did my hook work? Did the students enjoy the activities?
How to Make a MummyName:Embalming the bodyFirst, his body is taken to the tent known as 'ibu' or the 'place of purification'. There theembalmers wash his body with good-smelling palm wine and rinse it with water from the Nile.One of the embalmer's men makes a cut in the left side of the body and removes many of theinternal organs. It is important to remove these because they are the first part of the body todecompose.The liver, lungs, stomach and intestines are washed and packed in natron(a type of salt) whichwill dry them out. The heart is not taken out of the body because it is the centre of intelligenceand feeling and the man will need it in the afterlife.A long hook is used to smash the brain and pull it out through the nose.The body is now covered and stuffed with natron which will dry it out. All of the fluids, and ragsfrom the embalming process will be saved and buried along with the body.After forty days the body is washed again with water from the Nile. Then it is covered with oilsto help the skin stay elastic.The dehydrated internal organs are wrapped in linen and returned to the body. The body isstuffed with dry materials such as sawdust, leaves and linen so that it looks lifelike.Finally the body is covered again with good-smelling oils. It is now ready to be wrapped in linen.In the past, when the internal organs were removed from a body they were placed in hollowcanopic jars. These jars are images of the Gods that protect the dead persons organs.Over many years the embalming practices changed and embalmers began returning internalorgans to bodies after the organs had been dried in natron. However, solid wood or stone canopicjars were still buried with the mummy to symbolically protect the internal organs.
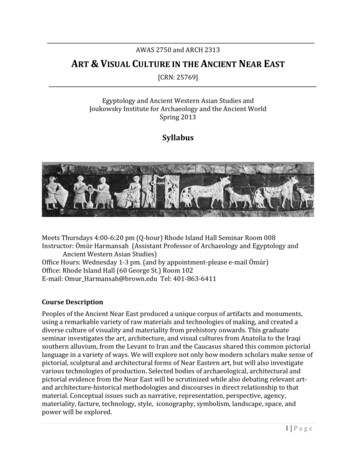
Imsety the human-headed god looks after the liver.Hapy the baboon-headed god looks after the lungsDuamutef the jackal-headed god looks after the stomachQebehsenuef the falcon-headed god looks after the intestines.Wrapping the mummy
First the head and neck are wrapped with strips of fine linen. Then the fingers and the toes areindividually wrapped.The arms and legs are wrapped separately. Between the layers of wrapping, the embalmers placeamulets to protect the body in its journey through the underworld.A priest reads spells out loud while the mummy is being wrapped. These spells will help wardoff evil spirits and help the deceased make the journey to the afterlife.The arms and legs are tied together. A papyrus scroll with spells from the Book of the Dead isplaced between the wrapped hands.More linen strips are wrapped around the body. At every layer, the bandages are painted withliquid resin that helps to glue the bandages together.A cloth is wrapped around the body and a picture of the god Osiris is painted on its surface.Finally, a large cloth is wrapped around the entire mummy. It is attached with strips of linen thatrun from the top to the bottom of the mummy, and around its middle.A board of painted wood is placed on top of the mummy before the mummy is lowered into itscoffin. The first coffin is then put inside a second coffin.A ritual called the 'Opening of the Mouth' is performed, allowing the deceased to eat and drinkagain.Finally, the body and its coffins are placed inside a large stone sarcophagus in the tomb.Furniture, clothing, valuable objects, food and drink are arranged in the tomb for the deceased.Now his body is ready for its journey through the underworld. There his heart will be judged byhis good deeds on earth. If his heart is found to be pure he will be sent to live for all eternity inthe beautiful 'Field of Reeds'.
On the body providedhere, draw where anembalmer would cut intothe body. Also, on thelines below list theorgans that would beremoved during thisprocess.What organ is removedseparately with a hook?What organ is left in thebody at all times?Why is this organ left inthe body?
For each of the organs removed, list the name of the God that protects the organ as well as whateach God resembles.1.2.3.4.How many days does the body sit in natron?During later years of the Ancient Egyptian civilization, were the organs left out or returned to thebody?List the steps to wrapping the Mummy:
What is the name of the coffin that the mummy is placed in to be buried?If you had the choice to be buried in this fashion now, would you want to? Why or Why not?
Lesson Plan # 5Lesson: Ancient Egypt AssessmentLength: 60 mins x2 daysAge or Grade Level Intended: 7thAcademic Standard(s): 7.1.2 Describe the achievements of ancient Egypt in art, architecture,religion and government and the development of the concept of theocracyPerformance Objective(s): Students will create a full funeral procession for an EgyptianPharaoh using all of the knowledge they have gained in previous lessons with a minimum of85% based on a rubricAssessment: The students will, using a bureaucratic style, list and reenact all of the stepsrequired in the process of creating a pyramid and mummifying the pharaoh while usinghieroglyphics were needed.Advance Preparation by Teacher: Collect some kind of dolls (Barbie’s) for the students to mummify Provide materials for students to use on their projects such as paper, markers, glue, tape,toilet paper and any other items that may be needed. Create a handout to guide the students through all of the required steps for projectcompletion Make a rubric to use to grade the assessmentProcedure:Introduction/Motivation: Tell the students that over the past week, they have becomeexperts in the field of ancient Egyptian study and now it is time for them to show what theyknow. Tell the students that they are elites in Ancient Egypt and the Pharaoh has just died. It isup to them to work as a team to ensure that the pharaoh is buried in a timely manner and properlywith Egyptian customs. They will manage the completion of the Pharaohs final resting place, itsmarking and the process of m
The students will write their names in hieroglyphics using the given “Rosetta Stone” with 100% accuracy. Assessment: Students will be assessed by the completion and correctness of a translation of their names into hieroglyphics. Advance Preparation by Teacher: Print off a worksheet with letter