Transcription
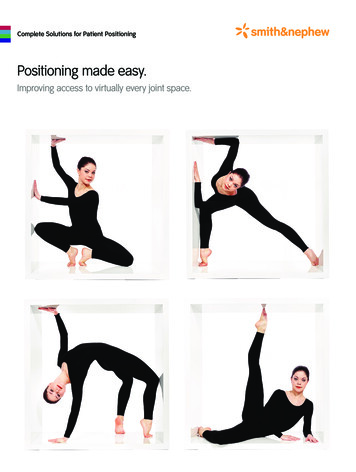
U.S. ARMY MEDICAL DEPARTMENT CENTER AND SCHOOLFORT SAM HOUSTON, TEXAS 78234-6100STANDARD POSITIONINGTECHNIQUES ISUBCOURSE MD0961EDITION 200
DEVELOPMENTThis subcourse is approved for resident and correspondence course instruction. Itreflects the current thought of the Academy of Health Sciences and conforms to printedDepartment of the Army doctrine as closely as currently possible. Development andprogress render such doctrine continuously subject to change.ADMINISTRATIONStudents who desire credit hours for this correspondence subcourse must enroll in thesubcourse. Application for enrollment should be made at the Internet website:http://www.atrrs.army.mil. You can access the course catalog in the upper right corner.Enter School Code 555 for medical correspondence courses. Copy down the coursenumber and title. To apply for enrollment, return to the main ATRRS screen and scrolldown the right side for ATRRS Channels. Click on SELF DEVELOPMENT to open theapplication; then follow the on-screen instructions.For comments or questions regarding enrollment, student records, or examinationshipments, contact the Nonresident Instruction Branch at DSN 471-5877, commercial(210) 221-5877, toll-free 1-800-344-2380; fax: 210-221-4012 or DSN 471-4012, e-mailaccp@amedd.army.mil, or write to:NONRESIDENT INSTRUCTION BRANCHAMEDDC&SATTN: MCCS-HSN2105 11TH STREET SUITE 4191FORT SAM HOUSTON TX 78234-5064Be sure your social security number is on all correspondence sent to the Academy ofHealth Sciences.CLARIFICATION OF TERMINOLOGYWhen used in this publication, words such as "he," "him," "his," and "men" 'are intendedto include both the masculine and feminine genders, unless specifically stated otherwiseor when obvious in context.USE OF PROPRIETARY NAMESThe initial letters of the names of some products may be capitalized in this subcourse.Such names are proprietary names, that is, brand names or trademarks. Proprietarynames have been used in this subcourse only to make it a more effective learning aid.The use of any name, proprietary or otherwise, should not be interpreted asendorsement, deprecation, or criticism of a product; nor should such use be consideredto interpret the validity of proprietary rights in a name, whether it is registered or not.
TABLE OF CONTENTSLessonParagraphsINTRODUCTION12345BODY MECHANICS, PATIENT HANDLING, ANDPOSITIONINGSection I.Protecting Your BackExercisesSection II.Moving and Transporting the PatientExercisesTHE ORDER OF PROCEDURESection I.Order of Procedure (Steps 1 and 2)ExercisesSection II.Order of Procedure (Step 3 through 5)ExercisesPOSITIONING TERMINOLOGYSection I.General Terms and Body Part TermsExercisesSection II.Positioning and Projection TerminologyExercisesSection III. Projection, Central Ray, and BreathingTechnique TerminologyExercisesFILM IDENTIFICATION AND CAPTIONINGSection I.The X-ray Request FormExercisesSection II.Film IdentificationExercisesPOSITIONING FOR EXAMS OF THE UPPER EXTREMITIESSection I.Radiographic Projection of the HandSection II.The Wrist and ForearmSection III. The ElbowSection IV. The HumerusSection V. The ShoulderSection VI. The ScapulaSection VII: The Clavicle and Acromioclavicular JointsExercisesAPPENDIX, GLOSSARY OF 215-22—5-235-24—5-25
CORRESPONDENCE COURSE OFTHE U.S. ARMY MEDICAL DEPARTMENT CENTER AND SCHOOLSUBCOURSE MD0961STANDARD POSITIONING TECHNIQUES IINTRODUCTIONAs an X-ray technologist, positioning the patient is one of the most routine, yetcritical, aspects of your job. You may have to position up to fifty patients in the course ofany given day. Though you may come close to knowing the steps for positioning apatient almost without thinking, you should never let positioning procedures become amindless part of your job. Failure to position a patient correctly could cause harm to thepatient. It could also involve the hospital and/or health care team in needless litigation.If you fail to position the patient correctly for a particular study, the radiologist may endup with an incomplete study and, thus, inadequate or inaccurate information toformulate a valid diagnosis.If you fail to take proper precautions in handling, moving, and/or positioning thepatient, you may contribute to a slip-and-fall injury or a radiation therapy injury, two ofthe four principal categories of patient injuries and the cause of malpractice suits in theradiology department. Therefore, although you may position many patients in a givenday or week, you must never let the steps of the various positioning procedures becomerote or mechanical. You must think about and put all of your attention into what you aredoing at all times.Subcourse Components:The subcourse instructional material consists of five lessons and a glossary asfollows:Lesson 1,Lesson 2,Lesson 3,Lesson 4,Lesson 5,Appendix,Body Mechanics, Patient Handling, and Positioning.The Order of Procedure.Positioning Terminology.Film Identification and Captioning.Positioning for Exams of the Upper Extremities.Glossary of Terms.Here are some suggestions that may be helpful to you in completing thissubcourse:--Read and study each lesson carefully.--Complete the subcourse lesson by lesson. After completing each lesson, workthe exercises at the end of the lesson, marking your answers in this booklet.MD0961ii
--After completing each set of lesson exercises, compare your answers with thoseon the solution sheet that follows the exercises. If you have answered an exerciseincorrectly, check the reference cited after the answer on the solution sheet todetermine why your response was not the correct one.Credit Awarded:Upon successful completion of the examination for this subcourse, you will beawarded 12 credit hours.To receive credit hours, you must be officially enrolled and complete anexamination furnished by the Nonresident Instruction Branch at Fort Sam Houston,Texas.You can enroll by going to the web site http://atrrs.army.mil and enrolling under"Self Development" (School Code 555).A listing of correspondence courses and subcourses available through theNonresident Instruction Section is found in Chapter 4 of DA Pamphlet 350-59, ArmyCorrespondence Course Program Catalog. The DA PAM is available at the followingwebsite: 961iii
LESSON ASSIGNMENTLESSON 1Body Mechanics, Patient Handling, and Positioning.LESSON ASSIGNMENTParagraphs 1-1 through 1-20.LESSON OBJECTIVESAfter completing this lesson, you should be able to:SUGGESTIONMD09611-1.Identify definitions of the base of support, centerof gravity, and body mechanics.1-2.Identify general rules for lifting and carryingheavy objects.1-3.Identify criteria for assessing patient mobility.1-4.Identify procedures for moving a patient who isable/unable to assist from:a. Wheelchair to X-ray table.b. Stretcher to X-ray table.1-5.Identify procedures for positioning a patient inthe supine, lateral, and prone positions.1-6.Identify special precautions for handling traumapatients, and patients with casts.After reading and studying the assignment, completethe exercises at the end of this lesson. Theseexercises will help you to achieve the lessonobjectives.1-1
LESSON 1BODY MECHANICS, PATIENT HANDLING, AND POSITIONINGSection I. PROTECTING YOUR BACK1-1.INTRODUCTIONa. According to registered occupational therapist, Kathryn Ryan, in 1989, workrelated injuries in California reached "epidemic proportions" (over 370,000 injuries werereported, with 100,000 back-related). Ryan says that the combined occurrence of backpain at work and home means that "eight out of ten of us will suffer back pain sometimein our lives”.b. Common injuries, such as acute sprains and strains, cause back injury.Everyday stress and wear and tear can cause chronic muscle and joint strain that slowlybuilds up. Actual case load and specific duties play a role in the incidence of back,injury. But, the job of a radiologic technologist (RT) is somewhere in the middle ascompared to other jobs for susceptibility to back injury (somewhere between light officework and heavy labor).c. Most back injuries affect the discs, cushions of the spine, ligamentsconnecting the vertebra, and muscles of the lumbar area. Bad habits like excessivebending can weaken the wall of the back discs causing disc strain or bulge.” The worstproblem, nucleus protrusion; can require surgery. Protrusion occurs when the discnucleus projects beyond the discs outer shell and onto the spinal cord or nerve roots.Loss of bladder control and paralysis can result. Bad posture, poor body mechanics,high stress, poor physical condition, and erratic sleep habits increase the risk of backinjury. Bad posture can cause you back pain. Soft mattresses do not support the spine.Sleeping on your stomach can strain the neck and back1-2.AN OUNCE OF PREVENTIONa. Avoiding Injury and Lawsuits. As stated earlier slip-and-fall injuries, whichaccount for malpractice suits in the radiology department, are one category of injurywhich the radiologic technologist often has direct responsibility. You do not want to beresponsible for malpractice suits. So, you must do your best to prevent injury whilemoving or lifting the patient, especially when the patient needs assistance. Bypreventing injuries resulting from negligence, you will also help reduce the number ofmalpractice suits in the radiology department.MD09611-2
b. Avoiding Injury to Oneself. Patients are not the only ones who incur injuryin the radiology department technologists also suffer injury themselves, especiallythrough abuse of the spine. You are most likely to do this while lifting or moving apatient. Have you ever tried to lift a 350-pound patient? You may suffer injury if you failto apply the principles of good body mechanics in performing tasks that requirestooping, lifting, pushing, pulling, and carrying. The injury will not only cause youdiscomfort, but it will cause you to function at a reduced level of efficiency. This willplace a greater burden on your colleagues or even result in injury to the patient.c. The Importance of Good Body Mechanics. For the reasons stated above,you must know and apply the principles of good body mechanics, which include properbody alignment, proper movement, and proper use of balance. Doing so will helpminimize patient injury and costly litigation that may result, as well as injury to yourself.This lesson outlines key concepts of body mechanics and patient handling.NOTE:1-3.Body mechanics is the safe and efficient use of the body in movement.BODY ALIGNMENTa. Lining Up the Major Body Parts. Correct body alignment is essential to thesafe and efficient use of good body mechanics. As the term suggests, good alignmentmeans lining up the major body segments (pelvis, thorax, and head) in properrelationship to one another. When body segments are properly lined up, it becomeseasier to maintain body balance (see figure 1-1). With good balance, the body is stable,and steady. Thus, you are less likely to tip over or fall.NOTE:Body alignment is the lining up the pelvis, thorax, and head in properrelationship to each other so as to maintain body balance.Figure 1-1. (a) Good alignment-pelvis, thorax, and head lined up in proper relationshipto each other.(b) Poor body alignment.MD09611-3
b. Small Structures Support Main Body Segments. Relatively smallvertebrae in the spinal column support the main body segments, small neck bonessupport the head, and small bones in the feet support the pelvis. Your ligaments andmuscles must, therefore, be used property in order for these small structures tocorrectly support the right relationship and balance among anatomical parts.1-4.BASE OF SUPPORTa. Your Contact With the Ground. The base of support, the part of the body incontact with the ground (or other horizontal surface), may be represented by animaginary line. When standing, your feet provide the base of support. An imaginaryline drawn between your feet would represent your base of support.b. The Base of Support. If you were lying on your back, with the entire lengthof your body in contact with the bed, that imaginary line would now run the entire lengthof your body. The base of support keeps you from toppling and provides stability forlifting, pushing, or pulling.NOTE:Base of support is an imaginary line created by body parts that are in contactwith the ground or other horizontal surface.c. The Broader the Base of Support, the Better. When lying down, forexample, your body is very stable because you have a broad base of support.Conversely, it is harder to maintain your balance if your feet are close together becauseyour base of support is narrow. Remember, when moving or lifting a patient, spreadyour feet slightly for improved stability. See figures 1-2, 1-3, and 1-4.Figure 1-2. A stack of film cassettes has a broad base of supportMD09611-4
Figure 1-3. Spreading your feet broadens the base of, support, providing greaterstability.Figure 1-4. Standing on the tip of one foot provides only a narrow, thus, less stablebase of support.1-5.THE LINE OF GRAVITYa. The line of gravity is an imaginary vertical line that passes through thecenter of gravity (figure 1-5). Follow the line of gravity in the profile shot (left half) offigure 1-6. When erect, the line of gravity passes behind the ear. It continues justbehind the center of the hip joint. Then the line descends along the knee and anklejoints. (The exact location of the line of gravity will, of course, vary according toindividual differences in body build and the curvature of the spine.)MD09611-5
Figure 1-5. The line of gravity and center of gravity do not cross the base of support,making it hard to keep oneself in a stable position.Figure1-6. The ideal interrelationship of the line of gravity, the center of gravity and thebase of support, when good body mechanics is practiced.MD09611-6
b. As you can see from figure 1-6, when good body mechanics is practiced, thecenter of gravity is low. Note, too, that the line of gravity crosses the center of gravityand the base of support. Consider the frontal pose (right-hand portion, figure 1-6).Note that the base of support is wide, since the feet are spread apart.c. The body is most stable when the line of gravity bisects the base of support.You can protect your back while carrying heavy objects by maintaining good postureand holding your load close to the body (figure 1-7). When the load is held close to thebody, the line of gravity will bisect the base of support. Did you notice that one foot isplaced slightly in front of the other? This provides the advantage of added front-to-backstability.Figure 1-7. Carry the load close to your body. Keep feet apart, with one foot slightly infront of the other.d. Figure 1-8 is an example of what not to do! You are inviting back injury, ifyou hold the load away from your body. The line of gravity will not bisect the base ofsupport. The consequence of this technique is suffering fatigue, strain, and possibleinjury. This will not only mean personal discomfort, but a heavier workload forcolleagues who might have to fill in for you if you are not able to work because of aninjury. Do not allow failure to practice common sense body mechanics place you out ofcommission. Take a moment to think before acting in order to plan your movements formaximum ease and efficiency and minimum strain.MD09611-7
Figure 1-8. Avoid this! Holding the load away from the body will cause strain, fatigue,and possible injury1-6.THE CENTER OF GRAVITYa. Located at Mid-Pelvis or Lower Abdominal Area. The center of gravity (orcenter of body weight) is the point around which the weight of your body is balanced.Allowing for some variation based on body build, the center of gravity is generallylocated at the mid-pelvis region (about the level of the second sacral vertebrae) or in thelower abdominal region. (See figure 1-6.)NOTE:The center of gravity is the point around which the weight of the body isbalanced (mid-pelvis or lower abdomen, depending upon body build).b. About Half Your Weight Above, Half Below. About half of your bodyweight is distributed above the center of gravity and half below that point. Your centerof gravity is affected by the size and position of the load you are carrying. The size andlocation of the load add to the weight placed on the base of support. This, in turn,effects the location of the center of gravity.MD09611-8
c. A Broad Base of Support and a Low Center of Gravity Desirable. Stableobjects have a broad base of support and a low center of gravity. The recumbent figureand the box of chemicals in figure 1-9 are very stable because they have a broad baseof support and a low center of gravity. The body is most stable when the center ofgravity is nearest the center of the base of support. By carrying a load close to yourbody rather than away from your body, the load will be close to your center of gravity.You will expend less energy, feel less strain, and be less likely to suffer injury.Figure 1-9. Factors promoting stability: a broad base of support, a low center ofgravity, a line of gravity that intersects the base of support.d. Keeping the Center of Gravity Over the Base of Support. Note that infigure 1-10, the line of gravity does not pass through the base of support. However, infigure 1-11, the line of gravity passes through the base of support. This is a desirableconfiguration that should be applied when lifting objects. When lifting an object, bend atthe knees and hips and keep your back straight (figure 1-11). Positioned in thismanner, the center of gravity will remain over the base of support (the feet) as it oughtto be, making it easier to keep your balance.1-7.RULES FOR LIFTING AND CARRYING HEAVY OBJECTSa. The tips for good body mechanics and six common-sense rules for lifting andcarrying heavy objects, outlined below, recap the highlights of goad body mechanics.By applying these principles, you will minimize strain on the weakest pan of yourmuscular system, the muscles of the back. You rely, instead, more heavily on thestronger muscles of the thighs, arms, and abdomen.TIPS FOR GOOD BODY MECHANICSCenter of gravity is low.Base of support is wide.Line of gravity passes through base of support.Body parts are in good alignment.MD09611-9
RECAP: APPLIED BODY MECHANICSFeet wide apart.When lifting or carrying:1. Load balanced close to rile body (and the center of gravity),2. Back straight trunk not twisted (line of gravity bisecting base of support).3. Greater use of leg and abdominal muscles.4. Less reliance on back muscles.When picking up objects from the floor.1. No bending from the waist.2. Whole body lowered (squatting position), with knees bent.b. The radiologic technologist shown in figure 1-10 is straining his back musclesneedlessly. He has forgotten to apply the simple principles of good body mechanics.The line of gravity falls outside the base of support because he is bending over from thewaist.Figure 1-10. Poor body mechanics.MD09611-10
c. The RT shown in figure 1-11 is applying principles of good body mechanics.Instead of straining the weaker back muscles, he is relying on the long and strongmuscles of the legs and arms. He is also holding the object close to his body so thatthe line of gravity falls within the base of support.Figure 1-11. Good body mechanics.1-8.AVOIDING BACK INJURY ON THE JOBa. Everything you do of work can put you at risk for back injury. A commonmistake is lifting with the back bent and legs straight using last jerky movements.Bending increases the pressure on the discs and twisting applies even more pressure tothem.b. If reading this section has made you want to change your ways, keep in mindthat it will take of least two weeks of concerted effort both at home and at work beforenew work habits became second nature.c. Key suggestions are to use body momentum, keep the back neutral, get help,use assisting devices, keep loads close to the body, and avoid twisting activities.Continue with ExercisesMD09611-11
EXERCISES, LESSON 1, SECTION IWhen you have completed all of the exercises to your satisfaction, turn to the solutionsthat follow to check all of your answers.MATCHING. For exercises 1 through 4, match the term in the left-hand column withthe applicable definition in the right-hand column. Enter the letter you have selected inthe space provided (One definition will not be selected.)1.Body mechanics.a. Imaginary line created by body parts incontact with horizontal surface.2.Base of support.b. The safe and efficient use of the body inmovement.3.Center of gravity.c. Imaginary vertical line that passes throughcenter of gravity.4.Line of gravity.d. Point around which body weight isbalanced.e. Severe muscle strain resulting frommisalignment of body parts.MULTIPLE-CHOICE. For exercises 5 through 11, select the ONE word or phrasethat BEST completes the statement or BEST answers the question.5.It is important to know and apply the basic principles of good body mechanics inorder to avoid in the radiology department.a. Moving, lifting, and carrying patients.b. Ethically questionable behavior.c.Patient/self injury and malpractice suits.d. Damage to equipment.MD09611-12
6.When carrying a load close to your body, the line of gravity should:a. Bisect the base of support.b. Fall in front of the base of support.c.7.Fall behind the base of support.A wide and stable base of support is obtained by:a. Standing with your feet apart.b. Lunging forward.c.Rounding your shoulders slightly.d. Limbering up before using your muscles.8.You will protect your back most effectively if you carry a load:a. Extended approximately 12 inches from the waist.b. Close to the body.c.Unevenly balanced, favoring your dominant side.d. Above your head.9.When the pelvis, thorax, and head are properly , it is easy to keep thebody stable and steady and to prevent tipping or falling over.a. Shaped.b. Joined.c.Aligned.d. Exercised.MD09611-13
10.Which of the following is NOT a principle of good body mechanicsa. Maintain a wide stance with the load held close to the body.b. Rely on your back muscles as much as possible when lifting and movingheavy objects.c.Keep your back straight when lifting or carrying objects.d. Avoid twisting the trunk of your body when lifting or carrying objects.11.When moving, lifting, or carrying heavy objects you should NOT:a. Bend your knees and lower your body when picking up objects.b. Use leg and abdominal muscles.c.Roll or push heavy objects.d. Bend from the waist when reaching near the floor.IDENTIFICATION. For exercises 12 through 15, indicate whether the illustrationshows good or bad body mechanics by entering a "yes" or "no" in the space provided.12.Retrieving an object from the waist.MD09611-14
13.Retrieving an object using your leg and thigh muscles.14.Pushing a portable X-ray machine using your arm and chest muscles.15.Pulling a portable X-ray machine, using your back muscles.Check Your Answers on Next PageMD09611-15
SOLUTIONS, LESSON 1, SECTION IBe sure to re-read and study the paragraph(s) pertaining to any exercises you mighthave answered incorrectly. The relevant paragraph(s) is (are) listed after each of theanswers below.1.bpara 1-2c)2.a(para 1-4)3.d(para 1-5)4.c(para 1-6a)5.c(para 1-2)6.a(para 1-6b)7.a(para 1-4)8.b(para 1-5c)9.c(para 1-3a)10.b(para 1-7)11.d(para 1-7, chart: "Applied Body Mechanics," rule number five.)12.no para 1-7; chart, rule no. 5)13.yes para 1-7; chart, rule no. 6)14.yes para 1-7; chart, rule no. 2)15.noMD0961para 1-7)1-16
Section II: MOVING AND TRANSPORTING THE PATIENT1-9.ASSESSING THE PATIENTa. Weight. Have you ever moved a 350 pound patient? Although weight is oneconsideration, the assessment that you make before moving and/or transporting apatient involves a number of factors besides weight. The patient's physical and mentalcondition, mobility, strength and endurance, balance, and ability to understand must bedetermined as well.b. Condition. Assuming that you have verified the patient's identity, the firststep in assessment is to talk to the patient to get an overall impression of his condition.How is the patient feeling? Is the patient coherent? How well or poorly is hefunctioning?c. Mobility. Can the patient walk around on his own? Is the patient'smovement limited in any way? You need to determine whether or not the patient willneed any assistance and, if so, the extent of the assistance needed.d. Strength and Endurance. If the patient seems mobile, does he, forexample, have the necessary strength and endurance to walk all the way down the hallunassisted?e. Balance. Is the patient steady on his own feet? Can he sit and stand for longperiods, as required? Or, is there a chance that the patient could collapse halfwaydown the hall?f. Responsiveness and Alertness. What about the patient's mental state?Does the patient understand what you are asking? Is he alert and responsive? Wouldthe patient be able to warn you if he suddenly felt dizzy?g. General Rules. Figure 1-12 outlines helpful hints for preparing the patient tobe moved or transported.HELPFUL TIPS IN PREPARING THE PATIENT1. Provide only the assistance needed to ensure the patient's comfort andsafety.2. Always transfer the patient across the shortest distance.3. Lock all wheels on beds and gurneys.4. Tell the patient what you plan to do.5. Encourage the patient to help within his own capabilities.6. Provide short, simple instructions to the patient.Figure 1-12. Tips for moving and transporting the patient.MD09611-17
1-10. AN ON-THE-JOB INJURYa. A civilian RT injured his back during a failed attempt to lift a patient. Thetechnologist, a slight man of 5 foot 4 inches, did not want to take the time to get help inmoving his patient, a rather heavy-set, but mobile individual. The RT had alreadyexperienced some difficulty in assisting the patient with the initial move from wheelchairto X-ray table, which was supposed to have been patient-assisted.b. The mishap occurred when the partially-mobile patient was stepping downfrom a step stool. He lost his footing and toppled over the RT. As a result of this fell,the technologist injured his back, suffering nerve damage and rupturing his L-5 disc.The injury resulted in chronic pain and discomfort, which led to absenteeism. This, inturn, caused a personnel shortage within the department for a full six months. The RT,who loved his job, ended up getting Workmen's Compensation and being medicallyretired. He wanted to work, but no longer could because of one hasty decision basedon a mistaken notion about saving time.c, The fall was, almost literally, the straw that broke the camel's back. Thisradiologic technologist's back had already been weakened by years of misuse resultingfrom poor body mechanics. As a secondary observation, if he had known how to takethe fall, his injury might have been less serious.1-11. TRANSFERRING A PATIENT FROM A WHEELCHAIR TO AN X-RAYTABLEa. Patient Able to Assist. Even a mobile patient must be given some help inmaking the transfer from wheelchair to X-ray table, or from the X-ray table to thewheelchair. While it is desirable to let the patient assist to the extent possible, thepatient might, in fact, not be as strong as he thinks. A sudden movement, for example,may make the patient dizzy and fall. So, you must be on the alert, ready to provide theassistance needed. The next series of figures shows what you need to do for a patientwho is able to assist from properly positioning the wheelchair in relation to the table(figure 1-13), helping the patient to stand up (figure 1-14), helping the patient onto thestep stool (figure 1-15), easing the patient onto the table (figure 1-16), positioning thepatient on the table (figure 1-17), and placing him in the supine position (figure 1-18).MD09611-18
Figure 1-13. Positioning the wheelchair.Steps: 1. Wheelchair, parallel to table.2. Brakes locked.3. Footrest out of the way.4. Step stool nearby.Figure 1-14. Helping the patient to stand up.Steps: 1.2.3.4.MD0961Patient’s hands on your shoulder.Your hands under patient’s arms, in axilla.You lift as patient stands.You pause, so patient can regain balance.1-19
Figure 1-15. Onto the step stool.Steps: 1. Patient places one hand on stool.2. Places other arm across your nearest shoulder.Figure 1-16. Help patient onto table.Steps: 1. Patient pivots so back is to X-ray table.2. You support patient, as he eases into sitting position.MD09611-20
Figure 1-17. Position patient on table.Step: Place one arm around patient’s shoulder, the other under knees.Figure 1-18. Place patient in supine position.Steps: 1. In one single motion, place patient’s legs on table.2. Lower the head and shoulders on to table.MD09611-21
b. Patient Unable to Assist. It the patient cannot assist, find someone else tohelp you. Two movers are needed when a patient cannot provide assistance. Followthe procedures given in figures 1-19 through 1-24.Figure 1-19. Two movers in position, one on each side of the wheelchair,shoulder to axilla.Steps: 1. The mover on the left places right shoulder under patient'sleft axilla and places left arm under patient's thighs,2. The mover on the right places left shoulder under patient’sright axilla and places right arm under patient’s thighs.Figure 1-20. The wrist grasp. Step: Grasp each other’s wrist.MD09611-22
Figure 1-21. Hands across the back.Step: Wrap your free hand around the patient’s back, to provide support.Figure 1-22. The lift begins.Step: Lift the patient at the leader’s signal, generally,“One, two, three, lift.”MD09611-23
Figure 1-23. Place patient on table.Step: Turn sideways to place the patient on the X-ray table.Figure 1-24. Place in supine position.Step: Assist the patient to lie down.MD09611-24
1-12. TRANSPORTING FROM STRETCHER TO X-RAY TABLE (PATIENTASSI
radiology department. Therefore, although you may position many patients in a given day or week, you must never let the steps of the various positioning procedures become rote or mechanical. You must think about and put all of your attention in
