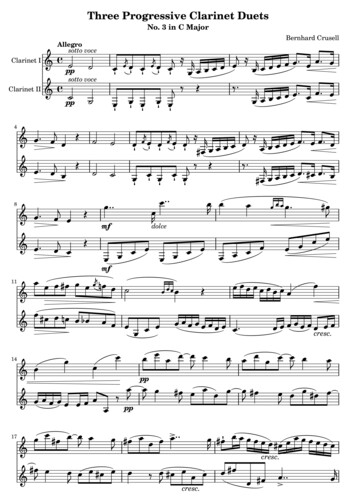
Transcription
OWNER'S MANUALAllegro CX Owner’s Manual1
Manual Part #Release Date:Editor:214601-03March 2006J. JohnsAllegro CX Owner’s Manual
Table of ContentsChapter 1Introduction. 7Welcome.9Allegro CX Overview .10Quick Start Guide .12Chapter 2Hardware Components . 13Case Design .15Hand Strap and Shoulder Strap .16Keyboard .17Display .22Systems Tray Indicators .25Batteries .29Communication Ports .47USB/Power Dock .49PC Card .51Expansion Pods .53Chapter 3Memory Configurationand Data Storage Options . 55Internal Memory .57Program and Data Storage Options .58Chapter 4Windows CE Operating System . 61Windows CE Overview .63Starting Windows CE.63Display Touchscreen .64Windows CE Programs .66Allegro CX Owner’s Manual3
Desktop .67Special Functions .69On-Line Help .70Control Panel .70Windows Explorer .93Storing Files and Programs .95Application Command Bars .97Chapter 5Allegro CX Applications and Utilities . 99ActiveSync Transfer Program .101Downloading ActiveSync from CD-ROM .102Downloading ActiveSync from the Internet .102Installing ActiveSync .103Establishing a First Time ActiveSync Connection.104ActiveSync COM 1 or 2 Connections .105ActiveSync IrDA Infrared Connections .108ActiveSync USB/Power Dock Connection.109Unsuccessful Connection . 111Establishing Additional ActiveSync Connections . 111New Partnership Setup. 113Transferring Files .123System Save/Restore Utilities .126PTab Spreadsheet Program .130WordPad.182Windows Media 9 Series Player .183Internet Explorer and Inbox .189Calculator Program .193Terminal Program .194Bluetooth .1984Allegro CX Owner’s Manual
Chapter 6Technical Reference . 223Specifications .225Communication Cable Schematic .230Chapter 7Software Developer’s Guidefor Allegro CE .NET . 231CE .NET Software Development Tools .233Software Development Programming Tips .235Options for Program and File Storage .237Power Management .238Windows CE .NET References .239Chapter 8FCC Information, Warranty,and Software License Agreement . 241FCC Information .243Warranties and Repair Information .244Software License Agreement .247Manufacture Agreement .247Microsoft End User License Agreement .248Chapter 9Expansion Pods . 251Expansion Pod .253GPS Expansion Pod .254Bar Code Expansion Pod .261802.11b Expansion Pod.278Bar Code/802.11b Expansion Pod .286Index . 287Allegro CX Owner’s Manual5
6Allegro CX Owner’s Manual
Chapter 1IntroductionWelcomeAllegro CX OverviewQuick Start GuideAllegro CX Owner’s Manual7
8Allegro CX Owner’s Manual
WelcomeWe would like to welcome you as a user of the Allegro CX, arugged, handheld field PC for data collection. Developed with theinput of data collection professionals worldwide, the Allegro CX isadaptable and versatile for use in a wide variety of data collectionenvironments.The Allegro CX continues to utilize our ergonomic, lightweightdesign that is standard in our line of Allegro Field PCs. This designmakes your Allegro easy to use for extended periods while movingto and from data collection sites in the field.The Intel XScale 400 MHz processor is integrated into the AllegroCX, providing outstanding speed and performance. Solid state datastorage keeps your data secure, even without power backup.The Allegro CX offers the option of a color or monochrome displaythat provides excellent visibility in all lighting conditions. Bothdisplays use a non-glare touchscreen with optimal sensitivity.Bluetooth connectivity gives additional functionality to the AllegroCX. Bluetooth connects to many other Bluetooth devices without theuse of wires.If you have any questions or comments about the Allegro CXafter reviewing this manual, please feel free to contact our SalesDepartment.Allegro CX Owner’s Manual9
Allegro CX Overview FeaturesThe standard features of the Allegro CX are listed below. Thesefeatures are described in detail throughout this manual. A completelist of specifications is in the Technical Reference section. Operating System: Microsoft Windows CE .NET V4.2 Processor: Intel XScale processor, 400 MHz Memory: 64 M or 128 M RAM Data and Program Storage: 128 M, 256M, 512 M, or 1 G internalSolid State Storage PC Card Slot: User-accessible for ATA, Compact Flash and otherType I or II 3V/5V PC cards, modems, wireless networking cards,or other accessory cards Built-in Bluetooth (optional): Internal Class 2 Bluetoothtransceiver, for wireless capabilities Case: Rugged, waterproof, floats, and easy to hold Display (Monochrome): Large 4.1” diagonal, 1/4 VGA display,320 wide x 240 high pixels (landscape view), equipped with abacklight (brightness adjustable) and heater for cold weatheroperation Display (Color): Large 3.8” diagonal, 1/4 VGA TFT Active Matrixdisplay, 320 wide x 240 high pixels (landscape view), equippedwith a backlight (brightness adjustable), the TFT display does notrequire a heater for cold temperature operation Touchscreen: Anti-reflective coating and pressure sensitive withkeyboard accessible disable touchscreen function Keyboard: Includes all printable ASCII characters, 12 functionkeys, centrally located number keys, and special coatings toprevent the characters from rubbing off Keyboard Bezel: Protects keys from tearing; removable forcleaning keyboard Power: NiMH battery pack lasts an average of 12 to 20 hours,depending on the application Communication Ports: Two sealed 9-pin D serial ports, oneinfrared IrDA port, and pins for connection to the USB/PowerDock Software: PTab Spreadsheet, Calculator, and Microsoft programs10Allegro CX Owner’s Manual
Windows Explorer , InBox Email, Pocket Internet Explorer ,WordPad , and Media 9 Series media player. Sound: Screen taps and key beeps, programmable to associatebeeps with events. Volume is adjustable System Tray Indicators: Remaining battery status, chargingstatus, data storage activity, PC card activity, caps lock on,touchscreen disable, external power input, ActiveSync/Networkconnection, and Bluetooth File Synchronization between the Allegro and desktop PC Standard AccessoriesThe Allegro comes with the following accessories: Allegro CX Distribution CD-ROM with the desktop PC SetupPrograms, Software Suite programs, Microsoft ActiveSync filetransfer program, and the Owner’s Manual NiMH Battery Pack Universal AC Adapter Communication Cable Two Mini and One Full Size Stylus Carrying Straps Hand Straps Screen Protectors Optional AccessoriesThe accessories listed below are optional. Contact our SalesDepartment if you are interested in any of the following items. USB/Power Dock Hard copy of Owner’s Manual Alkaline Battery Holder Vehicle Power Adapter External Battery Charger Expansion Pods ATA Flash Cards or Compact Flash Cards Application Development Software Replacement Accessories Screen Protector Replacement PacksAllegro CX Owner’s Manual11
Quick Start GuideA Quick Start Guide is included with the Allegro. It offers basic andinitial steps to get the Allegro charged and ready to take out into thefield. The instructions on the guide should be done first, before youbegin using the Allegro.If the Quick Start Guide is discarded or misplaced after setting upthe Allegro and you discover you need the guide again, you canaccess a copy of it from the Allegro Distribution CD.To access the Quick Start Guide from the Allegro CD complete thefollowing steps:1) Place the Allegro Distribution CD into the desktop PC’s CDROM drive. The following splash page appears:2) Click on the Browse CD option. The CD opens up in a WindowsExplorer program displaying the contents of the CD.3) Double-click on the Quick Start Guide file to open it in AcrobatReader.4) Read and/or print the Quick Start Guide.12Allegro CX Owner’s Manual
Chapter 2HardwareComponentsCase DesignKeyboardDisplaySystem Tray IndicatorsBatteriesCommunication PortsUSB/Power DockPC CardExpansion PodsAllegro CX Owner’s Manual13
14Allegro CX Owner’s Manual
Case Design Case FeaturesThe case has the following features: The polycarbonate PBT material is rugged, shock resistant, andformulated to resist damage from chemicals. The ergonomic shape and smooth edges make it easy to hold,maximizing comfort and usability in the field. The weight distribution is balanced. There are three gaskets used to seal the case from water and dust:- between the top and bottom case halves- around the battery compartment- around the PC card slot compartmentThe gaskets are not field replaceable. Contact our ServiceDepartment if a gasket needs to be replaced. There are two doors: one for the battery compartment and onefor the PC card slot. These doors are user-replaceable. Contactour Sales Department for ordering information.PC Card SlotBattery Compartment Cleaning the CaseTo clean the Allegro, we commonly recommend that you use warmwater, mild detergent, and a toothbrush to clean the case. Note: This method can also be used when cleaning the keyboard. Do notuse the brush on the display, it could be scratched.In some environments, the Allegro is exposed to substances, such aspitch or tar, which require stronger cleaning supplies for removal.Some of the available cleaning supplies/chemicals on the marketwill damage the case, so use caution. To see a current list of cleaningsupplies we have test and recommend for cleaning the Allegro, visitour Web site at, www.junipersys.com. Go to the Support section anddo a search for “cleaning supplies.Allegro CX Owner’s Manual15
Hand Strap and Shoulder StrapThere are four metal cleats, one on each corner of the Allegro CXcase. Each cleat has two metal rings that are used to attach the handstrap and shoulder strap onto the Allegro.The straps can be attached for right or left handed operation. Thetension on the hand strap is adjustable. The shoulder strap can beused as a neck strap for hands-free operation.16Allegro CX Owner’s Manual
Keyboard Keyboard FeaturesThe keyboard on the Allegro CX is designed to maximize data entryefficiency and to withstand rugged, wet conditions. Careful planning went into the placement, size, and spacebetween keys to increase efficiency and ease of use. The number keys are large and placed in the center of the Allegrofor easy access from either side. Some keys have standard functions as well as special functionsaccessed with the GOLD and BLUE shift keys. Five function keys are located below the display. With the useof the GOLD and BLUE shift keys, twelve function keys areavailable. Two special coatings prevent the key labels from rubbing off afterextended use. The keyboard bezel helps protect the keys from tearing. It isremovable for cleaning purposes.Allegro CX Owner’s Manual17
Special Keys and Key SequencesThe standard keyboard letters, numbers, and functions are printed intwo ways:1) In dark brown on the off-white keys2) In off-white on the dark brown keysThese standard options are operational unless a GOLD or BLUE shiftkey is pressed.Blue Bluekey keyGoldGoldkey keyBlue Shift Key UsageTo access a single blue printed keyboard characters:Press and release the BLUE shift key followed by the key with thedesired blue-lettered character.To activate several blue-lettered keys before returning to standardmode:Press and hold the BLUE shift key down while you press allthe desired BLUE keys. Once the BLUE shift key is released, thekeyboard reverts back to the standard mode.Gold Shift Key UsageTo access a single gold shift key option:Press and release the GOLD shift key followed by the key with thedesired gold symbol.To activate several gold-lettered options before returning to standardmode:Press and hold the GOLD shift key down while you press all thedesired GOLD keys. Once the GOLD shift key is released, thekeyboard reverts back to the standard mode.Circular Key UsageThe circular key located in the center of the keyboard has twofunctions:1) Standard (no shift keys): Up, Down, Right, and Left arrow keys2) BLUE shifted functions: Page Up, Page Down, Home, and End18Allegro CX Owner’s Manual
Shifted OptionsThe shifted options and the associated key sequences are listedbelow.OptionKey SequenceFunction keys F6, F7, F8, F9and F10BLUE key desired function keyFunction keys F11 and F12GOLD key desired function keyEnable/Disable touchscreenBLUE key TSView Windows CE StartMenuBLUE key StartPage upBLUE key PgUpPage downBLUE key PgDnEndBLUE key EndHomeBLUE key HomeToggle caps lock on and offBLUE key CapLkToggle display backlightGOLD key F3 (see gold light bulbsymbol above function key)Display Contrast Lighten(monochrome display only)GOLD key F4 (see gold symbolabove function key)Display Contrast Darker(monochrome display only)GOLD key F5 (see gold symbolabove function key)Perform a resetOn/Off (hold down for eightseconds)Keyboard OptionsThe following keys and key sequences are functional in Windows.NET.On/Off (Warm and Hard Reset)This key is used to turn the Allegro on and off. The ridge aroundthe key helps prevent the Allegro from being accidentally turned onwithout your knowledge.A warm reset is performed by holding down the On/Off key forabout eight seconds. Release the key when the reset process begins.A hard reset is performed by holding down the On/Off key for abouteight seconds. When the reset process begins, continue holding theOn/Off key down for an additional eight seconds. A hard reset doeserase the RAM memory.Allegro CX Owner’s Manual19
Contrast (monochrome display only)Goldkey To make the display darker, press the GOLD key and the F5 key.To make the display lighter, press the GOLD key and the F4 key.Backlight On/OffGoldkey The backlight is toggled on and off by pressing the GOLD key andthe F3 key.Tab, Forward and BackwardThe tab keys are used primarily for cursor movement between fields.Touchscreen Disable/EnableBluekey The touchscreen key allows you to disable and enable thetouchscreen. This feature allows you to wipe off the screen withoutinadvertently making selections on the screen.Press the BLUE shift key and the TS key to disable the touchscreen.A system tray icon appears showing that the touch screen hasbeen disabled. Once the screen has been cleaned, use the same keysequence to enable the touchscreen. (For instructions on how to cleanthe screen, refer to Display, Touchscreen later in this section.)Task ManagerPress the Task Manager (Start) key to view all of the programs that arecurrently running. Select which program you want to be in by usingthe up and down arrow keys to highlight the desired program andpressing ENTER.Start MenuBluekey Press the BLUE shift key and the Start key to view the Windows CEStart Menu. Use the arrow keys to move up and down the menu.Press the ENTER key to make your selection.The Task Manager and Start Menu functions have been providedto speed up operation. You do not have to use the touchscreen andstylus to bring up the Start Menu or to change tasks. These keys arealso handy when the Taskbar has been hidden.20Allegro CX Owner’s Manual
Right Mouse ClickThere are two ways to achieve a right mouse click, you can pressthe Alt key and touch the screen with a stylus, or touch and holdthe stylus in one spot on the touchscreen. In many Windows CEprograms, when you right click on an item a menu is displayedlisting functions and options that pertain to the item. Cleaning the KeyboardDirt and debris can get underneath the keyboard bezel. To clean, usea coin (do not use a screwdriver) to pull the bezel up at the recesslocated at the bottom of the keyboard and remove it.We recommend that you use warm water, mild detergent, and atoothbrush to clean the keyboard or simply brush it out. The Allegroremains sealed during this process. Note: Do not direct a high pressure stream of water at the keyboard toclean it. This action could break the seal, causing water to get inside theAllegro.Reattach the bezel by carefully inserting the top ridge under thefunction keys and lowering the bezel down flat onto the case. Pressdown along the sides while aligning the keys through the holes. Note:After you reattach the bezel, check each key to make sure it iscompletely free from the bezel. If any part of a key is caught underneaththe bezel, you may not be able to turn the Allegro on or you may hear acontinuous string of beeps.In some environments, the Allegro is exposed to substances, such aspitch or tar, which require stronger cleaning supplies for removal.Some of the available cleaning supplies/chemicals on the marketwill damage the case, so use caution. To see a current list of cleaningsupplies we have test and recommend for cleaning the Allegro, visitour Web site at, www.junipersys.com. Go to the Support section anddo a search for “cleaning supplies.”Allegro CX Owner’s Manual21
DisplayThe Allegro CX offers the choice of either a monochrome or colordisplay. Both displays are a 1/4 VGA, 320 wide x 240 high pixels(landscape view), high-contrast liquid crystal displays, shockmounted and sealed, and are equipped with a brightness adjustablebacklight.The monochrome display has a 4.1” diagonal viewing area and isequipped with a heater for cold weather operation.The color display has a 3.8” diagonal viewing area. Display Features Contrast: Do not attempt to adjust the contrast for a color displaymodel; it is not adjustable. Doing so may affect the visibility ofthe display.The contrast for the monochrome display model can be manuallyadjusted by using the yellow shift key and pressing F4 to lightenor F5 to darken. The display automatically adjusts the contrast tocompensate for temperature. Video Quality: With the color display, the video quality isadjusted manually by using the Yellow shift key and pressingF4 or F5. This adjusts display flickering or shaking on the colordisplay. Heater: The monochrome display heater allows you to use the22Allegro CX Owner’s Manual
Allegro in temperatures below freezing. The technology used tocreate the color display does not require a display heater to usethe Allegro in temperatures below freezing. Backlight: The backlight enhances visibility in low-lightconditions. The brightness of the backlight is adjustable. Position: The display is slightly tilted up to reduce glare andenhance visibility. Touchscreen: A 1/4 VGA display touchscreen with an antireflective coating to eliminate reflective glare and is used to makeselections and enter data. Adjusting the DisplayThe display features can be enabled, disabled, or controlled throughthe Control Panel (see Chapter 4). Some display features can beadjusted using the special key sequences shown below:Display FunctionKey SequenceIncrease Contrast/DisplayQuality AdjustmentGOLD F5Decrease Contrast/DisplayQuality AdjustmentGOLD F4Backlight Toggle On and Off GOLD F3BacklightThe display backlight is used to enhance visibility in low-lightconditions in the field or indoors.The brightness of the display backlight is adjustable from dimto bright. This adjustment is made by selecting Start Settings Control Panel, double tapping on the Display icon and tapping on theControls tab. Choose Brightness Adjustment to adjust the brightnesslevel. (The default of the monochrome display is set at 100%brightness; the default of the color display is set at 75% brightness.)The run time of the battery pack is reduced when the backlight isoperated. To get longer battery life, use the backlight only whenneeded.Contrast and Automatic Temperature CompensationOnce you have set the contrast, you seldom need to readjust it. Thecontrast adjusts automatically for temperature. TouchscreenThe Allegro display has a touchscreen used to activate programs andfunctions. The touchscreen can be operated with a stylus, finger, orAllegro CX Owner’s Manual23
Three styli are provided: two mini styli, one of which snaps intoa holding bay built into the top of the case, and a pen-size stylus.For more details on how to use the touchscreen, refer to the DisplayTouchscreen in Chapter 4, Windows CE Operating System.Touchscreen Disable/Enable KeyBluekey The Allegro offers a touchscreen key option that allows you todisable and/or enable the touchscreen. The function is optimal whencleaning the touchscreen. Once disabled you can wipe off the screenand avoid accidentally activating programs, or moving icons orentire screens around on the Allegro.Press the BLUE shift key and the TS (BkSp) key to disable the screen.Use the same key sequence to enable the touchscreen.Cleaning the TouchscreenTo clean the touchscreen of the Allegro, complete the following steps:1) Press the BLUE shift key TS (BkSp) key to disable thetouchscreen.2) Use a clean cotton cloth to wipe off the screen. Note: Do not use anything abrasive that could scratch the screen(including tissues and paper towels).3) Press the BLUE shift key TS (BkSp) key to enable thetouchscreen. Note: Petroleum-based cleaners and solvents should not be used. Theycan damage the touchscreen surface.In some environments, the Allegro is exposed to substances, such aspitch or tar, which require stronger cleaning supplies for removal.Some of the available cleaning supplies/chemicals on the marketwill damage the case, so use caution. To see a current list of cleaningsupplies we have test and recommend for cleaning the Allegro, visitour Web site at, www.junipersys.com. Go to the Support section anddo a search for “cleaning supplies.”24Allegro CX Owner’s Manual
System Tray IndicatorsSystem tray indicators specify applications that are running on yourAllegro. The indicators are located in the bottom right corner systemtray.These system tray indicators are active while the Allegro is runningspecific tasks. These indicators provide you with the followinginformation:System TrayIndicatorsIndicatorDescriptionRemaining Battery Charge Status: shows thepercent of charge remaining in the batteries.External Power Input: indicates that you areconnected to an external power source and notdrawing power from the internal batteries.Charging Indicator: appears in the system traywhile the rechargeable batteries are being charged.Data Storage Idle: outlined when the solid state diskis idle and not being read from or written to.Data Storage Active: darkens when data are beingread from or written to the solid state disk.PC Card: indicates that a PC card is installed inyour Allegro.PC Card Activity: darkens to indicate that theapplication program is accessing the PC card (donot remove the card when this icon is darker).Caps Lock On: appears when the all capital lettersoption is activated.Touchscreen Disable: appears when the touchscreenis disabled.PC Connection: appears when there is an activeconnection between the Allegro and the desktopPC.Bluetooth Connection: appears when Bluetooth isbeing actively used on your Allegro.Heater: appears when the touchscreen heater turnson (this is applicable with monochrome screenonly).Allegro CX Owner’s Manual25
Making Space in the System TrayThe system tray only has a certain amount of space to display theicons that show which features are currently active on the Allegro.You can remove the clock and the AM/PM icons if you want to makeroom for the other icons.Clock RemovalTo remove the clock from the system tray, complete the followingsteps:1) Select Start Settings Taskbar and Start Menu on the Allegro toaccess the following screen:2) Tap on the check mark next to the Show Clock option to deselectthis option and tap on OK. The clock is now removed from thesystem tray.System tray with clock:System Tray without clock:AM / PM RemovalYou may want to show the clock on the Allegro desktop, but toconserve on the amount of space it takes up in the system tray youcan remove the AM/PM setting shown after the clock. This functionshifts the time into military time (2:00 PM 14:00), to do this,complete the following steps:1) Select Start Settings Control Panel.26Allegro CX Owner’s Manual
The following screen appears:2) Double tap on the Regional Settings icon:3) The following screen appears:Allegro CX Owner’s Manual27
4) Tap on the arrow next to the tabs to get them to scroll overuntil the Time tab appears and tap on that, the following screenappears:5) Tap on the down arrow in the Time style in the Appearance boxand select the hh:mm:ss or HH:mm:ss option:6) Tap on OK.The clock in the system tray no longer has the AM/PM next to theclock and military time is shown:28Allegro CX Owner’s Manual
BatteriesBatteries are the key power source the Allegro uses while you are inthe field collecting data. When collecting data, the Allegro performswith efficient power consumption.The Allegro CX uses an Auto Suspend power management featureto help conserve power. A battery status icon is displayed in the taskbar of the Allegro indicating the amount of power (as a percentage)that is left in the battery pack. This battery status icon helps youmaintain the battery pack by keeping you informed of the chargelevel and warning you when the charge is getting low and needs tobe charged or replaced.There are three types of batteries and a backup capacitor associatedwith the Allegro power supply: NiMH battery pack Alkaline battery holder (an optional accessory using threealkaline cells) Lithium CMOS battery to power the real time clock Super capacitor designed to maintain the RAM while you changethe battery pack Main Power SourceThe Allegro is powered by a rechargeable nickel metal hydride(NiMH) battery pack. The battery compartment is accessed througha door in the back of the case. The NiMH battery pack is shippedwith the Allegro but it is not installed at the factory.In this section we the following battery related information: Battery pack installation Setting the charge status on the Battery Detected screen Charging the battery pack Battery gauging Charging accessories Storing the Battery Pack during inactive periods Backup batteriesAllegro CX Owner’s Manual29
Installing the NiMH Battery PackWhen you receive the Allegro, you must install and then charge theNiMH battery pack. To do this, complete the following steps:1) Push up on the sliding latches on the sides of the Allegro to openthe battery compartment door.2) Place the NiMH battery pack in the left side of the batterycompartment, push down, and slide it all the way to the right.There is a small arrow on the bottom right corner of the batterypack, make sure the arrow is pointing to th
The Allegro CX offers the option of a color or monochrome display that provides excellent visibility in all lighting conditions. Both displays use a non-glare touchscreen with optimal sensitivity. Bluetooth connectivity gives additional functionality to the Allegro CX. Bluetooth connects
