Transcription
STEP BY STEP GUIDE TO IMPLEMENT KOHA &PROCESS OF DATA MIGRATION1 National Workshop on Library Automation (Koha), Content Management System (Joomla) & Data Migration
ContentsSN Topics1.System Requirement2.Creating free space in Hard Disk for dual booting (Windows Linux)3.Note Down the IP Address of System4.Installation of Linux (Ubuntu 12.04 LTS)5.Setting IP Address6.Installation of Koha (Package Installation)7.Setting Parameters in Koha8.Acquisition Module9.Cataloguing Module10. Circulation Module11. Serial Control Module12. How to Use Koha tools (Export/Import etc.)13. Additional Modules in Koha14. Configuration of e-mail to send notices to library users15. Configuration of cron for automatic indexing, backup etc.16. Process of Data Migration2 National Workshop on Library Automation (Koha), Content Management System (Joomla) & Data Migration
1.System Requirement:Hardware Requirement:ProcessorRAMHDDDVD DrivePentium-4, 2.6 GHz or higher2 GB80 GBSoftware Requirement:To install Koha for use we recommend A Linux server – Debian/Ubuntu is what most people use Apache MySQL Perl Root access to the server A better than average level of skill with the command line, Apache, and MySQL toolsManpower: The professionals having expertise in Linux operating system and knowledge of LocalArea Network (LAN).Internet Configuration: A high speed dedicated Internet link.3 National Workshop on Library Automation (Koha), Content Management System (Joomla) & Data Migration
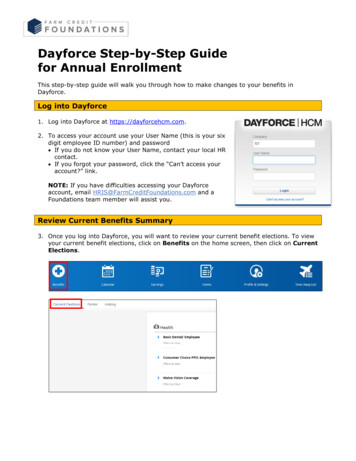
2.Creating free space in Hard Disk for dual booting (Windows Linux)For installation of Linux on system where one has already Windows pre-installed, you have to create free space sothat Linux can be installed side by Windows Operating System without disturbing the Windows OS. And to do this,you have to follow the procedure given below:First, right click on My Computer and Click on Manage:Second, Click on Manage and find out Disk Management OptionIt will display the list of Hard Drive already created. Just select the partition to be divided and right click on it. It willdisplay the option in which one has to choose delete volume.Once the partition is deleted, again right click on the same volume and choose create partition. Here, you have toenter the space to be used for new partition such 150000 (150 GB) and remaining size will be free space. It will bevisible in light green color.4 National Workshop on Library Automation (Koha), Content Management System (Joomla) & Data Migration
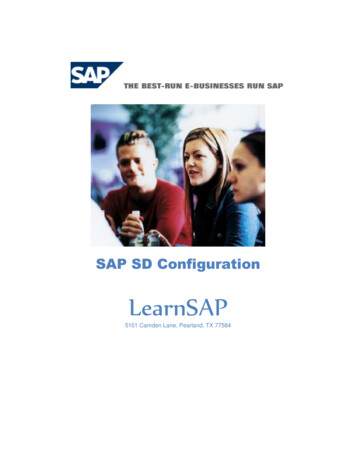
Note: This free space will be used for installation of Linux (Ubuntu 12.04 LTS)3.IP Address of the System:After creating free space in the system, you have to note down the current IP address (Static not Dynamic) of thesystem so as to provide the same in Linux. So that, the Online Public Access Catalogue can be accessed from othersystem. Procedure to note down the IP address is given below for reference.First, right click on the network icon given in right bottom corner of the window.And then, click on Open Network and Sharing Center. It will open the Window with Local Area Connection Details.Click on Local Area Connection, it will display the Local Area Connection Status. Just Click on Details button toget the full details of IP Address of the System.Note down the information about IP Address, Subnet mask, Default Gateway and DNS Server.5 National Workshop on Library Automation (Koha), Content Management System (Joomla) & Data Migration
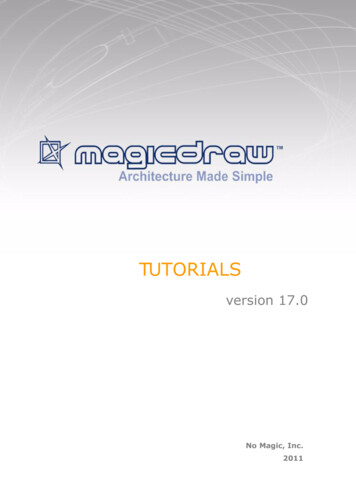
4.Installation of Linux (Ubuntu 12.04 LTS)To install Ubuntu 12.04 you must have at least 10GB of free space as a pre-requisite .The steps given herecan also be used to dual boot Ubuntu 12.04 and Windows 7.To dual boot Ubuntu 12.04 and WindowsOS, first you got to empty any one of your drives having at least 10GB of total capacity. Then format it tomake it free (shown as green is Disk Management in Windows). Ubuntu 12.04 can be dual booted withWindow 7, XP or Vista. Given here are the step-by-step instructions to install Ubuntu 12.04 along withrelevant screenshots.Step by Step instruction for Ubuntu installation 1) Boot from a bootable Ubuntu USB or CD (DVD is recommended).Select Install Ubuntu2) The following Ubuntu screen will appear.Ubuntu 12.04 installation Step 2.Leave the "Install this third party Software" option unchecked as you can download this software later on andContinue.6 National Workshop on Library Automation (Koha), Content Management System (Joomla) & Data Migration
3) The following window will appear. If you select the option "Erase disk and install Ubuntu", the alreadyinstalled OS gets deleted/erased and Ubuntu's installation gets underway. In case you want to dual boot Ubuntu12.04 select the option "Something else".Step 3 of Ubuntu 12.04 installation.4) Then, the following window appears. In this window select the disk drive in which you intend to install theUbuntu 12.04. In this window, a drive is shown as free space. Select the drive and click on change option.Step 4: Select the drive in which Ubuntu has to be installedIn the options, "Device for boot loader Installation" select the master hard-drive of your system (usually itdoes not require any change).7 National Workshop on Library Automation (Koha), Content Management System (Joomla) & Data Migration
5) After clicking on change option, the following window will appear.Step 5: Set the drive size here.Define the size of the partition (8GB is recommended). In the “Use as” option select “Ext4 journaling filesystem”, the latest file system in Linux and then select mount point as “/“. Press OK.6) The next window which you will see, appears the same as the window in step 4. The only addition here thesticking up of the Ext4 and "/" at their respective positions i.e., in the Type and Mount point columns(corresponding to the drive you have selected). Make sure you have these options next to your selected drive elseyou got to check your taken steps again. Once sure, click on "Install Now".Note: The method shown above is a simple guide. You can also create additional partitions if you want, namely,/boot, /home, etc. In that case, you will have to divide your available free space accordingly. Normally, "/" shouldbe given around 8GB space as all the installed packages go into it and remaining space can be given to otherpartitions.8) Now, you will be asked to select the time zone and keyboard layout of your system.9) In the last window, give the name and password of your system (you need to give an alphanumeric passwordand obviously remember it for future use) and after this click "Next".10) With this your Ubuntu installation is done!!. Reboot and you shall see the Grub menu at the start, allowing youto choose the OS from which you want to boot up.Note: About the Swap partition, now a day’s laptops and desktop come with a large RAM, it is not advisable touse swap partition. Just try to keep things simple, swap partition can be created later on.8 National Workshop on Library Automation (Koha), Content Management System (Joomla) & Data Migration
5.Setting IP Address in Ubuntu 12.04:To setup new IP in Ubuntu you have to edit the IP address in Network Connections. It can be accessed by typingNetwork Connection in Dash Home. Select and click on iconIt will open one window, click on Add button which will open another window where you have to set the IPaddress for the system.Connection Name:Wired Connection 1IPv4 Settings(Select the Tab IPv4)Method:ManualAddresses:IP :192.168.28.1DNS Server:192.168.1.250Note: This is the example given above. The same way you have to set the IP address for his/her system beforeinstalling Koha on the System.Note: Once the setting is done successfully, you will get the message “Connection Established”. If you are alreadyworking with any other internet connection and to use the new one, you have to restart the network.9 National Workshop on Library Automation (Koha), Content Management System (Joomla) & Data Migration
Installation of Koha (Package Installation):6.Find Terminal and open it1.Type sudo su then press enter2.Enter your Ubuntu admin Password3.Your locale should be set to UTF-8. This step is very important for a UNICODE compliantsystem, so execute the following commands in terminal.sudo update-locale LANG en IN.UTF-8Now check the Locale and enter the command locale then press enter, this will display linesends in en IN.UTF-8 now.Installation of Koha Enter the following command in terminal to get the signing keywget -O- http://debian.koha-community.org/koha/gpg.asc sudo apt-key add – To install the repository for the 3.14 release, use the following command:echo deb http://debian.koha-community.org/koha squeeze main sudo tee /etc/apt/sources.list.d/koha.list Use the following commands one by one in terminal it will take time to complete:sudo apt-get updatesudo apt-get upgradesudo apt-get clean To Download Koha latest stable release enter following command and press enter:sudo apt-get install koha-common Next, you will need to enable the Apache mod rewrite module for this enter:sudo a2enmod rewrite Now install mysql-server so enter following command:sudo apt-get install mysql-server Now Create database/instance in mysql for your library by following command:sudo koha-create --create-db library10 National Workshop on Library Automation (Koha), Content Management System (Joomla) & Data Migration
To remove some security risk execute the following command:mysql -u root -p USE mysql; SELECT host,user FROM user; DELETE FROM user WHERE user ''; SELECT host,user FROM user; FLUSH PRIVILEGES; QUIT Configure Apache ports by following commands:sudo gedit /etc/apache2/ports.confAdd line “Listen 8080” below the line Listen 80 then save the file and close Disable the default site of apache:sudo a2dissite 000-default To Enable modules and sites enter following commands one by one:sudo a2enmod rewritesudo a2enmod deflatesudo a2ensite librarysudo /etc/init.d/apache2 restart To know your default database password of “ library” enter below command:sudo xmlstarlet sel -t -v 'yazgfs/config/pass' /etc/koha/sites/library/koha-conf.xmlIt will display your password, please note this properly because it is case sensitive Now enter the 127.0.0.1:8080 in browser and enter your User name in koha client:User name: Koha libraryPassword: as noted in step 12.Then follow the on screen instructions to complete the installation of Koha. Now set charset in mysql to do this enter following command in terminal:sudo gedit /etc/mysql/my.cnf11 National Workshop on Library Automation (Koha), Content Management System (Joomla) & Data Migration
Now enter the following line below the [mysqld] section:init-connect 'SET NAMES utf8'character-set-server utf8collation-server utf8 general cicharacter set client utf8Then restart mysql with: /etc/init.d/mysql restart For Apache make sure you have these lines in your ubuntu in charset file and to opencharset file enter “sudo gedit /etc/apache2/conf.d/charset”) then add the below lines:AddCharset UTF-8 .utf8AddDefaultCharset UTF-8Then restart apache with: /etc/init.d/apache2 restart12 National Workshop on Library Automation (Koha), Content Management System (Joomla) & Data Migration
7.Parameter Settings in Koha:Once the Koha is installed in the system, you have to set some parameters for smoothfunctioning of Koha. Most of the Koha work will depend on these settings. To set theparameters, you have to login with User ID and Password:Click on Login and you will get the Koha Main Interface.Now click on Koha Administration, it will open the parameters setting page.13 National Workshop on Library Automation (Koha), Content Management System (Joomla) & Data Migration
On this page, you have to set the ‘Global System Preferences’ and their values. Just click on thelink provided.14 National Workshop on Library Automation (Koha), Content Management System (Joomla) & Data Migration
Global System Preferences:In Koha Library Management System, you have to set the value for different preferences fordifferent options before using the same.1. Acquisition15 National Workshop on Library Automation (Koha), Content Management System (Joomla) & Data Migration
2. Administration3. Authorities16 National Workshop on Library Automation (Koha), Content Management System (Joomla) & Data Migration
4. Cataloguing17 National Workshop on Library Automation (Koha), Content Management System (Joomla) & Data Migration
5. Circulation18 National Workshop on Library Automation (Koha), Content Management System (Joomla) & Data Migration
19 National Workshop on Library Automation (Koha), Content Management System (Joomla) & Data Migration
6. Creators20 National Workshop on Library Automation (Koha), Content Management System (Joomla) & Data Migration
7. Enhanced Content21 National Workshop on Library Automation (Koha), Content Management System (Joomla) & Data Migration
22 National Workshop on Library Automation (Koha), Content Management System (Joomla) & Data Migration
8. I18N/L10N9. Local Use23 National Workshop on Library Automation (Koha), Content Management System (Joomla) & Data Migration
10.Logs11.OPAC24 National Workshop on Library Automation (Koha), Content Management System (Joomla) & Data Migration
25 National Workshop on Library Automation (Koha), Content Management System (Joomla) & Data Migration
26 National Workshop on Library Automation (Koha), Content Management System (Joomla) & Data Migration
12.Patron27 National Workshop on Library Automation (Koha), Content Management System (Joomla) & Data Migration
13.Searching28 National Workshop on Library Automation (Koha), Content Management System (Joomla) & Data Migration
14.Serials15.Staff Client29 National Workshop on Library Automation (Koha), Content Management System (Joomla) & Data Migration
16.Web Services30 National Workshop on Library Automation (Koha), Content Management System (Joomla) & Data Migration
Basic Parameters:Once the setting parameter for Library Administration is over, you have to set the basicparameter for the smooth functioning of Koha.In Basic Parameter, the first setting is ‘Libraries & Groups’. Using this, you can define libraries &groups.An example is given below ‘how to define libraries & groups’:As soon as you press on “Libraries & Groups option”, it will open and show the list of librariesalready defined. To create or define new library or group, you have to press either on ‘NewLibrary’ or ‘New Group’.31 National Workshop on Library Automation (Koha), Content Management System (Joomla) & Data Migration
Format for New Group:Format of New Library:32 National Workshop on Library Automation (Koha), Content Management System (Joomla) & Data Migration
Item Type/ Document Type:After defining the library, you have to create the Item Type / Document Type such as Books, CDROM, Atlas/Map, etc.The list of sample item type is given below.To create new item type, simply click on ‘New Item Type’ and it will open one form where youhave to fill the detail to create new item.33 National Workshop on Library Automation (Koha), Content Management System (Joomla) & Data Migration
Authorized Value:The list of sample authorized value is given below.These authorized value is used when we catalogue any item. The detail description can be foundin Cataloguing module New Entry page.34 National Workshop on Library Automation (Koha), Content Management System (Joomla) & Data Migration
Patron & Circulation:1. Patron Category:Under this option, you have to define patron category so as to use the same for defining thecirculation privileges & fine rules. A list of already defined category is given below.To define new category, you have to opt ‘New Category’. It will bring / open new window to befilled to get new category.35 National Workshop on Library Automation (Koha), Content Management System (Joomla) & Data Migration
Circulation & Fine Rules:Already defined sample is given below.To define new fine rule, a library must have defined patron category & defined item type.Patron CategoryTo set the circulation privilege and fine rule, select the patron category first fromdrop down menu by clicking on ‘All’. It will display the list of available patroncategory in the library.Item TypeSelect the Item Type (Document Type) such as Books, CD-ROM etc. to be givenprivilege to the particular category that a user can take how many particular itemfrom the library.Current checkouts allowedThis option will allow you to restrict the number of books to be issued to aparticular category for a particular item. For ex. One sets as 10 so total 10 bookscan be issued to particular category for particular item.Loan PeriodThis option will allow you to restrict the number of days the books to be issued.UnitThis option gives freedom to restrict particular item for days or hourly issue.Hard Due DateThis option will allow you to fix any due and set date after that even the categoryhas another due date already, it will calculate fine based on Hard Due date.Fine AmountThis option is to be filled by entering the total amount to be charged per day asper the fine from the user.Fine Charging IntervalThis option is used to give the interval (in days) for calculating fine. For ex. Oneenters the value as 1, so system will calculate the fine daily but one enters thevalue as 2, then system will calculate the fine at the interval of 2 days.Fine Grace Period (day)While calculating the fine, grace period can also be defined for a particularcategory (in days). Then system will calculate the fine after grace period and notfrom the due date.Overdue Fines Cap (amount) This option allows to set the overdue fine cap. If the fine amount exceeds theparticular amount, then system will stop calculating the fine.Suspension in days (day)In this option, if you enter the value (in days), system will stop calculating the fine36 National Workshop on Library Automation (Koha), Content Management System (Joomla) & Data Migration
Renewal allowed (count)Renewal PeriodHold allowed (count)after that particular number of days.This option allows total number of renewal for a particular category. For ex. Youenter the value as 2, then you can renew the books 2 times from the library.This option can be used for setting the total number of days for renewal. For ex.You have taken the book from library and after the expiry of due date, you haveto renew the book from library, then you can define the value for renewal sosystem will renew the book for that number of days.This option allows maximum number of reservation from library.Catalog:MARC Framework:Using this option, you can define the MARC framework for entering the bibliographic record of any document.Using this window, you can export existing MARC framework to be used in new system or import any otherframework being used in any other system. Koha allows to limit the number of tags in the framework andadvantage of this option is that you can use tag as per his/her requirement.Acquisition Parameters:1. Currencies & Exchange Rates:This option can be used to define currencies and exchange rates for the purpose of purchasingbooks through Acquisition module. A list of already defined currencies is given belowAnd to define new currency, you have to click on New Currency and make it active before saving.37 National Workshop on Library Automation (Koha), Content Management System (Joomla) & Data Migration
2. Budget:This option is used for defining budget for the purpose of Acquisition of Books/Serials. A list ofalready defined budget is given below and new budget can be defined using this option.3. Fund:Using this option, you can set the fund limit so as to use for the purpose of Acquisition ofBooks/Serials.38 National Workshop on Library Automation (Koha), Content Management System (Joomla) & Data Migration
Acquisition Module:In Koha, this module is used for the purpose of Acquisition of Books. In this PDF tutorial, module is discussed‘How to used Acquisition Module in Indian Context?’ Generally, we follow the following procedure in the libraryfor the Acquisition. Receipt of Requisition/Indent from the Faculty/Officer Duplicate Checking with existing documents Preparation of List of Books based on Requisition received for the Approval If the list of the books is approved, preparation of purchase order for registered vendor (Note: If the list isnot approved, then book is not purchased). Receiving of Documents, Accessioning and Invoice Processing Sending the bills to Account Section for the payment after getting the necessary signature. Finally, send the book to technical section for technical processing.In this process, we observe that selection of Vendor is done at the time of placing / sending the purchase order.But in case of Koha, Koha user has to start the work of Acquisition by searching the vendor from the system.Let us take one example: (Hit Enter on Acquisition and Search the Vendor)First Step:Searching the Vendor:I searched the Vendor i.e. Saraswati and did not find any vendor with the name ‘Saraswati’. And my screen lookslike If, you don’t find any record regarding Vendor, then you have to create ‘New Vendor’. It will open New EntryForm for new vendor, fill all the information correctly.39 National Workshop on Library Automation (Koha), Content Management System (Joomla) & Data Migration
After entering the value correctly, ensure that Vendor is active.Again search for your Vendor, this time it will show the Vendor record and screen appears as it is given below.40 National Workshop on Library Automation (Koha), Content Management System (Joomla) & Data Migration
Second Step:Now, create the purchase order. In Koha, there is an option ‘New Basket’. This option works as your purchaseorder. Just click on ‘New Basket’ (New Purchase Order). It will display the window with the option to add title tothis purchase order. See the example given below. First Create the Purchase order (New Basket) and save it.Once, it is saved, it will display the next screen where you have to add the new title to purchase order by 5methods.1. From an existing record:2. From a suggestion3. From a new empty record4. From an external resource (z39.50 server)5. From staged fileWe start with the First Option ‘From an existing record’:I searched for the title ‘Cataloguing’ and found the following result on the screen.41 National Workshop on Library Automation (Koha), Content Management System (Joomla) & Data Migration
Now, just click on Order option to add the title to purchase order (New Basket). It will be added to the purchaseorder. Now, fill all the necessary details such as no. of quantity required, vendor price etc. and save the record.42 National Workshop on Library Automation (Koha), Content Management System (Joomla) & Data Migration
It will get saved into database. Now, you can observe that it has been added to the purchase order.Second Option: (Through Suggestion)A title to the purchase order can be added through Suggestion also. For ex. A user searches the title “Ghosala” inthe Online Public Access Catalogue and does not find any record in the database so user can recommend thebook through Online Public Access Catalogue.43 National Workshop on Library Automation (Koha), Content Management System (Joomla) & Data Migration
There is an option, ‘purchase suggestion’, just click this option and it will open the window where you have to fillall the detail related to desired book. The details of this suggested book will appear on the main interface of Kohawhich needs approval before purchase. Ex. ‘How to fill the Purchase Suggestion Form for new book’.Finally hit the submit button.44 National Workshop on Library Automation (Koha), Content Management System (Joomla) & Data Migration
Click on Suggestion Pending Approval, it will open on window where one has to approve or reject the requestedtitle.Once it is accepted, it will be ready to be added to the purchase order.Now search for the vendor whom order has to be placed.Now select the title which has to be added to the purchase order.Click on order and it will again open the same window where one has to fill all the details such as number ofbooks required in the library, fund, vendor price etc.45 National Workshop on Library Automation (Koha), Content Management System (Joomla) & Data Migration
46 National Workshop on Library Automation (Koha), Content Management System (Joomla) & Data Migration
Finally, save it to the database.Third Option (Through New (Empty) Record):A title can be added in purchase order through New (Empty) Record. First, search the Vendor and open or viewthe basket and add the title through New (Empty) Record.Select the option ‘From a new (empty) record’ and add the title to purchase order.Using through ‘New (Empty) Record’, it will open a blank new order template where the detail of book has to befilled and save it to the database.47 National Workshop on Library Automation (Koha), Content Management System (Joomla) & Data Migration
Forth Option (Through External Agency):A title can be added to the Purchase Order through External Agency as well. There is an option in Koha where wecan fill the agency detail and book’s bibliographical detail can be fetched from these agencies. In these agencies,one is very famous and known as ‘z39.50 server’.While adding the title to purchase order (basket), just select ‘Through External Agency’ and you will get theabove window where detail of the book like title or author is to be entered and searched. NOTE: to use thisoption, ensure that system is connected with internet with good speed.48 National Workshop on Library Automation (Koha), Content Management System (Joomla) & Data Migration
Fifth Option (Through staged file):Actually, any title to the purchase order in Koha can be added through staged file also. These staged files areprovided by the Vendor which contains the list of titles available for supply by the vendor. Actually, this is veryunique method to give the detail of available books with vendor. It works as catalogue.These staged files are given in the MARC format which needs to be imported in Koha through Tools Importoption.Once imported, while adding the title to the purchase order, select the option ‘through staged file’, it will openthe window as given below.Just, click on Add order and it will display the list of titles available in this staged file. Choose and add title to thepurchase order.Just click on ‘Add order’ and add the title to the purchase order accordingly.So, we have seen that through five different methods, a title can be added to the purchase order (basket).49 National Workshop on Library Automation (Koha), Content Management System (Joomla) & Data Migration
Receiving the Book & Invoice Processing:Once the order placed, book has to be received. In Koha, again you have to search the Vendor to find out thepurchase order to receive the book.We can see, the purchase order Vikash-10 which we created. Now we will receive the title against this order.Simply, click on Receive Shipment. Fill all the details, such as Vendor Invoice No., Fund, Shipment Date and clickon Next Button.It will display the list of titles in the purchase order.50 National Workshop on Library Automation (Koha), Content Management System (Joomla) & Data Migration
At the right side of this screen, you can see there is an option ‘Receive’, just click on this option to receive thetitle.It will display the window given below to receive the document.Just fill the detail at the left side screen, and click on Add item. As soon as you press on Add Item, it will show thenumber of item received in ‘Quantity Received’ text box.51 National Workshop on Library Automation (Koha), Content Management System (Joomla) & Data Migration
Finally, save it. The same way, receive the second item also.Finally, screen will appear as it is given below.Now, Finish Receiving by clicking on it.Now close the Invoice.52 National Workshop on Library Automation (Koha), Content Management System (Joomla) & Data Migration
Save it.Closing the Purchase Order (Basket):Once the order is received, an order has to be closed because if it is not closed, it will display all the orders fromthe day ordering was started in the Koha and it will be tough task to find out the current order while receivingthe item. So, it is advisable to close the order so as to avoid any difficulty in smooth functioning of the KohaAcquisition Module.Again search for the Vendor. It will display the current Purchase Order.53 National Workshop on Library Automation (Koha), Content Management System (Joomla) & Data Migration
Now, click on View and it will display the total numbers of Titles already available and received against thePurchase Order.At the top of this screen, there is button ‘Close this Basket’. Just click on it and it will confirm before closing.Select ‘Yes, Close’ and purchase order will be closed.NOTE:Next time, when you search for the same vendor, it will not display the purchase order in thecurrent list of orders.In this way, Acquisition Module can be used for the purpose of Acquisition of Books in thelibrary.54 National Workshop on Library Automation (Koha), Content Management System (Joomla) & Data Migration
Cataloguing:Cataloguing is the most important part / module of any good library management system because a data entry isdone with the help of this module and record in the software is maintained using this module.In Koha, record is entered through MARC framework. These framework includes all the t
5 National Workshop on Library Automation (Koha), Content Management System (Joomla) & Data Migration Note: This free space will be used for installation of Linux (Ubuntu 12.04 LTS) 3. IP Address of the System: After creating free space in the system, you have to not