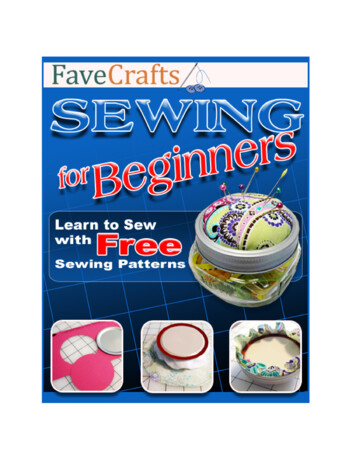
Transcription
Recycling eBook‐42 Ways to Reuse MaterialsThe contents of this eBook, including all craft projects, are the property of FaveCrafts.com and cannotbe distributed or published without permission from FaveCrafts. Any syndication requests may bedirected to FaveCrafts. 2009, Prime Publishing LLC, All Rights Reserved.Find thousands of free craft projects, decorating ideas, handmade gift options and more atwww.FaveCrafts.com.2
Recycling eBook‐42 Ways to Reuse MaterialsLetter from the EditorsDear Crafter,Reduce, reuse, recycle. We often hear this saying as a reminder to save our earth and not to throwthings out. Recycle the items you can because in the long run it’ll help us all out. We have discoveredsome fancy ways to make reusable crafts. Just wash out your containers or whatever items you may beusing and go at it. Some of these crafts will blow your mind away. Not only are you gaining somethinguseful or decorative, but you’re also helping to save the environment! Recycle those materials and seewhat you can create!You can find more recycling craft projects, great activities for kids and extensive decorating ideas atwww.FaveCrafts.com.Our eBooks, like all our craft projects, are absolutely FREE to members of our crafting community.Please feel free to share with family and friends and ask them to sign up at our website for our free e‐mail newsletter.We hope you enjoy reading and creating!With Love,The Editors of Find thousands of free craft projects, decorating ideas, handmade gift options and more atwww.FaveCrafts.com.3
Recycling eBook‐42 Ways to Reuse MaterialsTable of ContentsPaper . 7Junk Mail . 7Rolled Paper Beads . 7Paper Making . 9Newspapers . 11Comic‐Wrapped Decorative Balls . 11Recycled Newspaper Beads . 13Papier Mache: The Necessary Materials. 15Greeting Cards . 17Gift Tin . 17Recycled Christmas Card . 20Easy Recycled Christmas Ornament 2. 2215 Homemade Christmas Ornaments: Recycled Paper Ornaments . 24Magazines . 25How to Make a Great (Cheap) Valentine’s Day Gift . 25Check it out! Decoupaged Accessories . 27Toilet Tubes . 28Easter Bunny Napkin Rings . 29Calendars . 31Calendar Page Envelope . 31Metal. 32Aluminum Cans . 32Recycled Tin Can Luminaries . 32Tin Can Critters. 34Cookie/Snack Tins . 36Find thousands of free craft projects, decorating ideas, handmade gift options and more atwww.FaveCrafts.com.4
Recycling eBook‐42 Ways to Reuse MaterialsPearly Treasure Tins . 36Mint Tins (Altoids) . 38For You Gift Container . 38Plastic . 40Plastic Bottles . 40Cat Bottle Bank . 40Plastic Bottle Lid Art . 42Milk Bottle Cap Ornament . 44Plastic Pumpkin Luminaries . 46Jewel Cases (On CDs, Software, etc.) . 48CD Case Picture Frame . 48Plastic Containers . 51Recycled Plastic Jewelry . 51Plastic Fruit/Applesauce Cups . 53Easter Table Favor Cups . 53Plastic Cup . 56Plastic Cup Vase . 56Yogurt Cups . 58Recycled Yogurt Cup Bud Vase . 58Foam Trays . 60What to Do With Foam Trays from the Supermarket. 60Glass . 61Bottles . 61Beaded Bottle . 61Jewel Glass Bottles . 64Wine Bottles, Corks and Labels . 66Faux Dichroic Glass Recycled Bottle . 66Find thousands of free craft projects, decorating ideas, handmade gift options and more atwww.FaveCrafts.com.5
Recycling eBook‐42 Ways to Reuse MaterialsWine Coasters . 69Clothing. 7210 Ways to Refresh Clothing You Already Have . 72Sweaters. 74Felting Wool Sweaters . 74Recycled Sweater Throw Pillows . 75Belts . 77Recycled Belt Leather Bracelets . 77Jeans . 80Turn Old Jeans into Pot Holders. 80Miscellaneous. 81CDs . 81Altered CD . 81Beaded CD Ornaments . 83Recycled CD Holiday Ornament . 85Recycled CD Letter Holder for Mom . 87Records . 89Vinyl Record Bowl . 89Old Toothbrush . 9010 Crafty Uses for an Old Toothbrush . 90Old Light Fixtures‐ Really! . 93Hammered Bowl . 93Find thousands of free craft projects, decorating ideas, handmade gift options and more atwww.FaveCrafts.com.6
Recycling eBook‐42 Ways to Reuse MaterialsPaperJunk MailRolled Paper BeadsRoller paper beads are a great way to recycle all that junk mail we receive on a daily basis and createsome, beautiful handmade jewelry.MaterialsPaper‐ Junk mail with colorful photos works best, but you can also use plain paper and decorate it afterwith markersScissors or Paper Cutter (An Exacto Knife and a Ruler will give you perfect edges!)Glue‐ Elmers, Liquid Paper Glue, or Mod Podge (which can also be used to varnish the beads afterrolling)Thin Metal or Straw for Rolling the Beads‐ Long needle, straightened‐out clothes hanger, or coffeestirrer (Just don’t use a wood stick, the glue will stick too easily to this)(Optional) Varnish‐ Mod Podge, Spray Acrylic, Clear Nail PolishThin Wire or String for Stringing the Beads‐ You can also use thin copper wire for a different lookDirections1. Cut your paper into long triangles (wide at one end, narrow at the other). The longer the triangle, thethicker the bead will be when rolled up. You can also layer several different colored triangles beforerolling for added design. Make these thinner and shorter, since the extra paper triangle will add bulk. You can finally rid yourself of leftover wrapping paper scraps with this beads project!To make a set of triangles of the same size, lay your sheet of paper down on the table. Put a dotevery ¾ in. along the bottom edge of the paper. Measure out six inches from the bottom, andmake a horizontal line across the width of the paper with your ruler. Cut along this line. Then, onthe newly cut edge, make a mark every ½ in. Using your ruler, connect the dots to make thetriangles, and cut apart. Perfect triangles!Different shaped triangles will make different beads. If you make the base of the triangle wider,the bead will be rounder. For long, thin beads, make a wider base, and a shorter triangle.2. Pick up your paper and roll it tightly around your needle/hanger/straw/pen refill, starting at the wideend. You can make different shaped beads based on how your roll the paper on the needle. You can roll the paper more to one side for a teardrop shape.Try to roll the paper directly in the middle for a symmetrical, egg‐shape.Find thousands of free craft projects, decorating ideas, handmade gift options and more atwww.FaveCrafts.com.7
Recycling eBook‐42 Ways to Reuse Materials An interesting twist is to make a cut a long, thin rectangle out of the paper. Then, cut a trianglefrom one end of the rectangle, so that your paper shape resembles a pair of pants. The bead willbe thicker on each end and thinner in the middle (for a thinner middle, cut the triangle higherinto the rectangle).3. Apply a tiny dot of glue at the end of triangle to secure the roll.4. At this point, you can varnish the bead to make it hard and shiny. The bead will last longer this way.Apply the clear nail polish, varnish or spray acrylic and let dry. For a great painting and drying rack, cut small notches into a shallow cardboard box, such as ashoe box. This will catch any drips when you varnish the beads. Place the long needles or stirrersinto the notches to hold them in place.You can also stick the needles or straws into a piece of Styrofoam.5. You can now string the beads for necklaces, bracelets, anklets, and earrings. You can use thin wire, copper wire, elastic string (great for kids), or even dental floss to stringthe beads.Earring findings, clasps, and other supplies can be purchased inexpensively at craft stores.Enjoy your handmade paper bead jewelry!Find thousands of free craft projects, decorating ideas, handmade gift options and more atwww.FaveCrafts.com.8
Recycling eBook‐42 Ways to Reuse MaterialsPaper MakingBy: Maria NeriusMaking your own paper is a fun idea that you can use for so many different craft projects. Recycling yourpaper scraps also creates less waste and is great for the environment.Paper MakingMaterials Paper (also called waste paper): Almost any paper you can tear easily and recycle including:scraps of paper, envelopes, copier paper, and even mail order catalogs.Blender: Filled 3/4 full of waterPour Mold: This is a 2‐part mold made up of a wood frame and ultra fine screen.Couch sheets: Highly absorbent paper used to remove excess water from hand made paper. Youcan substitute plain newsprint, but you’ll need a lot of it.Sponge: Again, to absorb excess water.Fine screening: An optional supply, but can help with removing excess water from newly madepaper so not as many couch sheets are needed.Large tub or kitchen sink: Pour mold is placed into water covering about 1/3 of the mold.Ironing board and iron or paper pressStep by Step1. You’ll need the equivalent of 1 sheet of waste paper to make an equal sized sheet of handmadepaper. After making your first sheet of handmade paper, if you find your paper too thick thenuse less recycled paper and if you find it too thin to work with add a touch more recycled paper.2. Tear up recycled paper and place in blender. Blend at medium speed for at least 20‐30 seconds.You want all pulp with no bits of paper left.3. Pour pulp into pour mold that is in tub or sink. With hand mix the pulp for even distribution. Liftpour mold straight up out of the water allowing excess water to dip off.4. Remove wood frame from pour mold. Place fine screening over handmade paper and usesponge to remove more excess water. Remove fine screen when done.5. Place couch sheet over top of handmade paper. Lightly press down and remove more excesswater. Flip over and gently remove ultra fine screen. Place second couch sheet on top. Flip overand remove the first couch sheet. An additional couch sheet may or may not be needed toFind thousands of free craft projects, decorating ideas, handmade gift options and more atwww.FaveCrafts.com.9
Recycling eBook‐42 Ways to Reuse Materialsremove more excess water.6. Place handmade paper onto an ironing board and iron on medium heat until dry.7. Place handmade paper between two couch sheets and place heavy object over it for a fewhours. Your handmade sheet of paper is ready to use!Tips Handmade paper is a great way to use up paper scraps you just can’t bring yourself to throwout. Keep scraps of colored papers to use to color your handmade papers.Have fun by adding flowers, flower petals, seeds, spices, herbs, leaves, grasses and otherbotanicals to your paper pulp.Embed memorabilia in your handmade paper by adding postage stamps, ticket stubs, cigarbands and other paper items into the mold as you pour in the pulp.Find thousands of free craft projects, decorating ideas, handmade gift options and more atwww.FaveCrafts.com.10
Recycling eBook‐42 Ways to Reuse MaterialsNewspapersComic Wrapped Decorative BallsBy: Kathleen George for STYROFOAM Brand FoamThis is a fun and easy project that even kids can do. Recycle your favorite comic strip from thenewspaper or a comic book and decoupage them on to STYROFOAM Brand Foam balls. Kids will lovepicking out their own design and displaying these in their rooms.Materials: STYROFOAM Brand Foam:o 5" or 6" BallComic section of newspaper or comic booksSmall disposable container1" foam brushHeavyweight glass quart jarGloss decoupage medium (optional)White craft glue, thickWooden skewerScissorsSteps:1. Using photo as a guide, cut comics into assorted small shapes such as rectangles and squares.Also cut out some individual characters and interesting word balloons, following their outlines.2. Insert a wooden skewer into foam ball to use as a handle while adhering images. Thin glue withwater and then brush onto a small section of the ball. Place a comic cutout in the glue and pressonto the ball, smoothing out any wrinkles or bubbles. Brush a small amount of glue over top ofimage, making sure all edges are secure.Find thousands of free craft projects, decorating ideas, handmade gift options and more atwww.FaveCrafts.com.11
Recycling eBook‐42 Ways to Reuse MaterialsContinue to adhere cutouts to ball until completely covered, overlapping images in a pleasingmanner. Add word balloons last so messages are easily readable.3. Stand skewer in a glass jar, allowing ball to dry thoroughly.4. If desired, apply a coat of decoupage medium over entire ball to produce a glossy finish. Let dryand then remove wooden skewer. Trademark of The Dow Chemical Company ("Dow") or an affiliated company of Dow. For moreproject ideas, please see styrofoamstyle.com.Find thousands of free craft projects, decorating ideas, handmade gift options and more atwww.FaveCrafts.com.12
Recycling eBook‐42 Ways to Reuse MaterialsRecycled Newspaper BeadsMaterialsOld newspapersLarge pot or metal bowlGlue (Elmer’s or other liquid glue)SandpaperA drill to make holes in the beadsWhatever string or ribbon you want to string the beads withLeftover paintVarnishDirections1. Grab a few newspapers before they make it to the bin or recycling basket. Try a couple differentpapers for different colors. The Sunday comics might be interesting!2. Rip the newspaper into small pieces in a large stock pot or metal bowl.3. Cover the paper pieces with boiling water (easy if you have a kettle on hand).4. Allow this mixture to sit for an hour or more, stirring occasionally.5. Drain the water using a strainer or try to get as much water as possible out with the lid of thepot.6. With the paper back in the pot, add enough glue so that the mixture sticks together.7. Squeezing water out with your hands, roll the mixture into balls. You can make the balls as bigor small as you like.8. Place the balls on parchment paper or foil.9. Roll them several times a day for several days as they dry. Roll them every 3‐4 hours for a coupledays for compact beads.10. When completely dry, use the sandpaper to sand off any rough points on the bead.11. Drill a hole through each bead for stringing. Bigger holes can accommodate ribbons and the like.Find thousands of free craft projects, decorating ideas, handmade gift options and more atwww.FaveCrafts.com.13
Recycling eBook‐42 Ways to Reuse Materials12. You can now paint the beads with any paint you have on hand. When dry, you can varnish themwith Mod Podge, clear acrylic spray, or other varnish. For a great painting and drying rack, cutsmall notches into a shallow cardboard box, such as a shoe box. This will catch any drips whenyou paint and varnish the beads. Place long needles, coffee stirrers, or sturdy wire through thebeads and secure in the notches of the box.13. When dry, string the beads. Ribbons work especially well for these chunky beads, but you canexperiment with other materials.Enjoy your recycled newspaper beads!Find thousands of free craft projects, decorating ideas, handmade gift options and more atwww.FaveCrafts.com.14
Recycling eBook‐42 Ways to Reuse MaterialsPapier Mache: The Necessary MaterialsPapier‐Mache is an inexpensive and relatively easy craft project. Recycled newspaper is ideal for thepaper component and you can even make the paste!MaterialsNewspaper (you can use a mixture of newspaper and lightweight, brown paper bags)AdhesivePlastic Throw Cloths or Table CoveringsPaintLarge Container for mixing the adhesive(Optional) Sturdy Mold‐ Ballon, Bowl, Plate, Milk Jug, etc.(Optional) PaintbrushMixing the AdhesiveThere are many different ways to make the adhesive for papier‐mache, but three main types.Flour and Water Paste‐ Three Methods1. Mix three parts water into one part flour until smooth (3 cups of water and 1 cup flour forexample).2. Mix one cup flour into one cup water until smooth. Then add four cups of boiling water andsimmer for 3 minutes.3. Mix ½ cup flour into two cups of cold water. Add two cups boiling water and return to boil.Remove from heat and add 3 tablespoons of sugar. The mixture will thicken as it cools.NOTE‐ These glue mixtures may not produce long‐lasting results. The flour mixtures can mold,especially in humid climates. A couple drops of Wintergreen essential oil can make the paste last longer.Wallpaper Paste (contains a fungicide to prevent mold)Find thousands of free craft projects, decorating ideas, handmade gift options and more atwww.FaveCrafts.com.15
Recycling eBook‐42 Ways to Reuse Materials1. The paste generally comes in powdered form in large jugs anywhere wallpaper is sold. Mixaccording to the directions, or use a little less water for a thicker result.2. A good rule of thumb is to mix three parts water with one part wallpaper paste.NOTE‐ Unlike flour and water mixture, wallpaper paste is toxic so do not use with children.White Glue Paste1. Water down the white glue. Combine two parts warm water with one part white glue.Read on for how to papier mache.Find thousands of free craft projects, decorating ideas, handmade gift options and more atwww.FaveCrafts.com.16
Recycling eBook‐42 Ways to Reuse MaterialsGreeting CardsGift TinWe are creating a gift tin that is perfect for giving a brooch, earrings or a bracelet. It is quick to make andcan incorporate recycled cards, papers and fabric.Courtesy of Bead StudioMaterials: 1 ‐ 2.5" glass top tin1 ‐ recycled greeting card or your own collage image1 ‐ 2.5" square piece of cardboard1 ‐ 4" square pieces of fabricScissorsClear Drying GlueSteps:1. Using the top of the tin as your guide, mark and cut your image to fit the inside of the tin.Find thousands of free craft projects, decorating ideas, handmade gift options and more atwww.FaveCrafts.com.17
Recycling eBook‐42 Ways to Reuse Materials2. Cut a piece of cardboard the same size, making sure they fit inside the tin.3. Trim the fabric so there is a half inch border around the cardboard circle.4. Cover the cardboard with the fabric and glue the fabric down in the back. Let dry. (You mayneed to clamp it while it dries. We used the eyeglass clips as clamps, but clothepins will worktoo.)Find thousands of free craft projects, decorating ideas, handmade gift options and more atwww.FaveCrafts.com.18
Recycling eBook‐42 Ways to Reuse Materials5. Clean the glass with window cleaner. Place a very small bead of glue on the outside edge of yourimage and place in the tin. The image should be facing the glass.6. Glue the fabric covered cardboard to the inside bottom of the tin.Find thousands of free craft projects, decorating ideas, handmade gift options and more atwww.FaveCrafts.com.19
Recycling eBook‐42 Ways to Reuse MaterialsRecycled Christmas CardBy Arnold Grummer for Arnold Grummer'sHave a "green" Christmas this year with this inexpensive and fun way to recycle old Christmas Cardsinto new!Supplies: Arnold Grummer's Papermill Complete KitChristmas card and leftover gift wrap to recycleScissorsSteps:1. Cut art from a selected Christmas card, then surface embed the art on a new handmade sheet.2. Select a received Christmas card whose art you particularly admire.3. Cut the art from the card and lay it aside.4. Follow the directions in your kit or handmold to make a sheet that's 5.5" x 8.5" with leftoverholiday gift wrap whose color complements any color in the cut‐out art.Find thousands of free craft projects, decorating ideas, handmade gift options and more atwww.FaveCrafts.com.20
Recycling eBook‐42 Ways to Reuse Materials5. Save some of the pulp in a container.6. Remove the screen and new sheet from the hand mold.7. Place the art on the surface of the right‐hand side of the wet sheet.8. Tap the art's edges firmly down onto the wet sheet.9. Let the art "wet" for one or two minutes.10. With a turkey baster, dribble pulp you saved along and just barely over the art's edges.11. This will tie it firmly to the sheet's surface.12. Follow the directions in your kit or hand mold to finish the sheet with pressing and drying.Find thousands of free craft projects, decorating ideas, handmade gift options and more atwww.FaveCrafts.com.21
Recycling eBook‐42 Ways to Reuse MaterialsEasy Recycled Christmas Ornament 2By: Dena Lenham for KreinikUse old Christmas cards to create ornaments in a flash with iron‐on threads and cookie cutter shapes.Pop these into holiday gift bags or mail the flat ornaments with this year's Christmas cards. Theseornaments are a snap!Materials: Kreinik 1/8" Iron‐on Ribbon in your choice of colors (we like 6130 Red, 6225 Gold, 6300Meadow, 6010 Pearl, or 6020 Silver)Kreinik #16 Iron‐on Braid in your choice of colorsKreinik #8 Iron‐on Braid in your choice of colorsKreinik teflon press clothCookie cutters in desired shapes (we used a house shape)Old Christmas cardsMini iron or household ironIroning surfacePen or pencil for tracingScissorsSteps:1. Turn your iron on to the highest heat setting and let it heat thoroughly.2. Meanwhile, trace the outline of the cookie cutter shape onto your Christmas cards, then cut out.3. To begin decorating, lay your iron‐on ribbon at the edge of your card design. Cover the threadwith the Teflon Press Cloth, then press for several seconds until the thread adheres. ContinueFind thousands of free craft projects, decorating ideas, handmade gift options and more atwww.FaveCrafts.com
This is a fun and easy project that even kids can do. Recycle your favorite comic strip from the newspaper or a comic book and decoupage them on to STYROFOAM Brand Foam balls. Kids will love picking