Transcription
IT 341 Introduction to System AdministrationProject I – Installing Ubuntu Server on a Virtual MachineHere we create a new virtual machine and install Ubuntu 20.04 LTS Server on it. In this instance, we follow most of the defaults, meaning that the virtual network spoofsthe identity of your server to be that of the host (the real) computer. This is how mosthome networks work. A router attached to the internet service provider (ISP) uses Network AddressTranslation to fool the ISP into thinking all of the computers on your local network areactually just one, byo rewriting packets going out via the router with a single (spoofed) MAC addresso keeping track of this in a tableo using this table when packets come back from the ISP to rewrite the destination MAC addresses for the local computers the packets are really meant for.In the next project, we will change this configuration -- considerably!Please read instructions in full before proceeding!1. Decide which team will be first to create a VM. One member from that team should loginto your physical host (it2x, where x 1-8), using your Windows login. This step assumes you have your Linux account AND your Windows login. If you do not have a Windows login, then please notify your professor.2. Check the Ethernet outlets next to your host: If the CAT5 cable is plugged into the top-side CAT5 outlet associated with yourhost then the computer is connected to it20 on the IT Lab LAN, an Ubuntu serverthat acts as a router for the network it.cs.umb.edu If the CAT5 cable is plugged into the bottom-side ) CAT5 outlet the computer isanother network, which is not as relevant to our purposes.If in doubt about this, ask me, and I can check your Ethernet connection for you!.3. We want to install a virtual machine running Ubuntu 20.04 LTS Server. Fortunately,we have ISO images on our computers, so it will not be necessary to download them.
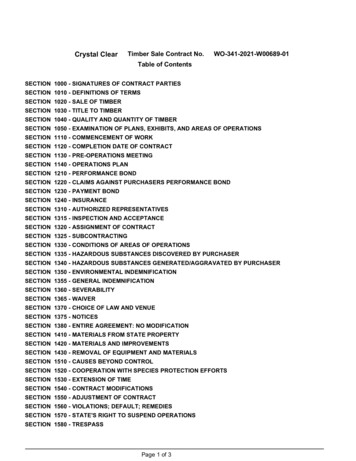
We begin by starting up VMWare Workstation. Use the Start Menu, or there may be ashortcut for this on the desktop. (If you are unable to get VMWare Workstation working,then please see me.)At this point, you will almost certainly be sharing the physical machine with atleast one other team, if not more. Each team must create a VM, but while oneteam is creating a VM, the other team(s) should sit and watch, as preparationfor creating their own.4. Create a new Virtual Machine. Click Create a New Virtual Machine or File New Virtual MachineVersion 15, as ofthe Fall 2019semester Make sure the radio button for Typical is highlighted, and then click the Next button.5. Now we have a choice. We can either let the installation proceed on its own after givinga few parameters – which is suitable if you’ve installed Ubuntu before – or we caninstall Ubuntu step-by-step. We will do the latter, which is suitable if you. are installing Ubuntu for the first time or just want to refresh your memory.Here, we will first create a VM and then (later) install Ubuntu, proceeding step by step.
i.Choose I will install the operating system later. Then, click Next.ii.For a Guest Operating System, choose Linux. For a Version, choose Ubuntu 64-bit. Then, click Next.iii. Now, for a virtual machine name, we want (instead of the default "Ubuntu") aname that is meaningful to our network. Use your team name, based upon: The name of your host : it2x, where x 1-8 Your section number (or that number plus two) Your group ID : For example, if you are sitting at host it28, in section 4 and group b,a or bthen use the name itvm28-4biv. There exists a subdirectory of C:/IT341 with the name "sectionyz" where yis your section number (or plus two) and z is your group ID. For example, if your team name is "itvm28-4b", then your VM will be in thedirectory C:/IT341/section4b of machine it28
If this directorydoes not alreadyexist, then I willneed to create itfor you.The location where the virtual machine image will be stored is in the directoryC:/IT341/sectionyz so browse to that location, and hit the OK button,followed by the Next button. You may get a prompt about the location containing another virtual machine.As long as you are following directions for naming your machine, this will notbe a problem so click the continue button.v.Go along with the default disk size and "Split virtualvi.We needn't customize anydisk into multiple files". 20 GB should be more thanhardware. If we want to later,sufficient. Choose Next.it is very easy, as long as ourvirtual machine has been shutdown. Click Finish.
vii.Now, under Devices, you will see that the CD/DVD drive has the value "Auto detect". Wewant to change this temporarily, so:A. Double-click on CD/DVD. This will bring us to a panel where we can (temporarily)change the association so that we can install Ubuntu Server from an ISO image.B. Choose Use ISO image ; and then browse to (from File System)(NOTE: The exact file path may differ from what you see here!)C:\OS erver-amd64.isoMake sure you have "20.04"! If in doubt, ask me !C. Once ubuntu-20.04.1-live-server-amd64.iso is highlighted, choose Open, and then OK.
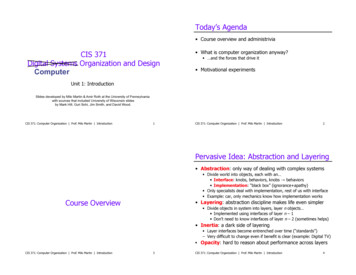
If the ISO image is indifferent location thanspecified here, thenyou will need to lookthere, instead.D. Now, our (virtual) CD/DVD reader is associated with the ISO image for Ubuntu Server, so wecan now install the OS on our VMs. Next, make a note of your VM's current memory, likelyat 4 GB .i.Your VM should have only 2 processors right now. Click on Processors, andincrease processors to 4, and do not worry about cores. Click OK.ii.Choose Power onthis virtual machine.You will be led,step-by-step,through theinstallation.
iii. To give control of your keyboard and mouse over to the virtual machine, click onits screen. (Whenever you want to give control back to your host, press CtrlAlt . A reminder of this simple sequence is on the lower-left corner of yourVMware Workstation window.)iv. For a Language, choose Englishand hit Enter.v.When you receive the Installer updateavailable screen, choose Continuewithout updating, and hit Enter.vi. For "Layout" and "Variant", chooseEnglish (US), arrow to "Done", andhit Enter. (stepscont'd rt. column)vii. If you see ens33 and eth for NAME andTYPE,arrow to "Done" and hit Enter.viii. We don’t want a proxy, so leave Proxyaddress blank and hit Enter.
ix. If Mirror address matches the below,then arrow to "Done" and hit Enter.x.Use the arrow to choose "Use anentire disk" and hit Enter.Uncheck the LVM option! (See end-of-report questions.) Tab/choose Donexi. Assuming things are in order as indicated below, arrow to "Done" and hit Enter. Whenasked to confirm, arrow to "Continue" and hit Enter.xii. At this point, the install will start to commence, and you will be given a "Profile setup"screen. Here, it is extremely important that you provide the correct information to defineyour hostname, admin username, and admin password. Carrying out these steps
correctly NOW saves you the trouble of having to fix mistakes later! To make it easier,remember you are using the following two pieces of (case-sensitive) information:The name sysadminYour team name (ex. itvm28-4b )Enter the relevant information below. (Replace itvm28-4b with your own team name,naturally.) Then arrow to "Done" and hit Notice that your team name is serving as your hostname and as your admin password!)In response to the following prompt, leave UN-selected, tab to Done, and press Enter:xiii.We do not want to add any snaps, hit Tab – which should move focus directly to
"Done" – and hit Enter. (Installation will take a while!)Choose "Reboot Now" (only "Reboot Now", specifically) and hit Enter.xiv.xv.You should click "I Finished Installing". Then, click inside your VM, so that you canpress Enter in response to the prompt:xvi.(After a wait.) The system will reboot, and your screen may look something like this:Though it may not be exact. If in doubt, just ask me!1. Ctrl-Alt to return focus to the host.
2. Click the icon indicated below, and choose Shut Down Guest; confirm to shutdown.3. Double-click on CD/DVD. This will let uschange the association back.4. Choose Use physical drive and “Autodetect” for the device. Click OK.5. Now we are ready to turn the virtual machine back on.Choose Power on this Virtual Machine.After your VM finishes booting, you will see:
6. Log in as sysadmin. Remember, thepassword is the same as your teamname, same as your VM's name.On successful login, you should see thisBefore you continue, enter the script command as indicated below.This will allow you to save the output of your CLI session to a text file, with a unique filename. You can export this file from your VM to another source, later, and have accessto the material to use in your lab report.7. Let’s see if we can reach the outside. Enter the following command:ping -c 5 www.yahoo.comBe sure to record success or failure as part of your lab report's daily entries.8. We want to install some software; but we need to do some preparatory steps. For each ofthe four commands below, type the command and then press Enter. After the first
command, you will be prompted for sysadmin's password because you invoked the sudocommand. Hereafter, you need not re-enter the password because it has been "cached".Also, it’s always a good idea to do an update of your catalog before these installations.This, too, will require invoking administrative privileges with the sudo command.sudo apt-get updateThen we will do an upgrade sudo apt-get upgradeAfter lots of output, you are asked if you want to continue. Choose Y, or just press EnterMuch more output will follow.(Note that this is the ONLY time you will run an upgrade in this course. If you feel you have acompelling reason to run an upgrade at a later date, ask me before proceeding!)9. Then install the ssh server sudo apt-get install openssh-server(You will want to answer Y at the prompt)
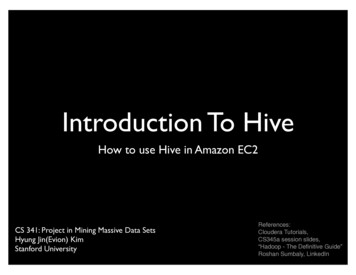
10. Be sure you are documenting all of this in your lab report's daily log entries. May bepart of exam questions.11. Now you can end yourscript session andlog out.exitlogout12. At this point, you should do two things: First, recall how we made changes to the VM's specs for Memory and Processors.o Referring back to the step where you made these changes, you need tochange the memory back to the original amount of 4 GB.o You will also want to change the number of processors back to 2.o When we "upgraded" your VM's specs back then, it was just to speed up theinstallation process. Now that installation is finished, we need to "downgrade"so that your VM does not consume too many of the physical workstation'shardware resources! Second, you need to create your first snapshot. Ctrl-Alt to return focus to the host,and then click the first of the 3 clock icons below – the one with a plus sign.13. In the dialog box, give your snapshot a meaningful name and a useful description.Then, click Take Snapshot.
14. You can take a Snapshot of your VM at any time, and you can have several of them,representing the VM's state at various points in time. In order to restore your VM to thestate as of the latest snapshot, click the second clock icon:15.You can view and manage all of your snapshots for your VM by clicking the third clockicon, which opens the Snapshot Manager:This will give you a dialog like the following:Where was the snapshot saved? Figure this out and write about it in the indicated questionbelow. You can change this, or you can copy it to a memory stick if you have one.Then you won’t lose your work if you mess up!FINALLY! It is imperative that you get in the habit of copying your VM files to an externalmemory source like a USB thumb drive. Accidental deletions of VMs DO happen, andyou want to be prepared for this possibility!
Discussion Questions:1. What does LTS stand for, and what does that mean? Pleaseexplain.2. What is an LVM? (It stands for "logical volume manager".)Please explain what a logical volume is and what a logicalvolume manager does.3. Please explain what the sudo command is, how it is used, andwhy we need it.4. Please explain what apt-get is and why we use it.5. Please explain what "snapshots" are and why they are useful tous.
IT 341 Introduction to System Administration Project I – Installing Ubuntu Server on a Virtual Machine Here we create a new virtual machine and install Ubuntu 20.04 LTS Server on it. In this instance, we follow most