Transcription
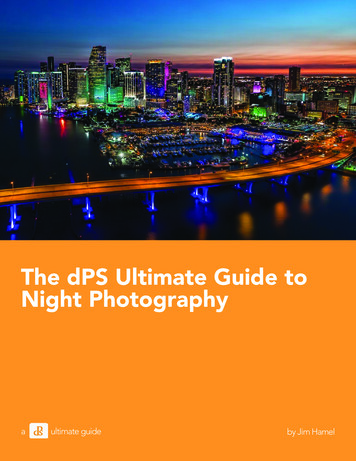
The dPS Ultimate Guide toNight Photographyaultimate guideby Jim Hamel
2Share this dPS Ultimate Guide with your -guide-night-photography/Visit the dPS Facebook pagehttps://www.facebook.com/digitalpsLike this dPS Ultimate Guide on FacebookClick here to shareJoin our Digital Photography School Facebook raphyschoolgroupLearn How to Take Amazing Photos at Night withJim Hamel’s Night Photography CoursePublisher: Darren m/digitalps/The dPS Ultimate Guide to Night Photography Copyright 2018
3Contents1.Introduction 52.What to Bring for Night Photography3.Exposures for Night Photography 104.A Starting Point for Proper Exposure165.Exposing the Night Sky Photo196.Picking a Subject for Night Photography227.Focusing 318.Processing Your Night Photos 349.Getting Started with Night PhotographyThe dPS Ultimate Guide to Night Photography739
4The dPS Ultimate Guide to Night Photography
5IntroductionNight photography immediately solves a huge problem that you confront constantly inphotography. That problem is being faced with ordinary scenes that just aren’t very interesting.If you take a picture of a building or a standard street scene during the day, it can be sort ofdull. We are all used to seeing shots taken in the middle of the day. That same scene – shot atnight – can be a really interesting photograph though.Tower Bridge, London. Exposure: shutter speed 2.6 seconds, aperture f/5.6, ISO 100.The dPS Ultimate Guide to Night Photography
6Night photography immediately solves a huge problem that you confront constantly inphotography. That problem is being faced with ordinary scenes that just aren’t very interesting.If you take a picture of a building or a standard street scene during the day, it can be sort ofdull. We are all used to seeing shots taken in the middle of the day. That same scene – shot atnight – can be a really interesting photograph though.The actual taking of pictures at night might seem a little bit like magic if you are just gettingstarted. Even those who have been shooting a while may wonder how to get a properexposure and focus in the dark. Although photographing in the dark certainly has itschallenges, in some ways, it is actually easier than photography during the day.So let’s take a quick look at the essentials of night photography. In particular, we’ll cover thegear you need, how to expose your photos, how to focus at night, great subject matter, andsome post-processing tips. Hopefully, this will help open up the world of night photography toyou.The dPS Ultimate Guide to Night Photography
7What to Bring for NightPhotographyBreckenridge, Colorado – Exposure: shutter speed 15 seconds, aperture f/2.8, ISO 3200.First, let’s talk about what you will need in terms of equipment for doing night photography.The good news is that you will not need much in the way of extra gear. Besides your standardcamera and lens, the only thing you will absolutely need is a tripod. The darkness means thatyour camera needs to use a long shutter speed to gather enough light for a proper exposureThe dPS Ultimate Guide to Night Photography
8(more about that in a second). So you need to be able to hold your camera steady and a tripodis the best choice for that.Another helpful item for keeping the camera steady is a remote shutter release. I highlyrecommend that you get one – and the corded ones are very cheap (under 10). You canspend a lot on an intervalometer if the extra features will benefit you, but you don’t need thatfor standard shooting at night.Miami, Florida – Exposure: shutter speed 0.3 seconds, aperture f/2.8, ISO 200.Although not necessary, here are some additional items to consider having on hand for yournight photography: A flashlight: This will come in handy in a myriad of ways. It will help you with finding yourcamera controls if you don’t know them cold. It will help you set up your tripod and dealwith straps and other attachments. Finally, a flashlight will also help you find things in yourcamera bag. Just keep a small one (or a headlamp) handy.The dPS Ultimate Guide to Night Photography
9 Lens hood: At night you will have bright lights coming at you from different directions –such as street lights and neon lights. Using a lens hood will help keep flares to a minimum. Extra batteries: The long exposures you take at night will drain your camera battery at analarming rate. You may also be using Live View, which drains them even faster. So doescold weather. Therefore, night photography always calls for spare batteries. Don’t take anychances here – a dead battery means your night is over.If you are going to capture the night sky, you’ll need to be on top of weather conditions. Inaddition to your standard weather apps, be sure to add an app to your phone that will help yousee where the moon, constellations, and Milky Way (if visible) will be. If you don’t already haveapps you are using (there are several), I recommend PhotoPills and Star Walk 2.The dPS Ultimate Guide to Night Photography
10Exposures for Night PhotographyPigeon Point Lighthouse, California. Exposure: shutter speed 6 seconds, aperture f/5.6, ISO 1600.The biggest difference between daytime and night photography is the exposure values youwill need to use. The darkness changes everything. Don’t worry though, once you have yourcamera on a tripod, it is actually not that difficult to get the proper exposure in most cases.Let’s back up and cover things that you might already know. Your camera’s exposure is aThe dPS Ultimate Guide to Night Photography
11result of three controls (the exposure triangle) – shutter speed, aperture, and ISO. Because ofthe darkness, you need to let more light into the camera, and you can only do so by affectingone of these three controls. We’ll cover how to do that for each of them now.Toledo, Spain – Exposure: shutter speed 8 seconds, aperture f/8, ISO 200.Shutter SpeedDuring the day, you will typically use shutter speeds that are a small fraction of a second.At night, however, the camera will use shutter speeds that are longer than one second –sometimes significantly longer. Think of it this way: because it is dark, the camera needs alonger period of time to gather light for a proper exposure.The shutter will now be open for a longer period of time, so the camera needs to be heldsteady or the picture will move during the exposure process, causing your image to be blurry.That is why a tripod is required equipment at night. You can leave the shutter open as long asyou want, as long as the camera is steady and does not move at all.The dPS Ultimate Guide to Night Photography
12Millennium Bridge and St. Paul’s Cathedral, London – Exposure: shutter speed 4 seconds, aperture f/5.6, ISO 400.ApertureThe aperture is the opening in the lens that lets light into the camera. The size of the aperturedetermines the amount of light being let into the camera for a given shutter speed, and it alsoaffects the depth of field.For the most part, there is no difference between how you will use the aperture at night versushow you use it during the day. The only difference is that the camera will struggle to get enoughlight for a proper exposure, so a small aperture will often require ridiculously long shutter speeds.In addition, the background is usually black, so you don’t need to worry as much about achievinga wide depth of field.Both of these factors (needing more light, and not needing a wide depth of field) tend to mitigatetoward using larger apertures at night.meaningful to them that could act as the backdrop of your photo session. From the public libraryto grandma’s famous dahlia garden, to a family friend’s lake house, you might be surprised atwhat they come up with!The dPS Ultimate Guide to Night Photography
13When you are shooting a scene like this where everything is far away, you don’t need a wide depth of field. Hence you can getaway with a larger aperture. New York, New York – Exposure: shutter speed 0.3 seconds, aperture f/4.0, ISO 400.ISOThe third exposure control, ISO, is a measurement of the sensitivity to light of your digitalsensor. Higher ISO values make your digital sensor more sensitive to light and thereby allowyou to use a shorter shutter speed or a smaller aperture.But, there is no free lunch here, and using higher ISOs will result in more digital noise in yourpictures. Since dark areas of your picture tend to show more digital noise than lighter areas,it is often a problem with night photos. Therefore, resist the temptation to crank up the ISO atnight if you can help it.Since you will be using a tripod, you can usually avoid the need to use a high ISO. In otherThe dPS Ultimate Guide to Night Photography
14words, the tripod allows you to use a longer shutter speed, and that long exposure allowsmore light into the camera such that you don’t need to use a high ISO. However, in thosecases where you cannot use a tripod or you have a moving subject, you will need to increasethe ISO.I needed the foreground sharp in this image, so these exposure settings are brighter than the typical night sky shot, which youwill learn more about shortly. Shutter speed 30 seconds, aperture f/2.8, ISO 3200.The dPS Ultimate Guide to Night Photography
15That is certainly bad news, but the silver lining is that cameras are getting better and betterat handling higher ISOs without showing much digital noise. In addition, post-processingsoftware continues to improve at noise reduction, so you should be able to remove the digitalnoise later.The dPS Ultimate Guide to Night Photography
16A Starting Point for ProperExposureIt might seem a little silly for me to even try to give you some night photography defaultexposure settings, but that is what I’m going to do anyway in an effort to get you started.Let’s say you are in Aperture Priority mode, which is what I find a lot of people use. If you arestill using an automatic mode, give Aperture Priority a try, as it is still semi-automatic (meaningthe camera will set the shutter speed for you to create a correct exposure), but you get to setthe Aperture and ISO.The dPS Ultimate Guide to Night Photography
17I So, let’s talk about the aperture setting first. Start by setting your aperture to f/5.6, which is afairly moderate choice that lets in a healthy amount of light. It won’t give you as much depth offield as you might like, but remember that you typically don’t need an extremely deep depth offield since the background will be black.Next, set your ISO. Start at about 400, which is high enough that you won’t have to use anextremely long shutter speed. At the same time, most cameras can shoot at ISO 400 withoutdigital noise becoming a problem.After that, just see where the shutter speed ends up when you line up your shot. I’m assumingyou are using a tripod for this example, by the way. You know the shutter speed is going to belong – probably a few seconds. I have tried to keep the other settings such that you won’t bestanding in one spot for a minute or more while the camera creates the exposure.Chicago River – Exposure: shutter speed 30 seconds, aperture f/13, ISO 200.The dPS Ultimate Guide to Night Photography
18That’s not to say you should never do that. Depending on the scene and subject, you mightwant your shutter speed to be measured in minutes – but it is not the norm.If you don’t have a tripod, your options are limited. In fact, there is only one option, and that isto open up the aperture all the way, crank up the ISO to at least 1600 (probably 3200 or 6400),and then use whatever shutter speed the camera sets.Even with a wide aperture and high ISO, the shutter speed is likely to be long enough thatcamera shake will still be an issue.The dPS Ultimate Guide to Night Photography
19Exposing the Night Sky PhotoThere is one specific exposure setting I can tell you right now because it is often the same. Itis the exposure settings for photographing the night sky. Your exposure settings will be: Shutter speed: 15 seconds. Aperture: f/2.8 ISO: 6400The dPS Ultimate Guide to Night Photography
20This is not set in stone, and you’ll notice that my night sky photos add a little exposure tothese settings, but it is a good starting point. But what if your lens doesn’t open up to f/2.8?Then you have to just increase the ISO or the shutter speed by the corresponding amount.For example, if your lens’s maximum aperture is f/3.5 – which is the case with many kit lenses– you’ll need to find another 2/3 of a stop of light. Either add that to the ISO, the shutter speedor just increase both by one click (remember one click of your dials is 1/3 of a stop).Big Bend National Park, Texas. Okay, the exposure settings don’t have to be exactly the same. I wanted this brighter toaccentuate the Milky Way. Shutter speed was 13 seconds, aperture f/2.8, ISO 6400.The dPS Ultimate Guide to Night Photography
21You might be tempted to lengthen your shutter speed a lot on the premise that you are usinga tripod. After all, that would seem like a good way to reduce your ISO to control digital noiseand also to use a smaller aperture so you don’t have such a narrow depth of field. Don’t do it!The stars in the sky are moving (okay, it is really the earth’s rotation, but they appear to bemoving across the sky). If you lengthen your shutter speed too much, the stars will have littletrails which appear as a blur in your shot. You may not see it until you get the pictures homeand look at them on the computer screen, but it will be there and will ruin the shotBig Bend National Park, Texas. Look closely at this picture and you will see little star trails. This was the result of using a longershutter speed than I mentioned above. Shutter speed 165 seconds, aperture: f/4.0, ISO 1600.For more in night photography exposure, please read Tips for Getting Proper Exposure forNight Photography.The dPS Ultimate Guide to Night Photography
22Picking a Subject for NightPhotographyNow that you have the right gear and know how to expose your photos at night, you have topick a good subject for night photography. For the most part, that is no different than what youdo during the day. A good subject is a good subject. Still, things will look different at night.Let me introduce you to some of the things I like to photograph at night. Hopefully, these willgive you some ideas, which you can take in your own directions.The dPS Ultimate Guide to Night Photography
23The Night SkyIf you are out in the countryside, you need nothing more than a clear night to get a greatphoto. Moonless, clear nights are the best. If you can happen to catch the Milky Way (usuallypossible from March through October, and best from May to September), all the better.Check out an app called Star Walk 2 to help you get a handle on the timing for these things. Ifyou can add an interesting foreground to the shot, even better.Museums and Public BuildingsThe Louvre, Paris. I was forced to hand-hold this shot (it was taken from inside the Louvre), so I really had to crank the ISO andopen up the aperture. Shutter speed 1/8th of a second, aperture f/4.0, ISO 3200.The dPS Ultimate Guide to Night Photography
24Well-lit buildings are an obvious choice for a nighttime subject. You almost can’t go wronghere. Although the concept is obvious, when executed well the result can still be great. Youcan also use this as a starting point for your night photography. You will have additional ideasas you stand there waiting for your pictures to expose.FountainsBuckingham Fountain, Chicago – Exposure: shutter speed 10 seconds, aperture f/18, ISO 100.Perhaps my favorite nighttime subjects are fountains. Many times they are lit with differentcolors as well, adding additional interest. The long shutter speeds you use at night make thefountain appear to be flowing.The dPS Ultimate Guide to Night Photography
25BridgesIt seems like every city or town has a bridge. It may not be the Golden Gate Bridge, but therewill likely be a bridge and it will be well lit at night, which makes it an interesting subject. Plusthe long exposure time you use for night photography will cause the water under the bridge toblur, and the traffic to appear as streaking lights.Brooklyn Bridge, New York – Exposure: shutter speed 15 seconds, aperture f/11, ISO 200.StreetlightsPay close attention to streetlights when you are doing night photography. They can be usefulin a lot of different contexts. They can add a point of interest to it otherwise blank area of thepicture. If there are multiple lights, they can create a nice leading line into your picture.The dPS Ultimate Guide to Night Photography
26Washington, D.C. For this shot, I wanted the twinkle or starburst effect from the streetlights, so I used a smaller aperture.Exposure: shutter speed 8 seconds, aperture f/16, ISO 800.Car Light TrailsA really fun thing to include in your night photos is streaking light trails from moving cars.These are created when a car or other vehicle drives through the frame while you have theshutter open. The camera picks up the lights, but since the car has gone all the way throughthe frame while you had the shutter open, it shows up in your picture as streaks of lights.Try to time your pictures so that vehicles move all the way across the frame while you havethe shutter open. Read: How to Create Dynamic Photos of Car Light Trails for more tips on thistechnique.The dPS Ultimate Guide to Night Photography
27Washington, D.C. For this shot, I wanted the twinkle or starburst effect from the streetlights, so I used a smaller aperture.Exposure: shutter speed 8 seconds, aperture f/16, ISO 800.ReflectionsA benefit of the longer shutter speeds you will be using at night is that reflections show upbetter on the surfaces of water. This is obviously true on ponds and lakes. But it is also true forpuddles. After a rain can be a great time for night photography.The dPS Ultimate Guide to Night Photography
28Reflections in London, U.K. – Exposure: shutter speed 1.3 seconds, aperture f/8, ISO 200.The dPS Ultimate Guide to Night Photography
29Overlooks and VistasLet’s end with overlooks and vistas. Some of the best night photography I have ever seenare nighttime views of cities. You can often get great skyline shots. Be careful though – agreat view often does not translate into a great picture. Make sure you have an interestingforeground and/or a strong center of interest in the picture.When picking subjects for night photography, it is important to note that things will not look thesame to the camera as they do to you. Take some test shots whenever possible. If the idea ofa long exposure test shot seems tedious due to the wait time, crank up the ISO for purposesof your tests which will allow you to use a short shutter speed. When you go to take the finalpicture you can reduce the ISO and increase the shutter speed by a corresponding amount.When picking subjects for night photography, it is important to note that things will not look thesame to the camera as they do to you. Take some test shots whenever possible. If the idea ofa long exposure test shot seems tedious due to the wait time, crank up the ISO for purposesof your tests which will allow you to use a short shutter speed. When you go to take the finalpicture you can reduce the ISO and increase the shutter speed by a corresponding amount.New York City from the Manhattan Bridge – Exposure: shutter speed 10 seconds, aperture f/8, ISO 200.The dPS Ultimate Guide to Night Photography
30Nashville via drone – Exposure: shutter speed ½ a second, aperture f/5.6, ISO 310.The dPS Ultimate Guide to Night Photography
31FocusingOne final difficulty you will face in night photography is that it is often tricky to focus yourcamera. That is because most cameras focus by detecting contrast. If the scene is too dark,there is no contrast for the camera to pick up. There are a few things you can do to get yourcamera to focus though.U.S. Capitol, Washington D.C. – Exposure: shutter speed 30 seconds, aperture f/16, ISO 400.The dPS Ultimate Guide to Night Photography
32The first is to focus on a bright light in the picture. A streetlight works well for this. Try focusingon the edge of the light (between the bright part and the black background), which will giveyou the necessary contrast. Be sure you are focusing the same distance away as where wantyour final picture to be focused. Once you have the focus set, recompose your picture andpress the shutter button to take the picture.Another trick to allow you to use your autofocus is to break out the flashlight and shine it onthe thing that you want your camera to focus on. If it is close enough, the flashlight shouldprovide sufficient light for your camera to focus.Finally, if none of that works, you will need to manually focus your lens. Just put the camerain Live View and look at the LCD as you compose the picture (zooming in if possible) to see ifyour picture is in focus.The dPS Ultimate Guide to Night Photography
33Henry Street, New York – Exposure: shutter speed 1/13th second, aperture f/5.6, ISO 3200.The dPS Ultimate Guide to Night Photography
34Processing Your Night PhotosLincoln Memorial, Washington, D.C. Another benefit of night photography is that you get to take pictures of memorials withoutany people in your shot. Exposure: shutter speed 6 seconds, aperture f/11, ISO 200.You can make your night photos look a lot better with a minor amount of post-processing. Ofcourse, given all the different types of night shots you may face, giving specific editing advicehere is difficult. Still, there are a few general things you might want to consider.The dPS Ultimate Guide to Night Photography
35HighlightsThe first thing to consider is how to handle the highlights. Given the nature of nightphotography, you are doing to be dealing with some really dark areas, and some really brightareas. Many times those highlights will be slightly blown out. Even if they aren’t completelyblown out, they are still bright enough that they would look better toned down a bit.It wasn’t too long ago that thismight have required usingHDR (high dynamic range)software, but not anymore.Most RAW editors can bringback the highlights a bit(assuming you’ve’ shot inRAW format).If you use Lightroom orPhotoshop (Adobe CameraRaw or ACR), all you need todo is find the Highlights sliderand pull it to the left a bit. Thatwill decrease those highlights.As an added benefit, it willoften make those samehighlights appear a bit morecolorful.Westminster Bridge, London. Here I used a 5-second exposure to capture thelights of the bus passing by. Shutter speed 5 seconds, aperture f/8, ISO 200.The dPS Ultimate Guide to Night Photography
36Shadows and BlacksNow you have to deal with the dark areas of your photo. There will be parts you want tobrighten, but at the same time, you should allow the darkest parts of the photo to go pureblack. There is no point in attempting to preserve detail in a black sky.To accomplish both of these goals, I have another quick move for you. Pull up on the Shadowsslider, and then pull down on the Blacks slider. Areas of detail you want brighter will benefitfrom the increase in the Shadows, but you will maintain contrast by pushing down the Blacks.Salt Lake City, Utah. In this shot, I needed a wide depth of field to keep both the fountain in the foreground and the Tabernaclebuilding in the background sharp. I used a long exposure, which also created a flowing effect to the water, but I still had toraise the ISO a bit. Shutter speed 6 seconds, aperture f/16, ISO 400.The dPS Ultimate Guide to Night Photography
37SharpeningSharpen your night photos the same as you would any others, but you will likely need to dealwith digital noise more than you are used to. If the whole picture is noisy, then give it a globalnoise reduction. In Lightroom and ACR, there is a Noise Reduction section in the Detail panel,and you just pull up on the Luminance slider to the right.You might just need to reduce noise in specific sections of your photo though. Noise oftenmanifests itself in the darkest areas of your image. In that case, apply a local adjustment. Ifyou are using Lightroom or ACR, use the Adjustment Brush, paint where you want the noisedecreased, and increase the Noise slider. That should take care of it.The Golden Gate Bridge from the Sausalito side – Exposure: shutter speed 30 seconds, aperture f/6.3, ISO 200.The dPS Ultimate Guide to Night Photography
38You have to watch noise reduction though. Applying too much of it will reduce detail in yourphoto. That’s why you don’t want to apply a global adjustment if you don’t have to. If you havea serious noise problem and want to fix it without sacrificing detail, there are some plug-insthat are truly wonderful. I use Noiseware and I am often shocked at what a good job it does ofreducing noise but preserving detail. Other good products are Noise Ninja and Dfine by Nik.Read more on noise reduction in my article here: Good, Better, and Best Noise ReductionTechniquesThe dPS Ultimate Guide to Night Photography
39Getting Started with NightPhotographyNight photography is a great way to get really interesting and unusual pictures. It is also agreat time to go shoot since it is not during business hours (you’ll be off work) and others willbe asleep (notably spouses and children).The dPS Ultimate Guide to Night Photography
40Hopefully, this guide will help you get started with night photography. As you get ready for yournext outing, just remember a few things: The only additional items that are necessary for night photography are a tripod andremote shutter release. Some other helpful items are a flashlight, a lens hood, and anextra battery. For exposure, start with moderate ISO (around 400) and aperture (around f/5.6-8) andsee where that puts your shutter speed. Adjust from there with an eye toward getting theshutter speed (exposure time) you want. Pick a subject that lends itself to night photography. Remember that things look verydifferent at night, so take some test shots. Focus your camera by finding or creating areas of contrast and setting the autofocus onthose areas. When necessary, switch to manual focus. When you get home, edit your images as you wish, but you might try decreasing theHighlights, increasing the Shadows, and pulling down the Blacks slightly.If you have these things straight, you should end up with some impressive night photos. Goodluck!The dPS Ultimate Guide to Night Photography
41About the authorJim Hamel shows aspiring photographers simple, practical steps for improving their photos.Check out his free photography guides and photography tutorials at Outdoor Photo Academy.The free tips, explanations, and video tutorials he provides are sure to take your photographyto the next level. In addition, check out his book Getting Started with Photography.The dPS Ultimate Guide to Night Photography
42Share this dPS Ultimate Guide with your -guide-night-photography/Visit the dPS Facebook pagehttps://www.facebook.com/digitalpsLike this dPS Ultimate Guide on FacebookClick here to shareJoin our Digital Photography School Facebook raphyschoolgroupLearn How to Take Amazing Photos at Night withJim Hamel’s Night Photography CoursePublisher: Darren m/digitalps/The dPS Ultimate Guide to Night Photography Copyright 2018
t 8 (more about that in a second). So you need to be able to hold your camera steady and a tripod is the best choice for that.