Transcription
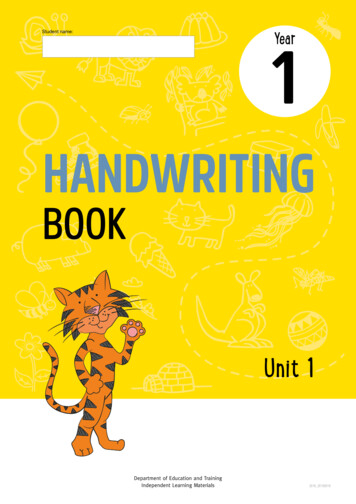
Year1Student name:HANDWRITINGBOOKUnit 1Department of Education and TrainingIndependent Learning Materials2016 20150016
The State of Queensland (Department of Education and Training) 2016COPYRIGHT STATEMENTCopyright in this publication and the content therein is owned by the State of Queensland (acting through the Department of Education andTraining) (‘the Department’) or, in the case of some materials, by third parties (‘Third Party Content’).Apart from any use expressly permitted by the Copyright Act 1968 (Cwlth), no part of this publication may be reproduced, published, adapted,communicated, or otherwise used without the prior written permission of the Department.Third Party Content may only be used as permitted by the Copyright Act 1968, or with the prior permission of the relevant third party.Queensland state educational institutions, within the meaning of the Education (General Provisions) Act 2006 (Qld), may reproduce andcommunicate all or part of this publication (retaining this notice) for non-commercial, educational purposes.This publication is only to be shared with or distributed to students of Queensland state educational institutions, their parents, staff of theDepartment, or any other person authorised by the Department.This publication is not part of NEALS.Written requests for permission should be addressed to the:Legal and Administrative Law BranchDepartment of Education and TrainingPO Box 15033, City East, Q 4002DISCLAIMER STATEMENTWhile all care has been taken in preparing this publication, the State of Queensland (acting through the Department of Education andTraining) does not warrant that the content is complete, accurate or current. The Department of Education and Training expressly disclaimsany liability for any damage resulting from the use of the material contained in this publication and will not be responsible for any loss,howsoever arising, from use of, or reliance on this material. If you rely on the information in this publication, you are responsible for ensuringby independent verification its completeness, accuracy, and currency.All material identified byis material subject to copyright under the Copyright Act 1968 (Cwlth) and is owned by the Australian Curriculum,Assessment and Reporting Authority (ACARA) 2013.For all the Australian Curriculum material except elaborations: This is an extract from the Australian Curriculum.Elaborations: This may be a modified extract from the Australian Curriculum and may include the work of other authors.Disclaimer: ACARA neither endorses nor verifies the accuracy of the information provided and accepts no responsibility for incomplete orinaccurate information. In particular, ACARA does not endorse or verify that: the content descriptions are solely for a particular year and subject; all the content descriptions for that year and subject have been used; and the author’s material aligns with the Australian Curriculum content descriptions for the relevant year and subject.You can find the unaltered and most up-to-date version of this material at http://www.australiancurriculum.edu.au. This material is reproducedwith the permission of ACARA.
ContentsStraight lines3Pattern practice: Straight lines5New pattern: Loopy7Pattern practice: Loopy9New pattern: Humpy11New letter: mM13Letter practice: mM15New letter: nN17Letter practice: nN19Revision: Humpy pattern — m and n21Letter r on the humpy pattern23New letter: r R25Letter practice: rR27Letter revision: m and n29New letter: hH31Letter practice: hH33More practice for hH35New letter: pP37Letter practice: pP39More practice for pP41
Straight linesI have been practising my straight lines.I wrote these lines from left to right.1.Trace over the lines with your finger while saying ‘left to right’.Start at the star.2. Trace over the lines with your pencil. Start at the star.Say ‘left to right’ as you write. 3. Copy the pattern. Start at the star. Say ‘left to right’. 4. Finish this pattern. Write from top to bottom and left to right.Eng Y1 U1 ILM16 Handwritingbook Page 3
Pattern practice: Straight linesThis picture of houses is made of straight lines.1. Trace over the dotted lines in the picture with your finger.2. Trace over the dotted lines in the picture with your pencil.Remember to say ‘left to right’ or‘top to bottom’ as you go.Eng Y1 U1 ILM16 Handwritingbook Page 5
New pattern: LoopyToday I’ve been practising a loopy pattern.This pattern goes round and round in thesame direction as the hands on a clock.1.Trace over the loopy pattern with your finger while saying ‘round andround’. Start at the star.ou n d a n d r oun d a n d r o u n d . . . r 2. Trace over the pattern with your pencil. 3. Copy the loopy pattern onto the lines. Eng Y1 U1 ILM16 Handwritingbook Page 7
Pattern practice: LoopyLet’s do some more practice of the loopy pattern.1. Trace over the dotted loopy patterns in the picture with your pencil.2. Remember to say ‘round and round’ as you go.Maybe you could do your own big loopydrawing or painting in your spare time.Eng Y1 U1 ILM16 Handwritingbook Page 9
New pattern: HumpyNow that you can do the loopy pattern, let’s trythe humpy pattern. It goes from left to right inthe same direction as the hands on a clock.1.Trace over the humpy pattern with your finger while saying ‘top tobottom and round’. Start at the star. 2. Trace over the pattern with your pencil.3. Copy the humpy pattern onto the line. Eng Y1 U1 ILM16 Handwritingbook Page 11
New letter: mMMake sure you have a sharp pencil ready.Sit correctly and hold your pencil properly.1.Trace over the letters m and M with your finger as you follow and saythe directions. 2. Write an m in the air.3. Trace over m with your pencil.4. Repeat steps 1 and 2 for an uppercase M. Trace over M with yourpencil.5. Write m and M twice each in the box below.Eng Y1 U1 ILM16 Handwritingbook Page 13
Letter practice: mMLet’s practise writing the letter m.1.Write m and M inside the lines.2. Write the letter m on each line to finish these words.3. Read the sentence. Trace over each m and M with your pencil.Monkeys munchmangoes.Note: U ppercase letter M is a head and body letter andlowercase letter m is a body letter.Eng Y1 U1 ILM16 Handwritingbook Page 15
New letter: nNMake sure you have a sharp pencil ready.Sit correctly and hold your pencil properly.1.Trace over the lowercase n with your finger as you follow and say thedirections. 2. Write an n in the air.3. Trace over n with your pencil.4. Repeat steps 1 and 2 for uppercase N. Trace over N with your pencil.Eng Y1 U1 ILM16 Handwritingbook Page 17
Letter practice: nNLet’s practise writing the letter nN.Remember the lowercase n looks just likethe start of the humpy pattern.1.Write n and N inside the lines.2. Write the letter n on each line to finish these words.3. Read the sentence. Trace over each n and N with your pencil.Nine numbatsnibbled nice nuts.Note: U ppercase letter N is a head and body letter andlowercase letter n is a body letter.Eng Y1 U1 ILM16 Handwritingbook Page 19
Revision: Humpy pattern — m and nLet’s practise the humpy patternand the letters m and n.1.Trace over the humpy pattern with your pencil.2. Draw the humpy pattern on the lines.3. Trace over the letter m with your pencil.4. Write the letter m to fill the line.5. Trace over the letter n with your pencil.6. Write the letter n to fill the line.Eng Y1 U1 ILM16 Handwritingbook Page 21
Letter r on the humpy patternIt’s time to practise the humpy pattern again becauseyou’re going to learn to write another letter that fitson this pattern. You already know m and n.1.Trace over the pattern with your pencil.2. Draw the pattern on the line.Look at how the letter r fits on this pattern.The humpy pattern is great because theletters r, m and n fit on it.Eng Y1 U1 ILM16 Handwritingbook Page 23
New letter: r RLet’s learn the new letter r R. Make sureyou have a sharp pencil ready. Sit correctlyand hold your pencil properly.1.Trace over the lowercase r with your finger as you follow and say thedirections. . smoothturn . . straightdown to theright . . smoothturn . 2. Write an r in the air.3. Trace over r with your pencil.4. Repeat steps 1 and 2 for uppercase R. Trace over R with your pencil.Eng Y1 U1 ILM16 Handwritingbook Page 25
Letter practice: rRLet’s practise the letter r.1.Write r and R inside the lines.2. Write the letter r on each line to finish these words.3. Read the sentence. Trace over each r and R with your pencil.Rabbits arerunning a race.Note: U ppercase letter R is a head and body letter andlowercase letter r is a body letter.Eng Y1 U1 ILM16 Handwritingbook Page 27
Letter revision: m and nLet’s practise writing the humpy pattern and the lettersm and n on the handwriting lines. The letters m and nare ‘body’ letters. They sit in the same space as my body.mn1.Trace over the humpy pattern with your pencil.2. Write the letter m on the pattern.3. Trace over the letter m with your pencil.Eng Y1 U1 ILM16 Handwritingbook Page 29
New letter: hHThe letter h is another letter that fits on the humpypattern. Get ready to start writing the letter h bychecking that you are holding your pencil correctlyand sitting properly in your chair.Look at how the letter h fits on the humpy pattern.See how it starts above the pattern.1.Trace over the lowercase h and uppercase H with your finger as youfollow and say the directions. 2. Write a lowercase h in the air. Write an uppercase H in the air.Eng Y1 U1 ILM16 Handwritingbook Page 31
Letter practice: hHLet’s practise writing the letter h.1.Write h and H inside the lines.2. Write the letter h on each line to finish these words.3. Read the sentence. Trace over each h and H with your pencil.Happy hipposare hopping.Note: B oth uppercase H and lowercase h are head andbody letters.Eng Y1 U1 ILM16 Handwritingbook Page 33
More practice for hH1.Trace over then copy the humpy pattern.2. Trace over the letter h on the humpy pattern.3. Trace over then copy the letter h.4. Trace over then copy the letter H.5. Trace over the letters h and H.hH hH hH hHEng Y1 U1 ILM16 Handwritingbook Page 35
New letter: pPYou have learned that the letters m, n, r and h canfit on the humpy pattern. The letter p also fits on thispattern. Look at how the letter p fits on the humpypattern. See how its tail goes below the pattern.1.Trace over the lowercase p and uppercase P with your finger as youfollow and say the directions. Straight to the right . . smoothturn . . smoothturn . 2. Write a lowercase p in the air. Write an uppercase P in the air.Eng Y1 U1 ILM16 Handwritingbook Page 37
Letter practice: pPI’ve been practising two things that begin withthe letter p — posture and pencil grip. Get yourselfready for some more writing practice of p. Be carefulas you retrace over the tail of p.1.Write p and P inside the lines.2. Write the letter p on each line to finish these words.3. Read the sentence. Trace over each p and P with your pencil.Pink pigs arepopping popcorn.Note: U ppercase P is a head and body letter andlowercase p is a body and tail letter.Eng Y1 U1 ILM16 Handwritingbook Page 39
More practice for pP1.Trace over then copy the humpy pattern.2. Trace over the letter p on the humpy pattern.3. Trace over then copy the letter p.4. Trace over then copy the letter P.5. Trace over the letters p and P.pP pP pP pP pPEng Y1 U1 ILM16 Handwritingbook Page 41
Straight lines I have been practising my straight lines. I wrote these lines from left to right. 1. Trace over the lines with your finger while saying ‘left to right’. Start at the star. 2. Trace over the lines with