Transcription
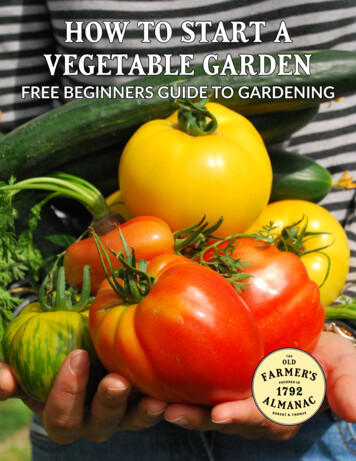
HOW TO START AVEGETABLE GARDENFREE BEGINNERS GUIDE TO GARDENING1THE OLD FARMER’S ALMANAC
INDEXHOW TO START A VEGETABLE GARDENFREE BEGINNERS GUIDE TO GARDENING5 GARDEN PLANNING TIPS.3CHOOSING WHICH VEGETABLES TO GROW.3FREE SAMPLE GARDEN PLANS.4BENEFITS OF GARDEN PLANNING SOFTWARE.5CHOOSING A LOCATION FOR YOUR GARDEN.6SOIL PREPARATION: BUILDING THE SOIL.7SOWING SEEDS.8TRANSPLANTING IN THE GROUND.9FERTILIZING.10PLANT GROWING GUIDES.13GARDEN PESTS.17RAISED BED GARDENING.17CONTAINER GARDENING .19PREPARING YOUR GARDEN FOR WINTER.191THE OLD FARMER’S ALMANAC
LEARN MORE
HOW TO START A VEGETABLE GARDENAre you wondering how to fit gardening into your life? Start small! With a bit of planning, you can master thebasics—and then go beyond. In this guide, you will find everything you need to know to make a garden grow.So, roll up your sleeves and read on!5 GARDEN PLANNING TIPSWHERE TO START? HERE ARE 5 TIPS TO CONSIDER:1. Space is often the biggest limitation. Think about how much space you have for growing. Once you selectyour vegetables, you will notice that some plants take more room to grow than others, and you will needto make some choices. For example, corn needs a lot of space and can over-shadow shorter vegetables.Plants set too close together compete for sunlight, water, and nutrition and fail to mature. If you are tighton room, remember you can always grow vegetables in con-tainers.2. Length of the growing season in your region is very important. If you live in the far North, some vegetables may not mature during your growing season. The Almanac lists the first and last frost dates for yourseason: Almanac.com/frostdates View Almanac.com/plantingdates calculator for sowing and plantingdates by location and frost dates.3. Seriously think about how much time you have to devote to your garden. For example, bush beans growprolifically with little care. Radishes almost grow themselves. However, tomatoes will require staking andpruning. (We have more information on easy-to-grow crops below!)4. Understand the timing of harvest. For example, warm-season vegetables such as peppers will start laterthan cool-season vegetables such a lettuce and broccoli. (More on which vegetables to choose later.)5. Test out the Almanac Garden Planner software. We’ve done the research for you. The planner calculateshow many vegetables fit in a space, as well as the planting and harvesting dates for every vegetable! It willsave you a lot of headaches (and money) and yield bigger harvests. Go here to try the Garden Planner forfree for 7 days: Almanac.com/gardenplannerCHOOSING WHICH VEGETABLES TO GROWOnly grow things that you like to eat. There’s no sense in cultivating veggies destined for the compost heap.The vegetables suggested below are common, productive plants, but you’ll also want to con-tract your localcooperative extension to determine what plants grow best in your local area. Think about what you like to eat aswell as what’s difficult to find in a grocery store or farmers’ market. Tomatoes—5 plants stakedZucchini squash—4 plantsPeppers—6 plantsCabbageBush beansLettuce, leaf and/or BibbBeetsCarrotsChardRadishesMarigolds to discourage rabbits!(Note: If this garden is too large for your needs, you do not have to plant all 11 rows, and you can also make the rows shorter.)3THE OLD FARMER’S ALMANAC
FREE SAMPLE GARDEN PLANSHere’s a tip: A good-size beginner vegetable garden is about 16x10 feet. A plot this size, based on the easy vegetables suggested above, can feed a family of four for one summer, with a little extra for canning and freezing (orgiving away). Make your garden 11 rows wide, with each row 10 feet long. The rows should run north and southto take full advantage of the sun.SAMPLE PLANS FROM ALMANAC GARDENERS!1. Backyard Garden Plan: Traditional Rows Garden Size: 29’ 11” x 29’ 11” Garden Type: Backyard / back garden Garden Layout: Traditional layout - rows etc Sun or Shade: Sunny See plant lists and more details about this garden here.2. Backyard Garden Plan: Raised Beds Garden Size: 23’ 11” x 23’ 11” Garden Type: Backyard / back garden Garden Layout: Raised Beds Sun or Shade: Sunny Garden Soil Type: Good soil See plant list and more details about this garden here.3. Backyard Garden Plan: Traditional Rows Garden Size: 25’ 0” x 15’ 11” Garden Type: Home garden Garden Layout: Traditional layout—rows Sun or Shade: Sunny Garden Soil Type: Heavy / Clay soil See full plant list and more details about this garden here.4. Small Garden Plan: Raised Beds Garden Size: 50’ 0” x 21’ 11” Garden Type: Home garden Garden Layout: Raised Beds Sun or Shade: Sunny Garden Soil Type: Good soil See full plant list and more details about this garden here.You will find hundreds of free garden plans using our Almanac Garden Planner!4THE OLD FARMER’S ALMANAC
BENEFITS OF GARDEN PLANNING SOFTWAREThe above plans were created using the Almanac Garden Planner software. We can’t emphasize enough the importance of planning for a more productive garden.The Garden Planner will: Help you plan where each plant goes. With over 250 plants and 100 structures, you can easily identify thebest positions for each plant and move them around until you get the perfect layout. Make the most of your available space. See how many plants will fit and which crops can occupy the samespace in your garden at different times of the year. Make sure you plant at the right times. You’ll receive reminders by email when it’s time to start planting,specifically for your garden and your climate.We’re offering a free 7-day trial—ample time to play around and plan your first garden.Go here: Almanac.com/gardenplanner5THE OLD FARMER’S ALMANAC
CHOOSING A LOCATION FOR YOUR GARDENWhether you’re starting a new garden or extending an existing one, give careful consideration to where to site it.The right location gives your crops the best chance of success. When choosing a site, note the following environmental conditions:SunPick the right site. Most vegetables need at least 6 hours of sunlight a day, although some crops, such as broccoli,lettuce, spinach, and other greens will grow well in less sunny spots.In general, the more sunlight they receive, the greater the harvest and the better the taste.Tip: In cooler climates, a suntrap is ideal for tender crops. In hot climates, growing under shade cloth or in theshadow of taller climbing plants, such as pole beans, helps to expand the choice of what you can grow in theseconditions.Also, avoid planting crops near large trees which will not only cast shade, but compete with your vegetables fornutrients and water.Air CirculationGood airflow will encourage sturdy growth in your plants and help keep fungal diseases at bay. It also makes thegarden less hospitable to insect pests such as whitefly that prefer a stag-nant, humid environment.Bear in mind that solid walls or fences may provide shelter but they can also cause the wind to form destructiveturbulence on the leeward side, so don’t plant too close to them. Hedges and open or woven fences are moreeffective, as they filter wind rather than deflect it.Shelter from winds is helpful for most crops, especially peppers, eggplant, peas, beans, and any climbing vegetables.MoistureBe sure water is readily available. Nothing burns out a beginning gardener faster than having to lug water tothirsty plants during a heat wave.Extra water is likely to be necessary during dry weather, so locate new beds close to an outdoor water source. Thesoil near walls, fences, and under overhanging trees tends to be too dry for good plant growth, which is why anopen area is best.FrostCold air is heavier than warm air so it settles in low points in the garden and near structures such as walls andfences. Avoid planting in these potential frost pockets; they can delay the time when you can start sowing seedsand they can damage young growth.6THE OLD FARMER’S ALMANAC
SOIL PREPARATION: BUILDING THE SOILGood soil is the key to a successful garden. Soil may be the most overlooked aspect of gardening—and the mostimportant. Good-quality soil provides plants with essential nutrients necessary to reap a good harvest.In general, the goal is to enrich soil with compost to provide needed nutrients. Compost, leaf-mould, or wellaged manure will increase the ability of your soil to both drain well and hold moisture—the “sponge factor.”Never use fresh manure! It can harbor dangerous pathogens and will burn tender plant roots. Compost it for atleast 6 to 12 months.Here are some guidelines to help ensure your soil is tip-top: Test your soil. Results will reveal its pH, phosphorus, lime, potassium, soluble salts, and texture. For accurate results, contact your local cooperative extension service office for a free (or low-fee) soil test. Theywill provide recommendations for any needed amendments. Start with well-drained, sandy loam and add as much organic matter as possible. Plant roots penetratesoft, loamy soil more easily. If you have sandy soil, add humus or aged manure,peat moss, or sawdust. Heavy, clay-rich soil can alsobe added to improve the soil. If you have silt soil, add coarse sand (not beach sand)or gravel and compost, or well-aged horse ma-nuremixed with fresh straw. If you have clay soil, add coarse sand (not beach sand), compost, and peat moss. If you have impossibly rocky soil or solid clay, consider building some raised beds that you can fill withgood soil. Growing vegetables in containers or grow bags are also options. Proper drainage is essential; water-logged plant roots will negatively impact plant health.Soil AmendmentsIf your soil needs replenishing, these materials can be of help: Bark, ground: made from various tree barks; improves soil structureCompost: excellent conditionerLeaf mold: decomposed leaves that add nutrients and improve soil structureLime: raises the pH of acid soil and helps loosen clay soilManure: best if composted; good conditionerPeat moss: conditioner that helps soil retain waterSand: improves drainage in clay soilTopsoil: usually used in combination with another amendment for added soilRemember: You should build your soil, but also you have to work with nature. If you have cold, clay soil, it takeslonger to warm up in the spring. Consider raised beds, plastic mulch, and indoor seed-starting to get startedearlier. If you have light soil, your early crops will thrive but you may struggle with later crops which dry out;consider building trenches alongside plants and irrigate more often to keep soil from drying out.7THE OLD FARMER’S ALMANAC
SOWING SEEDSSeeds or plants? Most garden vegetables can be directly seeded where they are to grow, including: lettuce, beans,carrots, beets, chard, spinach, peas, cukes, and squash. Starting with small plants rather than seeds is a good ideafor crops that take longer to mature.View Almanac.com/plantingdates calculator for sowing and planting dates for each vegetable.Purchase transplants for tomatoes, peppers, eggplant, and melons (or start your own indoors 6 to 8 weeks beforeplanting them outside). Also, if you wish to speed up the season, consider a raised bed garden as the soil willwarm up more quickly.If you decide to grow from seed (versus young plants), be sure to buy high-quality seeds. If seeds don’t germinate, that’s time and money wasted. A few extra cents spent in spring for that year’s seeds will pay off at harvesttime with higher yields.Selecting Seeds Buy from a reliable source. For a list of garden seed catalogs and mail-order sources,go to Almanac.com/seedcatalogsChoose quality seed. It will be true to cultivar/variety name, and will not contain contaminants, such asweed seed, insect casings, soil particles, or plant pulp.Choose varieties suitable for your area that will reach maturity before frost, survive heat, and tolerateyour growing conditions.Purchase only enough seed for use in the current season (viability decreases with stored seed).Germinating SeedsGermination is affected by four environmental factors: water, oxygen, light, and temperature. Manage them correctly and your seeds are sure to sprout. Read your seed packets to know the requirements of each crop.Water:It’s important to know how much water to give your seedlings; they will remain dormant if they are too dry andcan rot if too wet. Adequate and consistent moisture is ideal. A gentle daily misting with a spray bottle should dothe trick. Covering seeds with a thin layer of vermiculite or peat moss also helps.Oxygen:For seeds to get enough oxygen, your soilless growing medium needs to drain well. Heavy, wet media cause anaerobic conditions, which inhibit germination.Light:Plants’ light requirements vary from crop to crop; where you locate your seeds will determine how much lightthey receive per day.Temperature:Temperature affects the number of seeds that germinate and how quickly they germinate. Some seeds have a veryspecific temperature range for germination, while others will germinate over a broad range of temperatures. A65 to 75 F range is typical for most seeds.8THE OLD FARMER’S ALMANAC
SOWING SEEDSPotting Soil for Starting SeedsWhen it comes time to start seeds, plan to use a sterile, soilless potting medium. Sterile mixes have been treatedto be free of weed seeds and disease organisms. Do not use garden soil—it’s much too heavy and holds too muchwater for germination. A fine, uniform texture is what’s needed. If you are up for a little experiment, you caneven make your own . . .For a basic mix, use: 1 bucket (2½ gallons) peat moss 1 bucket(2½ gallons) vermiculite or perlite A half bucket (1¼ gallons) screened compost or composted cow manure 2 cups fine sand 2 cups pelleted time-release fertilizer ½ cup lime (to counter the acid of peat and keep the pH level near neutral)Mix thoroughly. Makes enough to fill two 14-inch tubs. Double or triple recipe for bigger containers.TRANSPLANTING IN THE GROUNDIf you started vegetable plants indoors from seeds or you purchased small plants—sometimes called “plugs”—here is advice on transplanting them into your beds: 9Check our Planting by the Moon’s Phase calendar.During your seedlings’ last week indoors, withhold fertilizer and water less often—this helps toughenthem up.7 to 10 days before transplanting, set the seedlings outdoors in dappled shade, protected from wind for afew hours each day, gradually increasing their exposure to full sun and windy conditions—this hardensthem off in preparation for transplanting into the ground.Keep the soil moist at all times during the hardening-off period. Dry air and spring breezes can result inrapid transpiration.If possible, transplant on overcast days or in the early morning.Set transplants into loose, well-aerated soil that will capture and retain moisture, drain well, and alloweasy penetration by young roots.Soak the soil around new seedlings immediately after transplanting.Spread mulch to reduce soil-moisture loss.To ensure that phosphorus, which promotes strong root development, is available in the root zone ofnew transplants, mix 2 tablespoons of a 15-30-15 starter fertilizer into a gallon of water (1 tablespoon forvining crops, such as melons and cucumbers), and give each seedling a cup of the solution af-ter transplanting.THE OLD FARMER’S ALMANAC
FERTILIZINGThe three primary nutrients plants need are nitrogen (N), phosphorus (P), and potassium (K). These are available in chemical/synthetic (nonorganic) fertilizers. The numbers of each nutrient indicate the percentage of netweight contained. For example, a100-pound bag of 10-10-10 contains ten pounds of each element.Nitrogen promotes strong leaf and stem growth and dark green color, such as desired in broccoli, cab-bage,lettuce, and herbs. Add aged manure to the soil and apply alfalfa meal or fish or blood meal to increase availablenitrogen.Phosphorus promotes root and plant growth, including setting blossoms and developing fruit, and seed formation; it’s important for cucumbers, peppers, squash, and tomatoes—any edible that develops after a flower hasbeen pollinated. Add (fast-acting) bonemeal or (slow-release) rock phosphate to increase phosphorus.Potassium promotes plant root vigor and disease and stress resistance and enhances flavor; it’s vital for carrots,radishes, turnips, and onions and garlic. Add green sand, wood ashes, gypsum, or kelp to increase potassium.What to Know About pHIt’s important that garden soil has the proper soil pH. A very high or very low soil pH may result in plant toxicity or nutrient deficiency. A pH value of 7 is neutral; microbial activity is greatest and plant roots absorb/accessnutrients best when the pH is in the 5.5 to 7 range.When to FertilizeWoody plants and perennials absorb nutrients from the soil during the growing season; they require fewnutrients while dormant. Therefore, apply fertilizer as soon as the plants begin breaking dormancy in the spring.Follow instructions on the label as to how often to apply (this depends on the type of fertilizer used).Stop applications after the first fall frost.Food crops also benefit from an early-start fertilizing schedule. Some “feed” on fertilizers lightly, others are considered heavy feeders, and require more regular applications throughout the growing season.Choosing Fertilizer: Granular Vs. SolubleGranular fertilizers are solids that must be worked into the soil and given time (and water) before they dissolveand become available to plants.Slow-release fertilizers are a subset of granular formulations. A portion of the fertilizer is not immediatelyavailable to the plant. Nutrients are metered out over several weeks. Therefore, they are applied less frequently.Sometimes called “liquid feed,” soluble fertilizers are sold as either ready-to-use solutions or as packageddry-milled materials that need to be dissolved in water. These tend to be quick-release fertilizers high in nitrogenthat result in fast green growth.10THE OLD FARMER’S ALMANAC
FERTILIZINGHow to Apply Granular FertilizersApply granular fertilizer by broadcasting it either by hand or with a spreader. Using a hoe, spade fork, or rakework it into the top 4 to 6 inches of soil. You can also add small amounts to planting holes (be sure to mix it inwith backfill soil) or to rows as you sow seeds or plant plugs. It’s a good idea to water after you have appliedfertilizer to help it leach down toward the plants’ root zones.During the growing season, add supplemental fertilizer to the top inch of soil in crop rows, perennial beds, andaround the drip line of trees or shrubs. (Read the label to find out how often applications should be made.)How to Apply Liquid FertilizersFast-acting liquid fertilizers are typically applied biweekly during the growing season. They are best used forcontainer plantings and annuals.With flowering and fruiting plants, foliar sprays are most useful during critical periods, such as aftertransplanting or during fruit set, or periods of drought or extreme temperatures. For leaf crops, some suppliersrecommend biweekly spraying.Foliar SprayingPlants can absorb liquid fertilizers through both their roots and through leaf pores. Foliar feeding can supplynutrients when they are lacking or unavailable in the soil, or when roots are stressed. It is especially effective forgiving fast-growing plants like vegetables an extra boost during the growing season. Some foliar fertilizers, suchas liquid seaweed (kelp), are rich in micronutrients and growth hormones. These foliar sprays improve nutrientuptake by plants. Compost tea and seaweed extract are two common exam-ples of organic foliar fertilizers.To apply, simply mix the foliar spray in the tank of a backpack sprayer or hand mister set to emit a fine spray, andspray all your plants at the same time. (Never use a sprayer that has been used to apply herbi-cides.)Spray until the liquid drips off the leaves. Concentrate the spray on leaf undersides, where leaf pores are morelikely to be open. You can also water in liquid fertilizers around the root zone. A drip irrigation sys-tem cancarry liquid fertilizers to your plants. Kelp is a better product for this use, as fish emulsion can clog the irrigationemitters.Tip: The best times to spray are early morning and early evening, when the liquids will be absorbed most quicklyand won’t burn foliage. Choose a day when no rain is forecast and temperatures aren’t extreme.11THE OLD FARMER’S ALMANAC
FERTILIZINGCOMPOST TEASome gardeners prefer to use compost tea for fertilizing. Compost tea is a liquid produced by extractingbeneficial microorganisms (microbes)—bacteria, fungi, protozoa, nematodes, and micro arthropods—fromcompost using a brewing process. A true compost tea contains all of the organisms that were present in thecompost before brewing.How to Make Compost TeaCompost tea can be made with or without aeration, and with or without adding supplemental nutrient sourceslike molasses to feed microbes. For best results, aeration and supplements are recommended, and the rightcompost is critical.To learn how to make compost, visit e-how-get-yourcompost-heap-cooking.This sample recipe is good for vegetable crops:Materials 5-gallon bucket, filled with water (let it sit for 24 hours to allow chlorine to evaporate)1 fish tank aerator1 compost tea brewing bag (either purchase one online or make one from a scrap of meshed materialsuch as row covering, tied with twine—it should be large enough to hold 5 to 6 pounds of dryingredients)1 aquarium thermometerIngredients 1 large handful of compost1 handful of garden soil2 handfuls of straw1 cup fish hydrolysate (pulverized fish, available at most garden centers)1 cup seaweed extract (available at most garden centers)InstructionsPut the first three ingredients ingredients into the tea bag, tie the bag tightly and submerge it in the bucket ofwater. Add the fish hydrolysate and seaweed extract liquids directly to the water. Place the aerator in the bucketand turn it on. Brew the tea for about 36 hours, monitoring temperature—the optimal temperature is between68 and 72 F. Dilute it to a 3 parts tea to 1part water ratio before spraying. Fill a backpack sprayer. Spray early inthe morning or late in the evening to avoid burning leaves in the midday sun.Tip: If you do not have a backpack sprayer, apply tea to the soil using a gallon jug, and a spray bottle to mist thefoliage.12THE OLD FARMER’S ALMANAC
PLANT GROWING GUIDESHere are vegetable growing guides for five popular crops, including three popular vegetables (beets, carrots, andtomatoes) and three popular herbs (basil, thyme, and rosemary).For over 100 plant growing guides, go to Almanac.com/plants.How to Grow BeetsBeets are delicious, whether grated into salads, roasted in oil,boiled, or made into soup (borscht). They’re also really easyand quick to grow from seed.For best results grow beets in rich, fertile soil in full sun.(They can also be grown in containers.)Sowing Seeds Sow seeds outdoors from mid-spring until the middle of summer. (You can sow a couple of weeks earlier using a hoop house or row cover for protection.) Our Garden Planner will recommend ideal sowingtimes for your location.Mark out seed drills into prepared soil 1 inch deep and 1 foot apart.Pop a beet seed into the drill every 1 to 2 inches.Cover the drill over with soil and pat down.Alternatively, sow seeds into plug trays, which are great for early crops started under cover. Sow two orthree seeds into each cell.Note: Beet seeds are actually capsules that contain several seeds, so you may get two or three sproutsfrom each one.After Germination Thin out rows of direct-sown seedlings to 4 inches apart.Plant clusters of plug tray-grown seedlings 8 to 10 inches apart in each direction. The plants will naturallypush each other apart as they grow, and don’t need to be thinned.Keep plants watered in dry weather. This will promote good, even growth and reduce the risk of bolting,or flowering, which renders the root inedible.Keep beets weeded by hand, or by carefully hoeing between rows.Harvesting and StoringHarvest beets when they’re between the size of a golf ball and the size of a tennis ball. Dig them out, or just gather the base of the stems and twist the root out of the soil.Tip: If you experience mild winters you can leave beets that were sown later in the season in the ground longer,harvesting as you need them. Or, store roots in boxes of dry sand in a cool, dry, frost-free place.13THE OLD FARMER’S ALMANAC
PLANT GROWING GUIDESHow to Grow CarrotsCarrots are a popular root vegetable that are easy to grow insandy soil. They are resistant to most pests and diseases, and area good late-season crop that tolerates frost.Planting Plant seeds outdoors 3 to 5 weeks before the last springfrost date.Make sure your soil is free of large rocks; carrots needdeeply tilled soil that they can root down deep.Soil should be well drained and loose to prevent forkedand stunted growth.Plant seeds 3 to 4 inches apart in rows. Rows should beat least a foot apart.Tip: Do not add fresh manure before sowing seed; it can causecarrots to fork and send out little side roots.Caring Gently mulch to retain moisture, speed germination, and block the sun from scorching the roots.Once plants are an inch tall, thin so they stand 3 inches apart. Snip them with scissors instead of pullingthem out to prevent damage to the roots of remaining plants.Water at least 1 inch per week.Weed diligently.Fertilize 5 to 6 weeks after sowing.Tip: Carrots taste much better after a couple of frosts. Following the first hard frost in the fall, cover your rowswith an 18-inch layer of shredded leaves to preserve them for harvesting later.Harvesting and Storing Carrots are mature at around 2 ½ months and ½ inch in diameter—that’s the time to start harvesting.You can leave mature carrots in the soil for storage if there is no threat of the ground freezing.To store freshly harvested carrots, twist off the tops, scrub off the dirt under cold running water, let dry,seal in airtight plastic bags, and refrigerate. If you simply put fresh carrots in the refrigerator, they’ll golimp in a few hours.Tip: Carrots can be stored in tubs of moist sand for winter use.14THE OLD FARMER’S ALMANAC
PLANT GROWING GUIDESHow to Grow TomatoesTomatoes are America’s favorite garden vegetable. (Technically, we eat the fruit of the tomato plant, but it’s used as avegetable in eating and cooking and, thus, usually categorized in vegetables.)Planting If you’re planting seeds (versus purchasing transplants), you’ll want to start your seeds indoors 6 to 8weeks before the average last spring frost date. See our post on “Tomatoes From Seed the Easy Way.” Select a site with full sun and well-drained soil. For northern regions, is is very important that your sitereceives at least 6 hours of sun. For southern regions, light afternoon shade will help tomatoes surviveand thrive. Two weeks before transplanting seedlings outdoors, till soil to about a foot and mix in aged manure,compost, or fertilizer. Harden off transplants for a week before moving outdoors. Transplant after last spring frost when the soil is warm. See our Best Planting Dates for Transplants foryour region. Plant seedlings two feet apart, pinching off a few of the lower leaves and planting the root ball deepenough so that the remaining lowest leaves are just above the surface of the soil. Water well to reduce shock to the roots.Tip: Establish tomato stakes or cages in the soil at the time of planting. Staking keeps fruit off the ground, whilecaging keeps the plant growing upright. Some sort of support system is recommended.Caring Water generously for the first few days.Water well throughout the growing season, about 2 inches per week during the hottest part of the summer.Mulch 5 weeks after transplanting to retain moisture.To help tomatoes through periods of drought, place a few flat rocks next to each plant; the rocks will pullwater up from under the ground and keep it from evaporating.Fertilize 2 weeks prior to the first harvest and again 2 weeks after the first harvest.If using stakes, prune plants by pinching off suckers so that only a couple stems are growing per stake.Harvesting and Storing Leave your tomatoes on the vine as long as possible. If any fall off before they are ripe, place them in apaper bag with the stem up and store them in a cool, dark place. Mature, ready-to-harvest tomatoes are firm and very red, regardless of size, with perhaps some yellowremaining around the stem. A ripe tomato will be only slightly soft. Pick tomatoes continuously as theyredden. If your tomato plant still has fruit when the first hard frost threatens, pull up the entire plant and hang itupside down in the basement or garage. To freeze, core fresh, unblemished tomatoes and place them whole in freezer bags or containers. Seal,label, and freeze. The skins will slip off when they defrost.Tip: Nev
Purchase transplants for tomatoes, peppers, eggplant, and melons (or start your own indoors 6 to 8 weeks before planting them outside). Also, if you wish to speed up the season, consider a raised bed garden as the soil will warm up more quickly. If you decide to grow from seed