Transcription
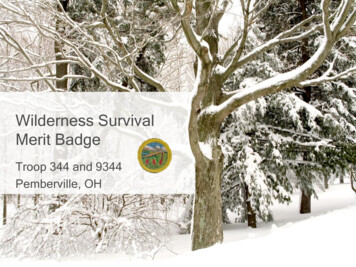
Wilderness SurvivalMerit BadgeTroop 344 and 9344Pemberville, OH
Wilderness SurvivalMerit Badge Requirements1. Do the following:a. Explain to your counselor the hazards you are mostlikely to encounter while participating in wildernesssurvival activities, and what you should do toanticipate, help prevent, mitigate, or lessen thesehazards.b. Show that you know first aid for and how to preventinjuries or illnesses likely to occur in backcountrysettings, including hypothermia, heat reactions,frostbite, dehydration, blisters, insect stings, tick bites,and snakebites.2. From memory list the seven priorities for survival in abackcountry or wilderness location. Explain the importanceof each one with your counselor.
Wilderness SurvivalMerit Badge Requirements3. Describe ways to avoid panic and maintain a high level ofmorale when lost, and explain why this is important.4. Describe the steps you would take to survive in the followingexposure conditions:a. Cold and snowyb. Wetc. Hot and dryd. Windye. At or on the water5. Put together a personal survival kit and be able to explainhow each item in it could be useful.6. Using three different methods (other than matches), buildand light three fires.
Wilderness SurvivalMerit Badge Requirements7. Do the following:a. Show five different ways to attract attention when lost.b. Demonstrate how to use a signal mirror.c. Describe from memory five ground-to- air signals andtell what they mean.8. Improvise a natural shelter. For the purpose of thisdemonstration, use techniques that have little negativeimpact on the environment. Spend a night in your shelter.9. Explain how to protect yourself from insects, reptiles, bears,and other animals of the local region.10. Demonstrate three ways to treat water found in the outdoorsto prepare it for drinking.
Wilderness SurvivalMerit Badge Requirements11. Show that you know the proper clothing to wear while in theoutdoors during extremely hot and cold weather and duringwet conditions.12. Explain why it usually is not wise to eat edible wild plants orwildlife in a wilderness survival situation.
Requirement 1Do the following:a. Explain to your counselor the hazards you are most likelyto encounter while participating in wilderness survivalactivities, and what you should do to anticipate, helpprevent, mitigate, or lessen these hazards.b. Show that you know first aid for and how to prevent injuriesor illnesses likely to occur in backcountry settings,including hypothermia, heat reactions, frostbite,dehydration, blisters, insect stings, tick bites, andsnakebites.
1a. Hazards in the WildernessCommonsense ways to increase your safety and yourenjoyment of outdoor adventures are covered in theseven points of the BSA’s Trek Safely plan: Qualified Supervision. Whenever planning a trek, makesure your group includes a mature, conscientious adult atleast 21 years old who understands the potential risksinvolved in the trip and can take responsibility for thegroup’s safety. One additional adult who is at least 18years old must also accompany the group.Keep Fit. You can train for a trip in the outdoors just likeany other athletic event. Start slowly, gradually increasingthe duration and intensity of your workouts, to build yourphysical fitness and stamina. Staying in good shape helpskeep you ready for the physical demands of a trek.
1a. Hazards in the Wilderness Plan Ahead. Any trip you plan should match the skill leveland fitness of the members of your group. Remember toget permission from the land owner if you plan to cross oruse private land, and research the terrain, elevationranges, trails, wildlife, campsites, typical weatherconditions, and environmental issues for the period of thetrek. Know where you’re going and what to expect.Gear Up. Before you leave, get topographic maps andcurrent trail maps for the area. Take equipment—includinga first-aid kit—and clothing that is appropriate for theweather and is in good condition. Wear proper protectionagainst the sun and biting insects and animals, andremember to adjust clothing layers to match the weatherconditions. Drink plenty of water to stay hydrated.
1a. Hazards in the Wilderness Communicate Clearly and Completely. Communication iskey to a safe outdoor adventure, and staying in touch withhome base is the first step. Complete a trip plan and sharethe details of your trek with someone back home.Monitor Conditions. The leaders are responsible formaking good decisions during the trip, based on theirknowledge of the group’s abilities. Keep an eye on weatherconditions before and during the trip, and continuallymonitor your food and water, the group’s morale, and theirphysical condition. Don’t enter into a dangerous situation.Discipline. Make sure everyone in your group understandsthe rules and procedures for safe trekking. Whenparticipants know the reasons behind the rules, they aremuch more likely to follow them.
1a. Trip Plan A trip plan answers five questions, each beginningwith the letter W:––––– Where are we going and by which route?When will we return?Who is going along?Why are we going?What are we taking with us?A copy of your trip plan should be left back home withone or more persons who are responsible, reliable,and available.If you don’t return as scheduled, those back homecan alert search-and-rescue personnel and give thema good idea where to start looking for you.
1b. Heat Emergencies11
1b. Heat Exhaustion Symptoms Heavy sweatingThirstFatigueHeat crampsHeadacheDizzinessNauseaVomiting12
1b. First Aid for Heat Exhaustion Move victim from heat to rest in acool place.Loosen or removeunnecessary clothing.Give water or a sports drink.Raise feet 8-12 inches.Put cool, wet cloths onforehead and body – spray skin withwater.Seek medical care if victim’scondition worsens or does notimprove within 30 minutes.13
Heatstroke14
1b. First Aid for Heat StrokeCall 911.Move victim to cool place.Remove outer clothing.Cool victim quickly.Apply cold compresses orspray skin with water. Put ice bags or cold packsbeside neck, armpits, andgroin. 15
1b. Hypothermia Occurs when body cannot make heat as fast as it losesit.Internal body temperature drops below 95oF.Can occur whenever and wherever a person feels cold,including indoors in poorly heated areas.16
1b. First Aid for Hypothermia Move victim to shelter.Remove wet clothing and wrapvictim in warm covers.Apply direct body heat.Re-warm neck, chest,abdomen, and groin first.Give warm, sweet drinks ifconscious.Monitor breathing,administer CPR.Get medical help.17
1b. Frost Nip Frost nip is an earlier and mildercase of frostbite. Usually the ears,cheeks, nose, fingers and toes areaffected.Skin white or numb.Don’t rub – hold against a warmbody part.Change clothing and/or environment.Frost nip is a warning that you arenot keeping warm enough!18
1b. Frostbite Mild Frostbite: Skin looks waxy andwhite, gray, yellow, orbluish.Area is numb or feelstingly or aching Severe Frostbite: Area feels hard.May become painlessAfter warming, areabecomes swollen andmay blister.19
1b. First Aid for Frostbite Move victim to warm environment.Hold frostbitten area in hands towarm – do not rub.Remove any tight clothing or jewelryaround area.Put dry gauze or fluffy cloth betweenfrostbitten fingers or toes.Do not use heat lamp, campfire, orheating pad to rewarm.Seek medical attention immediately.20
1b. Prevention of Frostbite Be sure you dress in layers for coldweather. The first layer should be thermalunderwear, and the outer layer needs tobe waterproof. The layers should be loose,not tight. Mittens are warmer than gloves.You should wear a hat. Over 50% of ayour body heat is lost from the head.Set limits on the time spent outdoors whenthe wind-chill temperature falls below 0 F(-18 C).Recognize the earliest warnings offrostbite. Tingling and numbness arereminders that your are not dressedwarmly enough for the weather and needsto go indoors.21
1b. Dehydration When the body puts out more liquid thanit is taking in.Ways we lose fluids: Signs of dehydration: Sweating.Urination.Vomiting.Thirst.Yellow or dark urine.Dry mouth.Lightheadedness.Nausea and vomiting.Dry skin.Cease sweating.Treatment: Drink fluids (water, Gatorade).Avoid physical activity.Get inside air conditioned or cool area.22
1b. Blisters A blister is skin injurythat is usually filledwith water. Blisters commonlyoccur on the feet orhands. They are most oftencaused by the handsor feet rubbingagainst something(such as wearingnew shoes).23
24
1b. Treatment for Blisters Do not open the blisters, sincethis increases the possibility ofinfection.Clean the skin around it.Take the pressure off the areaby placing a Band-Aid over theblister or Moleskin with a holecut in the center.If the blister accidentally breaksopen, trim off the loose skin.Keep the surface clean bywashing it twice a day with anantibacterial soap (such as Dialor Safeguard).Apply an antibiotic ointment anda Band-Aid to help with healing.25
1b. Popping a Blister If a blister is in a frequently used areathat has a high risk of rupturing, it maybe best to pop it to make sure it’sproperly protected against infection.Wash your hands and the blisterthoroughly.Disinfect a needle with alcohol.Carefully puncture the blister.––– Cover the blister with a first aid ointmentsuch as Neosporin.Apply a dressing.– Poke three or four shallow holes around theedge of the blister.You want to keep as much of the skin intactas possible.Allow the fluid to drain out.Cover the blister tightly with a bandage orgauze.Repeat if necessary.––You may need to perform these steps everysix to eight hours for the first 24 hours.After that, change the dressing and applyointment daily.26
1b. Preventing Blisters Friction can also bereduced by wearingtwo pairs of socks.Place Moleskin onsensitive areas werethe friction may occur.27
1b. Insect Bites Bites of mosquitoes and chiggers (harvest mites usuallycause itchy, red bumps. The size of the swelling can varyfrom a dot to a half inch.Signs that a bite is from a mosquito are: itchiness, acentral raised dot in the swelling, a bite on skin notcovered by clothing, and summertime,Bites from horseflies, deerflies, gnats, fire ants, harvesterants, blister beetles, and centipedes usually cause apainful, red bump.Fire ant bites change to blisters or pimples within a fewhours.28
1b. Treatment of Insect Bites Apply calamine lotion or a baking soda pasteto the area of the bite.If the itch is severe (as with chiggers), applynonprescription 1% hydrocortisone creamfour times a day.Do not to pick at the bites or they canbecome infected or leave scars.Cold, moist compresses or ice on the areacan help.29
1b. TickBites Can transmit Rocky Mountain spottedfever or Lyme disease.Tick embeds its mouth parts in skinand may remain for days suckingblood.30
1b. Engorged Tick31
1b. TickRemoval Grasp the tick’s mouthpartsagainst the skin, using pointedtweezers. Pull steadily without twisting untilyou can ease the tick headstraight out of the skin. DO NOT squeeze or crush thebody of the tick. DO NOT apply substances suchas petroleum jelly, nail polish, or alighted match to the tick while it isattached.32
1b. Tick Removal (cont.) Once you have removed the tick,wash the wound site and your handswith soap and water, and applyrubbing alcohol or antiseptic to thesite.Observe the bite over the next twoweeks for any signs of an expandingred rash or flu-like symptoms (LymeDisease).Lyme Disease Rash33
1b. Bee Stings Honey bees, bumble bees, hornets,wasps, and yellow jackets can allsting.These stings cause immediatepainful red bumps.While the pain is usually better in 2hours, the swelling may increase forup to 24 hours.34
1b.Treatment of Stings If you see a little black dot in thebite, the stinger is still present(this only occurs with honey beestings).Remove it by scraping it off with acredit card or something similar.For persistent pain, massage withan ice cube for 10 minutes.Give acetaminophen immediatelyfor relief of pain and burning.For itching, apply hydrocortisonecream.35
1b. Poisonous Snakebite In the U.S. the poisonous snakes arerattlesnakes, copperheads, cottonmouths, andcoral snakes.Currently about 8,000 people per year in the U.S.are bitten by a poisonous snake, of which about 6will die.36
1b. First Aid for PoisonousSnake Bites Have victim lie down and stay calm.Keep bitten area immobile and below levelof heart.Call 911.Wash bite wound with soap and water.Remove jewelry or tight clothing beforeswelling.Do not try to catch snake but noteappearance.If possible, wrap entire extremity withelastic (compression) bandage to slowspread of venom.Do not use a tourniquet.Do not cut wound open to try to drain orsuck venom out.37
Requirement 2From memory list the seven priorities for survival in a backcountryor wilderness location. Explain the importance of each one withyour counselor.
2. Seven Priorities for Survival in aWilderness Location1.2.3.4.5.6.7.STOPProvide first aidSeek shelterBuild a fireSignal for helpDrink waterDon’t worry about food
2. Seven Priorities for Survival in aWilderness Location STOP“S” is for Stop. Take a deep breath, sit down if possible,calm yourself and recognize that whatever has happened toget you here is past and cannot be undone. You are now ina survival situation and that means . . .
2. Seven Priorities for Survival in aWilderness Location STOP“T” is for Think. Your most important asset is yourbrain. Use it! Don’t Panic! Move with deliberate care.Think first, so you have no regrets later. Take noaction, even a foot step, until you have thought itthrough. Unrecoverable mistakes and injuries,potentially serious in a survival situation, occur whenwe act before we engage our brain. Then . . .
2. Seven Priorities for Survival in aWilderness Location STOP“O” is for Observe. Take a look around you. Assess yoursituation and options. Consider the terrain, weather andresources. Take stock of your supplies, equipment,surroundings, your personal capabilities and, if there areany, the abilities of your fellow survivors.
2. Seven Priorities for Survival in aWilderness Location STOP“P” is for Plan. Prioritize your immediate needs anddevelop a plan to systematically deal with theemergency and contingencies while conserving yourenergy. Then, follow your plan. Adjust your plan onlyas necessary to deal with changing circumstances.
2. Seven Priorities for Survival in aWilderness LocationProvide First Aid Treat life-threatening injuries and illnesses immediately.As you begin putting together your survival plan, take thetime to properly examine anyone who has been hurt, anddecide on a course of action to care for that person.
2. Seven Priorities for Survival in aWilderness LocationSeek Shelter Begin by assessing what you have forclothing. Rather than wearing one heavycoat, putting on layers of clothing will allowyou to adjust the insulation around you tomatch the weather conditions you face. Clothing insulates best when it is dry. Protectthe clothing you are wearing from rain andsnow by putting on any rain gear you mighthave or by staying under shelter. A shelter extends the effectiveness of yourclothing by adding another layer to yourinsulating and wind-blocking system.
2. Seven Priorities for Survival in aWilderness LocationSeek Shelter (continued) Assemble a shelter that does the job but that takes as littleenergy as possible for you to set up. Before building a shelter, think about how you will build itand then locate the right site for it.
2. Seven Priorities for Survival in aWilderness LocationBuild a Fire In chilly and cold weather, a fire can be important formaintaining body warmth, melting snow for water, dryingout clothing, signaling for help, and raising your spirits. Select a Leave No Trace Campfire Site1. Fire will cause no further negative impact on the land.2. Fire cannot spread from it.
2. Seven Priorities for Survival in aWilderness LocationSignal for Help Signaling for help can be very important if you havebecome lost or if you or others in your group are injuredand cannot be moved. Think about where you are, how you might be seen, andwhat you have on hand to make yourself and your locationmore visible to others.
2. Seven Priorities for Survival in aWilderness LocationDrink Water Drink plenty of water. You can survive for days withoutfood, but in hot weather without water, only hours. Dehydration happens in cold weather, too, even thoughyou may not feel as thirsty. The best rule is to drink plenty of water—enough so thatyour urine is clear—whenever you are in the outdoors.
2. Seven Priorities for Survival in aWilderness LocationDon’t Worry About Food Being hungry is not very pleasant, but on the list of survivalpriorities, it is not very high, either. In general terms, the human body can go two to three dayswithout water. As long as you stay hydrated, you can go 30to 40 days without food of any kind. Keeping warm in cold weather and cool in hot weather,finding shelter, drinking plenty of water, and signaling yourlocation are all more important than finding something toeat.
Requirement 3Describe ways to avoid panic and maintain a high level of moralewhen lost, and explain why this is important.
3. Avoid Panic and Maintain MoraleAvoiding Panic Panic leads you to do irrational and dangerous things toaggravate your emergency further. The best way for you to prepare yourself for trouble andnot panic is to have plans for different contingencies - likegetting lost, becoming immobilized, running out of food,etc. If unexpected trouble comes your way, the best way toavoid panic is to evaluate your resources. What do youand your companions have with you? How can you usethese items to make the most of your situation and avoidpossible risks?
3. Avoid Panic and Maintain MoraleKeep a Positive Attitude Many survivors of wilderness emergencieshave said that a willingness to survive is thekey factor in getting through a difficult situation. You might assume that everyone has an equaldesire to survive, but that is not always thecase. Some people will endure almost unbelievableconditions while others in much less difficultsituations might simply give up and quit. Make a conscious choice to be among thosewho can and will endure.
3. Avoid Panic and Maintain MoraleKeep a Positive Attitude
3. Avoid Panic and Maintain MoraleHow to Maintain Morale Assessment: The best way to begin with moralemaintenance is to have a fair assessment of thelevel of morale in your group or yourself. You won'treally know what you need to do until you find outwhat you actually need. Ask your group questionslike "How are you feeling right now?" and "What areyou thinking about?" Some people may not showtheir pain or problems, so ask. Support: Your fellow survivors need to know thatyou have their back. Show your support throughword and deed. Survival situations are stressful andtraumatic, and people handle hardships verydifferently. You might not be able to have an effecton their feelings or thoughts, but show them thatyou are on their side anyway.
3. Avoid Panic and Maintain MoraleHow to Maintain Morale Encouragement: Unless the person has mentally oremotionally "checked out" from the situation, a few positivewords can boost morale significantly. Repeat uplifting wordsto yourself and anyone in your company. Find somethingthat motivates you or your group, and use that idea tobolster morale. Reward: Find ways to reward yourself or your group. Findgood things to look forward to in the short term. Celebrateeven your smallest successes (or even just the absence offailure).
3. Avoid Panic and Maintain MoraleHow to Maintain Morale Reassess: Don't ignore orneglect morale. Reassess the morale levelevery day. Find a better morale boosterthan threats. You don't have to be the classclown, but you need to keepeverybody (or yourself) goinguntil you finally make it throughyour ordeal.
Requirement 4Describe the steps you would take to survive in the followingexposure conditions:a. Cold and snowyb. Wetc. Hot and dryd. Windye. At or on the water
4a. Surviving Cold and Snow Cold weather brings with it the very real danger ofhypothermia.The temperature does not need to be all that low forhypothermia to be a concern.Do all you can to keep yourself warm and dry.Watch those around you for signs that they are becomingchilled.
4a. Surviving Cold and Snow Take steps to find shelter and, if possible, to light a fire.Snow can be an effective resource for building a shelter. Itmay be as simple as a depression dug into a snowbank sothat you can get out of the wind. With more time andenergy, you might dig a snow cave or construct a snowtrench to create a shelter that will insulate you from thecold.Be sure to drink plenty of fluids even though you might notfeel thirsty. Melt snow over a stove or campfire.
4b. Surviving Wet Conditions While forests can offer an abundance ofmaterials for making shelters andbuilding campfires, they can also bechallenging, especially if the weather iswet. The shade of a forest floor can feelchilly, and dampness can make it seemeven colder.As in other settings, do what you must tokeep yourself and others dry and warm,and be on guard against hypothermia.Dense forests can make signaling torescuers difficult. You might need tomove a short distance to a meadow,stream bank, or other open area visiblefrom an aircraft.Consider your options carefully, though,before changing locations. Mark yourroute clearly in case you need to findyour way back.
4c. Surviving Hot and Dry While the greatest challenge of desert survival might bestaying cool during the day, nights are sometimes coldenough in arid regions for you to need clothing, shelter,and perhaps a fire to keep warm.Rest in a high, shady spot during the day, then completenecessary activities in the cool of the evening or earlymorning.Wear sun protection if you have it, including long sleevesand a hat. A hat or some type of head cover will help beatthe heat, too.
4d. Surviving Windy Conditions Wind can make other challenges more difficult toovercome.–––––In hot weather, a wind might help keep you cooler, butit can also sap away moisture and cause you to needto drink water more often.In cold weather, wind can blow warm air away fromyour body and cause the temperature to seem colderthan what is indicated on a thermometer.A steady wind can be exhausting as it hammers awayat your energy and morale.Protect yourself from the wind by wearing a windproofouter layer—a jacket, rain gear, or even a tarp or tentrain fly. Seek shelter on the calm side of a boulder orlarge tree.If the weather is chilly or cold, watch for any signs ofhypothermia.
4e. Surviving At or On the Water Emergencies on water often beginwhen a watercraft capsizes or whensomeone falls from shore or from aboat.The first concern is to protect thosein the water from drowning.They will need to get to dry land, getback into their watercraft, or stayafloat until help arrives.If you are in cold water very near theshore, get everyone out of the wateras soon as possible to help avoidhypothermia.
4e. Surviving At or On the Water If you capsize far from shore, try to get asmuch of your body out of the water aspossible by climbing on the capsized craft.If that is not possible, conserve energy andbody heat by floating with your personalflotation device and clothing on, your headpositioned so that you can breathe, andyour legs drawn up close to your trunk.Huddle together with others if you are notalone.A capsized canoe, boat, or other watercraft,even if damaged, might stay afloat. It isalso more visible than a person alone in thewater.Canoes and small boats can sometimes berighted, but don’t waste much energy in theeffort.
4e. Surviving At or On the Water When a survival situation involves a life raft, look forstorage compartments containing an emergency kit thatmight contain first-aid supplies, water, signaling devices,and emergency food. Follow the instructions included withthe kit.
4e. Surviving At or On the Water If you are stranded at sea or on the coastline of an ocean,don’t drink the salt water. The mineral content will causeyour body to dehydrate more quickly than if you drank noseawater at all.Instead, stay in the shade to keep from sweating awaymore moisture than necessary. On shore, try to locatestreams, springs, and other sources of fresh water. If youare stranded on a watercraft, be ready to collect water fromrain or morning dew.
Requirement 5Put together a personal survival kit and be able to explain howeach item in it could be useful.
5. Personal Survival KitEvery survival kit begins with the Outdoor Essentials. Get intothe habit of having them with you on every trip into thebackcountry. Pocketknife First-aid kit Extra clothing Rain gear Water bottle Flashlight Trail food Matches and fire starters Sun protection Map and compass
5. Personal Survival KitAdding some or all of the following items to youremergency kit can come in handy during survivalsituations. Duct Tape. Wrap a length of it around a plasticwater bottle and you will always have some handy. Whistle. A whistle can be heard for longer distancesthan shouting can and requires less energy. Signal Mirror. A metal signal mirror can be slippedinto your first-aid kit or a side pocket of your pack.Keep it in its case or slip it inside a spare sock toprotect it from becoming scratched and dull.
5. Personal Survival KitAdding some or all of the following items toyour emergency kit can come in handyduring survival situations. Thin Wire. A few feet of thin wire cancome in handy for repairing campinggear. Garbage Bag. A heavy-duty 30- to 39gallon plastic bag, preferably in a brightcolor, can be used for emergency raingear, to protect tinder and kindling fromthe rain, and to shield your sleeping bagand other equipment. Fishing Line and Hooks. Fifty feet ofnylon fishing line can have many usesfor making repairs. Add a few hooks andyou will have the gear you need to tryfishing in lakes and streams.
5. Personal Survival KitMobile Phones and Global Positioning Receivers. Global positioning system (GPS) receiversallow travelers to pinpoint locations, but theyare no substitute for mastering the use ofmaps and compasses. Likewise, mobiletelephones can be a convenient means forgroups to contact emergency responsepersonnel, but phones are useless if theymalfunction, the batteries are exhausted, ordistance and terrain prevent clear reception ofsignals. Most of all, never assume that having aportable telephone, GPS receiver, or any otherelectronic device gives you any protection toattempt activities beyond your levels of skilland experience, especially if you are far fromemergency support.
Requirement 6Using three different methods (other than matches), build and lightthree fires.
6. Lighting a Fire without MatchesBuilding a Fire Begin by gathering three kinds of flammable material:–––Tinder is fine, dry material that will burst into flame at thetouch of a match. Pine needles, the inner bark of deadbranches, weed fluff, dry grasses, and slivers shaved with aknife from a stick all are good sources of tinder.Kindling is material that will burn with a little encouragement.Twigs no thicker than a pencil.Fuel is dead and downed wood no bigger than your wrist thatyou will use to keep your blaze burning. In wet weather, lookfor small, dry branches near the bases of trees where largerbranches above them have kept off the rain.
6. Lighting a Fire without MatchesMaking the Fire Lay A tepee fire lay works especially well.––––Place a big, loose handful of tinder in thecenter of your fire site.Mound plenty of kindling over the tinder.Then, arrange small and medium-sizedsticks of fuelwood around the kindling as ifthey were the poles of a tepee.Leave an opening in the “tepee” on theside the wind is blowing against so that aircan reach the middle of the fire.
6. Lighting a Fire without MatchesTinder for Lighting Fires WithoutMatches Very fine tinder is essential for lightingfires without matches.– In the field, try shredding the dry innerbark of a cottonwood, elm, or cedartree, or gathering the fluff from amouse nest or chipmunk burrow.– You can use lint from a clothes dryer,too. In survival situations, gather three orfour times as much tinder, kindling, andfuel wood as you would normally wantso you won’t have to run off to gathermore flammable material once the fireis burning.
6. Lighting a Fire without MatchesMagnifying Lens. On a clear day you might be able to focus sunlight througha curved lens such as that found on the baseplates ofsome compasses and in eyeglasses, a magnifying glass,camera lenses, binoculars, and telescopes.– In some cases, you might need to remove the lens from theinstrument in which you found it.Hold the lens so that the sunlight streaming through it isconcentrated down to a bright pinpoint on your tinder.In a few moments it will generate enough heat to cause thetinder to burn.
6. Lighting a Fire without MatchesFlint and Steel. Striking one hard object against another can sometimesproduce sparks such as a pocketknife and a piece of flint.–––––Form your fine tinder (dryer lint works well) into a bird’s nestshape the size of a softball.Holding the flint just above the tinder, strike it with the steel todirect the sparks into it.Use a downward motion to strike the steel against an edge ofthe flint.Nurse a spark into a flame by blowing on it very gently.When the tinder bursts into flame, and the kindling catchesfire, push it underneath your fire lay.
6. Lighting a
5. Put together a personal survival kit and be able to explain how each item in it could be useful. 6. Using three different methods (other than matches), build and light three fires. Wild
