Transcription
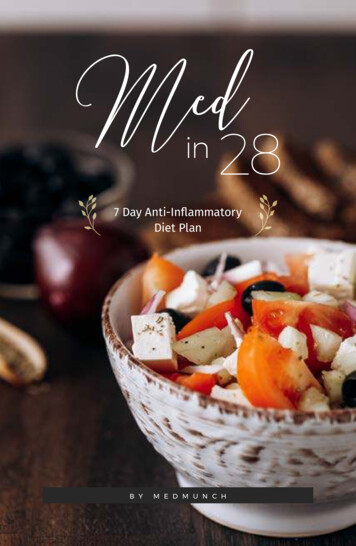
Anti-InflammatoryDairy Free/Gluten Free Meal Planfrom Cotter CrunchAll images & content are copyright protected. Please do not use any textor images without prior permission.
Breakfast and Snacks
cocoa coconut low carb shakePrep Time: 5 minutesTotal Time: 5 minutesYield: 2 servingsDESCRIPTIONThis low carb shake recipe is full of healthy coconut cream and unsweetened chocolate cocoa. It will fuelyour body for the day, keeping you energized and nourished. Gluten free, grain free, dairy free, paleofriendly, vegan and low carb.NGREDIENTS 4 oz full fat coconut cream or milk – To make EXTRA creamy, freeze your coconut creambeforehand. (see notes for lighter option) 2 tbsp coconut MCT oil or melted coconut oil (grass fed butter also works) 8 oz almond or unsweetened coconut drinking milk 2 tbsp cocoa powder dash of sea salt 1/2 tbsp creamy almond butter or sunflower seed butter Optional add ins to sweeten it – berries, stevia leaf or xylitol, cinnamon, banana or maple syrup forextra sweetness (banana and maple syrup will add additional carbohydrates but still VERY nutrientdense and healthy)INSTRUCTIONS1. Place all ingredients into a blender, blend all together and go. For more Protein add in 1-2 tbsp grassfed collagen protein or vegan protein powder of choice.2. MCT oil to add if desired. (if you add extra coconut oil, be sure to consume right away so the shakedoesn’t get clumpy). SEE NOTES.NOTES This makes 2 smaller, very filling shakes or 1 large nutrient dense chocolate shake.This shake is rich, but not sweet if you don’t add a sweetener. Erythritol or a Xylitol sweetener likeSwerve are diabetic friendly. Or you can add stevia.If you don’t care about carbohydrate intake, feel free to add in banana and/or maple syrup.To lighten it up, replace the coconut cream with almond milk (unsweetened) or coconut drinkingmilk. Still add in the MCT oils or melted coconut oil.This shake can also be heated to make a creamy LOW CARB Creamy HOT CHOCOLATE.Nutrition shown for 2 servings, without any added sugars.
nasi goreng breakfast (paleo friendly)Prep Time: 15 minutesCook Time: 15 minutes Total Time: 30 minutes Yield: 3 -4 servingsDESCRIPTIONNasi Goreng is the perfect way to utilize leftover veggies. A stir fried “carrot rice” mixed with egg andsausage. This Indonesian style breakfast is paleo friendly, super flavorful, and packed full of protein andveggies! Cook and serve all in 30 minutes!INGREDIENTSFOR THE SWEET TAMARI SOY SAUCE (YOU WILL USE 3 TBSP IN RECIPE. SEE NOTES FORQUICK SUBSTITUTE) 3 tbsp tamari sauce (gluten free) or coconut aminos for paleo option 2–3 tbsp molasses 1 tbsp waterSPICY MIX-INS: 2 long red chilies, thinly sliced – remove seeds if you prefer less spicy (see notes forsubstitutes). Save 3- 4 tbsp of sliced chilies for garnishing. 3 garlic cloves 1 small shallot (sliced peeled) or 1/3 cup diced red onion. Pinch of ground gingerFOR THE CARROT RICE NASI GORENG: 2 Tbsp oil for the pan (sesame or avocado oil) 5 eggs (2 mixed in batter and 3 to fry separately for platting.) 8 ounces pre-cooked sausage (chicken or any type of pre-cooked breakfast sausage – gluten free).Chopped or minced in food processor. Equivalent to one cup minced. 4 large carrots – “riced” 1/2 cup fined diced broccoli 1 tbsp sweet soy sauce (gluten free recipe above) 1 cup bean sprouts Kosher salt and pepper to taste Cilantro to garnish Optional topping – Asian chili sauce, sesame seeds.
INSTRUCTIONSFOR THE HOMEMADE SWEET SOY SAUCE (COPYCAT KECAP MANIS)1. If you don’t want to make this then just use a gluten free hoisin sauce.2. Boil the tamari, molasses, and water in a saucepan over high heat. Then reduce heat to medium-lowand cook until molasses has dissolved with the tamari. Place in separate bowl and set aside.3. You will have extra sweet soy sauce. See notes for storing.For the Carrot Rice Nasi Goreng.To Prep Beforehand: Spicy Mix-In; Mix the sliced chile pepper, ginger, sliced onion or shallot, and garlic together in abowl; Set aside. Carrot/Vegetable “Rice”– Rice your carrots and finely dice the broccoli before starting to make thecarrot rice nasi goreng. Simply pulse in blender or food processor then mix together and set aside.1. Add 1- 2 tbsp oil to a large frying pan or wok and place on medium high heat. Add the spicy mix-invegetables and stir fry on medium high heat until fragrant. About 1 -2 minutes.2. Next, add the minced sausage and continue stir frying on medium high until flavors combine or arecooked through, about 3-5 minutes.3. Crack 2 eggs into the pan; fry together for 2 minutes. Mix in the carrot rice, broccoli, and beansprouts. Cook over medium heat until combined.4. Lastly, Add 3 tbsp of the sweet soy sauce and a dash of salt and pepper. Gently mix with thevegetables until combined. Taste and adjust salt if needed. Cook for another 1-2 minutes untileverything is coated.5. Divide carrot rice into 3 serving bowls.6. Using the same pan, fry 3 additional eggs over-easy . If skillet/pan is dry, add a tbsp more of oil. If thepan is still oily, you make skip adding more oil.7. Heat pan on medium-high heat then break eggs and SLIP into pan, 1 at a time. IMMEDIATELYreduce heat to low. cook until whites are completely set and yolks begin to thicken but are not hard.8. Top each bowl with fried egg and garnish with cilantro and any extra sliced pepper (if desired).9. Optional topping – Asian chili sauce and a sprinkle of sesame seeds.NOTES To reduce sodium, place tamari with reduced sodium Tamari sauce in your sweet soy sauce, and donot add additional salt.You will have extra sweet soy sauce. You can keep extra stored in fridge for 7-10 days. If youdon’t want to make sweet soy sauce, feel free to use store bought Sweet Soy Sauce, but most arenot gluten free.If you can’t find red chile peppers, you can use jalapeno or any other spicy pepper of choice.Spiciness will vary with each pepper. Deseed after slicing if you prefer less spiceNutrition shown is per bowl using pre cooked chicken sausage.
chocolate hazelnut breakfast proteincookies {vegan, flourless}Prep Time: 10 minutesCook Time: 15 minutes Total Time: 25 minutes Yield: 20-22 cookiesDESCRIPTIONChocolate Hazelnut Breakfast Protein Cookies {Vegan, Flourless, Gluten Free}INGREDIENTS 8 ounce hazelnuts 1/2 c dark chocolate chips (we use Enjoy Life Brand to keep GF and Vegan) 2 tbsp Coconut Oil 1 ripe Banana 1/2 cup coconut sugar (see notes for substitutes) 1/2 cup chocolate Vegan Protein Powder 1 tbsp or more 100% cocoa Powder 1 tsp Vanilla extract pinch of salt Optional Hazelnut Extract (1/2 tsp) Extra dark Chocolate (melted) and hazelnuts for toppingINSTRUCTIONS1. First Blend your hazelnuts and chocolate chips together in a food processor. Make a “mealy” base. Itwill be moist from the chocolate.2. Place in bowl.3. Add in your banana and coconut oil and extracts. Beat until blended.4. Add in your sugar, protein, extract, and cocoa. Mix again until blended.5. Roll dough into golf size balls and place on greased baking sheet. Press flat with hand or back ofspoon.6. Bake at 350F for 10-12 minutes or until cookies are browned a bit on the corners. They will still besoft but will harden later in fridge.7. While cookies or cooling, melt extra dark chocolate and drizzle the dark chocolate on top.Then crushextra hazelnut (you can crush in ziplock bag or food processor really quick) and sprinkle on top.8. Place cookies in fridge for 30 minutes so harden9. Makes 20-22 protein cookies.
NOTESFor best baking texture, use a plant protein with pea protein in it. We used Vega Chocolate All inOne from GNC.Brown Sugar or Palm Sugar will also work in place of coconut sugar but are unrefined.You could also reduce sugar by using xylitol or baking stevia. The baking times will be a little differentthough so check cookies before 10 minutes if using a sugar substitute.
synergy power fuel green smoothie{paleo, vegan}Prep Time: 5 minutesTotal Time: 5 minutesYield: 1DESCRIPTIONPOWER FUEL Green Smoothie. The perfect green smoothie that’s powered by real food. Whole 30friendly, Paleo, Vegan.INGREDIENTS 1/3 to 1/2 cup packed spinach leaves 1/2 tbsp unrefined coconut oil (melted) – may be substituted for other healthy fats, (i.e avocado,almond butter, or tahini) if desired. 1 green apple (core removed) 8– 10 ounces fresh orange juice 2–3 mint leaves Juice of 1/2 lemon Optional Ice (handful) Optional natural sweetener – 3-4 pitted dates, banana, or maple syrup/honey.INSTRUCTIONS1. First place your spinach leaves in microwave safe bowl. Add the coconut oil. Mix together. Steam inmicrowave for just 15-20 seconds. You can do this on the stove as well. Just make sure the spinachis slightly steamed and mixed with oil.2. Next place the remainder of your ingredients (apples, juice, mint, etc.) in a blender. Add your coconutoil and spinach.3. Blend until Smooth.4. Feel free to add more juice or water to thin it out or a handful of ice to thicken it.5. If you want it sweeter, add 1 small banana or maple syrup.NOTESOptional Sweeteners – 1 tbsp or more maple syrup, honey, coconut sugar, a few pitted dates, or even abanana.This can be made into 2 smaller drinks if desired.
chia matcha overnight breakfast smoothiePrep Time: 24 hoursTotal Time: 24 hours 5 minutesYield: 2 servingsDESCRIPTIONOvernight chia matcha Breakfast smoothie – Energizing Breakfast to go! Gluten Free, Vegan Friendly.INGREDIENTS 10 –12 ounces Coconut yogurt or Kefir yogurt (Plain or Vanilla) (Use Coconut yogurt for Veganoption. See notes for brand) 2 to 4 tsp matcha powder 1 large banana Cinnamon 8 oz Vanilla almond or coconut milk Optional but recommended – 1 scoop vanilla protein (plant based or collagen protein work great) 1/4 cup chia seed (2 tbsp per cup) 1/4 cup to 1/3 cup to gluten free oats or granola 1 tbsp honey or maple syrup (optional)INSTRUCTIONS1. Add yogurt/kefir , banana, milk, and protein to a blender and blend until smooth. Add your matchapowder (carefully), and cinnamon. The more matcha you use, the stronger the green tea taste, adjustaccordingly. Blend again.2. Set out 2 bowls or 2 glasses (one large if you want to use if for multiple days).3. To each bowl or glass, add 2 tbsp of chia seeds. Then add 2-3 tbsp or more of your oats. Pour halfyour matcha smoothie into each bowl or cup.4. Mix each cup and let it sit overnight in fridge.5. The next morning, top each bowl/cup with extra oats or granola, chia, and maple syrup.6. I also made a little matcha latte and poured extra on top of that before eating.NOTES Here’s the matcha powder bought from Amazon.Plain coconut yogurt for vegan optionNutrition shown per serving, without the additional sweeteners added.
Lunch
green goddess fig nourish bowlsPrep Time: 10 minutesTotal Time: 10 minutesYield: 3 servingsDESCRIPTIONGreen Goddess Fig Nourish Bowls – These plant powered nourish bowls are packed with super greens,healthy fats, nature’s candy (Fruit and Figs), and topped with homemade green goddess dressing. Theywill fill you up and nourish you all at once. Paleo, Vegan, and Whole 30 friendly!INGREDIENTS 6 tbsp Vegan Green Goddess Dressing (2 tbsp per bowl) 1 green apple (spiralized or thinly slices) 5–6 c spinach (large leaves) 2–3 tbsp almonds and/or seeds 1/3 c – 1/2 c red or green cabbage/shaved 1 cup micro greens/Sprouts 3/4 cup to 1 c Sun-Maid California Mission Figs. Sliced in half. handful of Fresh Parsley (2 tbsp – 3 tbsp per bowl). Extra if you making the homemade greengoddess dressing. Fresh Lemon juice and extra slices to garnish Sea salt and pepper to taste Drizzle of balsamic vinegar fresh berries (optional)INSTRUCTIONS1. First make your Vegan Green Goddess Dressing . Ingredient list in notes. If you don’t have tahini, youcan use avocado.2. Next spiralize or thinly slice your apple.3. Clean and dry the rest of your greens. Shred/chop extra if you bought larger spinach leaves andcabbage.4. Slice your figs in half.5. Arrange the spinach and cabbage into 2-3 bowls (depends on the size salad you’d like)6. Divide the sprouts, parsley, and apple and place around the spinach/cabbage in each bowl.7. Add divide figs in 2-3 portions. Place on top of each bowl along with the almonds and seeds.8. Drizzle your dressing on top of each bowl.9. Slice lemon, add a wedge to each salad so you can squeeze fresh juice if desired.
10. Drizzle with balsamic vinegar, if desired.11. Salt/pepper to taste.NOTES I used Sun-Maid California Mission Figs . They are available at most super markets and areDELISH!You can use other vegan green goddess dressing if desired but my Vegan Homemade GreenGoddess Dressing is quick to make.Nutrition shown per bowl for 2 bowls (without dressing). Add additional 110 calories for 2 tbsphomemade green goddess dressing per bowl.
spicy tuna spiralized vegetables saladPrep Time: 10 minutesTotal Time: 10 minutesYield: 2 servingsDESCRIPTIONGarlic Chili Tuna Spiralized Spring Vegetables Salad is made in 10 minutes! Gluten free, Whole30, Paleo,Low Carb, and Dairy Free salad recipe!INGREDIENTS 3 Sweet Baby Spring Turnips (or 2 regular turnips) 1–2 cucumber (1 large or 2 small) 1 tsp minced Garlic (about 3 cloves) 1/4 cup to 1/3 cup chopped shallot or red onion 1/4 cup paleo mayo (see notes for other options) 1 tsp mustard powder 1 small chili red pepper or cayenne pepper – sliced 2–3 tbsp olive oil with a pinch of ground chili pepper mixed in it salt/pepper to taste cilantro to garnish red pepper flakes or a pinch of cayenne to top 5 ounces wild caught canned tuna (drained)INSTRUCTIONS1. Wash and dry your vegetables.2. Next spiralize your turnips and cucumbers. Place in a bowl together with a pinch of salt and cover.Place in fridge while you make the sauce.3. In another bowl, mix together your mayo (we use paleo brand), mustard powder, lemon juice, garlic,onion, and salt/pepper (to taste). Set aside.4. . Drain your tuna and place in a bowl to separate pieces.5. Next mix up your olive oil with a pinch of chili pepper in it.6. Remove your cucumber and turnip spiralized vegetables from fridge. Drain any excess water from thebowl and pat vegetables dry with a towel. Do this a few times until water is removed.7. Place spiralized vegetables in a bowl and mix in mayo mixture. Add your tuna and chili red pepper tothe bowl and mix again.8. Drizzle your olive oil with chili pepper on top. Cilantro to garnish.9. Extra lemon, salt/pepper, and red pepper flakes to taste if desired.
10. Serve. Refrigerate leftovers in the fridge for up to 3 days.NOTES We use this spiralizer with small blade for this type of salad. KitchenAid also has an attachment fortheir stand mixer that works great!If you don’t want to use mayonnaise, feel free to use Greek yogurt or sour cream, but the recipe willnot be paleo.
spiralized apple kimchi salad with garlic beefPrep Time: 10 minutesCook Time: 10 minutesTotal Time: 30 minutesYield: 2DESCRIPTIONQuick apple kimchi salad with sesame beef! This Asian inspired spiralized apple salad recipe makes aquick and healthy kimchi substitute. A light nourishing meal that’s ready in 30 minutes. Paleo with Whole30 options.INGREDIENTSFor the Spiralized Apple Kimchi Salad: 2 apples (green and/or red). One of each is best combo! 1 small seedless cucumber 1 green onion diced. 1 tbsp hot mustard (asian) or a Dijion mustard 1 tbsp chili sauce (ex chili paste or Sriracha). For Whole 30 option use 1/4 tsp pinch of paprika 1/4 tsp sea salt 1 tbsp rice vinegar (rice wine vinegar) 1–2 tsp fresh grated fresh ginger or 1/4 to 1/2 tsp ground ginger Crushed black pepper to tasteFor the Garlic Sesame Beef: 2 tsp oil (avocado or sesame oil for frying) 2 tsp minced garlic (2–3 cloves minced) 1 tsp tamari sauce (Gluten Free soy sauce. Whole 30 option see notes) 6 – 8 oz organic lean beef ( top round, steak, separable lean only, 95 % lean ground) 1 to 2 tbsp sesame seeds for topping (extra for garnishing and plating) sea salt and pepper to tasteGarnishes for the Salad leafy greens sliced radish (1/2 cup) optional; crushed red pepper flakes optional; fresh cilantro
INSTRUCTIONS1. First prepare your quick Apple kimchi Salad. Spiralize (or julienne slice) your apples. It’s best to use agreen and red to even out tartness with taste. But any apple will do if you don’t have one of each.2. Spiralize or julienne slice your cucumber. Place in a large bowl and press out any excess water with apaper towel. Set aside.3. Chop your onion and garlic (if using cloves) and place in a small mixing bowl4. Then add in your mustard, spices, chili sauce, vinegar, and lastly the ginger. Fresh always tastebetter but ground works fine too.5. Toss kimchi flavored apple cucumber salad all together.6. Place in fridge to marinate while you cook beef.FOR THE BEEF1. Mix 2 tsp sesame oil, 1 tsp minced garlic, 2 tsp sesame seed, and dash of tamari in a small bowl.Whisk together and pour over your meat. Marinate for 10-20 minutes. Or skip if in a hurry.2. Heat skillet to medium high.3. Place your marinated steak (with oil) in the pan and sear for ingredients in a medium high for 7-10minutes, turning. Or until beef is cooked to 140F and browned.4. Remove from heat, strain excess fat/grease if desired.5. Sprinkle with extra sesame seeMAKE THE BOWL1. Divide the apple kimchi salad into two bowls.2. Place a radish, sprouts, or green leaf on one side of the bowl.3. Divide the beef strips (or ground) into the two bowls or plates.4. Top beef with extra red pepper flakes and sesame seed if desired.5. Drizzle any extra sauce on top of salad.6. Garnish with cilantro.NOTESFor whole 30 tamari sauce, use coconut aminosFor whole 30 Chili sauce, use sugar free optionYou don’t need to use the spiralizer, it works well shredded too. Keep the peel on for much crunch. Don’teat beef? Try with chicken, smoked salmon, tempeh, etc.
mexican avocado egg salad collard green wraps{paleo, whole 30}Prep Time: 15 minutesTotal Time: 15 minutesYield: 5 wrapsDESCRIPTIONThese Mexican avocado egg salad wraps make for a perfect low carb veggie packed lunch! PaleoAvocado Egg Salad seasoned with Mexican spices and jalapeño, all wrapped up in collard greens! Whole30 friendly, gluten free, and grain free.INGREDIENTS 1/2 large avocado 1 small bunch cilantro, chopped 3 oz fire roasted green chilies (canned, drained) 2 garlic cloves 1/4 tsp paprika 1/2 tsp cumin salt/pepper to taste 1 green onion, sliced or 1/4 c chopped white or red onion 5 large collard greens 1 bell pepper, sliced juice of one lime red pepper flakes garnish 1–2 jalapeños additional salt/pepper to season after blending sprouts to garnish 6 hard boiled eggs *Optional* Paleo Mayo or Olive OilINSTRUCTIONS1. Slice hard boiled eggs in half. Remove yolk and place in food processor or blender. Keep the eggwhites for later.2. Combine avocado, cilantro, green chilies, spices, garlic, and optional jalapeños slices (just a few) inthe food processor or blender. Blend until an egg salad consistency is formed. Taste to see if it needsmore salt/pepper, to your liking. Add additional avocado, paleo mayo, or oil if you want it extracreamy.3. Chop up a few of the extra whites from the hard boiled eggs and mix into egg salad.
4. Next clean your collard green wraps and place in a towel. Pat dry. Place the leaves/wraps inmicrowave to steam for 30 -40 seconds. This will make them easier to bend. Remove and place on aplate.5. Scoop 1/4 cup of the avocado egg salad into each wrap.6. Top with bell pepper slices, optional jalapeños slices, a dash of lime, sprouts, and red pepper flakes.7. Salt and Pepper to taste.NOTES The avocado egg salad will keep in sealed container in fridge for 5 days or so.If you don’t have avocado, feel free to use chipotle paleo mayo.Lettuce wraps or romaine leafs also work!For less spicyness, omit jalapeños. You can also use regular green chilies, canned or fresh.
Dinner
superfood baked salmonPrep Time: 5 minutesCook Time: 15 minutesTotal Time: 20 minutesYield: 4DESCRIPTIONThis one pan meal, superfood baked salmon recipe is ready in 20 minutes and packed full ofnutrients. A nourishing, whole 30 friendly, flavorful meal!INGREDIENTS 3 to 4 salmon fillets (4–5 ounces each) or 16 oz fillet (We use Sizzlefish Atlantic Salmon) 2 cups brussels sprouts (quartered) 1 cup fresh blueberries (or frozen) 1/4 to 1/3 cup chopped fresh basil 1/4 to 1/3 olive oil (divided) 3 tbsp balsamic vinegar 2 cloves or 1 tsp minced Garlic 1/4 to 1/2 tsp crush black Pepper Sea Salt (divided) 2 Lemons, one juiced and one slicedINSTRUCTIONS1. Preheat oven to 400F2. Clean your salmon fillets and place on lined sheet pan.3. Clean and chop your Brussels sprouts. Place on pan with salmon.4. Generously sprinkle sea salt on top of salmon and veggies. Set aside.5. Next, place your blueberries in a bowl. Mash with fork a bit.6. Add in 1/4 cup olive oil, 1/4 tsp salt/pepper, your basil, garlic, and balsamic vinegar. Mix all together.7. Drizzle another 2 -3 tbsp olive oil over your salmon and Brussels sprouts.8. Spoon the balsamic basil blueberry mixture over salmon fillets.9. Squeeze fresh lemon on top of salmon and veggies. Place lemon slices on top of veggies on thesheet pan. Sprinkle with extra black pepper.10. Place in oven and bake for 15 minutes.11. Broil for 1 -2 minutes extra to make Brussels sprouts and baked salmon skin extra crispy.12. Remove from oven. Serve and enjoy!NOTES We use Sizzlefish salmon, which offers both Atlantic and wild caught varieties.
healing roasted red pepper shrimp bisquePrep Time: 15 minutes Cook Time: 25 minutesTotal Time: 50 minutesYield: 4 cupsDESCRIPTIONHealing Roasted Red Pepper Bisque with Shrimp {Whole 30 friendly, Dairy Free, and Paleo}INGREDIENTS 1 large or 2 medium red bell peppers 1 tbsp olive oil 1 tsp minced garlic Salt/pepper (1/4 tsp & to taste) 1 shallot or 3/4 c sliced/chopped 6–8 oz peeled shrimp (without tail). We buy sizzlefish. See notes for link. 1 tbsp water 15 oz light coconut milk 2 c chicken broth 2 tbsp tapioca or potato starch to thicken 1/2 tsp cayenne 1/4 tsp ground mustard 1 tsp red pepper flakes (use less if you don’t want as spicy) Pinch of ground ginger Fresh Cilantro and extra spicy pepper (like jalapeno) to garnishINSTRUCTIONS1. Preheat oven to 475 F.2. Place red bell pepper(s) on baking sheet.3. Roast peppers at 475 F for 10 minutes rotating to each side, about 15-20 minutes total4. Broil last 2-3 minutes. Remove from oven. Cool. Remove skin from peppers and slice off the stem.IN THE SOUP POT:1. 1 tbsp oil plus your garlic & shallot.2. Saute on medium until fragrant. Add in the peeled shrimp and water.
3. Cook on medium until shrimp are pink and no longer translucent. Should not take more than 6-8minutes if shrimp are medium size. (for quick option you can use precooked shrimp & add it thawedat end of cooking bisque).4. Add in your salt/pepper. Stir all together.5. Remove shrimp, place in bowl or plate.6. Next add in the coconut milk, broth, seasonings, and starch to the pot. Lightly simmer and mix alltogether for about 5 minutes. (reduce the amount of red pepper flakes and cayenne for less spicy)7. Place liquid and roasted red pepper in high speed blender or use an immersion hand blender.*8. Blend until creamy.9. Add the soup back to stock pot. Bring to light boil. Reduce 10-20 minutes.10. Add shrimp back in last and keep warm until ready to serve.11. Serve and garnish with fresh cilantro and extra peppers if desired i.e. jalapenos.12. Season each bowl with more salt/pepper and red chili flakes to taste.NOTES A hand blender will work well but we LOVE using this new Vitamix blender for extra creamy soups.Vegan option just replace the shrimp with tofu or tempeh, or leave out.
easy drunken zoodle chicken casserolePrep Time: 10 minutesCook Time: 40 minutesTotal Time: 50 minutesYield: 6DESCRIPTIONPaleo friendly Drunken Zoodle Chicken Casserole takes a spin on the original Pad kee mao Asian stir fryand puts in casserole form. Light, healthy!INGREDIENTS 1 lb boneless chicken thighs or breast (the darker meat works best)INGREDIENTS FOR STIR FRY SAUCE: 2 tbsp fish sauce 2 tbsp chili garlic sauce/paste (available in most asian sections at store. Or use Sriracha) 2–3 tbsp gluten free Tamari soy sauce mixed with 1 tbsp dark sugar (coconut palm sugar, dark brownsugar, or molasses). This creates a dark soy sauce. *For Paleo use Coconut Aminos* Pinch of ground ginger kefir lime or 1/4 tsp lime zest (a splash of juice works too) salt and pepper to taste optional finely diced Thai bird’s eye red pepper for extra spicyOTHER INGREDIENTS FOR THE CASSEROLE: 1 cup chopped onion 1 tbsp olive oil or sesame oil 1 tsp garlic 1 cup stir fry veggies (i.e. broccoli, snap peas, etc.) 2–3 tbsp tapioca starch or potato starch/flour 1 red bell pepper, sliced 16 oz (or about 3–4 c Zucchini noodles- zoodles) This equals about 1-2 large zucchini 3 eggs 2–3 tbsp coconut milkGARNISH/TOPPING: Thai basil 1 Thai red pepper (see notes for other pepper) optional sesame seeds to garnish
INSTRUCTIONS1. Preheat oven to 350 F and oil a medium casserole dish. Set aside.2. Clean your chicken then dice your chicken meat into small slices/cubes. Set aside.3. Slice veggies and spiralize your zucchini. If you don’t have a spiralizer, just cut julienne style. I usethis spiralizer . Make sure to pat your zucchini noodles extra dry with a towel. To remove excesswater. Place zucchini noodles (zoodles) at the bottom of the casserole dish and set aside.4. Next Mix your stir fry sauce. Whisk together the fish sauce, chili sauce, ginger, tamari sugar (toequal the dark soy sauce), lime, pinch of pepper. Taste and adjust with more tamari/sugar if needed.For Paleo option, use palm sugar or molasses.5. Place meat, garlic, onion, oil in skillet or large pan. Sauté 5 minutes.6. Add your stir fry veggie mix, sliced red pepper, sauce, and 2-3 tbsp tapioca starch. Stir fry 10-15minutes until chicken no long pink (but not overcooked) and starch is mixed well with themeat/vegetables.7. Add the Chicken stir fry with sauce on top of zoodles in the casserole dish; evenly.8. Next whisk your eggs and coconut milk. Pour over casserole dish.9. Bake 25-30 minutes or until the edges are golden brown and the egg mix is cooked through.10. Remove from oven and garnish with Thai basil and optional sliced Thai peppers.11. Salt/pepper to taste. Sesame seeds to sprinkle over top, if desired.NOTES For Paleo friendly option use Coconut Aminos in place of tamari sauceIf you don’t have thai red pepper, you can use any other spicy red pepper. Thai red peppers areAvailable in the Asian foods section or produce section of some supermarkets, or at some Asianmarkets.
crispy rhubarb lemon chicken bakePrep Time: 15 minutesCook Time: 25 minutesTotal Time: 40 minutesYield: 5DESCRIPTIONThis Lemon Chicken Bake makes an easy one pan meal! A tangy rhubarb marinade caramelizes thechicken. Lemon and crispy Rhubarb shavings to top! Gluten free and Paleo friendly.INGREDIENTSFOR THE CHICKEN MARINADE: 1/4 cup creamy balsamic dressing or vinaigrette 1/4 cup tangy BBQ sauce (gluten free) 2 garlic cloves 1/2 tsp each salt and black pepper 2 –3 rhubarb stalks (shaved/peeled. Keep the shavings for topping) 1/4 cup maple syrup Lemon (1 tbsp juice)FOR THE LEMON CHICKEN BAKE AND CRISPY RHUBARB: 1.5 lbs skinless boneless chicken things (about 5 small thighs) 1 lemon olive oil for pan and to toss shavings in salt/pepper Shavings from rhubarb stalks optional 1/4 tsp lemon garlic seasoning or lemon pepper 1 cup pearled onions tarragon leaves or thyme to garnishINSTRUCTIONS1. Preheat oven to 375F.2. Clean rhubarb stalks and trim ends.3. With a vegetable peeler, gently peel the red skin of the rhubarb off in order to create shavings. Seepictures in blog post. Set shavings aside.4. Place 2-3 small stalks of the rhubarb in a blender along with the BBQ sauce, balsamic dressing ,maple syrup, and seasoning. Blend until creamy.
5. Clean and trim your chicken thighs. Set aside.6. Add 1 tbsp olive oil to a oven safe skillet or cast iron skillet . You can use a dutch oven too.7. Add your marinade and your chicken thighs to the pan. Squeeze fresh lemon juice on top. Bring themarinade to a to a quick bubble/boil. You will see the edges start to caramelize on the pan. Thenreduce heat or turn off completely.8. Flip the chicken thighs over and place lemon slices on top of each.9. Add 1 cup of peeled pearled onions to the pan. Drizzle a little olive oil on top of them. Salt/pepper totaste.10. Transfer to oven at 375F for about 20-25 minutes.11. While the chicken is baking for the first 10 minutes, season your rhubarb shavings. Just toss with a bitof oil, salt, pepper, and optional lemon pepper or lemon garlic.12. Place on greased baking sheet. Transfer to the oven (with the chicken) for the remaining 15 minutesof the chicken bake time. Toss the shavings half way to make sure they are getting crispy. thinnershavings will cook faster13. Once chicken and shavings are cooked and crispy, remove from oven.14. Serve chicken thighs in pan or to each plate. Add more marinade from the pan on top of eachchicken. Then top the each chicken thigh with crispy rhubarb shavings and serve with pearl onions.15. Salt/pepper to taste.16. Sprinkle with fresh thyme to garnish (or any other herb of choice)NOTES You can add in any other veggies while the chicken is baking, too. Just place on another pan witholive oil. I added broccolini.The thicker rhubarb shavings will take longer to get crispy. So check after 10 minutes. If yourshavings are thin, they will get crispy in less than 15 minutes in oven.NUTRITION shown is for one chicken thigh with marinade sauce, onion, and crispy rhubarb
8 ounces pre-cooked sausage (chicken or any type of pre-cooked breakfast sausage – gluten free). Chopped or minced in food processor. Equivalent to one cup minced. 4 large carrots – “riced” 1/2 cup fined diced broccoli 1 tbsp sweet