Transcription
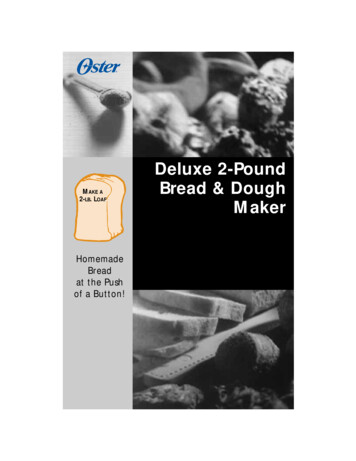
MAKE A2-LB. LOAFHomemadeBreadat the Pushof a Button!Deluxe 2-PoundBread & DoughMaker
CONGRATULATIONS!Fresh, warm homemade bread is just a few,easy steps away with your new Oster Deluxe 2-Pound Bread and Dough Maker.We've done everything we can to make breadbaking a breeze. We’ve streamlined theinstructions; designed a simple, easy-to-readcontrol panel; and developed a host of greatrecipes for breads, doughs, pastas, jams andjellies, spreads and glazes and quick breads.First review the Safety Guidelines, then turnto Page 12 for the easy step-by-step directions!Along the way, feel free to ask questions.You can call us toll-free at 1-800-526-2832.
TABLE OF CONTENTSBEFORE YOU START . . . . . . . . . . . . . . . . . . . . . . . . . . . . . . . . . . . . . .4Important Safeguards . . . . . . . . . . . . . . . . . . . . . . . . . . . . . . . . . . 5A SYMPHONY OF INGREDIENTSBasic Ingredients . . . . . . .Yeast . . . . . . . . . . . . . . .Sweeteners . . . . . . . . . .Flour . . . . . . . . . . . . . . .Liquids . . . . . . . . . . . . .Salt . . . . . . . . . . . . . . . .Fats . . . . . . . . . . . . . . . .Eggs . . . . . . . . . . . . . . .Important Measuring Tips .777788889GETTING TO KNOW YOUR BREAD MAKERThe Control Panel . . . . . . . . . . . . . . . . . . . . . . . . . . . . . . . . . . . . . . 10Settings . . . . . . . . . . . . . . . . . . . . . . . . . . . . . . . . . . . . . . . . . . . . . 11Step-by-Step Directions on How to Use Your Bread Maker. . . . . . . . 12Cycle Times . . . . . . . . . . . . . . . . . . . . . . . . . . . . . . . . . . . . . . . . . . 15Display Information. . . . . . . . . . . . . . . . . . . . . . . . . . . . . . . . . . . . . 15Tips for the Gourmet Baker . . . . . . . . . . . . . . . . . . . . . . . . . . . . . . . 16BREAD RECIPES AND TIPSBread Recipes. . . . . . . . . . . . . . . . . . . . .White Bread . . . . . . . . . . . . . . . . . . . . . .Whole Wheat Bread . . . . . . . . . . . . . . . .Sourdough Bread . . . . . . . . . . . . . . . . . .Quick Bread . . . . . . . . . . . . . . . . . . . . . .Dough Instructions . . . . . . . . . . . . . . . . .Variations for Shaping Dough . . . . . . . . .Dough Recipes . . . . . . . . . . . . . . . . . . . .Pasta Recipes . . . . . . . . . . . . . . . . . . . . .Jams and Marmalades . . . . . . . . . . . . . .The Finishing Touch: Spreads and HOOTINGTroubleshooting the Machine.Troubleshooting the Recipes .Commonly Asked Questions .How to Test Yeast . . . . . . . . .Care and Cleaning GuidelinesBaking at High Altitudes . . . .INDEX OF RECIPES. . . . . . . . . . . . . . . . . . . . . . . . . . . . . . . . . . . . . . . 533
BEFORE YOU STARTWe have designed the Oster Deluxe Bread and Dough Maker to be easy to use. But, likeany kitchen appliance, it requires proper use and handling.BEFORE USE1. Read and keep all instructions.2. Make sure to remove all foreign matter from the baking pan.3. Plug the Bread Maker into a properly wired outlet.WHILEINUSEKeep the Bread Maker out of the reach of children – IT’SHOT!1. The temperature is very hot during operation. Be careful to keep your hands and faceaway from the unit.2. Do not open the lid or remove the bread pan during operation.3. Do not place anything on the Bread Maker lid. Do not cover vents.4. If any buttons are accidentally touched during operation, baking may stop.5. If a power outage occurs, you can restart the machine if it has not begun the bake cycle.If it’s at the bake cycle, then remove bread pan and place into an oven to finish cooking.WHERETOUSE1. Use only indoors on a stable, heat-resistant surface.2. Do not use the Bread Maker where it will be exposed to direct sunlightor other heat sources, such as a stove or oven.3. Place the unit at least two inches away from walls. If you do not, the wallsmay become discolored.AFTER USE1. Use oven mitts or a pot holder when taking out the bread pan after baking.2. Make sure to disconnect the power by unplugging the unit.Allow the Bread Maker to cool down before storing.3. Read instructions before cleaning. Do not immerse the unit in water.This will cause electric shock and/or damage to the unit.4
IMPORTANT SAFEGUARDSWhen using electrical appliances, basic safety precautions should always befollowed including the following:1. READ ALL INSTRUCTIONS, PRODUCT LABELS, AND WARNINGSBEFORE USING THE BREAD MAKER.2. Do not touch hot surfaces. Always use oven mitts when handlinghot materials, and allow metal parts to cool before cleaning. Allow theBread Maker to cool thoroughly before putting in or taking off parts.3. When unit is not in use and before cleaning, unplug the Bread Makerfrom wall outlet.4. To protect against risk of electrical shock, do not immerse the applianceor plugs in water or other liquids.5.Close supervision is always necessary when this or any appliance is usedby or near children, or incapacitated persons.6. Do not allow anything to rest on the power cord. Do not plug in cordwhere people may walk or trip on it.7. Do not operate this or any appliance with a frayed or damaged cord,or plug, or after the appliance malfunctions or is dropped or has beendamaged in any manner. Return appliance to the nearest authorized servicefacility for examination, repair or electrical or mechanical adjustment.8. Do not let the cord dangle over the edge of a table or counter or touchhot surfaces. Do not place on an unsteady or cloth-covered surface.9. Avoid contact with moving parts.10. Do not use attachments not recommended by the manufacturer;they may cause fire, electric shock or injury.11. Do not use outdoors or for commercial purposes.12. Do not place the appliance near a hot gas or electric burner,or in a heated oven.5
13. To unplug, press and hold the “STOP” button for 2 – 3 seconds(until “Beep” is heard), grip plug and pull from wall outlet.Never pull on the cord.14. USE OF EXTENSION CORDS: A short power supply cord has been provided toreduce the risk of injury resulting from becoming entangled in or trippingover a longer cord. Extension cords are available from hardware storesand may be used with care. The cord should be arranged so that it will notdrape over the counter or table top where it can be pulled by childrenor tripped over accidentally. If the appliance is of the grounded type,the extension cord should be a grounding-type 3-wire cord.15. ELECTRICAL POWER: If electric circuit is overloaded with other appliances,your Bread Maker may not operate properly. The Bread Maker should beoperated on a separate electrical circuit from other operating appliances.THIS UNIT IS INTENDED FOR HOUSEHOLD USE ONLYREAD AND SAVE THESE INSTRUCTIONSA SYMPHONY OF INGREDIENTSLike the instruments in an orchestra, the ingredients in basic bread are verysimple: flour, sugar, salt, a liquid (such as water or milk), possibly a fat(such as butter or oil) and yeast. And, like each musical instrument,each ingredient performs a specific job, and each lends a special flavorto the final masterpiece.That’s why it’s important to use the right ingredients in exactly the rightproportions to ensure you get the most delicious results!6
BASIC INGREDIENTSYEASTYeast is actually a microscopic plant; without it, your breadwill not rise. When moistened by a liquid, fed by sugar andcarefully warmed, yeast produces gases which cause the doughto rise. If the temperature is too cold, the yeast will not beactivated; if it’s too warm, it will die. The Oster Deluxe Breadand Dough Maker takes care of this worry for you bymaintaining just the right temperature in the baking chamber atall times. You can use either “active dry yeast,” “quick acting,” “rapid rise yeast” or one ofthe new “bread machine yeasts” in your Oster Deluxe Bread and Dough Maker.If you prefer to use a fast-rising yeast, such as quick rise or rapid rise, merely decreasethe amount used. As a general guide, we recommend using 1/2 tsp. of fast-rising yeastper cup of flour. Example: 3 cups bread flour would require 1-1/2 tsp. of fast-rising yeast.Baking powder and baking soda may be used to assist yeast or on their own as leaveningin quick breads which require no kneading or rising. Recipes with baking powderand baking soda are different than yeast recipes. Leavening agents cannot be substitutedfor one another.SWEETENERSSugars sweeten the bread, brown the crust and lendtenderness to the texture. These jobs can be performedby white or brown sugar, molasses, maple or corn syrups,honey, fruits or other sweeteners.FLOURIn order for the bread to rise, the flour has to havea high protein content. You should always usea “bread flour” (for white bread recipes) in yourbread maker to get the best results. Do not useall-purpose flour, cake flour or self-rising flour.Unlike white bread flour, whole wheat flourcontains bran and wheat germ which inhibit rising.Wheat breads therefore tend to be heavier in textureand smaller in size. A lighter, larger loaf can beachieved by combining whole wheat flour withwhite bread flour for wheat bread recipes.7
LIQUIDSWhen liquids are mixed with the proteins in flour,gluten is formed. Gluten is necessary for rising.Many recipes use dry milk, but other liquids,such as fruit juice, beer and water work, too. It’s adelicate balance: A recipe with too much liquidmay cause the bread to fall during baking while arecipe with too little liquid will not rise. Water isthe most common liquid used in bread making.It produces a heavier, crisper crust and a moreopen texture. Buttermilk results in a light,high-rising and tender bread; it will also helpextend the bread’s freshness. To offset the acidityof buttermilk, add 1/4 cup of baking soda per cupof buttermilk.SALTSalt strengthens the gluten and controls the yeast andmakes the dough more elastic. However, it also inhibitsrising, so use ordinary table salt and be very careful inmeasuring. For dietary reasons, it can be omitted and insome cases you can use a vegetable seasoning substitutefor flavor.FATSAny form of solid shortening or oil can besubstituted for one another in some amounts.Fat enriches bread’s flavor and keeps it tenderand moist. Do not use diet spreads or tub-typemargarines as they will affect the quality.Butter adds flavor. The same amount ofvegetable shortening or oil can be substitutedif you choose. Salted or unsalted buttermay be used. Soft spreads will NOT work.Margarine is an acceptable substitute for butter;do not use whipped or diet margarines.EGGSEggs add richness and color to breads, but due to health and safety precautions,do not use with the delay cycle.8
IMPORTANT MEASURING TIPSBecause each ingredient plays such a specific role in relationship to the other,it is especially important to measure the ingredients exactly to get the best results.For Dry Ingredients, use standard measuring spoon ormeasuring cup – not a tableware spoon or coffee cup –and level off. For flour, simply spoon the flour into ameasuring cup and level off with a flat kitchen utensil.For Liquids, fill a standard measuring spoon ormeasuring cup to the level indicated. Check your cupmeasurement by placing the measuring cup on a flatsurface.For Solid Fats, fill a standard measuring spoon ormeasuring cup to the level indicated and level off with akitchen utensil.LAST THINGS LAST!You’ll see this tip often in the book, but it bears repeating:Always put the liquids in first, the dry ingredientsnext and the yeast last. Before adding the yeast, dig ashallow hole in the dry ingredients and place the yeast inthe hole so that there is absolutely no contact between theliquids and the yeast; you do not want the yeast to be activated too soon in the process.This is especially important when you are using the Delay Bake option.9
GETTING TO KNOW YOUR DELUXE BREAD AND DOUGH MAKERThe best way to get there is to use this map. Soon you’ll know the electronic bread-bakingterritory the way you know your own kitchen. In the meantime, here are someeasy-to-follow directions to get you started.432BasicRapidSweetFrenchQuickWhole WheatDough/PastaL - LightStartStopP - Medium5BakeH - DarkTimer SetSelectCrustColor1THE CONTROL PANELIMPORTANT: When using the touch pad controls, be sure to press the paduntil you hear a beep.1. Select. Press the Select button to choose the setting you desire. Each time youpress the button you will hear a “beep” and the setting will advance in the followingsequence; 1 Basic: 3:00; 2 Rapid: 2:20; 3 Sweet: 2:50; 4 French: 3:50;5 Quick Bread: 1:50; 6 Whole Wheat: 3:40; 7 Dough: 1:30; 8 Bake Only: 1:00.Holding the button down continuously will advance the settings more quickly.2. Crust Color. Choose from light (L), medium (P) or dark (H) crust settings; select “L”for the lowest setting to yield “light” crust; “P” for the default program setting to yield“medium” crust; and “H” for the highest setting to yield “dark” crust. Unit will automaticallybake on the medium setting unless another is selected. Dark setting will add 7 minutesto total time, Light setting will subtract 7 minutes from total time.3. Display Window. The display will indicate the cycle selected (number from 1 to 8)and the crust color (L, P or H) until the Start button is pressed. Then the display showsminute-by-minute countdown during the cycle. The display will show “0:00” whencycle is complete.4. Timer. Use the Timer to delay baking. The timer can be set up to 13 hours in advance.The panel has forward and reverse arrows. Arrows move time forward or backward in10-minute increments. Holding the buttons down continuously will advance or decreasetime more quickly.5. Start/Stop. Press the “Start/Stop” button to start operation or begin the Timercountdown for delayed completion. (A signal tone will sound to indicate that thebreadmaking cycle has begun). To stop the operation or cancel a timer setting,press and hold 2 – 3 seconds until you hear a “Beep.” The unit will return to itsready condition showing the time for the cycle you had selected.NOTE: Do not press “STOP” when you are just checking the progress of your breadas this will cancel the cycle.10
SETTINGSBelow are brief descriptions of the many different types of bread, doughs, pizzas, pastas,jellies and jams you can make with your new Oster Deluxe Bread and Dough Maker. Basic (1)This setting is probably used more often than any other because it gives the bestresults with almost any recipe (standard white bread, raisin bread and more).Total cycle time is 3 hours. Rapid (2)The Rapid setting will make bread faster than other cycles. We suggest that you use theClassic White Bread recipe and increase the water by 1 to 2 Tbsp. This setting reducesthe second knead and final rise times. Total cycle time is 2 hours and 20 minutes. Sweet (3)This setting is made for breads containing high amounts of sugar, fats or protein(cheese, eggs, etc.), all of which increase browning. It produces a finished loafin 2 hours and 50 minutes. French (4)This setting is used for the preparation of French white bread. Due to the longerkneading, rising and baking times, the bread has a heartier crust. This entire cycleneeds 3 hours and 50 minutes. Quick Bread (5)Recipes for this setting will use a quick-acting leavening agent, usually baking powderor baking soda, rather than yeast. Total cycle time is 1 hour and 50 minutes. Whole Wheat (6)This setting offers longer rise times to accommodate the slower rising action of breadcontaining more than 50% whole wheat flour. Total cycle time is 3 hours and 40 minutes. Dough/Pasta (7)This setting is used to prepare dough for rolls, specialty breads, pizza, pasta, etc.,which are shaped by hand, allowed to rise for a final time and then baked or cookedconventionally. Total cycle time is 1 hour and 30 minutes. When cycle is complete,remove the dough and proceed with hand shaping, rolling, etc. Bake Only (8)This setting is for baking doughs or making jams. Total cycle time is 1 hour.11
STEP-BY-STEP DIRECTIONS ON HOW TO USE YOUR BREAD MAKER1. OPEN THE LID AND REMOVE THE BAKING PAN by pulling straight up onthe handle. It is important to remove the Baking Pan from the unit before putting theingredients into the pan to avoid accidentally spilling ingredients into the inner case.2. ATTACH THE KNEADING BLADE onto the shaft inside the Baking Pan by liningup the flat side of the blade with the flat side on the shaft. Make sure the Kneading Bladeis placed securely on the shaft.3. MEASURE ALL INGREDIENTS carefully and accurately. Inaccuratemeasurements, even if only slightly off, can make a difference in results. Add ingredientsinto the bread pan in the order they are listed. Yeast is always added last and must notcome in contact with any liquid. (Before adding yeast, remember to dig a small hole inthe flour so that the yeast doesn’t prematurely come into contact with the liquids or salt.This is especially important when you are using the Delay Bake Timer).4. WIPE WATER AND OTHER SPILLS from the outside of the pan;then insert the pan firmly into the bottom of the machine, applying pressure toeach corner of the pan to make sure it is snapped tightly into the retaining brackets.5.CLOSE THE LID AND PLUG IN THE BREAD MAKER. You will hear a beepand the LED display window will show “1P” for “Basic” setting, “Medium” crust.6.CHOOSE YOUR BREAD TYPE. Select the appropriate setting for your recipeby pressing the “SELECT” button on the control panel. Each time “SELECT” is pressedthe number in the display window will advance to the next setting.7.SELECT CRUST COLOR. Your bread maker will automatically producea “medium” crust color (“P” the default program) unless another is chosen;select crust color by pressing the “Crust Color” button; “L” low setting (light crust);and “H” high setting (dark crust).8. PRESS THE “START/STOP” BUTTON firmly once you have selected yourbread type and crust color. A signal tone will sound to indicate that you have begun!The baking time in hours and minutes will appear in the display. It will count down theremaining bake time in one-minute increments until the bread is done. This bread makerhas a convenient Viewing Window so that you may watch the progress of the bread as itis mixed, kneaded, and baked. DO NOT OPEN THE LID DURING THE BAKING CYCLES.NOTE: Once the “Start/Stop” button is pressed, the selected function(s) cannot be altered.To make any changes at this point, the unit must be stopped, reset and restarted.To stop, press the “Start/Stop” button and hold until signal sounds and screenreverts to initial display setting.12
9.WHEN THE BREAD IS DONE. When the baking time is completed,a signal tone will sound and the display window will show “0:00” (the “Colon” inthe time display will continue flashing). The “Keep Warm” setting will automaticallycontinue to keep the bread warm for one hour after the cycle ends (except whenusing the dough setting). For best results, remove the bread as soon as possibleto keep the crust from getting soggy. Remove the pan using potholders and takethe bread out of the pan by turning the pan upside down and shaking it. If youhave difficulty removing the bread from the pan, slide a flat rubber or plasticspatula along the sides of the pan to loosen the loaf. If the kneading paddleremains in the bottom of the loaf, use the end of a plastic utensil to remove it.Once removed from the Bread Pan, it’s best to let your bread cool 15 minutesbefore slicing. Enjoy!10. KEEP-WARM CYCLE automatically begins when the bake time is done.At the end of the 60 minutes, the heater will turn off. NOTE: You may remove theBaking Pan at any time during the “Keep-Warm” cycle. To turn off the “Keep-Warm”feature, simply press the “STOP” button and hold it for 2 – 3 seconds.PLEASE NOTE: Bread is best when removed from bread pan no more than 1 hourafter the “Keep-Warm” feature ends. The “Keep-Warm” feature is not providedfor the dough setting or the Jam/Jelly Setting.CAUTION: Steam will escape when the cover is opened. Be sure to use potholders or oven mitts to avoid steam burns.NOTE: Your Bread Maker includes an auto cycle recall feature. When a cycleis completed and the “Start/Stop” button is pressed, the unit will automaticallyrevert to the last setting selected.NOTE: If you wish to make another loaf of bread right away, allow the Bread Makerto cool down for 10 to 15 minutes with the cover open and the pan removed. If youattempt to use the unit too soon, it will signal and the display will read “H:HH”.Press “Start/Stop” until the screen reverts to the setting display and wait untilthe unit has cooled.11. USING THE DELAY TIMER – You can add the ingredients into yourbread pan and set the timer to delay the baking. Baking can be delayed up to 13 hours.NOTE: Do not use the timer if your recipe includes fresh eggs, milk or otheringredients that may spoil. Follow Steps 1 – 7 on the previous page, making sure to measure ingredientsinto the bread pan in the sequence specified in the recipe. Take special carenot to let the yeast contact the liquid ingredients or the salt.13
Then calculate the number of hours and minutes until you want fresh baked bread.EXAMPLE: If it is 8:00 and you want the bread to finish baking at 2:00,the timer should be set at 6 hours. Press the timer button once. The cycle length will appear in the display window.BAKING CYCLE CYCLE LENGTH1 Basic3:00 hours2 Rapid2:20 hours3 Sweet2:50 hours4 French3:50 hours5 Quick Bread1:50 hours6 Whole Wheat3:40 hours7 Dough1:30 hours8 Bake1:00 hour Use theTimer button to advance the time in 10 minute increments. (UseTimerbutton to subtract time, if necessary). EXAMPLE: You have chosen the Sweet Setting and2:50 appears in the display window. If you wish your bread to be done in 6 hours,you will press the Timer button until 6:00 appears in the display window. Press “Start/Stop” to begin the Timer. The “Colon” (:) in the time display begins to flash,indicating that the Timer is engaged. When unit beeps three times and 0:00 appears in the display window, press “Start/Stop”to cancel the “Keep-Warm” cycle and remove the bread. If you make an error while setting the timer and wish to start over, press “Start/Stop”and hold until a beep sounds and the screen reverses to the original setting.Timer is canceled and you may begin again.NOTE: If you forget to press “Start/Stop,” the Timer will not function. When using the Timer Cycle for more than a few hours during times of highhumidity or hot weather, reduce the liquid by one or two Tbsp. to reduce thepossibility of over-rising. Salt may be increased by 1/8 to 1/4 tsp. to keep thedough from rising too quickly and falling. Sugar can also be reduced by up tohalf the amount called for in the recipe.14
CYCLE TIMESBASICQUICK WHOLERAPID SWEET FRENCH BREAD WHEAT DOUGH BAKE(MIN:SEC)(MIN:SEC) (MIN:SEC)(MIN:SEC) (MIN:SEC) (MIN:SEC) (MIN:SEC) (MIN:SEC)PRIMARY KNEAD10:00 10:00 10:00 18:00 14:00 10:00 20:00––PRIMARY RISE20:0040:00––25:00––––SECONDARY KNEAD15:00 15:00 20:00 22:00––20:00––––SECONDARY RISE20:00––30:00 20:00––30:00 20:00––PUNCH DOWN00:30––00:30 00:30––00:30 00:30––FINAL RISE55:00 55:00 55:00 65:00 41:00 70:00 50:00––BAKE60:00 55:00 50:00 65:00 55:00 55:005:00TIME TO FRUIT/NUT SIGNAL 40:00 25:00TOTAL CYCLE –03:00 02:20 02:50 03:50 01:50 03:40 01:30 01:00NOTES: The audible signal indicating that it is time to add raisins or other dried fruits appliesto the following settings only: Basic, Whole Wheat, French and Rapid.DISPLAY INFORMATIONAlways use the Bread Maker in a room that is free of drafts and is at least 55 F/13 C,but not warmer than 90 F/32 C. Do not use Bread Maker in an unheated garage,outdoors, near a heat vent or in direct sunlight.Generally, the display window will tell you what is happening with your Bread Maker.Here are some points to consider:DISPLAY MESSAGEPROBLEM0:00 Colon FlashingCycle is complete.Keep-Warm is engaged.Unit is too hot to beginnew breadmaking operation.H:HH Signal BeepingL:LL Signal BeepingDisplay BlankE:EE Signal BeepingHOW TO FIXPress “Start/Stop” buttonto cancel.Press “Start/Stop” button to cancel.Open cover, remove bread pan andallow unit to cool with cover open.Room Temperature isPress “Start/Stop” button to cancel.too low. (Below 59 F/15 C) Place Bread Maker in a warm roomand allow to warm up.Power has been interrupted. Unplug unit and plug back into outlet. Unitmust be reset. (See P. 4 “While in Use” #5)Room temperature is too high. Press “Start/Stop” button to cancel.(Above 86 F/30 C)Place Bread Maker in a cooler locationand allow it to adjust before using.15
REMOVABLE LIDYour new Bread Maker is equipped with a removable lid for easy cleaning and storage.To remove the lid, simply raise the lid just short of the vertical position (approx. 70 angle);while holding the base of the unit with one hand, gently hold the front edge of the lidand pull it to the right side so as to pop the left hinge pin out (you will hear a loud “pop”sound when the hinge pops out). Then simply slide the lid to the left to remove theright hinge pin.PROBLEMCHECK THIS:THE UNIT DOES NOT OPERATE AFTERPUSHING THE “START/STOP” BUTTON Unplugged Setting was not selected Did not push “Start/Stop” buttonto clear display after last cycleTHE BREAD ROSE TOO HIGH Too much yeast or moistureTHE BREAD DID NOT RISE HIGH ENOUGH Too much flour – not enough yeastFor Additional Troubleshooting Tips, See Pages 48 - 49.TIPS FOR THE GOURMET BAKERLAST THINGS LASTYou’ll see this tip in several places in this book, but it bears repeating: Always put theliquids in first, the dry ingredients in next, and the yeast last (fruits and nuts are addedlater, after the machine has completed the first knead). Dig a shallow hole in the dryingredients and place the yeast in the hole so that there’s absolutely no contact betweenthe yeast and any liquids or salt. This is especially important when you’re using theDelay Bake option. You don’t want the yeast to be activated too soon in the process!PLACEMENT COUNTS!Place dried fruits, vegetables, and dried spices away from the liquid ingredientsin the bread pan. If they soak up water, they can undermine the bread’s chemistry.FRESHNESS FIRSTAvoid using perishable ingredients – milk, yogurt, eggs, or cheese – withthe Delay Bake function.JUST WAIT FIFTEENFor best results, wait fifteen minutes before slicing; the bread needs time to cool.DEEP FREEZETo freeze fresh bread, let it cool completely and double-bag in plastic.16
Bread Recipes17
BREAD RECIPESIMPORTANTAltitude, weather conditions and accuracy in measurementcan all affect the outcome of a loaf; to help compensate forthis, we have created each recipe with a range for the liquidportion of the recipe.We recommend that you begin using the smaller amount of liquid. Allow your BreadMaker to mix the ingredients for a few minutes before checking the dough consistency.If it is dense, oddly shaped or the unit is making a knocking noise, add 1 Tbsp. of waterat a time until the dough is soft and pliable.Do not exceed 4-1/2 cups dry ingredients.IMPORTANT: Place ingredients into bread pan in the exact order listed. If the ingredientsare listed in two columns, begin with the left column and finish with thecolumn on the right.VICKI’S TRADITIONAL WHITE BREAD(Basic or Rapid Setting – Timer OK)All ingredients at room temperature (70 F-80 /21 C-27 C)WaterSaltButter or MargarineBread flourDry MilkSugarActive Dry Yeast1.5-Pound2-Pound8 to 9 oz.1-1/2 tsp.2 Tbsp.3 cups2 Tbsp.1 Tbsp.2 tsp.11 to 12 oz.1-3/4 tsp.2 Tbsp.4 cups2 Tbsp.2 Tbsp.2-1/4 tsp.Measure all ingredients into bread pan in the order listed above. Select desiredsetting ( 1 Basic or 2 Rapid). Select crust setting if other than “Medium.” Press the“Start/Stop” button to begin the breadmaking process. The display will begincounting down the minutes until the end of the cycle. When the baking is complete,the display will read 0:00 and the unit will signal (when this occurs, you maychoose to press the “Start/Stop” button to cancel the “Keep-Warm” cycle if desired).Remove the bread and enjoy!NOTE: Once the “Start/Stop” button is pressed, the selected function(s)cannot be altered. To make any changes once the process has begun,the unit must be stopped, reset and restarted. To stop, press “Start/Stop”and hold until signal sounds and the screen reverts to the setting display.18
SHAWN’S CLASSIC WHITE BREAD(Basic or Rapid Setting – Not for Timer)All ingredients at room temperature (70 F-80 /21 C-27 C), except milk11-12 oz. warm milk (110 F-115 /43 C-46 C)4 cups bread flour1-1/2 tsp. salt1-1/2 Tbsp. sugar2 Tbsp. butter or margarine, softened2 tsp. active dry yeastMeasure all ingredients into bread pan in the order listed above, beginning withthe column on the left, followed by the column on the right. Select desired setting(Basic or Rapid). Select crust setting if other than “Medium.” Press the “Start/Stop”button to begin the breadmaking process. The display will begin counting downthe minutes until the end of the cycle. When the baking is complete, the displaywill read 0:00 and the unit will signal (when this occurs, you may chooseto press the “Start/Stop” button to cancel the “Keep-Warm” cycle if desired).Remove the bread and enjoy!NOTE: Once the “Start/Stop” button is pressed, the selected function(s)cannot be altered. To make an
recipes for breads, doughs, pastas, jams and jellies, spreads and glazes and quick breads. First review the Safety Guidelines, then turn toPage 12 fortheeasy step-by-step directions! Along the way, feel free to ask questions. . a