Transcription
Tutorial for TestConductor for Rhapsody in C Rhapsody in C Tutorialfor IBM Rational RhapsodyTestConductor Add On
2License AgreementNo part of this publication may be reproduced, transmitted,stored in a retrieval system, nor translated into any human orcomputer language, in any form or by any means, electronic,mechanical, magnetic, optical, chemical, manual or otherwise,without the prior written permission of the copyright owner,BTC Embedded Systems AG.The information in this publication is subject to change withoutnotice, and BTC Embedded Systems AG assumes noresponsibility for any errors which may appear herein. Nowarranties, either expressed or implied, are made regardingRhapsody software including documentation and its fitness forany particular purpose.TrademarksIBM Rational Rhapsody , IBM Rational Rhapsody Automatic Test Generation Add On, and IBM Rational Rhapsody TestConductor Add On are registered trademarksof IBM Corporation.All other product or company names mentioned herein may betrademarks or registered trademarks of their respectiveowners. Copyright 2000-2016 BTC Embedded Systems AG.All rights reserved.
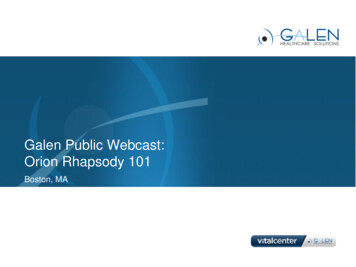
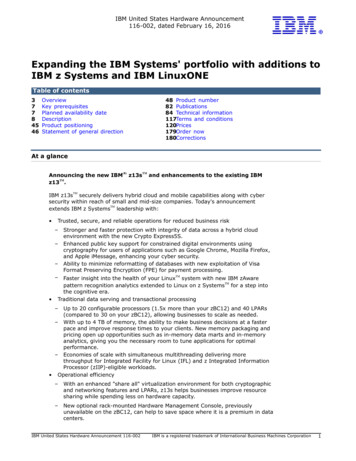
TestConductor for Rhapsody in C 3In this tutorial we would like to give you anTestConductor is the testimpression of the Rhapsody TestingEnvironment, which goes beyond currentembedded software testing technologies; itensures that the system can be continuouslytested throughout the design process. TheTesting Environment and its parts seamlesslyintegrate in Rhapsody UML and guide the userthrough the complex process of testpreparation, execution and result analysis.Rhapsody UML utomaticAutomaticTest CaseGenerationexecution and verification engine inthe Rhapsody Testing Environment. Itexecutes test cases defined bysequence diagrams, flow charts,statecharts, and source code. Duringexecution TestConductor verifies theresults against the definedrequirements.Test CaseExecutionIBM Rational Rhapsody Testing EnvironmentRhapsody ATG is the AutomaticTest Generation engine in theRhapsody Testing Environment. Inorder to thoroughly verify thefunctionality of the System UnderTest (SUT), it uses the UML modelinformation as well as the generatedsource code as basis for analysis,and creates executable test caseswith high coverage rates.See separate ATG tutorial how to useATG.
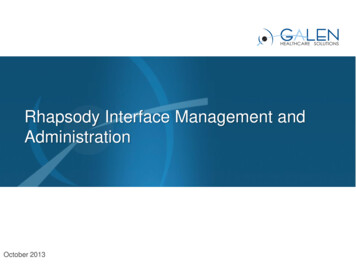
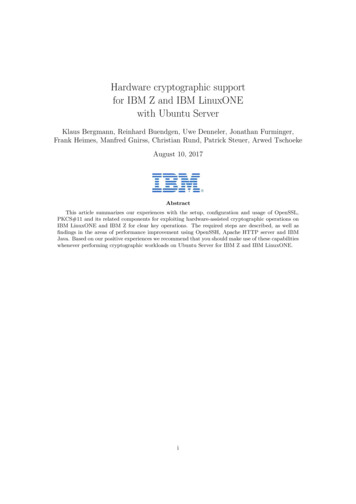
CashRegister ApplicationThe CashRegister application, the exampleC application for this tutorial, models a simple cashregister. Make yourself familiar with the use cases of theapplication. Open the project „CppCashRegister“ from thefolder „Samples/CppSamples/TestConductor“ in yourRhapsody installation, run the component«CashRegisterNoGui», and use the following input:To create a new shopping basketsend the event evStart toApplicationFramework[0]- itsCashRegister.To add an product to the shopping basket sendthe event evBarcode to ApplicationFramework[0]- itsCashRegister. The event evBarcode needsthe product code as argument. The productdatabase knows codes between 12344 and12349.To remove the last added product from theshopping basket send the event evRemove toApplicationFramework[0]- itsCashRegister.To print the bill send the event evEnd toApplicationFramework[0]- itsCashRegister.4
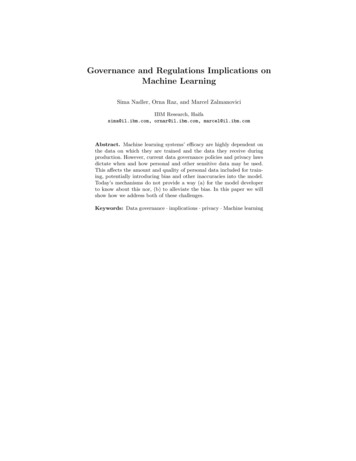
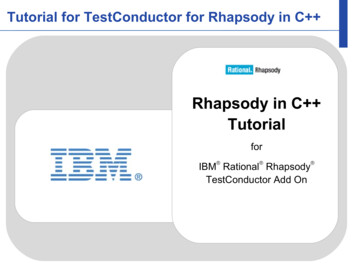
CashRegister ModelThe CashRegister model mainly contains theCashRegister class, a list of selected products, and aproduct database class with a list of all products orderedby barcode numbers. The model delegates all input andoutput messages to classes with interfaces of IDisplay,IPrinter, IBarcode and IKeyboard. These classes areconnected by a port named „hw“ to the CashRegisterclass.The ApplicationFramework class initialisesits parts itsCashRegister of type CashRegisterand itsTerminal of type Terminal. The linkbetween the parts ensures the bi-directionalcommunication over the port hw.The CashRegister class is able to managethe list of products the user wants to buy. Viewthe provided state chart to get familiar with eventprocessing and state changes.The Terminal class provides the interfacesIPrinter and IDisplay. Imagine the Terminal classas an input/output terminal, which is able toprocess keyboard inputs and displays theprogress and the bill.5
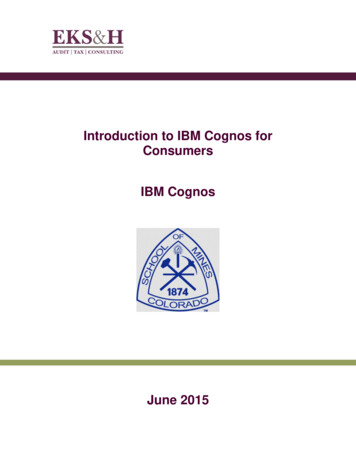
System Under TestDefining the System Under Test (SUT) is the firststep in the test workflow. This tutorial will focus on theCashRegister class. To define CashRegister to be theSUT, we have to create a test architecture. The neededadministrative framework will be placed in the folder„TestPackages“.The System Under Test (SUT) is a part andis the component being tested. A SUT canconsist of several objects. The SUT is exercisedvia its public interface operations and events bythe test components.1Select the class„CashRegister“ in thebrowser and choose fromcontext menu „CreateTestArchitecture“.2Have a look on the newly created Test Context Diagram„Structure of TCon CashRegister“, and view the resulting partsin the composite class „TCon CashRegister“ of our test context.6
Test ArchitectureThe automatically created test architecture iscompletely represented in the browser and seamlesslyintegrates into Rhapsody; think of it as an independent testmodel besides the design model. After creation thefollowing elements are visible:The new configuration under the component„TPkg CashRegister Comp“ initializes the testcomponents and SUT objects and theirinterconnections when a test case is started.A test component is a class of a test system.Test component objects (test componentinstances) realize partially the behavior of a testcase. A test component might have a set ofinterfaces via which it might communicate viaconnections with other test components or withSUT objects.A test context describes the context in whichtest cases are executed. It is responsible fordefining the structure of the test system. The testcomponents and SUT objects are normally partsof a test context.7
Test ContextThe automatically created test context representsthe formal structure of the test system. TestConductoranalyzed the model structure in consideration of theselected SUT and proposed a test structure, which isvisualized in the test context diagram inside the testcontext. TestConductor generated corresponding testcomponents for ports and associations of the SUT.The composite class„TCon CashRegister“ is the part containerfor the SUT object and the created testcomponent objects.The class „TC at hw“ realizes the requiredinterfaces „IDisplay“ and „IPrinter“ of port „hw“.Using ports as a high-grade encapsulationmechanism will result in clean test architectures.The class „CountedProduct“ is a derivationof the design class „CountedProduct“. It isgenerated due to its association to theCashRegister class.8
Test CasesTest cases are the soul of a test system. Until now we created a complete testarchitecture around the SUT with a few mouse clicks in less than a minute. Theestablished and reviewed test system is linkable and runable. Well, the body works,let‘s have a look at the test cases. A test case .is a specification of one case to test the system including whatto test, with which inputs, and what the expected outcomes are.It is defined in terms of stimuli injected to SUT objects andobservations coming from SUT objects.is an operation of a test context that specifies how a set ofcooperating test components interact with the SUT.can be specified as sequence diagrams, flow charts,statecharts, and source code.can be generated automatically by using TestConductor’s testcase wizard.can be generated automatically with the Rhapsody AutomaticTest Generation (ATG).can be recorded as animated sequence diagrams.can be created by hand.9
Test Case SpecificationHow to manually create test cases and how to execute themwith TestConductor will be discussed in the following sections. Thedifferent kinds of definitions have their own strengths:Sequence diagram test cases can be recordedautomatically or created by hand. In some cases they havealready been specified during the analysis phase of theproject, and define the actions and reactions of the SUT.The graphical formalism boosts the readability andunderstanding.Flow chart test cases also benefit from their graphicalnature, but in contrast to sequence diagrams the use ofcomplex data types (structs) and control structures (ifthen-else) is supported out-of-the-box.Statechart test cases are a well known and convenientmeans to specify behavior based on states and modes.Source code test cases are often preferred byexperienced programmers.In summary TestConductor, the Rhapsody test caseexecution engine, works with all kinds and combinations oftest case definitions.10
Test Case: Sequence Diagram ITo manually create a sequence diagramtest case we have to define a test scenariowhich is represented as a sequence diagramand link it to a test case. TestConductorsimplifies this process with a single command.1Select the test context„TCon CashRegister“ in theRhapsody-Browser .2. and choose from thecontext menu „Create SDTestCase“.3Rename the test case to„TestCase simple start“.Rename the test scenario to„simple start“ and open it.11
Test Case: Sequence Diagram IIDetermine the test objective of thetest case: the SD test case shouldcheck that requirement “REQ0” isindeed fulfilled by the CashRegisterclass. To make explicit that the SD testcase shall verify this particularrequirement, a test objective is addedto the test case.1Select the test case andselect “Add New - TestingProfile - TestObjective”2Select requirement “REQ0”as target of the testobjective”3The test objective nowlinks the test case to therequirement “REQ0”.12
Test Case: Sequence Diagram III13Determine the involvedobjects for the desired testscenario and remove not neededinstance lines from the view inorder to establish action andreaction between remaininginstances.1Right click the instance line„itsTC for itsCountedProduct“and remove it from view.2Arrange the remaining instance lines„itsTC at hw of CashRegister“ and„itsCashRegister“.
Test Case: Sequence Diagram IVDefine action and reaction of the systemunder test. We will specify the „simple start“scenario, where the user sends the eventevStart() to the SUT, and the SUT shall reactwith a status message show(aMsg).TestConductor, the execution engine, shall actas as driver for evStart(), and as observer forshow(aMsg). Driving means to simulate e.g. theusers activity during test execution byautomatically sending the message to the SUTin order to provocate a reaction. The test willpass, if TestConductor observes the specifiedreaction from the SUT. Otherwise it will fail.1Draw the driving message„evStart()“ from„itsTC at hw of CashRegister“to the SUT „itsCashRegister“.2Draw the message „show()“ fromthe SUT „itsCashRegister“ to„itsTC at hw of CashRegister“such that it can be observed.3Specify theparameter aMsg byediting the label ofshow() to„show(aMsg OK)“.14
Test Case Execution IExecute the test case with Rhapsody TestConductor.The execute dialog lists all executed test scenarios, theirprogress and status.The status, the final result can be either„PASSED“ or „FAILED“.The progress displays how many steps arefinished yet. In case of a passed test 100% haveto be achieved.The buttons in the top right corner of the executiondialog can be used to control actual test caseexecution and will be explained later.1To execute the test case with TestConductor select the testcase „TestCase simple start“ and choose from the contextmenu the items „Update TestCase“, „Build TestCase“, and„Execute TestCase“. The Rhapsody TestConductorexecution dialog will open.2The test case execution dialog isa dockable dialog that can beplaced e.g. underneath the mainbrowser window.15
Test Case Execution IIThe test case execution FAILED withRhapsody TestConductor. To analyze thereason TestConductor offers two kind ofviews. The HTML-report displays a textualsummary and can be found directly underthe test case in the Rhapsody-Browser.TestConductor created a witness scenarioto display the error. The red arrowvisualizes the faulty step and the reason.TestConductor expects the parameter value„OK“, but observes the value „Ready“during test execution. The expected valuewas not specified correctly. by accident.1To create and open thewitness scenario rightclick the item SD tc 0 inthe TestConductorexecution dialog 2. and select “Show as SD”.The witness scenario isadded to the model for laterinspection.3In the browser, below thetest cases, you can findthe generated html report.Double click the report toopen it.16
Test Case Execution IIIThe test execution PASSED with Rhapsody TestConductor after wecorrected the expected parameter value for argument “aMsg” from “OK” to“Ready” in the test scenario „simple start“. After changing the scenario,updating, building and re-executing the test case, the test case is passed.Refer to the user guideto get familiar with theextended functionality ofTestConductor.1To correct the test caseopen the test scenario„simple start“.2Respecify the „show“message parameter valuefrom „OK“ to „Ready“ andclose the test scenario.3Re-execute the test case bypressing the “Start” button inthe top right corner of theexecution dialog.17
Test Case: Source Code I18To manually create a source code test casecreate a code test case and write the test code intothe edit field under the implementation tab of thetest case. The Rhapsody-TestConductor-macro„RTC ASSERT NAME“ takes a name-parameterand a condition. If the condition(„isNoMoreProducts“) evals to true the test casewill pass.The package “Tutorial Prerequisits” contains acomment “sourcecode testcase” with the predefined code for the code test case.1Select the test context„TCon CashRegister“ andchoose from the contextmenu „Create CodeTestCase“.2Rename the created testcase to „TestCasecode assert“ and open thefeature dialog.3Replace the content of theedit field under theimplementation tab of the testcase with the content from thedescription field of thecomment and press „OK“.
Source Code Test Case: ExecutionExecute the test case with RhapsodyTestConductor.Both assertions evaluate to true and thetest case passes. Double-clicking anevaluated assertion in the executionwindow highlights the assertion in the testmodel.1Create in the test context„TCon CashRegister“ thetwo integer attributes „i1“and „i2“.2Select„TestCase code assert“and choose update, buildand execute from thecontext menu.3In the execution window,select the assertion anddouble-click “Show Assertion”in order to highlight theassertion in the model.19
Test Case: Flow Charts ITo manually create a flow chart test case wehave to define a test scenario which is representedas a flow chart and link it to a test case.TestConductor simplifies this process with a singlecommand.1Select the test context„TCon CashRegister“ inthe Rhapsody-Browser .2. and choose from thecontextmenu „Create FlowchartTestCase“.3Rename the created test caseto „TestCase Flow Chart“and open the flow chart.20
Test Case: Flow Charts IIDefine the flow chart in order to execute it withTestConductor. The Rhapsody-TestConductormacro „RTC ASSERT NAME“ takes a nameparameter and a condition. If the conditions [i1 1]and [i2 0] evaluate to true the test case will pass.Obviously the flow chart test case is very similar tothe source code test case we discussed somepages before. The difference in comparison with thesource code test case is the graphical nature of thistest case.1Replace the content of the flow chart ofthe test case with the content from theflow chart in Package „TutorialPrerequisits“.21
Flow Charts Test Execution22Execute the test case withRhapsody TestConductor. The„RTC ASSERT NAME“-macroevals to true and the test casepasses.1Select the test case„TestCase Flow Chart“ .2. and choose fromcontext menu the items„Build TestCase“and „Execute TestCase“.3In the execution window,double click on the assertionor right click on it and select“Show Assertion” in order tohighlight the assertion in themodel.
Test Case: Statecharts ITo manually create a statechart test case wehave to define a test scenario which is representedas a statechart and link it to a test case.Technically, the test case has a dependency to aTestComponent that contains the statechart.TestConductor simplifies this process with a singlecommand.1Select the test context„TCon CashRegister“ andselect “Create StatechartTestCase”.2Rename the test case to“TestCase statechart”3Add a test objective (using“Add New - TestingProfile- TestObjective”) torequirement REQ 223
Test Case: Statecharts IIDefine the statechart in order to execute it withTestConductor. The statechart test case first startsthe CashRegister by sending event evStart. Aftersending this event, the test case waits 1 second.After 1 second has elapsed, the test case checks ifthe CashRegister has changed its state from idle toactive after receiving the event evStart. If bothchecks are passed, the complete test case ispassed.1Replace the content of the test componentstatechart associated with this test casewith the statechart of the Tutorial package.2Add “evTCStart” as trigger ofthe transition from state“initial” to state “state 1”24
Statechart Test Case ExecutionExecute the test case with RhapsodyTestConductor. Both assertions evaluate totrue and the test case passes.1Select the test case„TestCase statechart“ .2. and choose fromcontext menu the items„Update TestCase“,„Build TestCase“and „Execute TestCase“.3In the execution window,double click on the assertionor right click on it and select“Show Assertion” in order tohighlight the assertion in themodel.25
Create Test Cases Using Test Case Wizard - SDsTo create a test case based on existingsequence diagrams, operations orrequirements, you can use theTestConductor test case wizard. For anexisting sequence diagram, the test casewizard creates an analogue test case withthe same message structure as the originalsequence diagram.For a requirement the test case wizardcreates a test case with the chosenrequirement as the test objective.1Select the sequencediagram “scenario wizard”in the tutorial package andselect “Create TestCase ”.2In the test case wizarddialog, the test context“TCon CashRegister” isalready highlighted. PressOK to proceed.3As a result, a new test case“SD tc 0” has been created which isbased on a new test scenariocontaining the same messages asthe original SD, but life lines adaptedto the test context structure.26
Create Test Cases Using Test Case Wizard OperationsThe test case wizard can also be used totest operations that are defined in the model.The wizard allows to create four different kindsof test cases: sequence diagram test cases,statechart test cases, flow chart test cases orcode test cases. Independent of the chosenkind of test case, the created test case calls theselected operation. Additionally, the test casealready contains a check that can be refined bythe user in order to check the out values of theoperation.1Select operation“countProducts” of classCashRegister in thebrowser and select“Create TestCase ”2In the test case wizarddialog, select “CodeTestCase” as test casekind and press OK.3As a result, a new code testcase has been created thatcontains a call to operation“countProducts” and also adummy assertion that can berefined.27
Debugging Test CasesDebugging failed test cases can also be donewith TestConductor. When a test case fails, onecan turn on debug execution mode inTestConductor’s execution window. After switchingon debug mode, when executing the test case onecan step through it by using the “Go Step”, “GoIdle”, etc. buttons of Rhapsody’s animation toolbar.Additionally, when stepping through the test case,one can use Rhapsody’s animation features toinspect animated statecharts, animated SDs, etc.in order to find the reason why the test case fails.In this mode, the application is not terminatedautomatically after the test case has ended.1Select test case“SD tc 0” and select“Execute TestCase”.2After the test case hasfailed, turn on debugexecution mode by clickingthe debug button in theexecution dialog.3Execute the test case againby pressing the “Start” buttonin the execution dialog. Nowyou can step through the testcase by using Rhapsody’sanimation toolbar.28
Executing Multiple Test CasesExecuting multiple test cases can bedone by executing a complete test context ora complete test package. When a test contextor a test package is executed, all test caseswithin the context or test package areexecuted. After all test cases have beenexecuted, TestConductor computes an overalltest result for the test context or the testpackage.1Select the test context“TCon CashRegister” andselect “UpdateTestContext”. After that,select “Build TestContext”.2Select the test contextagain and press “ExecuteTestContext”. All testcases will be executed oneafter the other.3The results are shown in theexecution window. As always,“Show as SD” resp. “Showassertion” can be used toshow the reasons of failedtest cases.29
Assessing Test Case Requirement Coverage I30Which requirements are covered bymy test cases? This important questioncan be answered either by using a testcase requirements matrix or by generatinga requirements coverage test report. Atest case requirements matrix shows therelationship between test cases andrequirements in a matrix view. Arequirements coverage test report showsthe same information, but presented as atextual report. It can be generated byReporterPlus using a predefined template.1Select the test package“TPkg CashRegister” andselect “Add New - TestingProfile - TestRequirementMatrix”.2Open the features dialogof the matrix, rename it to“ReqCoverage”, and setthe “from” scope and the“to” scope to the completemodel “CppCashRegister”.3When double clicking thematrix in the browser, thematrix view shows therelationship between the testcases and the requirements.
Assessing Test Case Requirement Coverage II31Test Case Reports can be used as an alternativein order to figure out coverage of requirements withthe test cases. With Rational Publishing Engine arequirement coverage report can be generated indifferent formats like Word, Html, etc. Therequirements coverage report shows the list ofrequirements, their coverage by test cases and theoutcome of the test case execution. The report alsocontains information about the specification of thetest cases.1From Rhapsody’s toolsmenu, select “RationalPublishing Engine“- “Generate Report.”.2Select the“TestRequirementCoverage.dta” as template for thereport to generate and clickNext in the following dialogs.3Select the desired outputformat, html for example, andclick on Finish. After generatingthe report, the report can beviewed with any browser thatcan display Html files.
Assessing Test Case Model CoverageBesides coverage of the requirements,32an important orthogonal information is whichparts of the model are executed by the testcases, i.e, what is the achieved ModelCoverage when executing the test cases.TestConductor can compute this informationduring test case execution. When modelcoverage computation is turned on, after testcase execution TestConductor adds a modelcoverage report to the test cases, test contextsetc. that shows the achieved model coverage.1On the tags tab of theconfiguration, turn on“ComputeModelCoverage”.2Execute the test context“TCon CashRegister”.3After execution has finished,model coverage reports canbe found both for individualtest cases as well as acumulative coverage reportfor the test context.
Assessing Test Case Code Coverage I33Besides coverage of the requirementsand model elements, an important additionalinformation is to what extend the code of theSUT generated by Rhapsody’s code generatoris executed, i.e, which Code Coverage isachieved when executing the test cases.TestConductor can compute this informationduring test case execution. When codecoverage computation is turned on, after testcase execution TestConductor adds a codecoverage report to the test cases, test contextsetc. that shows the achieved code coverage.1Create a copy of theRhapsody code generationconfiguration“DefaultConfig”, rename it to“Release” and make it theactive configuration.2On the tags tab of the configuration,turn off “ComputeModelCoverage”and turn on“ComputeCodeCoverage”.
Assessing Test Case Code Coverage IIThe Code Coverage report containsdetailed information to what extend the code ofthe SUT has been executed by the test cases.The report contains both a summary about theachieved coverage (e.g. statement coverage)as well as detailed information about eachsingle line of code. The source code viewcontains color coded presentations about thecoverage status of statements, decisions andconditions of the tested code.1On the settings tab of theconfiguration, setInstrumentation Mode to“None”.2Select the test contextagain and do “UpdateTestContext”, “BuildTestContext” and then“Execute TestContext”.3After test case execution hasfinished, by double clickingthe code coverage element inthe browser you can open thecode coverage report.34
ConclusionThe high-grade automation in the Rhapsody Testing Environmentwith TestConductor generates complete, immediately executable testarchitectures in shortest time with a few mouse clicks. makes it for the first time possible to implement cyclicallyquality assurance measures in early phases of thedevelopment. increases substantially the planning reliability forprojects, because design errors and subsequent errorswill be recognized very early. makes statements about the coverage rates for both themodel elements and model code. Developers can easilyand fast analyze reasons for not coved elements. highly automates the testing process and can save testdevelopment time compared to traditional approaches.
Appendix ITesting a Rhapsody Component!
Generate Test ArchitectureTo manually create a test architecturefor the component test, insert a new test package and anew test context. It is not necessary to define a SUT andtest components. We will use the pre-defined component«CashRegisterNoGui» and its configuration «Debug»;activate this configuration before you proceed. This testvalidates the complete model running in a productionconfiguration against its requirements. Here, the SUT is thecomplete component.Important is, this is possible only for animation basedtesting mode (see below).1Select the root package„CppCashRegister“ and choosefrom the context menu „Add New- TestingProfile- TestPackage“.Then open the Features dialog ofthe TestPackage and set “ to „AnimationBased“.2Select the created testpackage and choose fromthe context menu „AddNew - TestingProfile - TestContext“.3Rename the created testpackage to„TPkg ComponentTest“and the created testcontext to„TCon ComponentTest“.37
Link SD to Test Case38To link an existing sequence(requirement) diagram to a test casecreate a test case and open the dialog„Define Test“.In the dialog „Define Test“ the usercan specify properties concerningthe execution of sequence diagramtest cases. Refer the user guide to getfamilar with the properties and their effectduring test case execution.1Select the test context„TCon ComponentTest“ andchoose from the contextmenu „Add New - TestingProfile - TestCase“.2Rename the created testcase to„TestCase Purchasewith remove“.3Select the test case„TestCasePurchase with remove“and choose from context menuthe item „Edit TestCaseSDInstances“.
Test Case Property DefinitionDefine the properties of a test casein order to use an existing sequencediagram. In the dialog „Define Test“specify the sequence diagram, switch tolinear driving and apply the changes. Weuse the sequence diagram„SDPurchase with remove“ from thespecification phase of the CashRegisterproject, which specifies a completepurchase process.1Press „Add SDInstance“ andwrite in the field „SDInstanceName“ the text„Purchase with remove“.2Select the item„SDPurchase with remove“ from the drop-downcombobox in the field„Sequence Diagram“.3Select the „Driver andMonitor“ option and apply allchanges by pressing „OK“.The dialog closes.39
Passed Test ExecutionThe test execution PASSED withRhapsody TestConductor.1Set as active component“CashRegisterNoGui”.Select the test case“TestCase Purchase withremove”.2. and choose fromcontext menu the items„Update TestCase“, „BuildTestCase“ and „ExecuteTestCase“.3The test case runs andpasses as expected.40
Appendix IIGenerating test reports with Rhapsody ReporterPLUS!
Test Report Generation I42To generate a test report with RhapsodyReporterPLUS select a test package in the Rhapsodybrowser and start the ReporterPLUS wizard. After allneeded options are selected ReporterPLUS will start tocollect information and displays it in a well arranged stylein different formats as listed in the figure.In opposite to the Rhapsody TestConductorHTML Test Result Report every ReporterPLUStemplate can be customized to fit the usersneeds.1Select the test package„TPkg CashRegister“ in theRhapsody browser .2. and choose from the „Tools“ menu „ReporterPLUS - Report onselected package.“ to create a report for the selected testpackage. In case a report for all test packages in the model shallbe created, choose the menu item „Report on all modelelements.“
Test Report Generation IISelect the export format and choose thetest report template, which has beeninstalled with Rhapsody TestConductor inthe ReporterPLUS template directory. Thistemplate uses the TestingProfile to providethe underlying stereotypes to generate adocument.TestConductor provides also a template togenerate a test requirement report,TestRequirementCoverage.tpl.1Select the exportdocument format„Generate HTML Page“and choose „Next “.2Click on the Button „.“ tobrowse the test reporttemplate.3Select the template„TestReport.tpl“ in the folder„
See separate ATG tutorial how to use ATG. In this tutorial we would like to give you an impression of the Rhapsody Testing Environment, which goes beyond current embedded software testing technologies; it ensures that the system can be continuously tested throughout the design