Transcription
lifesaving
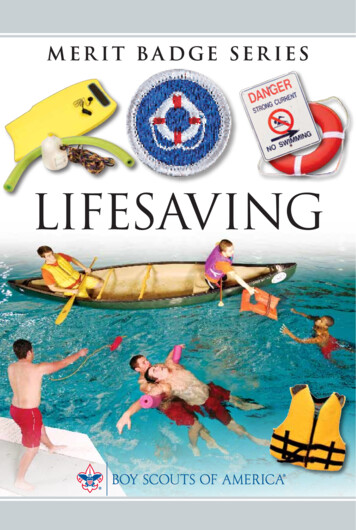
BOY SCOUTS OF AMERICAMERIT BADGE SERIESLifesavingThe Boy Scouts of America is indebtedto the American Red Cross for its subjectmatter expertise, review, and other assistance with this edition of the Lifesavingmerit badge pamphlet.
Note to the CounselorSeveral merit badges in Boy Scouting prepare the Scout for immediate service. First Aidis one; Lifesaving is another. In earning these merit badges, the Scout should learn howto perform this service safely. The well-being of both the accident victim and the rescuerdepends on it.The requirements for the Lifesaving merit badge are designed to prepare a12- to 14-year-old Boy Scout to respond safely and effectively to water emergencies.Each year, Scouts of all ages encounter such emergencies and successfully performscores of water rescues. A Scout may actually be the best person on hand to respond.As counselor, it is your responsibility to approve only thosewho fulfill the merit badge requirements. You should giveeach Scout reasonable opportunity to retake any formalwritten or skill tests, and continue to provide guidanceuntil all candidates have earned the badge. Providedthey are good swimmers, most Scouts who makea conscientious effort should earn the Lifesavingmerit badge without too much difficulty.At the very least, a Scout who is havingdifficulty with any element must be helpedto understand why his performance is not yetacceptable. A misconception is often worsethan no training at all. It is the responsibility ofthe counselor to ensure that each Scout knowsand understands what he can safely and properlydo in a rescue situation.The techniques deemed proper are thoseoutlined in this pamphlet. It is BSA policy thatrequirements be followed exactly as written. However,you have some flexibility in presentation and emphasiswhen more than one technique will satisfy a given requirement.For example, several types of rescue entries are discussed in the text.Remember that physical performance of a technique alone is not sufficient. Forexample, the Scout must understand that the concepts underlying rescue entries areto not jump or dive into water of unknown depth, to stay always aware of the victim’slocation, to move quickly, and to keep control of the rescue aid. If the Scout recognizes35915ISBN 978-0-8395-3297-2 2008 Boy Scouts of America2009 Printing
and understands these concepts, then he is much more likely to make a safe and effective entry in any rescue circumstance. It is not necessary for him to be tested on everyentry discussed in the text to satisfy requirement 7 for a “proper” entry.This merit badge pamphlet presents a comprehensive discussion of concepts andtechniques that the requirements alone cannot provide. Each instructor, regardless ofexperience, should read the latest printing of the pamphlet before beginning a course.Use the text, along with the requirements, to construct a detailed course outline. Also,encourage each Scout to read and study the pamphlet. It helps if the troop, camp, orcounselor maintains lending copies of the pamphlet and distributes them either beforeor during the first training session.Because earning the Lifesaving merit badge involves swimming assists, the Scoutis expected to have strong swimming skills before attempting the requirements. Usethe swimming prerequisite to review each Scout’s skills before accepting him as a candidate for merit badge instruction. If a Scout has marginal swimming skills, weigh anycommitment to provide remedial swimming instruction against that Scout’s chance ofsuccess in the time available for instruction. Denying a Scout an immediate but inappropriate opportunity may better serve the overall aims of Scouting.Offer training on a flexible schedule to a single buddy pair or small group, or on amore formal basis to a larger group at prearranged times. The minimum time requiredfor training is that which leaves the Scout prepared. No definite time limits are established. Factors such as class size, participant maturity, number of instructors, and priorinstruction in CPR will influence the time needed.Most Scouts can adequately absorb the material in six 90-minute sessions orfive two-hour sessions. For this age group, several short sessions over a week or twoweekends are better than a single 10-hour day. Most of the time should be spent within-water instruction, practice, and review. If available, a classroom setting can be usedto cover concepts, CPR, and first aid. A suggested schedule for use at summer camp ispresented in section IV, “Aquatics,” in Camp Program and Property Management, available through your local council service center.Formal skills testing is not required; adequate performance during practice willsatisfy the requirements. However, a final, basic skills test can be a valuable teachingaid. You also can assess and reinforce understanding by presenting participants withsimple “situation exercises.” For example, while the rescuer’s back is turned, placevarious rescue devices at the rescuer’s disposal and instruct the victim(s) in how toact and where to go. Ask the rescuer to turn and respond to the given scenario. Praisepositive performance and review it for other participants. If a different response wouldhave been more appropriate, lead the rescuer to that conclusion with a series of questions and suggestions, and then congratulate him on his reasoning. These exercisesshould be designed for success and learning, not intimidation or failure.The Lifesaving requirements cover a wide range of techniques based on the typeof equipment available and the victim’s condition. A deliberate progression of instruction is needed to prevent confusion. Emphasize simple, preferred techniques overcomplex skills. Clearly define the application of each exercise. Reviews at both thebeginning and the end of a session reinforce understanding, particularly if the reviewinvolves discussion and/or presentation by the participants. Cognitive requirementsmay be completed either orally or in writing at any time during the course.Lifesaving3
Base your instructional outline on material in this Lifesaving pamphlet. Otherorganizations offer excellent basic water safety and lifeguard courses that may supplement the Scout’s training, but the goals of such courses generally diverge from thoseof the Lifesaving merit badge. Do not substitute outside course material for Lifesavingmerit badge instruction.Basic water safety courses generally stop short of in-water assists, particularlycontact rescues of unconscious victims. Lifeguard courses train facility employees inwater rescue skills based on the availability of specialized equipment, such as arescue tube, that is often not available in a lifesaving situation. Lifeguard training alsoadds skills, such as backboarding, that are beyond the scope of the Lifesaving meritbadge. Such skills are included in the BSA Lifeguard program.The training that qualifies you as a counselor may have confined basic rescuetechniques to use of a rescue tube. If so, thoroughly familiarize yourself with the material in this book. Work unfamiliar material into your teaching outline. Practice withanother adult until you are comfortable with the skills and their range of application.Boats are rescue tools available to the public but not addressed in courses forpool lifeguards. Similarly, the Lifesaving merit badge requirements do not call for proficiency in small watercraft. Various boating merit badges address that need. However,make a reasonable effort to incorporate more than discussion into the “row” portion of“reach-throw-row-go.” A demonstration with a canoe or kayak in a pool should at leastbe feasible.Most of the requirements cover water rescue as an emergency response, but someof the prerequiste rank requirements along with requirement 2a deal with emergencyprevention based on an understanding of factors that lead to emergencies. To satisfyrequirement 2a, the Scout should demonstrate a basic understanding of how eachpoint of BSA Safe Swim Defense contributes to swimming safety.The intent of requirements 13 and 15 is to reinforce skills and knowledge previously learned or to teach them for the first time. If the Scout lacks training in eitherfirst aid or CPR, then the counselor should teach the skills if he or she is qualified, orarrange training from a qualified instructor. Where Scouts have learned and practicedfirst-aid and CPR skills through rank advancement or other merit badges, the counselorshould still review this information and apply it to the swimming and boating environment. Scouts should be able to demonstrate that they have retained informationlearned previously, either by discussion or skills performance. Recent training in CPRby a recognized agency can be accepted as completion of requirement 13 if the counselor feels the Scout’s skills are satisfactory and need no additional reinforcement.Suggestions for improvement are always welcome. Reviews of merit badge literature are conducted regularly, and updates often can be implemented within a year.Please send suggestions to Boy Scout Division, Boy Scouts of America, 1325 WestWalnut Hill Lane, P.O. Box 152079, Irving, TX 75015-2079.Your contribution to water safety and youth development is greatly appreciated.Scouting works because of volunteers. Thank you.4Lifesaving
Requirements1. Before doing requirements 2 through 15:a. Complete Second Class rank requirements 7a through 7c and First Class rankrequirements 9a through 9c.Second Class rank requirements 7a through 7c:(7a) Tell what precautions must be taken for a safe swim.(7b) Demonstrate your ability to jump feetfirst into water over your headin depth, level off and swim 25 feet on the surface, stop, turn sharply,resume swimming, then return to your starting place.(7c) Demonstrate water rescue methods by reaching with your arm or leg,by reaching with a suitable object, and by throwing lines and objects.Explain why swimming rescues should not be attempted when a reaching or throwing rescue is possible, and explain why and how a rescueswimmer should avoid contact with the victim.First Class rank requirements 9a through 9c:(9a) Tell what precautions must be taken for a safe trip afloat.(9b) Successfully complete the BSA swimmer test.(9c) With a helper and a practice victim, show a line rescue both as tenderand as rescuer. (The practice victim should be approximately 30 feetfrom shore in deep water.)b. Swim continuously for 400 yards using each of the following strokes in astrong manner for at least 50 continuous yards: front crawl, sidestroke,breaststroke, and elementary backstroke.2. Explain the following:a. Common drowning situations and how to prevent them.b. How to identify persons in the water who need assistance.Lifesaving5
c. The order of methods in water rescue.d. How rescue techniques vary depending on the setting and the condition ofthe person needing assistance.e. Situations for which in-water rescues should not be undertaken.3. Demonstrate “reaching” rescues using various items such as arms, legs, towels,shirts, paddles, and poles.4. Demonstrate “throwing” rescues using various items such as lines, ring buoys,rescue bags, and free-floating supports. Successfully place at least one such aidwithin reach of a practice victim 25 feet from shore.5. Show or explain the use of rowboats, canoes, or other small craft inperforming rescues.6. List various items that can be used as rescue aids in a noncontact swimmingrescue. Explain why buoyant aids are preferred.7. Perform the following equipment-based rescues for a conscious practicesubject 30 feet from shore. Use a proper entry and a strong approach stroke.Speak to the subject to determine his condition and to provide instructionsand encouragement.a. Present a rescue tube to the subject, release it, and escort the victim to safety.b. Present a rescue tube to the subject and use it to tow the victim to safety.c. Present a buoyant aid other than a rescue tube to the subject, release it, andescort the victim to safety.d. Present a buoyant aid other than a rescue tube to the subject and use it to towthe victim to safety.e. Remove street clothes in 20 seconds or less and use a nonbuoyant aid, suchas a shirt or towel, to tow the subject to safety. Explain when it is appropriateto remove heavy clothing before attempting a swimming rescue.8. Explain the importance of avoiding contact with an active victim and describelead-and-wait tactics.9. Perform the following nonequipment rescues for a conscious practice subject30 feet from shore. Begin in the water from a position near the subject. Speakto the subject to determine his condition and to provide instructionsand encouragement.a. Provide a swim-along assist for a calm, responsive, tired swimmer movingwith a weak forward stroke.b. Perform an armpit tow for a calm, responsive, tired swimmer resting with aback float.6Lifesaving
c. Perform a cross-chest carry for an exhausted, passive victim who does notrespond to instructions to aid himself.10. In deep water, show how to escape from a victim’s grasp on your wrist. Repeatfor front and rear holds about the head and shoulders.11. Perform the following rescues for an unconscious practice subject at or nearthe surface 30 feet from shore. Use a proper entry and strong approach stroke.Speak to the subject and splash water on him to determine his condition beforemaking contact. Remove the victim from the water, with assistance if needed,and position for CPR.a. Perform an equipment assist using a buoyant aid.b. Perform a front approach and wrist tow.c. Perform a rear approach and armpit tow.12. Describe how to respond if a victim submerges before being reached by arescuer, and do the following:a. Recover a 10-pound weight in 8 to 10 feet of water using a feetfirstsurface dive.b. Repeat using a headfirst surface dive.13. Demonstrate knowledge of resuscitation procedures:a. Describe how to recognize the need for rescue breathing and CPR.b. Demonstrate proper CPR technique for at least 3 minutes using a mannequindesigned to simulate ventilations and compressions.14. Demonstrate management of a spinal injury:a. Explain the signs and symptoms of a spinal injury.b. Support a faceup victim in calm, shallow water.c. Turn a subject from a facedown to a faceup position whilemaintaining support.15. Show that you know first aid for other injuries or illnesses that could occurwhile swimming or boating, including hypothermia, heat reactions, musclecramps, sunburn, stings, and hyperventilation.Lifesaving7
ContentsTo Help Other People at All Times. . . . . . . . . . . . . . . . . . . . . 10Basic Swimming Skills. . . . . . . . . . . . . . . . . . . . . . . . . . . . . . 12Drowning: Risks and Prevention . . . . . . . . . . . . . . . . . . . . . . 18Recognizing a Victim. . . . . . . . . . . . . . . . . . . . . . . . . . . . . . . 24Planning a Rescue. . . . . . . . . . . . . . . . . . . . . . . . . . . . . . . . . 28Reaching Rescues . . . . . . . . . . . . . . . . . . . . . . . . . . . . . . . . . 30Throwing Rescues. . . . . . . . . . . . . . . . . . . . . . . . . . . . . . . . . 32Rowing Rescues. . . . . . . . . . . . . . . . . . . . . . . . . . . . . . . . . . . 38Swimming Rescues. . . . . . . . . . . . . . . . . . . . . . . . . . . . . . . . 42Spinal Injury Management. . . . . . . . . . . . . . . . . . . . . . . . . . . 71First Aid for Water Rescue. . . . . . . . . . . . . . . . . . . . . . . . . . . 74Hazardous Water Conditions. . . . . . . . . . . . . . . . . . . . . . . . . 82Additional Opportunities. . . . . . . . . . . . . . . . . . . . . . . . . . . . 93Lifesaving Resources. . . . . . . . . . . . . . . . . . . . . . . . . . . . . . . 94Lifesaving9
To Help Other People at All Times.To Help Other Peopleat All TimesIf you look forthis Scout emblemthroughout thisNo Boy Scout will ignore a plea for help. However, the successof your response will depend on your knowledge and skills. TheLifesaving merit badge is designed to help you safely and successfully assist those involved in water accidents. Lifesaving is aserious undertaking and must be treated accordingly. You mayseldom need to use these skills. But if you do, your ability couldmake the difference between a person’s drowning and survival.pamphlet, you willsee true accountsof rescuesby Scouts.Preparation and PracticeSkills are best learned from demonstration and practice. Be alertto all that is said; your instructor will cover only necessarymaterial. Read this pamphlet carefully and swim regularly untilyou can easily complete the required distance swim. Practiceeach skill slowly and deliberately before working on speed.When practicing a rescue, do not use the word “Help!” Lifeguards andothers may think there is real danger. Also, arrange a signal with yourbuddy that means “Let go; I need to catch my breath.” Be sure that the“victim” is realistic; he should not chase after you in the water or in anyway behave unlike a real drowning person.Rescuer SafetyThe rescuer’s safety is important in any emergency. In mostemergency situations, you can help minimize risk and perform asuccessful rescue. Some people drown in futile attempts to saveothers, but these would-be rescuers are usually frantic friendsand relatives whose swimming skills are little better than thoseof the person in distress. They lack basic lifesaving training andact inappropriately.10Lifesaving
.To Help Other People at All TimesAfter earning the Lifesaving merit badge, you should knowwhen you can and cannot perform a safe rescue. If called upon,uphold your promise to help others at all times, but do it well.Do not risk injury to yourself when a rescue appears futile. Gofor help instead.Topics to Be CoveredThis pamphlet covers subjects in the following specific order tohelp you comprehend the material naturally. Review of basic swimming skills. You need to be a goodswimmer before you begin work on the Lifesaving merit badge. Common causes of water accidents. This discussion willgive you a feel for situations when help may be needed andperhaps help you prevent such accidents from happening.Knowing the factors that lead to drowning also will help youunderstand the need for each item in the Safe Swim Defenseand Safety Afloat standards, the foundations for safe BSAaquatics activities. How to recognize those in trouble. It is not always obviouswhen someone is drowning. How to plan a rescue. Once you recognize the need to act,you accept the responsibility only if you are the most qualified person present. If you are, you must decide whether togo for help or to plan a safe rescue. The action you take willdepend on several factors. How to classify the type of victim. Is he or she conscious orunconscious? What is the victim’s level of distress? How to estimate the distance from shore. Is the victim closeenough for a reaching or throwing rescue, or will you need totake a boat or flotation aid to the victim? How to identify what rescue aids are available. How to take notice of any special circumstances. Do cold water,swift current, or injuries to the victim need to be considered?Depending on the answers to these questions, you will chooseyour rescue method and confidently act within your knowncapability. Carefully studying this pamphlet and practicing withyour counselor will help you gain that confidence and knowledge.Lifesaving11
Basic Swimming Skills.Basic Swimming SkillsWater rescues don’t always require swimming; reaching orthrowing an aid often works. However, the rescuer must sometimes swim a float to an active victim or tow an unconsciousperson to safety. This requires strong swimming skills.Before beginning your Lifesaving training, you must firstmaster the basic strokes—front crawl, sidestroke, breaststroke,and elementary backstroke. An excellent way to prepare for theLifesaving merit badge is to first earn the Swimming merit badge.You must be able to easily complete the required 400-yard swim.If you can’t quite make the distance, get someone to reviewyour strokes with you. At this stage, stamina is probably notas critical as good form. If you know how to do the strokesproperly, the distance shouldn’t be a problem.The basic strokes are reviewed here.Lifesaving procedures will require you tomodify the strokes to carry equipment, toavoid obstructions, to keep an eye on the victim, and if needed, to tow the victim to safety.Front CrawlFront crawl, side and front views12LifesavingThe front crawl combines a relaxed flutterkick with a rotary arm motion and rhythmicbreathing. It is the fastest stroke but requiresconsiderable energy. The stroke is most efficient if your head remains supported by thewater. Turn your head to the side to inhale;rotate down to exhale. Keep the lower armbent and sweep it across the chest rather thanrotate it in a vertical arc. The arm motion generates most of the power. However, your kickshould be strong enough to push you forwardwithout having to use your arms. Your feetshould not slap the surface of the water.
.Basic Swimming SkillsBreaststrokeCoordination is the key to the breaststroke. Your legs power youforward as your arms move to a glide position with your headdown. Your arms power you while you pull your head up, take abreath, and prepare the legs for the next whip kick. Done slowlywith a glide, the breaststroke conserves energy and works well forlong distances.SidestrokeThe sidestroke uses a scissors kick in which the heels are firsttucked behind the body. The top leg is then extended forward andthe bottom leg back. Power is generated when the legs are snappedback to a trailing position. The lower arm pulls water past the chestwhile the upper arm pushes from the chin toward the feet. The earrests in the water, and the face is high enough to keep the mouthand nose above water. The stroke uses a glide to conserve energy.A good swimmer can do the sidestroke on both sides.Breaststroke, side and front viewsSidestroke, top and side viewsLifesaving13
Basic Swimming Skills.Elementary BackstrokeGlideBegin the backstroke with arms atyour sides and legs together. Start thewhip kick by slowly lowering theheels beneath the knees. Rotate theankles outward of the knees andreturn them to the start position in arapid, continuous, circular whippingmotion. The knees slightly separateand follow the feet out—do not leadout with the knees. Bring the armsslowly up along the chest with elbowstucked in close to the sides and thenextend them outward at shoulderlevel. The arms are used to pushwater toward the feet while the legsmake a circular “whipping” action.Avoid raising the head or bending atthe waist. This is a restful stroke goodfor long distances. A long glide is animportant part of the stroke.Using and Modifying theStrokes for LifesavingWith some modifications, the frontcrawl, breaststroke, sidestroke, andelementary backstroke can be mademore effective when used during alifesaving situation.Elementary backstroke, side and top views14Lifesaving
.Basic Swimming SkillsFront Crawl. Used as an approach stroke and to tow rescue aids.For lifesaving, the crawl is normally done with the head out ofthe water and a flotation device tucked under the arms or trailedbehind. Swimming with the head up is more difficult and takesmore energy but allows the rescuer to keep track of the victimwhile avoiding obstacles or other swimmers. Pace yourselfto prevent exhaustion. If you must swim a long distance,you may choose to swim facedown and look up everyfew strokes, although it is best to keep a close eyeon the victim’s location and condition.Breaststroke. Used as an approach stroke andto tow or push rescue aids. This is a more versatile approach stroke than the crawl. The headstays out of the water and rescue equipmentmay be trailed behind, tucked under the arms,or pushed forward with one or both hands. Ifwind and water are calm, the swimmer can pusha float, such as an inner tube or air mattress,ahead of him and use his arms for stroking. Therescuer also can lie on a bodyboard, surfboard, or airmattress while using his arms in a breaststroke fashion.The breaststroke may also be used to push one side of afloation aid while the victim holds the other side.Sidestroke and Elementary Backstroke. Generally used fortowing assists. If the victim needs help, both the sidestroke andthe backstroke will work for towing a conscious victim graspinga float. If the float is large enough that the victim and rescuercan hold opposite sides, use the breaststroke to push the victimto shore.If you have used a nonbuoyant aid or the victim is unconscious, tow using the sidestroke or elementary backstroke. Thisis discussed later in more detail. For now, practice the sidestrokewith the lower hand held at the side and practice the backstrokeusing just the kick.Lifesaving15
Basic Swimming Skills.Rotary KickAt times, you may need to stay in one position without a floatand with your head up; that is, you will need to tread water. Youmay already know methods for treading water, such as scullingwith your hands and using a combination of kicks. Anotheroption is to use the rotary, or eggbeater, kick. The rotary kickuses a sitting position with the knees apart. Rotate one leg andthen the other in a circular pattern similar to the whip kick usedfor the breaststroke and thebackstroke. However, eachleg moves separately in therotary kick. Try it first using afloat or sculling with yourhands. As you get the feel ofit, use just your legs. Kickonly fast enough to keepyour head above water.Surface DivesRotary kickSome drowning victims mustbe retrieved from below the water’s surface. Keep the followingin mind when diving below the surface. Don’t try to swim down. Your body is lighter than waterand naturally floats upward. Instead, practice the surfacedives described in this section until you can easily reachbottom in 8 feet of water. Take only one or two deep breaths before diving.Breathing too deeply for too long can lead to hyperventilation, which may cause you to black out underwater. Don’t ignore pain in your ears. As you swim downward,you may notice a slight pain in your ears. This is caused bythe increased pressure of the water against your eardrums.Swallowing, wiggling your ears, or gently blowing againsta pinched nose may ease the discomfort. However, if thepain in your ears becomes intense, return to the surface.Otherwise, your eardrums could rupture and cause you tolose your sense of direction and possibly to black out.16Lifesaving
.Basic Swimming SkillsFeetfirst surface diveFeetfirst Surface Dive. Use the feetfirst surface divewhenever you can’t clearly see what is beneath you.At the surface, begin in a vertical position with yourarms extended outward. Push down with your arms and use ascissors kick to lift yourself as far out of the water as possible.The weight of your body will then drive you back downward.Straighten your legs and push up against the water with yourhands. Do not lift your arms too quickly; they should pushagainst the water rather than break the surface.Headfirst Surface Dive. Use the headfirst surface dive whenthe water is deep and clear. Begin by moving forward with abreaststroke. With your hands at your sides and your legsstraight back, scoop downward with your arms and bend at thewaist, lifting your legs into the air. Then extend your arms infront of your head.The object is to point your entire body toward the bottomwith your legs above the surface, so the weight of your legs willdrive you downward. This dive is known as a “pike” if you keepyour legs straight the entire time. It is a “tuck” if you bring yourlegs toward your body and then straighten them into the air.Keep your arms extended to protect your head as you dive.Headfirst surface dive in pike positionLifesaving17
Drowning: Risks and Prevention.Drowning: Risks andPreventionMillions of people safely enjoy water sports year-round. Butaccidents can and do happen. This section reviews the mostcommon causes of drowning and ways to prevent them. TheCenters for Disease Control and Prevention, the U.S. CoastGuard, the National Safety Council, and various other government and public organizations monitor deaths and injuries fromswimming and boating incidents. D rowning is second only to car accidents as a leadingcause of accidental death for Scout-age youth. R oughly three-fourths of all drowning victimsare males. I n pools where lifeguards are on duty, relativelyfew drownings occur. H eadfirst entry into shallow or obstructed watercan result in neck or spinal injuries that lead toparalysis or death by injury or drowning. M any victims did not intend to enter the water.Drowning can result from falls, boating accidents, and cars going into the water. B oating activities account for roughly one-fourth ofall drownings. Personal flotation devices (PFDs) are not worn in more than80 percent of fatal boating accidents. Alcohol is estimated to be a factor in more than half of allswimming and boating fatalities. Cardiovascular disease is the No. 1 cause of death in theUnited States. A heart attack or stroke victim in or on thewater has a smaller chance of survival.18Lifesaving
.Drowning: Risks and PreventionInadequate Supervision. A toddler left alone near a pool is anexample of inadequate supervision. Allowing others to take partin unsafe activities is another. Qualified supervision, whichincludes appropriate discipline, can be an important factor inpreventing drowning. A potential lifesaver who notices anunsafe situation should try to prevent the need for a rescue.Poor Swimming Skills. Many people who drown are unableto swim even a few feet to save themselves, which means thatrescues can often be made from shore or over short distances.Small children are often poor swimmers, and many victims thatScouts rescue are young. Knowing how to swim well is the bestprotection against drowning.U
This merit badge pamphlet presents a comprehensive discussion of concepts and techniques that the requirements alone cannot provide. Each instructor, regardless of experience, should read the latest printing of the pamphlet before beginning a course. Use the text, along with the re
