Transcription
Replacing Old Leer Twist Handle with New Leer Twist HandleNew Leer Twist Handle can be found acementTwist-Handle.htmlRecommended Tools:Phillips Screw DriverFlat Head Screw Driver3/32 Allen WrenchChannel Locks or Large PliersRubbing AlcoholPutty Knife
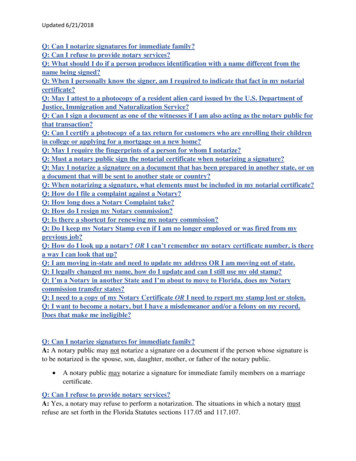
Step 1:Using an 3/32 Allen wrench, remove the cables from both rotarylatches.
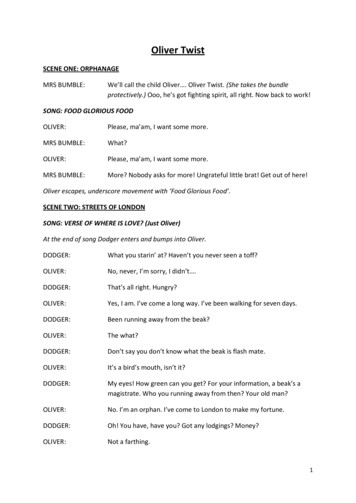
Step 2:Using a Phillips screw driver, remove the locking mechanism fromthe back of the existing handle.
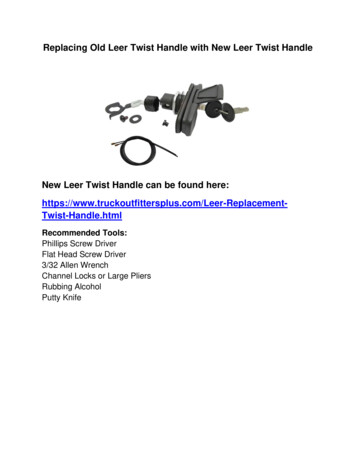
Step 3:Remove the sliding lock bracket from the back of the existinghandle by sliding it until the studs line up with the wholes and pulldown.
Step 4:Using a small flat head screw driver, remove the retainer clip fromthe back of the existing handle. The cable bracket will then slideoff.
Step 5:Using a pair of channel locks or a large pair of pliers, remove thelarge nut from the back of the existing handle.STOP!Lower the tailgate! From this point on you MUST leave thetailgate down until installation of the new handle is complete.There is no way to release the rotary latches until the newhandle is installed. If the door is latched and the tailgate isup it will be very difficult to get the door open again.
Step 6:Pull the handle out of the front of the door. Using a putty knife orflat object, remove the plate from the glass on the front side of thedoor. Be careful not to pry too hard and break the door. Residuefrom the handle may need to be removed from the glass as well.Clean the area with rubbing alcohol to aid in removing residueand prepare the surface for the installation of the new handle.STOP!Take all of the components you just removed and throw themin the garbage. They will not be needed to complete theinstallation of the new Leer Twist Handle.
Step 7:Remove paper backing from the new twist handle.
Step 8:Install the new twist handle thru the hole in the glass. Usepressure to adhere the handle to the glass. Make sure the lockdoor opens upward and the handle twists clockwise.
Step 9:Install the flat black washer and large nut to the back of the newtwist handle. Tighten the nut with channel locks or a large pair ofpliers. DO NOT OVERTIGHTEN.
Step 10:Unless you are installing a keyless entry system on your new LeerTwist Handle you will need to install the shroud over the inside ofthe handle. This shroud covers the bolt action used for thekeyless entry system.
Step 11:Hold the cable bracket/emergency release up to the inside of thehandle. Make sure the truck on the lever will be oriented the rightway when the door is closed (wheels down).
Step 12:Using a Phillips screw driver, install the flat washer and screw tothe inside of the new handle. The washer is what retains thecable bracket therefore it must be positioned correctly on thehandle. Tighten the screw.
Step 13:Insert the cables into the cable bracket. Run the cables thru thechannel in the door and out to the rotary latches. Repeat foropposite side.
Step 14:With the rotary latch in the closed position (see image below) runthe cable thru the rotary latch. Pull the cable tight and tightenusing an Allen wrench. Repeat for opposite side.Twist the handle to release the rotary latches and test thedoor. Make sure both sides latch and release evenly.Test the key. With the handle locked try twisting the handle.If one or both of the rotary latches release while the handle islocked the cables are too tight. Adjust the cablesaccordingly.New Leer Twist Handle can be found acementTwist-Handle.html
Step 6: Pull the handle out of the front of the door. Using a putty knife or flat object,