Transcription
EDI 101 Packet.DOCEclipse EDI Support DocumentationTable of ContentsAdministration and TasksEDI Admin Daily TasksDaily tasks that should be performed by the site’s EDI AdministratorEDI Testing:How to setup and test new trading partnersAlternate Trading Partner IDOften used with new trading partners who have a testing IDControl Number MismatchesHow to manage this commonly seen errorEDI DefinitionsExplanation of common EDI terminology and a list of the common inbound and outbounddocumentsEDI Cheat SheetCheat sheet to help you setup new trading partner profilesEDI Info TemplateTemplate to create an info sheet to send to your trading partnersVendor 850 Quote NumbersHow to send your vendors Quote numbers, Contract numbers, or special pricing referencenumbers within the Outbound 850 Purchase OrderEDI Trading with Customers850 Inbound SetupHow to setup your system to receive 850 Purchase Orders from Customers850 Inbound ProcessingInstructions for your order takers to manage and process inbound EDI purchase ordersEclipse EDI Error GlossaryList of possible errors that can be received into the EDI error queue with instruction on how tohandle the errorsUpdated 2/9/2017Page 1 of 42
EDI 101 Packet.DOCEclipse EDI Administrator Daily TasksOverviewThere are several tasks that should be completed on a regular basis by the designatedadministrator for Eclipse EDI. Typically, it is recommended that these tasks are completed on adaily basis. Depending on your EDI traffic, you may want to adjust the schedule of these tasks,completing them anywhere from several times a week to several times a day.For our Platinum EDI clients, these tasks are handled by the Eclipse EDI Support Group. Werecommend that all sites, either through Platinum Support or on their own, maintain the EDIqueues and check the EDI Activity Log regularly. This will aid in finding problems and resolvingthem in a timely manner.***Note: EDI has not fully been intergraded into Solar at this time. When you reacha screen that is not solarized an Eterm session will be launched and you will beasked to log in to your Eterm account.Daily TasksThese three areas should be checked daily as outlined below:1) EDI Activity Log: calls completing2) EDI Outgoing Status Queue: up to date3) EDI Error Queue: no errorsSystem System Programming EDI EDI Maintenance to view Maintenance optionsUpdated 2/9/2017Page 2 of 42
EDI 101 Packet.DOCUpdated 2/9/2017Page 3 of 42
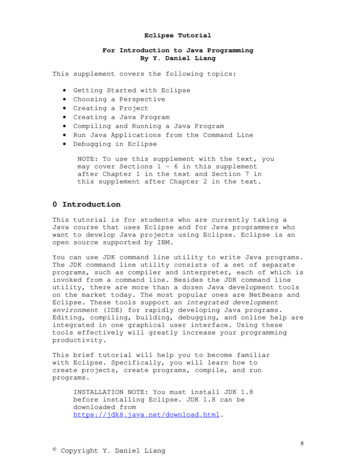
EDI 101 Packet.DOCEDI Activity LogThe EDI Activity Log (In Eterm, F2 S E M V) has the most recent activity at the top, andshould be checked for the following:1) EDI transmissions are starting and completing properly.a. For normal transmissions with your VAN you should see the following:Connect To (VAN name) Completed** Connected to (URL or IP address).** TRANSFER COMPLETED - SEND** Connected to (URL or IP address).** TRANSFER COMPLETED - RECEIVEConnect To (VAN name) Startedb. If there are no documents to send, or no documents at the VAN to receive youwould see the following:Connect To (VAN name) Completed** Nothing to Transmit to Epicor TDX** Connected to (10.16.25.19).** NO MATCHING FILES - RECEIVEConnect To (VAN name) StartedWatch for any errors or failures2) Check that documents are being enveloped and created. How many you see and what timeof day you see them depend on your volume of EDI trading.a. Enveloped:02/09/17 12:08pm Enveloped : 997 02/09/17 12:08pm Enveloped : 850 - P001097256.0001b. Created:02/09/17 12:08pm Created 850 - S001833229 Hint: You can search for entries in the log by selecting (ALT-S). The Select Pattern willallow you to search for any text in an entry. You can pull up all entries regarding your VAN tosee calls completing.For inbound orders that are created, you can view or edit the order by placing your cursor onthe line and doing an Alt-V for View or Alt-E for Edit.Example:Updated 2/9/2017Page 4 of 42
EDI 101 Packet.DOCEDI Outgoing Status QueueThe purpose of this queue (System- System Programming- EDI- EDI Maintenance- EDI OutgoingStatus Queue) is to review recent documents that are pending or have been sent, and are waitingto be acknowledged by the trading partner.When a user creates an EDI outbound document, an entry for that document is added to the EDIOutgoing Status Queue. At first, the document is in a SEND status meaning that it will be sent onthe next EDI VAN transmission. When a document is in the ENVELOPED status it means that acall is in the process of being transmitted to your VAN/Trading Partner. Once the transmission iscomplete, the status will change to SENT. When the trading partner receives the document, theywill send a 997 Acknowledgement back in return. When the 997 is received, the applicable entryis cleared off the queue automatically. Verify Older Documents.Documents should not sit in the Outgoing Status Queue for more than one or twobusiness days. If you see a document older than that, contact your trading partner andask if they have received the document. Resend as requested or manually post the 997. Resend Standard (850,810,855 and 856) Documents As NeededIf the trading partner has not received your document you can recreate it by going intothe order and selecting EDI in the print option drop down from the order status screen. Post Manual 997 As Needed/ Create Manual 997(Solar)If the trading partner has received your document, Right-Click Create Manual 997 topost a manual 997. The manual 997 posting will list the acknowledgement in the changelog of the order. Research ACK ERROR statusA document in the queue with a status of ACK ERROR means that your trading partnerreceived your document, but there was an error on the document you sent. Contact yourtrading partner and ask what the problem is. Once the error is resolved resend the EDIdocument if need be.Note: Problems to watch for: A document stuck in ENVELOPED status for more than a fewminutes may indicate a hung transmission. Check the EDI Activity log to see how long thetransmission has been active. If active for more than 10 minutes, contact EDI Support forassistance.Other helpful hot keys: Right-Click View Document will show you the raw EDI data of the outbound document. Right-Click Delete will allow you to delete a single entry. Right-Click Delete By Date will allow you to delete all items on the selection list older thanthe chosen date. Right-Click Change Status will switch the status of a document between HOLD and SEND.Updated 2/9/2017Page 5 of 42
EDI 101 Packet.DOCUpdated 2/9/2017Page 6 of 42
EDI 101 Packet.DOCEDI Error QueueThis queue (F2 S E M Q) shows errors on pending EDI documents. These errors need tobe dealt with as quick as possible as they are often for important incoming documents.The documents in this queue are pending and have not yet been processed into yoursystem. Ideally, this queue should be empty except for any new errors.The follow instructions are a quick guide on the common hot keys used in the EDI error queue.We have listed some of the more common error you may see in this queue just below. For acomplete list of errors please refer to the ‘EDI Error Glossary’ located on page 35 of this guide.To view any error in the EDI Error Queue put your cursor on the line in question and hit enter.This will allow you to view the EDI document.For documents that need to be requeued (see error glossary for full list) perform the neededupdate and then do an Alt-R on the document in question.Documents that need to be deleted (see error glossary for full list) do an ALT-D.To get access to your Trading Partner Profile quickly do an Alt-PTo process the Partner Sub-ID errors do an Alt-S and enter your ship-to account number whenprompted.Updated 2/9/2017Page 7 of 42
EDI 101 Packet.DOCCommon Errors (for full list, see document EDI Error Glossary)5 - Partner Sub-ID Not Found -ECIERR : XXXX-XXXThe bill-to or ship-to (N1-BT/N1-ST) data specified in the error message was not found in the EDIGroup Profile Receive Code Table accessed from the EDI Group Profile Maintenance screen.You need to enter the bill-to or ship-to (N1-BT/N1-ST) data specified in the error message into theReceive Code Info Table screen for this trading partner. Then requeue this document.5 - NO MAPPING FOUND -ECIERR: XXXA mapping subroutine is not defined on the EDI Group Profile Maintenance screen for this tradingpartner and document type. You must set up and define a mapper for this document on the EDIGroup Profile Maintenance screen for this trading partner. Then requeue this document.4 - Duplicate Recv Doc -EUNERR: XXXDuplicate control numbers have been received from a particular trading partner for a specificdocument type. Contact your trading partner and tell them which control numbers have beenreceived in duplicate. Then ask them to verify whether or not it is a duplicate. If the document thatwas sent was not a duplicate, they must resend it with control numbers that have not yet beenused. When resolved, delete the error.1 - NO TRADING PARTNER PROFILE FOUND -ECUERR: XXXXNo trading partner profile could be found for the given interchange ID. Set up a trading partnerprofile for the given interchange ID.7 Purchase Order # Already Exists. -OCLERRThe purchase order number that the EDI document tried to create already exists on Eclipse. Thiscould be caused by your trading partner trying to reuse a previously used purchase order numberor resending a previously sent order. Contact your trading partner to have problem corrected.3 - SEG COUNT MISMATCH IN SE -EUNERR: XXXX/XXXXThe number of segments indicated in the “SE” segment does not match the number of segmentsactually counted. This typically indicates the receipt of corrupted data from the network. ContactEclipse EDI Support for assistance. After fixing the problem, you can requeue the document fromthe Inbound Document Archive.3 - TS CONTROL# MISMATCH ST/SE -EUNERR: XXXX/XXXXThe control number in the transaction header does not match the control number that is in thetransaction footer. This typically indicates the receipt of corrupted data from the network. ContactEclipse EDI Support for assistance.Updated 2/9/2017Page 8 of 42
EDI 101 Packet.DOCEclipse EDI Document TestingOverview:This document will provide you with useful information and assist you in setting up and testingEDI inbound and outbound documents using the Eclipse EDI package.* It is strongly recommended that you have completed EDI 101 training prior to testing.Steps to Setting up and Testing a new Trading Partner:You must communicate with your new potential trading partner. Certain information should beexchanged so the setup goes well. Prior to beginning the exchange of production EDI data, alldocuments that are to be used should be thoroughly tested. This serves two purposes; it ensuresthat the intended party receives the transmitted data and that the data meets the needs of bothyou and your trading partner.The below topics will be covered in this section. Sharing Information with Trading PartnerAuthorize Interconnect at VANCreate Trading Partner ProfileCreate testsSend tests to Trading Partner (and/or)Receive tests from Trading PartnerYou and your Trading Partner agree to Move to ProductionSharing Information:Contact your new EDI trading partner and acquire the following information from them: VAN Qualifier ISA ID Group ID Any test ID’s List of EDI documents they utilize The version of EDI they are using (version 4010 is recommended)* Eclipse maintains generic maps for most documents for version 4010.Your Trading Partner will also need this information from you. It is recommended that you createan “EDI Information” document that you can easily send to any trading partner when requested.An example of this can be found on page 26 of this guide.Updated 2/9/2017Page 9 of 42
EDI 101 Packet.DOCThe Trading Partner may also ask for your EDI specs. These are available for download fromthe Customer Support website. http://support.epicor.com/ After logging in, go to the’Eclipse’ link and chose the Support tab to allow you to access to the link for ‘Download Center’.Here you will find the EDI specs under the title ‘EDI Mapping Specifications’. You can chose fromVendor mapping specs or Customer mapping specs.Authorize Interconnect with your VAN:Once you have the Trading Partner’s EDI information listed above, contact your VAN and askthem to set up an interconnect between you and your trading partner. The VAN will need yourTrading Partner’s EDI information to setup the interconnect.If you do not notify your VAN that you want to start trading with the new trading partner,you may not be able to send or receive documents with the trading partner in question.Create Trading Partner Profile:Trading Partner setup is detailed in EDI101 training class.The below will show you the basic EDI trading partner setup (please refer to the EDIAdministration recording for more details on Trading partner setup.):Start by setting up the ISA portion of the EDI trading partner profile.Updated 2/9/2017Page 10 of 42
EDI 101 Packet.DOCOnce you have the ISA portion set you can set up the Group piece of the EDI profile. To get intothe Group put your cursor on the Group ID and do an Alt-G.The following points are helpful when testing.ISA15 – Test Mode IndicatorYour trading partner may require you to indicate in the test document that they are to receive fromyou have a test indicator in the ISA15 of a ‘T’. To set this option set the ‘Test’ option to yes ‘Y’.The default status is no “N”. When testing is complete ensure that this field is set back to“N”.Updated 2/9/2017Page 11 of 42
EDI 101 Packet.DOCTrading Partner Testing IDIf your trading partner utilizes a test ID the test ID will need to be entered in the AlternateInterchange ID field in for the specific document being tested. For more detail on the Alternate IDrefer to document Alternate Trading Partner ID beginning on page 17 of this document.Default StatusA helpful tip when testing is to change the default status of outbound test documents to “Hold”.This is done in the Add’l Doc Info screen for the document being tested. Changing the defaultstatus to “HOLD” will allow you to control when an outbound test document is sent.Add’l Doc info settingsIt is recommended that you take the time to review the different options available to you in theAdd’l Doc Info for each EDI document. The F9 and F11 will give you details of each option andhelp you determine if that will be needed for your current trading partner setup.Create Tests:Vendor Testing – Outbound 850Normally the first document tested will be the outbound 850 Purchase Order. You will need tocreate a purchase order to generate the test 850 document. Your purchasing staff may createone for you containing items you would normally order from that vendor.Note: Eclipse provides functionality to allow you send special price quote and contract numbersto your vendors. Please see additional documentation 850 Quote Numbers found on page 28 ofthis guide if you need to add a quote/contract number to your test 850.On the status tab of the PO, select EDI as your print option.From the File drop down at the top select ‘Exit’ to generate the EDI Document. When promptedselect ‘Next Scheduled’ to send your EDI document to the Outgoing status queue (System System Programming EDI EDI Maintenance Outgoing Status Queue).You will want to notify the trading partner prior to sending the test document.The document must be in ‘SEND’ status in order for it to be sent to your Trading partner. If yourdocument is on HOLD you can change it to SEND by selecting the file drop down from the top ofthe page and selecting ‘Change Status’. Once the document is in the SEND status it will go outon your next scheduled VAN transmission.Updated 2/9/2017Page 12 of 42
EDI 101 Packet.DOCVendor Testing – Inbound 855, 856 and 810To test inbound documents ensure that the correct map is in place in the Group ProfileMaintenance screen and that the 997 flag is set correctly.Recommended Settings for the 997 Inbound Documents:Y Outbound Documents: NNote: If desired, you can wait until the inbound 855, 856 or 810 document comes in before addingthe document to the profile. With the document type missing from the profile, the document willbe routed to the EDI Error Queue with the message “No Mapping Found” and the EDI.ADMmessage group will be notified of the new error. You can add the document to the profile at thatpoint and Requeue the document from the EDI Error Queue.When the 855, 856 or 810 document comes in, the system adds it to the appropriate EDI ReviewQueue. Go to Purchasing Queues for the 855 PO Acknowledgment and 856 Advance ShippingNotification (ASN) review queues, and go to the A/P menu for the 810 Invoice review queue.Management of these queues is covered in the Eclipse training class EDI Review Queues.To sign up, log into the customer website and go to the Education ignIn.doCustomer Testing – Inbound 850To test customer documents ensure that the correct mappers are in place in the Group ProfileMaintenance screen and that the 997 flags are set correctly.Recommended Settings for the 997 Inbound Documents:Y Outbound Documents: NUpdated 2/9/2017Page 13 of 42
EDI 101 Packet.DOCNormally, the first document tested is the 850. Your trading partner must generate a test PO ontheir system and send a test 850 to you.A received 850 Purchase Order can be view or edited from the Remote Order Entry ReviewQueue (Orders Queues Remote Order Entry Review.) Enter in the appropriate branchinformation or “ALL” and for the Src (order source) enter “EDI”.To edit or view the order, select the ‘Order’ dropdown from the top of the page. Either option willtake you to the Sales Order Entry screen.Updated 2/9/2017Page 14 of 42
EDI 101 Packet.DOCFrom the Order Status screen, you can return the outbound 810 Invoice, 855 POAcknowledgment, and 856- Advanced Ship Notice, depending on the order status.The trading partner must contain the map for the document that you are attempting tocreate.Customer Testing – Outbound 855, 856 and 810855 Open order statusTo create the 855 the order must be in one of the open statuses (Call When Complete, ShipWhen Specified, etc.) The 855 will not print if the order is in a Bid, Cancel, or Pick Up Nowstatus.856 and 810 Invoiced or Pick up now StatusTo create the 856 or 810 the order must be in one of the closed statuses (Pick up Now orInvoiced) The 856 and 810 will not print if the order is in a Bid, Cancel, or Pick Up Now status.Create the Outbound EDI DocumentTo create the EDI document and place it on the outgoing status queue, the “Print” field must bepopulated with an “EDI”. After entering the “EDI” and exiting from the sales order, you will receivemessages on the screen asking if you want to send the document, in the case of the 810 and 856you will have the option of sending either one or both.If the system will not accept an “EDI” in the PRINT field, you need to make sure that thecustomer account number is attached to an EDI profile and that the proper outboundmapper is set up in Group Maintenance.The outbound document(s) will automatically be placed in the Outgoing Status Queue. (System System Programming EDI Maintenance Out Going Status Queue). It is recommendedthat you notify the trading partner prior to sending the test document.The document must be in ‘SEND” status. If your document is on HOLD, use the ‘Change Status’option from the files drop down. The status will be changed to SEND and the document will goout on your next network call.EDI and Batch Invoice PrintingOnce the Trading Partner relationship is put into production, if you want the 810 Invoice to besent automatically during the Batch Invoice Printing process, you will need to add thatUpdated 2/9/2017Page 15 of 42
EDI 101 Packet.DOCfunctionality to the customer
Eclipse EDI Document Testing Overview: This document will provide you with useful information and assist you in setting up and testing EDI inbound and outbound documents using the Eclipse EDI package. * It is strongly recommended that you have completed EDI 101 training prior to testin