Transcription
Intergy EHRSUMMER2015: v9.10 v9.20Version 9.10New System Features
GeneralRedesigned InterfaceRedesigned InterfaceIntergy EHR has been enhanced with a completely updated, redesigned graphical interface.A fresh, new color palette and new fonts have been used to modernize the design andimprove readability.In addition, tabs in areas such as Chart have been streamlined, and buttons in theNavigation Bar have a brand new look.You have reached the end of the Redesigned Interface topic.1Greenway Intergy EHR 9.10 New System Features3
ChartViewing Notes and Printing PDFs of Cardiology ResultsChartThis section describes the changes and enhancements made to Chart in version 9.10 ofIntergy EHR. Accessing the Patient Chart Setup Window Configuring Chart Navigation Buttons Configuring Chart Summary Sections Configuring Encounter Detail Sections Patient Summary Enhancements Showing/Hiding the Patient Picture2Greenway Intergy EHR 9.10 New System Features7
ChartAccessing the Patient Chart Setup WindowWorkflow: Accessing the Patient Chart Setup Window1. Access the Patient Chart Setup window by clicking the gear icon at the upper right ofthe patient’s chart.Alternately, you can access the Patient Chart Setup window from the Intergy EHR menuby selecting Setup, and then selecting Patient Chart.The Patient Chart Setup window opens.Greenway Intergy EHR 9.10 New System Features39
ChartAccessing the Patient Chart Setup Window2. From the Settings For drop-down list, select the chart layout you want to change.Based on security settings, you may be able to modify only your personal chart layout.However, you might have access to modify the Practice Default Chart layout.Note:If you modify the Practice Default Chart layout, the changes you make willapply to everyone who uses the default layout. For more information aboutassigning security permissions for modifying the Practice Default chart layout,refer to the topic “Setting the Security Permissions for Patient Chart Layout” inthe Intergy EHR online help or the Intergy EHR Setup Guide.You have reached the end of the Accessing the Patient Chart Setup Windowtopic.10Greenway Intergy EHR 9.10 New System Features4
ChartConfiguring Chart Navigation ButtonsConfiguring Chart Navigation ButtonsYou can configure which navigation buttons display in the Nav Bar on the left side of thepatient’s chart in Intergy EHR. You can also reorganize the buttons to display in the orderyou want. For example, you could move the Immunizations button higher up on the list, ormove the Docs button farther down.With this enhancement you now can configure the Web Applicationsbutton, which previously was not movable.In addition, the Medications and Administered Meds buttons have been separated, andnow can be configured independently.Similarly, the Recalls, Charge History, Diagnosis History, and Appointments buttonshave been separated, and now can be moved and configured independently.With these enhancements, the only button that cannot be moved or configured isthe Info button, which always remains at the top of the Nav Bar.Note:For more information about using the Nav Bar, see the “Chart Overview” topic inthe Intergy EHR online help or the Intergy EHR User’s Guide.The workflow below describes how to configure Chart navigation buttons.5Greenway Intergy EHR 9.10 New System Features11
ChartConfiguring Chart Navigation ButtonsWorkflow: Configuring Chart Navigation Buttons1. On the Patient Chart Setup window, select the Chart Navigation tab. The ChartNavigation tab displays.The chart summary sections are listed in the current order that they display in the NavBar of your Intergy EHR system.2. Do the following to configure the buttons of the Nav Bar:IfThenYou want a button todisplay in the Nav BarCheck the box beside the button. The button will display in the NavBar. If the Nav Bar contains more buttons than can be displayed, theadditional buttons can be accessed through the More option onthe Nav Bar.Clear the box beside the button. The button will not display in theYou want to remove abutton from the Nav Bar Nav Bar.12Greenway Intergy EHR 9.10 New System Features6
ChartConfiguring Chart Navigation ButtonsIfThenYou want to move abutton to a differentposition in the Nav BarDrag and drop the button in the list to the location where you wantit to display. For example, if you wanted to move the Vitals button tothe second position in the Nav Bar, drag and drop it there from itscurrent location in the list.3. When you are done configuring chart navigation options, click the Save button to saveyour changes. All the changes you have made on each of the tabs on the Patient ChartSetup window are saved.Note:Changes you make on the Patient Chart Setup window will not show up in theChart display until you click the Save button.TIPIf you want to configure other Patient Chart Setup window tabs beforesaving your work, you can do so. However, be sure to click Save when you aredone, so that your changes are saved.You have reached the end of the Configuring Chart Navigation Buttons section.7Greenway Intergy EHR 9.10 New System Features13
ChartConfiguring Chart Summary SectionsConfiguring Chart Summary SectionsThe Patient Summary tab of the Patient Chart Setup window allows you to control what isdisplayed on the summary page of the patient’s chart, including the information displayedon the Today panel.The workflow below describes how to configure Chart Summary sections.Workflow: Configuring Chart Summary Sections1. On the Patient Chart Setup window, select the Patient Summary tab. The PatientSummary tab displays.814Greenway Intergy EHR 9.10 New System Features
ChartConfiguring Chart Summary Sections2. Do the following to configure the Chart summary and Today panel:IfThenYou want a section todisplay in the ChartsummaryCheck the box beside the section. The section will display in theChart summary.You want to remove asection from the ChartsummaryClear the box beside the section. The section will not display inChart summary. For example, if you do not want Recent Images todisplay in the Chart summary, or you do not want Tasks to display inthe Today panel, clear those boxes.You want to move asection to a differentposition in the ChartsummaryDrag and drop the section in the list to the location where you wantit to display. For example, if you wanted to move the Recent CardioResults section to the third position in the summary, drag and dropit there from its current location in the list.3. When you are done configuring the Chart summary and Today panel, click the Savebutton to save your changes. All the changes you have made on each of the tabs on thePatient Chart Setup window are saved.Note:Changes you make on the Patient Chart Setup window will not show up in theChart display until you click the Save button.TIPIf you want to configure other Patient Chart Setup window tabs beforesaving your work, you can do so. However, be sure to click Save when you aredone, so that your changes are saved.You have reached the end of the Configuring Chart Summary Sections section.9Greenway Intergy EHR 9.10 New System Features15
ChartConfiguring Encounter Detail SectionsConfiguring Encounter Detail SectionsThe Encounter tab of the Patient Chart Setup window allows you to control whatinformation displays in the Encounter Detail in Chart. For example, if your practice is acardiology clinic that does not perform immunizations, you could choose not to displayinformation about immunizations.You can also specify whether each section displayed in the Encounter Detail should bedisplayed in its normal width or in Wideview.Note:You display Encounter Detail by selecting the Pt Enc button in the Nav Bar, thenselecting an encounter from the list of encounters that displays.The workflow below describes how to configure Encounter Details sections.1016Greenway Intergy EHR 9.10 New System Features
ChartConfiguring Encounter Detail SectionsWorkflow: Configuring Encounter Detail Sections1. On the Patient Chart Setup window, select the Encounter Detail tab. The EncounterDetail tab displays.2. Do the following to configure the sections of Encounter Detail:IfThenYou want a section todisplay in EncounterDetailCheck the box in the Show column beside the section. The sectionwill display in Encounter Detail.You want to remove asection from EncounterDetailClear the box in the Show column beside the section. The sectionwill not display in Encounter Detail. For example, if you do not wantimmunization details to display in Encounter Detail, clear that box.11Greenway Intergy EHR 9.10 New System Features17
ChartConfiguring Encounter Detail SectionsIfThenYou want a section todisplay in WideviewCheck the box in the Wide column beside the section. This providesmore space on the page to display the information. For example, ifyou want medications to display in Wideview, check the box in theWide column beside it. The other sections will remain their regularsize, while the Medications section will span the width of theEncounter Detail.You want a section todisplay in normal widthClear the Wide check box for that section.You want to move asection to a differentposition in EncounterDetailDrag and drop the section in the list to the location where you wantit to display. For example, if you wanted to move the Recent CardioResults section to the third position in the detail, drag and drop itthere from its current location in the list.3. When you are done configuring Encounter Detail sections, click the Save button tosave your changes. All the changes you have made on each of the tabs on the PatientChart Setup window are saved.Note:Changes you make on the Patient Chart Setup window will not show up in theChart display until you click the Save button.TIPIf you want to configure other Patient Chart Setup window tabs beforesaving your work, you can do so. However, be sure to click Save when you aredone, so that your changes are saved.You have reached the end of the Configuring Encounter Detail Sections section.1218Greenway Intergy EHR 9.10 New System Features
ChartPatient Summary EnhancementsPatient Summary EnhancementsThe following enhancements have been made to the Patient Summary in Chart: The patient banner now displays the patient’s primary insurance. The new Care Team section is available on the Patient Summary. The Recent Labs, Cardio Results, and Images sections in Patient Summary now showthe last five entries for each. This lets you view the most recent results for thosesections, even if they occurred before the patient’s last visit.You have reached the end of the Patient Summary Enhancements section.13Greenway Intergy EHR 9.10 New System Features19
ChartShowing/Hiding the Patient PictureShowing/Hiding the Patient PictureAs in previous versions of Intergy EHR, you can set up Intergy EHR parameters so that youcan view an available photo for the patient, birth date, and Social Security number in thePatient Banner section of the Patient Summary. For patients without a photo on file, thegeneric photo icon displays as blue for male patients, magenta for female patients, andindigo for those patients whose gender has not been recorded.In version 9.10 of Intergy EHR, a collapse icon has been added to the bottom right of thePatient Banner when the patient’s picture is visible. Clicking the collapse icon hides thepatient’s picture, name, and date of birth.If the Patient Banner is minimized, then the expand icon displays instead. Clicking theexpand icon displays the patient’s picture, name, and date of birth.20Greenway Intergy EHR 9.10 New System Features14
ChartShowing/Hiding the Patient PictureWhen the patient’s picture is displayed, you can click the expand icon on the picture to seea larger version of the picture.You have reached the end of the Showing/Hiding the Patient Picture section.15Greenway Intergy EHR 9.10 New System Features21
Orders/ChargesReopening a PregnancyOrders/ChargesThe following changes have been made to Orders/Charges in Intergy EHR: Authorization Number in Orders Group Details Changes to Diagnoses and Orders16Greenway Intergy EHR 9.10 New System Features47
Orders/ChargesAuthorization Number in Orders Group DetailsAuthorization Number in Orders Group DetailsThe Orders Group Details dialog box now contains the new Authorization # field, whichspecifies the identifying number associated with the order. The authorization numbermight be provided by the patient’s insurance or a referring provider.This new field allows you to include the authorization number on the order. Then, when theorder is sent via HL7 to another practice or facility, the number will be on the order that isreceived. Once it is on the order, it is included on other items, such as the appointment thatis created.For more information about the authorization number and HL7 orders and results, see“Sending Outbound Orders (from Intergy EHR)” on page 33.You have reached the end of the Authorization Number in Orders Group Detailssection.1748Greenway Intergy EHR 9.10 New System Features
Orders/ChargesChanges to Diagnoses and OrdersChanges to Diagnoses and OrdersIntergy and Intergy EHR now support encounter-level diagnoses for billing. This allowsproviders to select as many diagnoses as needed to associate with an encounter on a claim;however, only four (4) diagnoses can be associated with a charge. Beyond the four chargeassociated diagnoses, the remaining diagnoses will display on the claim as additionalencounter diagnoses. The additional diagnoses will be limited to a number specified by theinsurance payer.Along with this enhancement, the Selected Diagnoses and Orders panel of Orders/Chargeshas been renamed the Orders/Charges Cart.As in previous versions of Intergy EHR, when a diagnosis or order is selected, it displays inthe bottom panel of the Orders/Charges window in the Orders/Charges Cart list. Thediagnoses are listed first, and then each order displays under the primary diagnosis withwhich it is associated. You can add diagnoses for an encounter in the Orders/Charges Cart.Diagnoses can be added from the encounter note or from Orders/Charges. The diagnosesare displayed in numerical order. You can reorder the diagnoses in the orders tree bydragging and dropping the diagnoses.The maximum allowed diagnoses is the maximum number supported by the patient'sprimary insurance, which is displayed in the Orders/Charges Cart header. If the Orders/Charges Cart list contains more diagnoses than the number supported by the insurance, awarning will be displayed when you attempt to save. Diagnoses added to the cart will be18Greenway Intergy EHR 9.10 New System Features49
Orders/ChargesChanges to Diagnoses and Ordersadded to the encounter, and diagnoses removed from the cart will be removed from theencounter.The icon that displays in front of the order indicates its type: prescription renewal, newprescription, lab request, task, order, or charge. Icons also display for follow-up informationand facility information. Any diagnoses selected for the patient in Encounter Note displayautomatically in the Orders/Charges Cart list. The text “From Note” displays in parenthesesafter these diagnoses to distinguish them from diagnoses selected in Orders/Charges.Diagnosis Tree ModificationsThe following modifications have been made to the diagnosis tree in the Orders/ChargesCart: The No Diagnosis node now is always the first in the tree. You can no longer drag anddrop it to other locations Unresolved diagnosis nodes (such as for multiple ICD-10 codes) are listed after the NoDiagnosis node, if it exists. If the No Diagnosis node is not present, then unresolveddiagnosis nodes are listed first.Note:You can no longer drag and drop an unresolved diagnosis node to anotherlocation in the list. However, after a diagnosis is resolved it is numbered and canbe moved. Re-ordering the nodes in the Orders/Charges Cart affects their order in the encounterdiagnoses, and will affect their position on the claim when billing. Additional diagnoses added in labs, charges, and so forth, are added to the tree in theOrders/Charges Cart. However, they are only saved if you click Save in the cart. Notethat this is only applicable to labs ordered via the Lab Ordering window.TIPFor more information about how the new functionality of Orders/Chargesworks when posting charges, refer to the Intergy 9.10 New System Featuresdocument.You have reached the end of the Changes to Diagnoses and Orders topic.1950Greenway Intergy EHR 9.10 New System Features
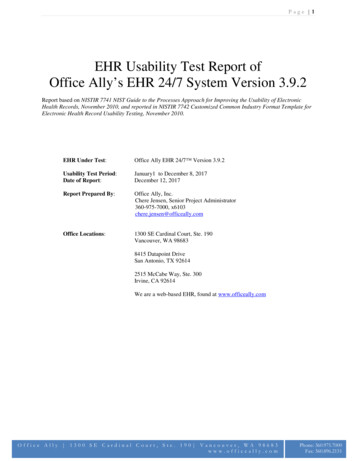
Practice and System SetupUser Password EnhancementsUser Password EnhancementsThe following Intergy user password enhancements have now been implemented for theIntergy and Intergy EHR systems: Security Questions for Changing a Password at Logon Setting Up Your Security Questions Option to Change Password at LogonThese enhancements are described in the following sections.Security Questions for Changing a Password at LogonSecurity questions are now included for answering when you change your password atlogon. This provides greater security for your Intergy system by requiring additionalauthentication of users.Previously, security questions were not used with Intergy passwords.Now, a user is required to set up security questions for changing passwords at logon. Whenattempting to change his or her password at logon, a user is required to answer the securityquestions. Additionally, when a user is forced to change a password, the user will berequired to reset his or her security questions.Setting Up Your Security QuestionsTo set up your user security questionsand answers, the new Select SecurityQuestions dialog box has been addedfor selecting your user password securityquestions and entering your answers.The Select Security Questions dialog boxdisplays on the first logon after upgradefor users to set up their securityquestions.54Greenway Intergy EHR 9.10 New System Features20
Practice and System SetupUser Password EnhancementsYou can select three security questions and enter your answers or you can skip the securityquestions for this logon.ToDo thisSelect security questionsand enter answers1. For 1. Question, 2. Question, and 3. Question, select a securityquestion, and then enter your answer in the field below thequestion. Answers are not case sensitive.2. Click the Save button.Skip security questions forthis logonClick the Skip for now button. You will be prompted to selectquestions and enter the answers the next time you log on.Option to Change Password at LogonYou now have the option to change your password from an Intergy system (Intergy andIntergy EHR) logon window, if the user permission to change your password had been setby the system administrator. This allows you to reset your password and log on if you arelocked out or have forgotten your password. Additionally, this provides you with the abilityto change your password at logon.Previously, passwords could be changed only after logon from within the Intergy system, ifthe user permission to change your password had been set by the system administrator. Ifyou had forgotten your password, there was not a method available for you to reset yourown password and log on, which was done by support personnel.Now, you have the ability to reset or change your password at logon, if the user permissionto change your password has been set by the system administrator. The new ForgotPassword? link has been added to all LogOn windows for the Intergy and Intergy EHRsystems.21Greenway Intergy EHR 9.10 New System Features55
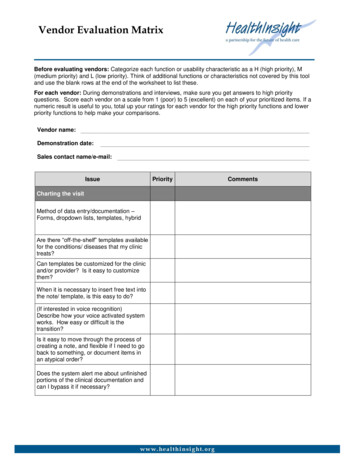
Practice and System SetupUser Password EnhancementsAdditionally, the new Security Questions dialogbox has been added. The Security Questions dialogbox displays when you click the new ForgotPassword? link on an Intergy system (Intergy andIntergy EHR) LogOn window. This allows you toanswer your password security questions in order tochange the password.Workflow: Changing the Current User Account Pa
Greenway Intergy EHR 9.10 New System Features 3. General. Redesigned Interface. Redesigned Interface. Intergy EHR has been enhanced with a completely updated, redesigned graphical interface. A fresh, new color palette and new fonts have b