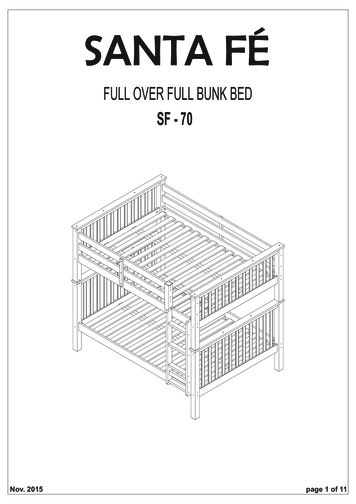
Transcription
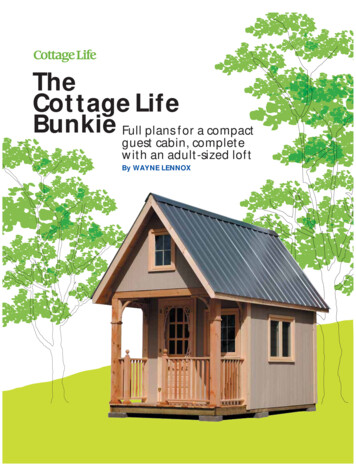
TheCottage LifeBunkie Full plans for a compactguest cabin, completewith an adult-sized loftBy WAYNE LENNOX
TheCottage LifeBunkieBy WAYNE LENNOXINSTRUCTIONSINTRODUCTION . 3FLOOR . 3SIDE WALLS . 3REAR WALL . 4FRONT WALL . 4PORCH . 5LOFT . 6RAFTERS AND GABLE ENDS. 6Project Editor Allan BritnellProject Art Director Gary DavidsonPlans Illustrations Len ChurchillROOF . 7PLANSLOFT LADDER . 7FLOOR . 10Cottage Life MagazineWINDOWS . 8SIDE WALLS . 11DOOR . 8REAR WALL . 12Editor Penny CaldwellSenior Editor Martin ZibauerArt Director Kim ZagarTRIM AND FINISHING . 9FRONT WALL AND PORCH . 13MATERIALS LISTSLOFT DETAILS . 16PARTS LIST . 6LOFT LADDER . 17SHOPPING LIST . 9Subscription enquiries,phone 1-800-465-6183 (Canada and U.S.);Toronto (905) 946-0406.Cottage Life Magazine54 St. Patrick St., Toronto ON M5T 1V1Copyright 2007 by Cottage Life. All rightsreserved. Reproduction of any article,photograph, or artwork, for otherthan personal use, in whole or in part,without written permission of the publisheris strictly forbidden.2B U N K I E P H OTO B Y L E N C H U RC H I L LROOF AND LOFT . 15You’ll find more great cottage projectsyou can build in Cottage Life magazineor at cottagelife.com.
Oneof the nicest thingsabout a cottage is that it becomes a placefor friends and family to gather and sharememories. But the cherished kind of memory probably doesn’t include the sound ofUncle Bob’s snoring, or having to step overhalf a dozen nieces and nephews on yourway to a midnight snack. With a bunkie,you can invite overnight guests and stillhave some privacy at bedtime.And the Cottage Life Bunkie not onlymakes an ideal guest cabin for cottage overflow, it also doubles as a quiet retreat forthose days when even two’s a crowd (see“Layout Options For Main Floor,” p. 4).When we designed this structure, weenvisioned it as suitable accommodationfor a couple of adults and three to four kids.A futon on the main level would work wellfor a bed for the big folks, while cots or aninflatable bed in the loft would be suitablefor the little ones. (Since a queen-size mattress will fit, a couple of adults can alsosleep comfortably in the loft).The Ontario Building Code (OBC)requires a building permit for any structurewith floor space greater than 10 squaremetres (108 sq. ft.). This bunkie wasdesigned with that stricture in mind: At 8'by 13'6", it is exactly 108 sq. ft. and therefore, in most jurisdictions, does not needthat particular documentation. But checkfirst: Some municipalities require permitsfor anything over 100 sq. ft. Cottagers inthose areas could modify the plans – say, byreducing the length to 12'6" – to fit themore restrictive rules. Even if a buildingpermit is not required, you must still checkwith your local municipality and complywith zoning bylaws (such as lot line andshoreline setbacks).This is a big project, but not a very complex one. In fact, if you built the CottageLife outhouse (“The Perfect Privy,” Aug. ’99)– as many readers have – or the treehouse(“High Society,” Apr./May ’05), you willfind this to be no more challenging.FLOORFootings (six in all) will need to be in placebefore construction can begin.I am partial to a double rim joist at thebase of structures like this because of itsgreater strength, especially at interlockingcorners. And I like pressure-treated (PT)lumber for any part of a structure close toThe Cottage Life Bunkiethe ground – although, since the floorframe does not, in fact, touch the ground,you could use ordinary lumber.1. With the parts list (p. 6) and Figures 1and 2 to guide you, cut all pieces for thefloor frame to length (wear a dust maskwhen you cut PT lumber) and treat the cutends. Lay out the joist locations – 16" oncentre – on the inner rim joists. Note thatthe measurement to the centre of the firstjoist from the end must take into accountthe 3" thickness of the double rim). Leavea 3 4" space between the two laminated4. Two-and-a-half sheets of 5 8" tongue-and-groove plywood are required to coverthe floor for the dwelling part of the building. Square up the floor – diagonals mustbe equal – and screw the plywood to thefloor frame.5. Level the floor frame, if required.SIDE WALLS1. Cut the side wall pieces to length. Notethat the window headers consist of two2 x 6s laminated together with a piece of1 " plywood between as a spacer. Also, the2Designer and builder Wayne Lennox first constructed the Cottage Life Bunkie on site at theSpring Cottage Life Show. Here, he’s prepping the double rim-joist floor framing.bunkie joists that sit at the 10' mark andthe first deck joist. This gap allows rain andmelt-water to drain between the boards.2. Nail or screw the inner frame together.(The 31 2" deck screws in the hardware list[p. 9] are needed only if you are screwing theframe together.) Remember to keep joistcrowns up; the crown is the convex edge ofa board when viewed from the end. Nail orscrew the outer rim joists to the inner frame.3. Cut bridging pieces to length and installbetween floor joists.Tip: When you measure for the bridging,take your measurements between the joistswhere they are secured to the rim, not inthe middle. After installing two or threebridging pieces, check the cumulative measurement of bridging and joists and compare with the measure at the rim joist to besure you’re not bending the joists out ofline. Adjust the next piece you install tocompensate, if needed.36 x 6 by 431 2" side headers are mitred 45 at the porch end and notched at the otherend (Figures 14 and 16). Drill two 1 2"holes – preferably with a Forstner bit – inthe face of each side header, as in Figure 14.Drill clearance holes. Cut eight 1 2" plugsand put them aside for now. (A plug cutteris an inexpensive accessory available at anylumber or hardware store. Use it to makeyour own matching plugs from castoffs. Ofcourse, there are also commercially available plastic plugs.)2. Lay out the stud locations on the bottomand top plates as in Figure 3 (make surethat your layout is consistent with therough opening for your windows). Notealso that the centres are not all 16". Whensiding, start from the porch end. The edgeof the second 4 x 8 sheet will line up withthe middle of a stud marked with an X. Theremaining piece is 2' wide (a 4 x 8 sheetripped in half provides the 2' pieces).
The Cottage Life Bunkie3. Nail or screw the wall frame together onthe ground, adding the double top plate last(lay out the location of the rafters on thedouble top plate first, starting from the porchend). Do not add the 6 x 6 side headers yet.4. Cut the 2 x 4 blocking to length and nailbetween the studs.5. We selected Canexel 4 x 8 pre-finishedpanels for this project for a number of reasons: sub-sheathing is unnecessary, sidingtime is reduced, and they look good. Onthe downside, there is a limited colourselection and the finish is only under warranty for five years, so repainting could benecessary after that. Cut five sheets to alength of 931 2" (good-side down to avoidchipping on that side). Rip one piece inhalf, lengthways.6. Lay the sheets on the wall so that theedges meet the top plate. Transfer the location of the rafters on the edges of thesheathing. Remove the siding and cut 11 2"by 53 4" notches where marked (see Figure14). The siding panels will sit proud of thetop plate. These notches allow the raftersto sit tight against the plates and also letthe siding butt against the bottom of theroof boards thereby sealing the buildingfrom drafts. You can be a little generouswith the cuts as small gaps can be filledwith caulking.7. Lay the siding pieces back on the walls,making sure that the bottom edges are 3"below the bottom plates (this lip can later benailed to the rim joist). Square up the frameand nail the siding to the wall using 2" galvanized ardox nails, spaced about 8" apart.You’ll need a couple of helpers to lift the walls in place. Note the notches cut into the top ofthe siding panels. These allow the bird's mouth rafters to fit snugly againsts the top plate.8. Find two helpers. Stand each wall up in10. Drill a 1"-dia. by 2"-deep hole downturn, being careful not to damage the bottom edge of the panels. Line up the bottomplates with the floor’s edges. Screw or nailthe bottom plates to the floor.Tip: Don’t drive the nails home yet in caseyou need to move the wall. Nail temporarybraces from the end studs to the rim joist.The walls should tip out slightly at the top.9. Add a 1 x 3 temporary, vertical brace atthe porch end (see photo, p. 5), from therim joist to the end of each top plate. Insertthe 6 x 6 side headers into the space createdwhen you framed the side walls. Screw tothe top plates and to the 2 x 4 studs. This isalso a helper-assisted procedure!through the top plate and into the sideheader where indicated in Figure 16. Drill a5 " clearance hole all the way through.1611. If you have a reciprocating saw, cut outthe window openings from the inside. Ifyou only have a jig saw, drill holes throughthe paneling at each corner, go outside,draw lines between the outside radii of theholes, and follow the lines to cut out thewindow openings.12. Do not add the 6 x 6 posts yet.Layout options for main floorCLUBCHAIRBUILT INBENCHCAFÏTABLELOWBOOKSHELF STORAGETALLBOOKSHELFDAYBEDDESKSIDE TABLEEASELTHROWCUSHIONSLOWBOOKSHELF STORAGEDROPDOWNTABLEREAR WALL1. Cut all the pieces and assemble the rearwall as shown in Figures 8 and 9. Sincethere are no window openings, cladding issimply a matter of nailing the two 4' by 89"panels to the assembled wall. Make surethat the top edges of the panels are lined upwith the bottom edge of the top plate, i.e.,between the two plates.2. With a helper, lift the rear wall assemblyinto place. Nail or screw the bottom plate tothe floor. Nail or screw the corners together.Nail the 31 2" overhangs to the side wall endstuds. Nail the bottom edge of each panelto the rim joists.FRONT WALLPORCHGuest cabinPORCHWriter’s retreatPORCHKids’ space41. Cut all front wall pieces to length (seeFigure 10). The header over the windowconsists of two pieces of 2 x 4 laminatedtogether. Since the front wall is not a loadbearing wall, the header over the door
The Cottage Life Bunkieconsists of a single 2 x 4 on the flat to provide the correct dimension for the entrancedoor rough opening.2. Nail or screw the frame together. Notethat the piece in the bottom plate, wherethe door is located, will be removed afterthe assembled wall is in place.3. Trim two sheets of siding to 91".4. Lay one panel on the wall over the dooropening, noting that the top edge shouldbe flush to the top of the double top plate,side wall end studs. (If the floor is level andthe walls are square then, when assembled,the walls should be plumb.)8. Before you can cover the porch ceiling,you will need to scab a 2 x 4 nailer to thetop of the front wall double top plate to actas a nailing edge (see Figure 11). It shouldextend about halfway over the leading edgeof the double top plate.9. With all four walls in place, drive the bottom plate nails home, cut out the openingsThe bunkie loft extends out over the porch. For an extra 31 2' of floorspace on the ground levelyou could modify the plans, eliminating the porch and moving the front wall forwardand the left side should be 31 2" past theend stud (this lip will be nailed to the sidewall end stud). Square everything up andtack the sheet in place. Have a helper liftthe upper end of the wall up off the floor,high enough so that you can trace theopening for the door. Lay the wall backdown, remove the sheet and cut out theopening for the door. While you’re at it, cutout notches for the 6 x 6 side header andfor the rim joists (include the thickness ofthe plywood floor in this calculation).5. Lay the panel back down and nail it tothe frame.6. Lay the other sheet on the frame and nailit down.7. Remove the two braces from the sidewalls and, with a helper, lift the front wallinto place. Nail or screw the bottom plateto the floor. Nail or screw the cornerstogether. Nail the 31 2" overhangs to thefor the front window and door, and thencut out the sill space for the door opening.PORCHI chose cedar for the front porch – despiteits rather steep cost – chiefly because it ishard to find 6 x 6 pine (my preferred material). PT is a lot cheaper but far less attractive than cedar, unless painted or stained.1. Cut the 5 4 x 6 deck boards to length –allowing for 1" of overhang at the front – andnail or screw to the joists. A clearance holemay be needed at the board ends to preventsplitting. Begin in the centre and work yourway out evenly to both sides, leaving a 3 8"gap between the boards. The last two boardsmay have to be ripped – make sure to leavea 1" overhang as well. If you were careful,each end board should be the same width.2. Cut the two 6 x 6 porch posts and thefront header to length; the header is mitred5at both ends. (Mitring the 6 x 6 is a bit ofchallenge if you do not own a 12" compound sliding mitre saw: Mark your cutline, then take passes with a circular sawfrom either side. There will likely still be asliver of wood in the middle that you’llneed to clear with a handsaw.) Drill two1 " holes, 3 " deep in the end faces, as in24Figure 14.3. Stand the end posts in place. Lag the6 x 6 by 431 2" side headers to the tops ofthe posts with the 8" lag bolts. Plumb theposts and toenail to the floor, keeping thenails or screws below the line of the trim(about 2"). For added strength, you canalso drive a few screws
A futon on the main level would work well for a bed for the big folks, while cots or an inflatable bed in the loft would be suitable for the little ones. (Since a queen-size mat- tress will fit, a couple of adults can also sleep comfortably in the loft). The Ontario Building Code (OBC) requires a building permit for any structure with floor space greater than 10 square metres (108 sq. ft .