Transcription
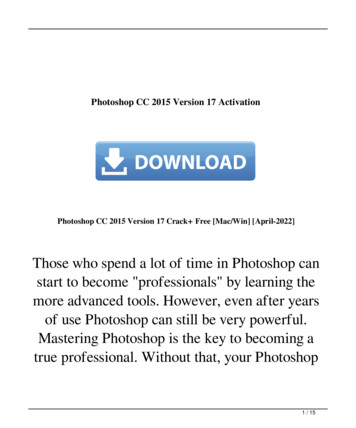
Photoshop - Beetle-Open the Beetle.jpg in Photoshop-Reset all Tools-Double click on the word Background of the layerin the Layers Palette-Type car for name in New Layer pop up window-Create a new layer by clicking the NewLayer button located at the bottom of theLayers Palette. Will show as Layer 1.-Double click on the word Layer 1 and name thelayer paint. This is the layer where you will paintyour car. DO NOT PAINT ON YOUR CAR LAYER!1
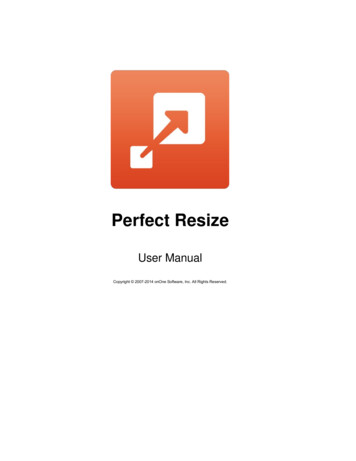
Photoshop - Beetle-Select the Brush tool (B) from the toolbar.-Select a hard brush from the top sub menus.Hard brushes are a solid dot. Soft brushesare dots with blurred or fuzzy edges.-Use the bracket keys to make your brushlarger or smaller (brackets look like cut offsquare) [ ]2-Choose a color for your Beetle from the SwatchesPalette. Do not choose white or black as yourcolor. Whatever color you choose will becomelighter as we continue.-If you do not have a Swatches Palette you canopen it by selecting it from Window menu at top ofyour screen.
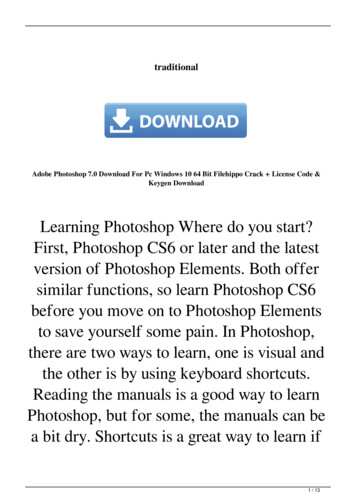
Photoshop - Beetle-Make sure you have your paint layerselected in your Layers Palette (it will beshaped in light blue)-Begin to paint only the door of your beetle-It will cover the car door completely-Make sure you paint layer is still selected in theLayers Palette-Click on the arrow beside the word Opacity in theLayers Palette-Use the slider to reduce the 100% down to 30%-Now look at your car. It looks like a real paint job.-Continue to paint the rest of the car. Do not paintwheels, lights, glass.-If you accidently paint on an area that youdonʼt want to paint then you can use theErase tool to get rid of it. Select it from theToolbar and select a brush size as well.-Use the eraser just like a paint brush.-If you do not finish painting the car before the endof class, make sure to save as a .psd (Photoshop)file to keep the layers separate-When you open the file the next day, you mustchange the paint layer back to 100% to match color-Use the Eyedropper tool to pick thesame color you chose at 100%, thendrop paint layer back to 30% andcontinue painting. If you do not, thenyour paint color will not match correctly.3
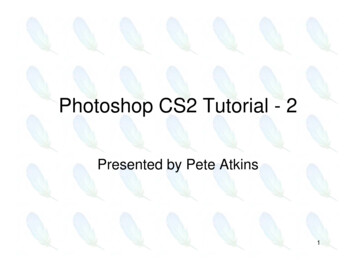
Photoshop - Beetle-Your finished beetle should look like aprofessional paint job. Make sure to use(Command or Command - ) to zoom in andout to see that you have painted all areas ofthe car to perfection.-Save your beetle as painted beetle.psd-Select one of the Beetle Backgrounds that matchthe color or closely match the color of your paintedbeetle and open it alongside your car in Photoshop.-The background you chose will have guidelines tohelp show you title safe areas and a center point forbalance.-Flatten your painted beetle so that all layersbecome one layer so we can move it to thenew background.-In the Layers Palette, click on the 3 lines justabove Opacity to open a drop down menu.-Choose Flatten Image from the menu.-Use the move tool and click on yourbeetle image and drag it onto thebackground you chose and let go sothat it appears on top of your colorbackground.-After you move your painted beetleonto your background, close your painted beetlefile. It will ask you if you want to save - MAKESURE TO CLICK DONʼT SAVE! You saved thepainted beetle in layers and you want to keep it thatway, not flattened.4
Photoshop - Beetle-Label the layers in the Layers Palette of thebackground file that now has your paintedbeetle on top as the following:-Use the Magic Wand tool and clickanywhere in on the white colorsurrounding your painted beetle. Makesure you are on you beetle layer in theLayers Palette.-Dotted lines will show surrounding the white andthe car. We call these dancing ants and anytimeyou have dancing ants that shows you have aselection.-We want to separate the car from the whitesurrounding it. The wand did not get all of it.-The white is selected, but what we want thecar selected. We need to select the oppositeof the car or the inverse.-From top menus choose the Select menu.Click inverse (Shift Command I)-Once the car is selected, Click the Q key onyour keyboard to enter Quickmask mode.The white around the car will now show pink.-Quickmask mode allows you to alter the pattern ofthe selection (dancing ants) by painting with thebrush tool using only black and white colors.-Black brush will hide what you do not want to see(mask will paint in pink), white brush will show whatyou want to see (see clear normal color).-Use a hard brush of black or white brushes to getrid of shadows and remaining white around beetle.Do not use the eraser tool!5
Photoshop - Beetle-Click Q on the keyboard to exit Quickmaskmode. Observer how your selection haschanged to fit exactly around the car.-NOTE : Whenever you enter Quickmaskmode to alter a selection, you mustalways exit when you are done-Next add a Layer Mask to hide the white aroundthe beetle.-Click on the Add Layer Mask button at the bottomof the Layers Palette.-The white surrounding the car should disappear.DO NOT HIT DELETE TO GET RID OF THEWHITE SURROUNDING THE CAR!-Notice that the beetle layer in the LayersPalette now has a extra thumbnail beside thevisual of your beetle. This is the Layer Maskhiding what you do not want to show.-The black on the Layer Mask is hiding thesurrounding of the car, and the white on theLayer Mask is allowing the beetle to show.6-Click Command T on the keyboard to bring up theTransform box around your beetle. This will put abox around your beetle with little boxes surroundingthe big box at corners and mid points.
Photoshop - Beetle-HOLD THE SHIFT KEY AND CLICK ANDDRAG ONLY FROM THE UPPER ORLOWER CORNERS OF THE BOX TORESIZE THE OBJECT! This maintains theaspect ratio for the beetle and keeps it inproportion. If you forget to hold shift or dragfrom any other part of the box then you willstretch or distort the object.-Let go of mouse before you let go of theShift Key.-Hit Enter to snap the transformation intoplace and the transform box will disappear.-Click on the move tool and move the beetleinto the spotlight area on the right side of theimage.7-Open the VW logo and move it onto thebackground just as you did the car.-Label the layer as logo.-Repeat same process you used to cut out the carto cut out and resize the logo-Use Magic Wand (Shift click to select multiple areaof white)-From top menus choose Select Inverse-Use Quickmask to alter selection if needed-Add a Layer mask to cut the logo from the whitesurrounding the logo.-If you have some uneven edges at sides like theone shown here, paint with a black brush on thelayer mask thumbnail of the logo to hide the unevenareas.-Make sure the mask thumbnail is chosen oryou will paint black on top of your logo!
Photoshop - Beetle-Command T to transform the logo.-Remember to hold Shift the entire time andonly drag from the corners and to let go ofthe mouse first then the Shift key.-Move the logo into place on the left side.-Look at the provided example online and add theexact text slogans.-Pay attention to size and placement of each. Youwant to achieve proportion and informal balance.-Add a Layer Style of a drop shadow to your text foremphasis.-Save your final work as a .psd file named (last name first initial beetlebug) (ex.pettywbettlebug.psd)-Save it again as a .jpg (JPEG format), Save As (last name first initial beetlebug) (ex.pettywbettlebug.jpg)-Submit your final JPEG version for a grade8
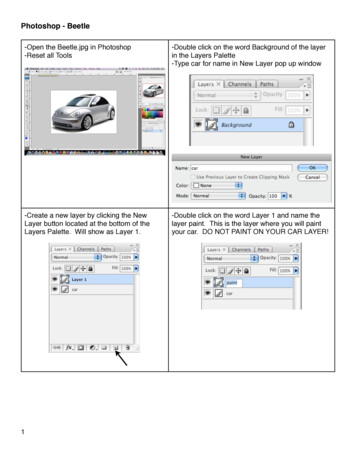
-Open the Beetle.jpg in Photoshop-Reset all Tools-Double click on the word Background of the layer in the Layers Palette-Type car for name in New Layer pop up window-Create a new layer by clicking the New Layer button located at the bottom of the Layers Palette. Will show as Layer 1.-Double click on the word Layer 1 and name the layer paint.


![Adobe Photoshop 2021 (Version 22.1.1) [32 64bit] [2022] - GWBC](/img/64/adobe-photoshop-2021-version-2211.jpg)