Transcription
4
ACKNOWLEDGEMENTSThe Colorado State 4-H Office/University Extension expresses gratitude andappreciation to the following contributors for their revisions to the Advanced CakeDecorating Manual Units 10–12:Helen Sembra, Professional Wilton InstructorKathy Hettinger, Colorado State Fair 4-H Cake Decorating Exhibit SuperintendentPat Candelaria, Douglas County 4-H LeaderConnie Harris, Bent County 4-H LeaderStephanie Morrison, Larimer County 4-H LeaderJulia Hurdelbrink, Adams County 4-H AgentGisele Jefferson, Golden Plains Area 4-H and Family & Consumer Science AgentKaren Johnson, Class Content Manager, Wilton BrandsJennifer Adams, Park County 4-H AgentSpecial appreciation is expressed to Wilton Brands for permission to use illustrationsfrom their website and books, and to the University of Wyoming for permission to useillustrations from their Cake Decorating Manual.Revised Fall 2019Colorado State University, U.S. Department of Agriculture and Colorado counties cooperating and Colorado State UniversityExtension programs are available to all without discrimination. To simplify technical terminology, trade names of products andequipment occasionally will be used. No endorsement of products names is intended nor is criticism implied of products notmentioned. Spring 20191
The 4-H program encourages a process that allows youth to first learn by doing before beingtold or shown how, and then to examine the experience. The experiential learning modeldeveloped by Pfieffer and Jones (1985), modified by 4-H, includes five specific steps:The Experiential Learning Process guides youth through a process of discovery with littleguidance from others. A situation, project or activity is presented that allows for individualthought and problem solving. Outside assistance is provided at a minimum and supportslearning by questioning at each stage. Youth in activities reflect on what they did, how theylearned and what could be applied to a life situation.1) Experience Questions: How is it working? What else might you try? What might make iteasier?2) Share Questions: What happened? How did you feel? What was the most difficult?3) Process Questions: What problems seemed to reoccur? What similar experiences have youhad?4) Generalize Questions: What did you learn about yourself? What did you learn about theactivity? How does this relate to something else in life? How did you decide what to do?5) Apply Questions: Where else can this skill be used? How will you use this in the future? Whatwill you do differently after this experience?2
Table of ContentsAdvanced Cake Decorating Manual Units 10 – 12 (Overview) . 6Advance Cake Decorating Unit 10 — Tiered Cakes . . 7Goals for Unit 10 . 7Exhibit for Unit 10 . .7Decorated Cake . .8Tips for e-Record . .8Project Planning Guide . . . .8Graduated Tier Sizes . . . .8Suggested Things to Do . . 9Assembling A Tiered Cake . . . .9Stacked Construction . 10Plate and Pillar Construction . .11Tips 13Suggested Things to Do . 14Cake Top Ornaments. . . 14Filler Flowers . .14Transportation . .14References . . . . . 14Advanced Cake Decorating Unit 11 — Molds .15Goals for Unit 11 . .15Exhibit for Unit 11 . . .15Molding Mediums . 16Molded or Shaped Object . .163
Tips for e-Record . . .16Molds . . . .16Sugar Molds . . 17Filling the Mold . . . .18Suggested Things to Do . . 18Cream Cheese Mints . . . 19Suggested Things to Do . . . .19Molded Buttercream . . . 19Suggested Things to Do . . . .19Modeling Mediums . . . .20Gum Paste . . . .20Gum Paste Recipe . . .20Suggested Things to Do .20Pastillage . . . .21Pastillage Recipe 21Suggested Things to Do . . .22Fondant . . . 23Suggested Things to Do . . .23Marzipan . . .23Marzipan Recipe . .24Suggested Things to Do .24Candy Leather . 25Chocolate Leather Recipe .25Candy Clay Recipe . 25Rice Cereal Treat Molds . .264
Suggested Things to Do .27Modeling Techniques . . . .28Basic Ball . .28Shaping Logs .28Shaping Cones . .29Forming Figures .29Flowers . .29Candy Mediums .30Hard Candy Recipe . . .30Spun Sugar Recipe . . .31References . . .31Advanced Cake Decorating Unit 12 — Create Your Own .33Goals for Unit 12 . . .33Exhibit for Unit 12 . . . .33Judging Standards . . . . .34Project Planning Guide . . . 34Advanced Training . . .35Experiment with Cakes and Icings . 35International Differences in Cake Decorating . . .35Moneymaking Aspects of Cake Decorating . . .36Your Notebook . . . 36Suggested Evaluation Questions . 385
ADVANCED CAKE DECORATING MANUAL UNITS 10 – 12(Units 10-12 are for Seniors Only)Overview: Learning Experiences Emphasized(Refer to manuals and state fair requirements for exhibit requirements)UNIT*10—One decorated cake or cake form of three or more tiers of graduated sizes, usingsupports. Separator plates and pillars may be used, but not required. A bottom baseborder is required.*11—One molded or shaped object on a decorated cake, a cake form or anindependent display in a case (no larger than 10 inches) to protect the item from harm.*12—A detailed notebook describing your project including your goals, plans,accomplishments and evaluation of results. You may use pictures or any records youhave kept to provide evidence of your accomplishments. Your main project exhibit isyour notebook and will count for 75 percent of the placing score. If an item wasmade as part of your project, a sample may be displayed as further evidence of thequality of your project but is not your main exhibit. Displays must not be over a 1 x 1foot exhibit area or consist of more than three items.* Units in this project manualNote: Units 10-12 are for senior members only.6
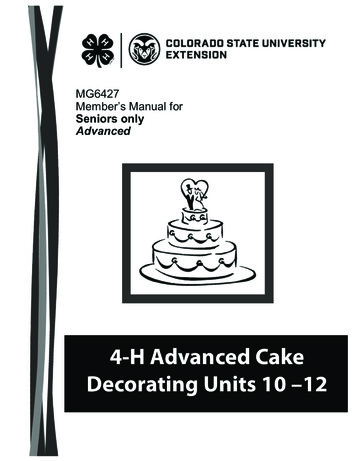
Advanced Cake Decorating Unit 10 —Tiered CakesFor weddings, anniversaries, formal parties and other equally elegant or festiveoccasions, the tiered cake has long been the eye-catching center of attention. Theartistic design, the graceful structure, the endless variety of dramatic decorating effectsall contribute to the fascination of the tiered cake. These combined qualities have notonly made the tiered cake a favorite, they assure its continuing popularity. Impressiveas they are, towering tiers of cake are well within the realm of achievement for anyaspiring decorator, once the basic techniques for proper assembly are acquired.Unit 10 cake decorating provides new experiences in working with supports andseparator plates, as you decorate a more elaborate cake of three or more tiers ofgraduated sizes. Pillars are optional.Practice these skills until you have them mastered.Goals for Unit 101. To build on skills developed in previous units.2. Learn to use supports, separator plates and pillars while decorating cakes.3. Design and decorate a cake of three or more tiers of graduated sizes, developingan overall design which is attractive and tied together by color, line, and design.4. Use special tips for special purposes.5. Decorate a minimum of three cakes (or use cake forms) plus your exhibit cake(total of 4). Each should have three or more tiers of graduated sizes. Two of thefour cakes must be real cakes. Forms are preferred for the exhibit cake.Exhibit for Unit 101. One decorated cake or cake form of three or more tiers of graduated sizes,using supports. Separators and pillars may be used but are not required. Abottom base border is required.2. Your completed Cake Decorating e-Record in a sturdy binder/notebook shouldaccompany the cake. Records are important, too. Keep a record of each cakeyou do. Either take a picture or make a simple drawing. Then write a shortexplanation of what you did and what you learned with each cake youdecorated.7
Decorated Cake1. A real cake or an artificial cake form may be used. The cake must have three ormore tiers and use supports. Pillars and separator plates may be used but arenot required.2. Cake should be placed on a firm base which will not sag with the weight of thecake. The board should be in proportion to the diameter and height of the cake.3. The cake board must be covered with a food safe material; examples arealuminum foil, Wilton--Fanci-Foil wrap, or freezer paper. If you use a decorativeor gift wrap paper or fabric, it must be covered in food quality plastic wrap.4. The design should be suitable for the size and shape of the cake. It shouldshow good use of color and a pleasing combination of decorations.5. Artificial stamens for flowers, leaves, wire stems, floral tape, special occasionornaments, tulle and ribbon, and filler flowers may be used. All other cakedecorations must be edible.Tips for e-Records1. Cake Decorating e-Records should be neat and complete. Instructions shouldbe followed.2. Cake Decorating e-Records should show that a minimum of three cakes plus thefair exhibit cake have been made (total of 4). Two of the four cakes must be realcakes. Forms are preferred for the exhibited cake.3. Cake Decorating e-Record books will count for 25 percent of the placing score.Project Planning GuideGraduated Tier SizesThe cake should be in proportion, graduatingsizes as you go up. As a guideline, all layersshould fit within a triangular shape, drawn fromthe edges of the bottom layer to the edges ofthe top layer, and extended until the two sidesmeet.8
When designing cakes withseparator plates and pillars,the triangle rule becomes moreflexible. The eye determines apleasing triangular shape,though a tier or two may not fitexactly on the ruled triangularline.Suggested Things to Do1. Look through cake decorating books or go to the Internet for suggestions for sizeof tiers when combining three or more.2. Stack cake pans of different sizes, leaving any space needed between layersand check to see that they conform to the triangle rule, or are pleasing to the eye.Assembling a Tiered CakeThe tiered cake, like any other architectural structure, needs a strong foundation onwhich to stand. A sturdy network of wooden dowel rods, plastic pillars, pegs, hardplastic straws (example bubble or fat straws) and separator plates gives the cake itsnecessary foundation and the framework on which to build.The classic tiered cake assembly shown here can be adapted for any multi-layer cake,be it two, three, four or more tiers. Wedding cake tiers are usually two layers deep, withthe base tier deeper than those above.NOTE: Every tier must be placed on cake board or a cake plate as part of the tier set.Figure 1: Picture taken fromWilton website: www.wilton.com9
Stacked Construction:1. Ice all tiers and allow to air dry before assembly.Place bottom tier on sturdy base board 4 incheslarger than the tier’s diameter.2. On the top of the bottom tier, press a cardboardcake circle the same size as the tier or separatorto be placed above it to imprint an outline whereyou want the tier to go. Remove cake circle.3. Measure one dowel rod at the cake’s lowest point.Figure 2: Pictures taken fromUsing this dowel rod for measuring, cut five orWilton website: www.wilton.comseven dowel rods depending on the size of thecake (using wire cutters, a small saw, a new dog nail clipper, etc.) the same size.Be sure the dowels are smooth and level. Smooth out any ridges left aftercutting.4. Push each rod into the cake. Make sure they touch the base of the cake stand orplate.10
5.With dowel rods in place, sprinkle coconut or extra powdered sugar inside theimprint on the bottom tier. Place next tier over dowels.6. Repeat procedure using four to six dowel rods for the second tier.Repeat procedure using 3 to 5 dowel rods for third tier.Note – additional tiers can be added.Once the tiers are assembled, measure a dowel rod the height of the entire cake andsharpen the end with a pencil sharpener or knife. Using a hammer, lightly tap the dowelrod so it goes through the cake layers and boards all the way to the base. This will addadditional structural support to your cake.Plate and Pillar ConstructionTiers can be assembled with pillars between each tier or acombination of pillar/plate construction. To separate tierswith pillars and separator, place the separator plate on topof the tier peg side up. Place pillars on pegs and place nexttier on a separator plate on top of the pillars. Generally,each tier is at least 2 inches smaller in diameter than thetier below it. (Always use same size top and bottomseparator plates with each set of pillars.)11Figure 3: Picture taken fromWilton website: www.wilton.com
Tiers separated by pillars should be transported separately and assembled at thedestination. Remove pillars as well from the plates and assemble when at destination.12
Below is an example of combined constructionTIPS: Use the same procedure for cakes with more than three tiers. Always removetiers separated by pillars and plates when transporting cake.Remove pillars from plates before transporting.Always cut dowel rods the same size, using only one master using the lowestpoint dowel on the cake from which to measure. Then cut all dowels to thatmeasure. This will prevent gaps.Do not move dowel rods around while in the cake.Separator plate pegs should not be used in place of dowel rods. They should beused with dowel rods.Finely shredded coconut or confectioners’ sugar, placed under cake circles orplastic plates, helps prevent frosting on the cake from sticking to the bottom ofcake circles or separator plates.Use extreme care when inserting dowel rods into tiers so the cardboard betweentiers does not bend.13
Suggested Things to Do1. Visit a bakery or professional wedding cake decorator. Take note of howdifferent sized tiers, supports, separator plates and pillars are used.2. Look through cake decorating books or go to the Internet for ideas on usingsupports, separator plates and pillars and planning the design for the cake.3. Explore the types of supports, separator plates and pillars. Determine whatwould best fit your needs.Cake Top OrnamentsOrnaments may be artificial or can be homemade. The size should be in keeping withthe triangular structure of the cake and never so tall it would extend above the pinnacleof the triangular design.Filler FlowersFiller flowers may be used to fill in empty spaces around the main arrangement. Whenusing fresh flowers, use flower picks to place flowers on the cake to preventcontamination issues with the cake.Preserved baby’s breath or artificial flowers may be used if appropriate for the designselected. Tulle and ribbon may also be used.TransportationIt is best to transport the cake as individual tiers – not stacked. Boxed or unboxed,place the cake on damp towels or rubber matting on a flat surface in the trunk or back ofa van or SUV. Do not transport cake on the car seat.References:Visit websites and go to the library and check out books on wedding cakes.Key words to use in your search: wedding, anniversaries, tier cakes, tiered cakeswww.wilton.comwww.bettycrocker.com14
Advanced Cake Decorating Unit 11—Molds(Seniors Only)Unit 11 cake decorating provides an opportunity for you to mold and shape many ediblematerials. This may be used in preparing decorations for a cake, or an individualmolded item.Practice these skills until you have them mastered.Goals for Unit 111. Learn to mold and shape different edible materials.2. Collect information on different molding and shaping materials.3. Mold and shape at least three different edible materials. (Fondant, gum paste,molding chocolate, candy melts, rice cereal treats, etc.)4. Collect information on at least three different molding and shaping materials.5. Use decorator tips to achieve the natural likeness or effect desired in the moldedor shaped item.Exhibit for Unit 111. One molded or shaped object may be on adecorated cake, a cake form or an independentdisplay in a case (no larger than 10 inches) toprotect the item from harm.2.Your completed Cake Decorating e-Record in asturdy binder/notebook should accompany theFigure 4: Picture taken fromWilton website: www.wilton.commolded item. Records are important, too. Keep a record ofeach mold you do. Either take a picture or make a simple drawing. Includeinformation on at least three molding or shaping materials used. Then write ashort explanation of what you did and what you learnedwith each molded or shaped item you decorated.Figure 5: Picture taken fromWilton website: www.wilton.com15
Molding MediumsMolded or Shaped Object1. Should be firmly set.2. Should be smoothly finished.3. No drying cracks should show.4. Seams should be joined smoothly with none of the joiningmaterials showing.Figure 6: Picture taken fromWilton website: www.wilton.com5. If cornstarch or confectioners’ sugar is used in molding, it should be brushedaway and not be visible.6. Color should be consistent throughout and compatible with the total design.7. Figures should be in proportion and natural in appearance and coloring.8. Size and shape should fit into the overall design.Tips for e-Records1. Cake Decorating e-Records should be neat and complete. Instructions shouldbe followed.2. Cake Decorating e-Records should show that a minimum of three differentmaterials were used in molding and shaping, plus the fair exhibit that has beenmade (total of 4). Include information on each material used with recipes, whereingredients and supplies can be secured, where and when this material shouldbe used, how fast you need to work, and how fast it hardens.3. Cake Decorating e-Record books will count for 25 percent of the placing score.MoldsMolds come in a variety of shapes and types including: Clear plastic sheetsClear plastic 3-dimensional moldsFlexible moldsRubberSilicone moldsSugar16
Handle molds with care. Follow the manufacturer’s instructions for cleaning your molds.Store molds flat and away from heat.Sugar MoldsThere are three basic recipes to use with sugar molds.Sugar Water Recipe2 cups granulated sugar2 teaspoons waterMix by hand, kneading for about one minute until sugar is moistened and packs like wetsand.For tinting, substitute one-part liquid food color for water in the recipe.Sugar, Meringue Powder and Water Recipe3 teaspoons meringue powder3 teaspoons warm water2 cups granulated sugarMix water and meringue powder until thoroughly dissolved. Add sugar and mixthoroughly to insure even distribution of all ingredients. The meringue powder actsmuch like egg white and gives the sugar a strong body which stands up well in humidclimates and will not discolor with age.17
Filling the MoldOnly use sugar molds for sugar. In humid climates the mold should be dusted withcornstarch before mixture is inserted. Pack mixture solidly into mold and scrape offexcess sugar mixture with a spatula so top is even with the edge of the mold. Place apre-cut cardboard square over the mold and turn upside down. Lift off the mold. Letdry. Drying time varies with the size of the mold and whether it is to be solid orhollowed out. To speed drying, molded sugar can be placed in low temp oven until dry.Suggested Things to Do1. Obtain instructions on basic sugar molding and try both hard and soft molds.(Soft molds may be listed under candies or mints in a recipe book rather than incake decorating sections.)2. Analyze the kinds of sugar molds(shapes) which would fit into youroverall design. You may want toexperiment with several differentshapes and sizes of molds.3. Try different coloring methods formolded sugar.4. Try using equipment you have at homefor molds such as plastic bells andcookie cutters.5. Purchase or borrow molds of desired shapes.Figure 7: Picture taken fromWilton website: www.wilton.com6. Research information on sugar molding. Find different recipes, whereingredients and supplies may be secured, how to use sugar molds andinformation on when and where they should be used. This may includeinformation on how fast you have to work and how soon the molded objects willset.NOTE: Use royal icing to decorate sugar molds. Buttercream icing will leave a greasestain; the color will bleed into the sugar and it will deteriorate the mold.18
Cream Cheese Mints3 ounce Package Philadelphia Cream Cheese2 ½ cup Confectioners’ sugarFlavor to taste with mint flavoring or other flavorings may be addedColor as desired1. Mix well.2. Remove a small portion, dip into granulated sugar, and press into mold smoothingtip edge.3. Unmold immediately.4. Storage—refrigerate or freeze the mints in an airtight container.Suggested Things to Do1. Research information on molding with a cream cheese recipe. Find differentrecipes, where ingredients and supplies may be secured, how to use the moldand information on when and where they should be used. This may includeinformation on how fast you have to work and how soon the formed objects willset.2. Try different coloring and flavoring recipes.3. Make mints for some special occasion in your family or community schedule.Molded ButtercreamButtercream frosting may be thickened with confectioners’ sugar to a play doughconsistency and molded or shaped into any shape desired.Suggested Things to Do1. Obtain instructions on how to make buttercream icing for use in shaping.2. Learn to make different shapes using buttercream frosting.3. Evaluate the quality of your work.4. Research information on buttercream frosting for shaping. Find differentrecipes, where ingredients and supplies may be secured, how to use the moldand information on when and where they should be used. This may includeinformation on how fast you have to work and how soon the formed objectswill set.19
Modeling MediumsGum PasteGum paste has been identified with the culinary arts for centuries. It is usually used forsingle shapes that can be shaped quickly (small animals on a log cake). It may also beused for forming beautiful, lifelike natural flowers, dolls, etc.Gum paste dries faster than molded sugar, but more slowly than pastillage.Gum Paste Recipe1 tablespoon Gum-Tex or tragacanth gum1 ¼ tablespoons Glucose3 tablespoons Warm water1 tablespoons Lemon juice1 lb. Confectioners’ sugar (more or less)Figure 8: Picture taken from1. Mix warm water and glucose until glucose is absorbed.Wilton website: www.wilton.com2. Add the gum tragacanth and lemon juice and mix thoroughly.3. Add small amounts of confectioners’ sugar until you can work the mixture with yourhands. Continue adding small amounts of confectioners’ sugar as you knead themixture on a table top. As soon as the mixture is pliable and can be shaped withoutsticking to your fingers, you have added enough sugar (a pound, more or less) andthe gum paste is of correct working consistency.4. If you are not going to use the gum paste mixture immediately, place it in a plasticbag and then in a covered container to prevent drying. When stored properly, yourgum paste will keep for several months. Gum paste handles best when it is severaldays old.Suggested Things to Do1. Obtain instructions on how to make and use gum paste.2. Learn to make different shapes using gum paste.3. Evaluate the quality of your work.4. Research information on gum paste. Find different recipes, where ingredientsand supplies may be secured, how to use gum paste and information on whenand where it should be used. This may include information on how fast you haveto work and how soon the formed objects will set.20
PastillageThis is a French word which comes from pastille, a firm, jelly type gum sweet.Pastillage is a very white, pliable pastry dough used to make pastry decorations such asribbons, bows, and large-scale three dimensional pieces. The dough is a combinationof confectioners’ sugar, cornstarch, gelatin, and sometime gum Arabic; it is kneadeduntil it is soft and smooth, and rolled to the desired thickness and cut and formed. It isvery strong and dries rock hard. Although the dough is easy to roll and cut, it dries outquickly. Food coloring may be worked into the dough prior to rolling or the finishedpiece may be airbrushed or painted with rehydrated cocoa powder, edible food coloringor if only for decoration petal or luster dust.Ewald Notter Pastillage Recipe850g (6 3/4 cup) Powdered Sugar150g (11/8 cup) Cornstarch10g (4 sheets) Gelatin Sheets (can substitute powdered gelatin 2 envelops dissolved in60g cold water)30g (1 ½ tablespoons) Corn Syrup or Glucose15g (1 tablespoon) White Vinegar1. Place the glucose (corn syrup) and white vinegar in a small pan.2. Bloom the gelatin in cold water. Start this while you are prepping your sugar andstarch so it has plenty of time to soak up water—you want it well hydrated. (Tosubstitute recipe with powdered gelatin use 60-80g water)3. Weigh and sift your powdered sugar and cornstarch together so they are wellcombined.4. Place the dry ingredients in the mixing bowl and warm your wet ingredients with thebloomed gelatin and let that melt –but not too hot (do not let boil, just warm enough tomelt the gelatin).5. Gradually pour the melted gelatin mix into the dry ingredients while stirring with thepaddle on the slowest speed.6. Let that stir until it all comes together then turn it out onto a very clean surfacedusted with powdered sugar and kneed until smooth21
Recipe Continued:7. If it seems too dry and crumbly moisten your hands and continue kneading—repeatuntil the consistency is smooth and cleans up the surface. Can add 2 teaspoons ofwarm water at a time if it is still too dry until correct consistency is reached.8. The pastillage dough should be like bread dough but not as soft or sticky.9. Flatten into a disc and triple wrap tightly with plastic wrap. Can be placed into aZiploc bag with a damp towel if the climate is dry to help prevent the pastillage fromdrying out. Keep any portion that is not being used wrapped at all times.Suggested Things to Do1. Obtain instructions on how pastillage is made and how to use it.2. Learn to make different shapes using pastillage.3. Evaluate the quality of your work.4. Research information on pastillage. Find different recipes, whereingredients and supplies may be secured, how to use pastillage andinformation on when and where it should be used. This may includeinformation on how fast you have to work and how soon the formedobjects will set.22Figure 9: Picture taken fromWilton website: www.wilton.com
FondantFondant is often used for floral and figure shaping or to completely cover a cake ormolded object.Explore using the variety of fondants out on the market.For recipes and tips on using fondant, refer to Unit 8.Suggested Things to Do1. Learn to roll out fondant and cover a cake ormolded object.2. Obtain instructions on how to prepare and usefondant in shaping.3. Learn to make different shapes using fondant.4. Evaluate the quality of your work.Figure 10: Picture taken fromWilton website: www.wilton.com5. Research information on fondant. Find different recipes, where ingredients andsupplies may be secured, how to use shaped and rolled fondant and informationon when and where it should be used. This may include information on how fastyou have to work and how soon the formed objects will set.MarzipanMarzipan is a thick pliable mixture of almond paste, sugar, glucose, and sometimes eggwhites. It may be colored. It is used extensively in creating edible figurines such asanimals and flowers, and also rolled into thin sheets and used to cover cakes andpastries. Confectioners’ sugar, rather than flour, is used to work with marzipan. If thedough is overworked, the almond oil will rise to surface and make the dough sticky; thismay be corrected by kneading in a bit of water and confectioners’ sugar. Owing to itshigh sugar content, marzipan dries out quicklyand should be kept covered. If it becomes toodry, it may be reconstituted with a bit of water,but this will reduce shelf life. It is best to storein an airtight container in a cool place.Almond meal is also known as almond flourand is finely ground blanched almonds.Figure 11: Picture taken from hilahcooking.com23
Almond paste is a soft past made from ground blanched almonds, sugar and glycerin.The British use the term Almond Paste for Marzipan.Marzipan Recipe1 cup Almond paste2 Unbeaten egg whites from pasteurized eggs3 cups Confectioners’ sugar½ teaspoon Vanilla or rum flavoringKnead almond paste in bowl. Add egg whites, m
1. One decorated cake or cake form of three or more tiers of graduated sizes, using supports. Separators and pillars may be used but are not required. A bottom base border is required. 2. Your completed Cake Decorating e-Record in a sturdy binder/notebook should accompany the cake. Records are important, too. Keep a record of each cake you do.

