Transcription
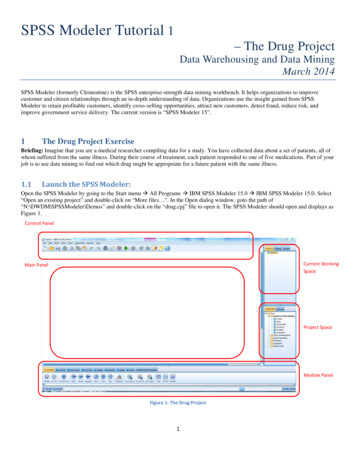
SPSS Modeler Tutorial 2– The Market Basket ProjectData Warehousing and Data MiningMarch 20142. The Market Basket ProjectBriefing: This example deals with fictitious data describing the contents of supermarket baskets (that is, collections ofitems bought together) plus the associated personal data of the purchaser, which might be acquired through a loyalty cardscheme. The goal is to discover groups of customers who buy similar products and can be characterized demographically,such as by age, income, and so on.This example illustrates two phases of data mining: Association rule modeling and a web display revealing links between items purchased C5.0 rule induction profiling the purchasers of identified product groupsNote: This application does not make direct use of predictive modeling, so there are no accuracy measurements for theresulting models and no associated training/test distinction in the data mining process.2.1Accessing the dataOpen the SPSS Modeler by going to the Start menu All Programs IBM SPSS Modeler 15.0 IBM SPSS Modeler15.0. Select “Open an existing project” and double-click on “More files ”. In the Open dialog window, go to the path of“N:\DWDM\SPSSModeler\Demos” and double-click on the “bask.cpj” file to open it.In this project, we need to use the data file “BASKETS1n”.1. Select the “Var.File” node listed in the “Sources” tab from the “Module Panel”, and add it to the “Main Panel”.2. Double click the “Var.File” node in the “Main Panel” to open its property window, and Click the “ ” button next tothe “File” field. In the “Open” dialog window, select to open the “BASKETS1n” file that contains records of basketinformation (Figure 1). The BASKETS1n file contains records for 18 attributes, termed “cardid”, “value”, “pmethod”,“sex”, “homeown”, “income”, ”age”, “fruitveg”, “freshmeat”, “dairy”, “cannedveg”, “cannedmeat”, “frozenmeal”,“beer”, “wine”, “softdrink”, “fish”, and “confectionery”.3. Click “OK” to close the “Var.File” property window.1
Figure 1: BASKETS1n File Property2.2Find and display associations between data attributes.1. Select the “Type” node listed in the “Field Ops” tab from the “Module Panel”, and add it to the “Main Panel”.2. Establish a link between the “BASKET1n” node and the “Type” node by right-clicking on the “BASKET1n” nodeand select the “Connect ” option, then left-clicking on the “Type” node (Figure 2).Figure 2: Link between BASKET1n and Type Nodes3. Double-click the “Type” node to open its property window. The “Type” node provides a way to modify the propertyof data attributes in the source node it connects to. Full detail of the “Type” node can be found in the Help file byclicking on the Help button and selecting “Type Node” (Figure 3).Note: You can click the “Read Values” button to detect value ranges for data attributes in the data source.2
Figure 3: Description of Labels in the "Type" node4. Modify the properties of attributes as in Figure 4.a. Set the “Measurement” property of “cardid” to “Typeless”. This is because that each loyalty card ID occursonly once in the dataset can therefore be of no use in modeling.b. Set the “Measurement” property of “Sex” to “Nominal”. This is to ensure that the Apriori modeling algorithmwill not treat “sex” as a flag.c. Set the “Role” property to “None” for “cardid”, “value”, “pmethod”, “sex”, “homeown”, “income”, and“age”.d. Set the “Role” property to “Both” for the remaining attributes.e. Click “OK” to close properties window5. Select the “Apriori” node listed in the “Modelling” tab from the “Module Panel”, and add it to the “Main Panel”.Apriori node discovers association rules in the data.6. Connect the “Apriori” node to the “Type” node in the “Main Panel” (Figure 5).7. Double click the “Apriori” node to open its property window.8. Click “Run”. It creates a new model. Double-click this model and you can observe a table that displays detectedassociations between data attributes, which roles are set to “Both” in step 4, should appear as in Figure 6. These rulesshow a variety of associations between frozen meals, canned vegetables, and beer.3
Figure 4: Modified Properties in the "Type" nodeFigure 5: Connections between BASKETS1n, Type, and Apriori nodes4
Figure 6: Associations between Data Attributes9. Select the “Web” node listed in the “Graphs” tab from the “Module Panel”, and add it to the “Main Panel”.10. Connect the “Web” node to the “Type” node to have a visual view of how different data attributes are associated as inFigure 7.Figure 7: Connection between Web and Type Nodes11. Double click the “Web” node to open its property window.12. Using the Select Fields drop down menu, select “fruitveg”, “freshmeat”, “dairy”, “cannedveg”, “cannedmeat”,“frozenmeal”, “beer”, “wine”, “softdrink”, “fish”, and “confectionery” for the “Fields”, and tick “Show true flagsonly” (Figure 8).5
Figure 8: Property Window of Web node13. Click “Run” and a graphical display of associations between data attributes should be generated as Figure 9. Yourresult may look different from Figure 9. This is because the threshold used, which can be set using the scroll bar at thebottom of the window.We can observe that three groups of customers stand out Those who buy fish and fruits and vegetables, who might be called Healthy eaters Those who buy wine and confectionery Those who buy beer, frozen meals, and canned vegetables (Beer, beans, and pizza)Figure 9: Result of Web Node6
2.3Profiling the Customer GroupsYou have now identified three groups of customers based on the types of products they buy, but you would also like toknow who these customers are, their demographic profile. This can be achieved by tagging each customer with a flag foreach of these groups and using rule induction (C5.0) to build rule-based profiles of these flags.1. You must derive a flag for each group. This can be automatically generated using the web display that you justcreated. Using the right mouse button, click the link between “fruitveg” and “fish” and select “Generate Derive Nodefor Link”. A new node should appear in the “Main Panel”.2. Double click the newly generated node to open its property window, and change the “Derive field” to"Healthy” (Figure 10).Figure 10: The Healthy Node3. Repeat Step 1 and 2 for the link between “Wine” and “Confectionery”, and rename the derived node to “WineChocs”.4. Repeat Step 1 and 2 for the links between “cannedveg”, “beer”, and “frozenmeal”. To derive a node from multiplelinks, you need toa. Goto the “interaction” mode, by selecting “Interactions” from the “View” menu.b. Select the “magic wand” – it appears as a magic wand icon with two red starts on the Graph menu.c. Use the magic wand to draw a line crossing the first link you want to select (Be careful, if you draw a lineacross multiple links, they will all be selected).d. While holding the “Shift” key, repeat for each other link you want to select.e. Then select “Devive Node (“And”) option from the “Generate” menu (Figure 11).A new node will be generated in the “Main Panel”. Rename it as “beer beans pizza”.7
Figure 11: Derive a Node from Multiple Links5. To profile these customer groups, connect the existing “Type” node to these three newly generated nodes in series,and then attach another “Type” node. (Figure 12).Figure 12: Connections for customer profiling6. Double click the new “Type” node to open its property window.a. Set “Role” for “value”, “pmethod”, “sex”, “homeown”, “income”, and “age” to “Input”;b. Set “Role” for a customer group, which is one of “Healthy”, “WineChocs”, and “beer beans pizza”, to“Target”.c. Set “Role” for the remaining data attributes to “None” (Figure 13).7. Click OK to close the property window.8
Figure 13: Modified Type Node8. Select the “C5.0” node listed in the “Modelling” tab from the “Module Panel”, and add it to the “Main Panel”.9. Double click the “C5.0” node to open its property window.10. Set the “Output type” to “Rule set” (Figure 14).Figure 14: Property Window of C5.0 Node11. Click “Run”, and a new model will be generated in the “Current Working Space” area.9
12. Double click on the new model.13. The result shows a clear demographic profile for this customer group (Figure 15).Figure 15: Demographic Profile for beer beans pizza Customer GroupThe same method can be applied to the other customer group flags by selecting them as the output in the second Typenode. A wider range of alternative profiles can be generated by using Apriori instead of C5.0 in this context; Apriori canalso be used to profile all of the customer group flags simultaneously because it is not restricted to a single output field.End of Tutorial 210
Open the SPSS Modeler by going to the Start menu All Programs IBM SPSS Modeler 15.0 IBM SPSS Modeler 15.0. Select "Open an existing project" and double-click on "More files ". In the Open dialog window, go to the path of "N:\DWDM\SPSSModeler\Demos" and double-click on the "bask.cpj" file to open it.
