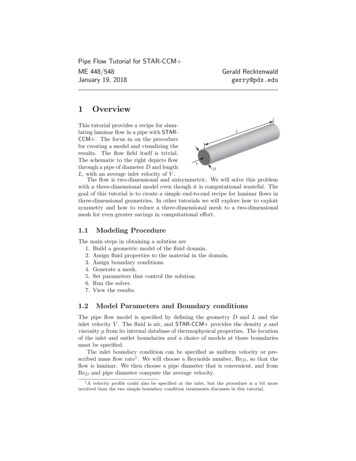
Transcription
Pipe Flow Tutorial for STAR-CCM ME 448/548January 19, 20181Gerald Recktenwaldgerry@pdx.eduOverviewThis tutorial provides a recipe for simuLlating laminar flow in a pipe with STARCCM . The focus in on the procedurefor creating a model and visualizing theresults. The flow field itself is trivial.The schematic to the right depicts flowVthrough a pipe of diameter D and lengthDL, with an average inlet velocity of V .The flow is two-dimensional and axisymmetric. We will solve this problemwith a three-dimensional model even though it is computational wasteful. Thegoal of this tutorial is to create a simple end-to-end recipe for laminar flows inthree-dimensional geometries. In other tutorials we will explore how to exploitsymmetry and how to reduce a three-dimensional mesh to a two-dimensionalmesh for even greater savings in computational effort.1.1Modeling ProcedureThe main steps in obtaining a solution are1. Build a geometric model of the fluid domain.2. Assign fluid properties to the material in the domain.3. Assign boundary conditions.4. Generate a mesh.5. Set parameters that control the solution.6. Run the solver.7. View the results.1.2Model Parameters and Boundary conditionsThe pipe flow model is specified by defining the geometry D and L and theinlet velocity V . The fluid is air, and STAR-CCM provides the density ρ andviscosity µ from its internal database of thermophysical properties. The locationof the inlet and outlet boundaries and a choice of models at those boundariesmust be specified.The inlet boundary condition can be specified as uniform velocity or prescribed mass flow rate1 . We will choose a Reynolds number, ReD , so that theflow is laminar. We then choose a pipe diameter that is convenient, and fromReD and pipe diameter compute the average velocity.1 A velocity profile could also be specified at the inlet, but the procedure is a bit moreinvolved than the two simple boundary condition treatments discusses in this tutorial.
2START A NEW SIMULATION2Let the tube have a diameter of 3 cm. The density and viscosity of air at15 C areρ 1.23kg,m3µ 1.79 10 5N·skg 1.79 10 5m2m·sFor laminar flow, choose ReD 500ReD ρV Dµ V kg1.79 10 5 m·sµm ReD 500 0.24kgρDs1.23 m3 (0.03 m)The mass flow rate is kg m πkgṁ ρV A 1.23 30.2425(0.03 m)2 2.11 10 4.ms4sThe outlet boundary condition can be specified as a pressure outlet or amass flow split condition. For this tutorial, we will use a pressure outlet. Thechoice of outlet boundary condition has little influence on the simulation resultsfor the simple pipe flow problem.Although the type of outlet boundary condition is not important for thisproblem, we need to consider where to locate the outlet boundary. In otherwords, how long should the pipe be? White2 gives the following estimate forthe entrance length for laminar fully-developed flow in a pipeLe 0.06ReDDFor ReD 500 and D 3 cm, White’s formula gives L3 15D 45 cm. Thepurpose of this demonstration is not to simulate the developing flow. However,using Le as a reference value allows us to choose a realistic length for the domain.We will choose L 45 cm.2Start a New SimulationCreate a new Simulation Model1. Launch STAR-CCM 2. From the File menu, select New Simulation.3. In the dialog box, make sure the Serial button (in upper left corner) is selected.4. Check the Power-On-Demand box, enterthe Power-On-Demand Key, and clickOK.The result is a new, blank simulation window,as shown in Figure 1.2 FrankM. White, Fluid Mechanics, sixth ed., 2008, McGraw-Hill, p. 347
2START A NEW SIMULATIONSimulation TreeGraphics(initially empty)MenusProperties.3OutputFigure 1: STAR-CCM user interface appearance after creating a new simulation.2.1Orientation to the User InterfaceSTAR-CCM has a complex user interface that is more similar to a CAD toolthan a typical business application. Figure 1 shows the state of the interface atthe start of a new simulation.The STAR-CCM interface is divided into four primary panes3 . The upperleft pane contains the Simulation Tree, which appears as a list of icons that looklike folders in a file browser. Each of the folder icons is a node in a hierarchyof model features and parameters. The Simulation Tree is manipulated byexpanding nodes with sign to the left of the node, or right-clicking on thenode names to reveal a pop-up menu. During model creation, additional nodesappear when features that are selected by the user require additional parametersto be specified.Below the Simulation Tree, in the lower left corner of the user interface,is the Properties Pane. When you select a node in the Simulation Tree, parameter choices or numerical values associated with that node are revealed inthe Properties Pane. Thus, an important mode of setting simulation parameters is to select a node in the Simulation Tree, and then choose the value of acorresponding parameter in the Properties Pane.The upper right corner of the user interface is the Graphics Pane, whichis empty at the start of a simulation. In creating a model and solving forthe flow field, you will create Scenes, which appear as tabbed sub-panes ofthe Graphics Pane. For example, a Geometry Scene is used to display and3 Referto the Using the Workspace section of the User Guide for more information.
3BUILD THE GEOMETRY OF THE MODEL4manipulate manipulate three-dimensional images of the domain geometry andmesh during the problem specification phase of the simulation. Other Scenes inthe Graphics Pane are used to monitor convergence of the solution, and displayfield variables (velocity, pressure, turbulence quantities, etc.) after a solution isobtained.The Output Pane in the lower right quadrant is used by STAR-CCM todisplay messages for the user. During meshing and during iterations towardconvergence, large amounts of text messages will scroll by in the Output Pane.Although this information seems superfluous at first, the Output Pane can revealimportant aspects of the simulation status or numerical values important forinterpreting the results of a simulation.For more information on the STAR-CCM user interface, refer to Using theStar-CCM Workspace, in the on-line help: Select Help from the menus at thetop of the window.3Build the geometry of the modelThe geometry of simple flow models can be created with a 3D-CAD tool thatis built into STAR-CCM . We will use the 3D-CAD tool to create a cylindricalobject, and then incorporate that object as the fluid domain for the pipe flowsimulation.CFD simulations require specifying the geometry and boundary conditionson a fluid volume. Thus, unlike a typical CAD tool for drawing physical parts,the STAR-CCM interface is designed to ultimately create volumes occupied byfluid, not volumes occupied by solid parts. Although we are creating a modelof flow in a pipe, we will not be drawing the pipe. Rather, we will be drawinga cylindrical plug that corresponds to the fluid inside the pipe.3.1Open the CAD tool and set the grid scale1. Right click on the plus sign ( ) next to the Geometry node in the SimulationTree.2. Right click on the 3D-CAD Models node and select New from the pop-upmenu. The Simulation Tree pane is replaced by a CAD Tree pane.3. Right-click on the XY plane icon under theFeatures node, and select Create Sketch fromthe pop-up menu. The CAD Tree pane is replaced by a pane with two sub-panels, eachone highlighted by a light blue box. The upper sub-panel labeled Create Sketch Entitiescontains icons for primitive sketching operations. The lower sub-panel labeled DisplayOptions contains icons for grid spacing, snapto-grid and other options. Note that the iconsin both panels contain tool-tips that are displayed when the mouse pointer hovers abovethe icon.
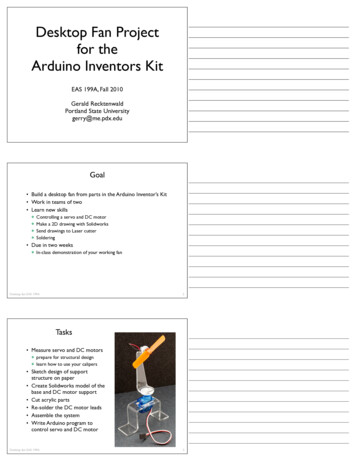
3BUILD THE GEOMETRY OF THE MODEL54. Before drawing any features, set the grid scale for the CAD tool. Click onthe icon in the lower right corner of the Display Options panel.5. Set the grid spacing to 0.005 mNote that all physical quantities are specified with dimensions. Thus, the inputto the grid spacing dialog box could be 0.005 m, 0.5 cm, or 5 mm. Only SI andmetric units are accepted. If the units are not specified, the value is assumedto be in the m-kg-s system.3.2Sketch a circle and extrude it to create a cylinder.During the following steps, it may behelpful to zoom in or rotate the geometric model in the Graphics pane. Refer to the instructions in the box to theright for an introduction to the mousemovements that manipulate models inthe graphics pane.Mouse input to the CAD Tool Drag and rotate an objectwith the left mouse button Zoom in with the middlemouse button or scroll wheel Pan with the right mousebutton1. Select the Create circle from center tool.2. Left-click at the origin of the XY plane and then right-click and drag toenlarge the circle until its radius is 0.015 m. Hint: dragging mouse pointeralong a grid line takes advantage of the snap-to-grid feature, making it easyto specify the radius.3. Click OK in the lower left corner of the CAD panel. Don’t skip this step!The result is a new entity, Sketch 1, in the CAD tree.4. Right-click on Sketch 1 node in the CAD tree, and select Create Extrudefrom the pop-up menu. A dialog box appears as shown in the left half ofFigure 2.
3BUILD THE GEOMETRY OF THE MODEL65. Enter 0.45m for the Distance parameter, and click the OK button in thebottom left corner of the CAD pane.The preceding steps create a three-dimensional cylinder in the Graphics Pane.You will likely need to manipulate the image with the mouse to make the cylinder visible. The default viewing position is so close to the origin that the cylinderdoes not fit into the viewport of the Graphics pane. For example, to make thecylinder visible, try zooming away by using the middle mouse button or thescroll wheel, and rotating the image with the left mouse button.Figure 2: Dialog box for setting the extrusion distance (left). Extruded cylinder(right).3.3Save the ModelSelect Save from the file menu, and save the .sim file to the hard drive of yourcomputer. It’s a good idea at this point to create a directory for the simulationresults as well as a meaningful file name. As you build the model and rundifferent cases, you will accumulate alternate .sim files for the same physicalproblem. You will also generate external graphics files to be incorporated intoreports. Therefore, a little thought at this point will help you stay organizedlater.3.4Label the surfacesLabeling surfaces in the 3D-CAD tool will make it easier to identify boundariesof the Regions later in the model setup. It is possible to label the surfaces laterusing tools in the simulation mode.Label the inlet, outlet and pipe wall surfaces with the following steps. Makesure you are in the 3D-CAD mode as described in Figure 3.1. Rotate the model so that the inlet (or outlet) end is visible. We will definethe inlet as the (x, y) plane containing (x, y, z) (0, 0, 0).2. Right-click on the face, and select Rename from the pop-up menu.
3BUILD THE GEOMETRY OF THE MODEL7Note: The steps to label the surface geometry require that you arein working in the 3D-CAD mode of STAR-CCM . If you are in theSimulation mode, you will see the Simulation Tree for the model asin the screen shot below right. Select the 3D-CAD mode by clickingthe 3D-CAD button as shown in the screen shot below left.Figure 3: Toggling between the 3D CAD mode and the Simulation mode.3. Change the name of the surface to inlet (or outlet).4. Repeat the preceding steps to label the outlet (or inlet) and the pipe walls.5. Close the 3D-CAD model, and return to the Simulation Pane.Notice that the view of the part shows up as a Geometry Scene.It’s possible that the geometry of the model will not be visible. In that caseyou will either need to open and select an existing Geometry Scene, or create anew Geometry Scene with the following steps.1. Right click on Scenes at the top level of the simulation tree and selectNew Geometry Scene.2. Expand the Geometry Scene node and select the Parts corresponding tothe CAD model you just created.
4CREATE A REGION THAT CONTAINS THE PIPE OBJECT3.58Create a Geometry Part from the CAD ModelSimple CAD object becomes a fluid regionThe 3D-CAD model is part of the current STARRegion3D-CAD objectPartCCM model file (the .sim file), but as a CADmodel it is not directly used in a CFD simulation.Multiple CAD objects become a fluid regionAll or part of a 3D-CAD model is a basis for a STAR3D-CAD objectPartCCM Part, and the Part is used to create a ReRegionPart3D-CAD objectgion. These steps are represented in the first row ofPartImported objectthe schematic to the right. This three-step proceMultiple CAD objects become multiple regionsdure may seem like a lot of unnecessary work justPart3D-CAD objectto build a model of flow in a pipe. The complexityRegion3D-CAD objectPartarises from the way that STAR-CCM manages defPartImported objectRegioninitions of the geometries used in flow simulations.The complexity of the steps to define a fluid region for a simple modelbecomes an important asset when working with geometrically complex modelsimported from CAD tools. As depicted by the other examples in the schematicabove and to the right, multiple CAD objects (which may be imported fromother CAD tools) can be used to create separate Parts, which can be combinedinto a single Region. Alternatively, multiple CAD objects can be used to createseparate Parts, which can be used to create multiple Regions.3.5.1Procedure to Create a Geometry PartUse these steps to create a geometry Part from the 3D-CAD model. Make sureyou are in the Simulation mode as described in Figure 3.1. Expand the Bodies node.2. Select Body 1 (or whatever you named the pipe object)3. Right click and select New Geometry PartYou can rename the 3D CAD model (or not). I suggest Pipe fluid or similarname for the part. Notice that a new Part is created under the Parts node. Alsonote that the names assigned in the CAD tool (Inlet, Outlet and Walls) havebeen propagated to the nodes of the Parts tree.3.6Save the ModelSelect Save from the file menu.4Create a Region that contains the pipe objectThe physical problem being modeled is specified in three distinct and independent categories. Regions Mesh Continuum Physics Continuum
4CREATE A REGION THAT CONTAINS THE PIPE OBJECT9A region defines the topological relationship between material in the simulation,i.e., it defines how the geometric entities (volumes or areas and their boundaries)in the model are connected to each other. Boundary conditions are definedon the region and the boundary conditions are independent of the mesh, thekind of simulation (e.g., laminar or turbulent flow) or the thermophysical fluidproperties.Each region has a Mesh Continuum that consistes of a surface and volumemesh. Each region also has a Physics Continuum that specifies the physicalbehaviors of the material, e.g., fluid or solid, compressible or incompressible,liquid or gas. The Physics Continuum also specifies other factors that determinethe physical behavior such as steady or transient as well as the solution methodsused.The three categories (Region, Mesh and Physics) influence each other. Forexample, wall boundaries and inlet boundaries influence the interior mesh differently. However, the three categories are sufficiently distinct that you can makemajor changes in on category, e.g., changing a boundary condition from constant wall temperature to adiabatic, without influencing the other categories.This flexibility comes at a cost of greater complexity in setting up the model.From the Star-CCM User’s Guide4 :“Regions are volume domains (or areas in a two-dimensional case) inspace that are completely surrounded by boundaries. They are not necessarily contiguous, and are discretized by a conformal mesh consistingof connected faces, cells and vertices.”Translation: A region is a volume of material with the same physical propertiesand the same meshing model. For the pipe flow tutorial, there is only oneRegion. The boundaries of the region are used to impose boundary conditionson the modelRegions are distinct. Information (e.g. mass flow or heat transfer) betweenregions is only shared when the regions are explicitly joined by an interface. Forthe pipe flow tutorial, there is only one region and it is the volume occupied bythe fluid inside the pipe.4.1Create the RegionFor this model there is only one region. The region is created from a part thatwas created with the built-in CAD toolCAD Model Part Region1. Right click on the Region node and select New2. Select the Geometric Parts for the regiona.b.c.d.In the Properties pane, click in the area to the right of PartsExpand the Parts node in the pop-up windowSelect the Pipe Fluid region (or Body 1 if you didn’t name the Part)Click OKNotice that the there is one boundary called “Default” in the list of Boundaries.Expand the Boundaries node if you do not see the Default boundary.4 See“What are Regions?” in the StarCCM User Guide
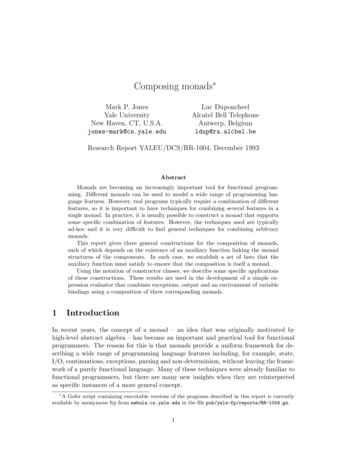
4CREATE A REGION THAT CONTAINS THE PIPE OBJECT10Figure 4: Assigning the inlet surface patch to the inlet boundary of the fluid region4.2Assign the Types of Boundary ConditionsThere is only one Boundary called “Default”. We will create two new boundarysurfaces – the inlet and the outlet – and we will rename the remaining part ofthe boundary.4.2.1Assign the Inlet Boundary1. Right click on Boundaries and select New.2. Right click on the newly created boundary and select Rename. . . (fromthe bottom of the menu).3. Enter “inlet” and click OK.4. Click on the [.] button in the Part Surfaces item in the Properties Pane.5. Expand the nodes and click on the inlet – See Figure 46. Click OK7. Set the boundary type to inlet with a prescribed velocity – See Figure 6a. Select the Type characteristic in the inlet property paneb. Select Velocity Inlet from the pop-up menuThe value of the inlet velocity cannot be assigned until the fluid continua isdefined in a later step in this tutorial.
5CREATE A PHYSICS CONTINUA11Figure 5: Specifying the type of inlet boundary condition.4.2.2Assign the Outlet BoundaryRepeat the steps used to create the inlet boundary. Instruction steps are abbreviated.1. Create a new boundary and rename it “outlet”. New.2. Assign the outlet part to the outlet boundary using the Part Surfaces itemin the Properties Pane.3. Set the Type to Pressure outlet.4.2.3Assign the Wall BoundaryThe default condition is that all surfaces are solid, adiabatic walls. Therefore,no additional steps need to be taken. However, it is good practice to assign ameaningful name to each boundary.1. Right click on the Default boundary in the list of boundaries.2. Select Rename. . . and enter “pipe wall”.4.3Save the ModelSelect Save from the file menu.5Create a Physics ContinuaThe Physics Continua defines the physical behavior of the material in the region.It is also used to specify the type of global solution algorithm can be used tosolve the flow field. Different solution methods may be required as more (or
6ASSIGN THE BOUNDARY VALUES12Figure 6: Specifying the magnitude of the inlet velocity.less) complicated physics are included in the model. Refer to Modeling Physicssection of the User Guide.1. Right click on the Continua node and choose New Physics Continuum.2. Right click on the newly created Physics 1 node and choose Select models. . .3. In the Model Selection dialog box, make the following choices Three Dimensional Steady Gas Segregated flow Constant Density Laminar4. Click “Close”6Assign the Boundary ValuesThe type of boundary condition for each boundary surface was prescribed in§ 4.2. After the fluid continua is selected, the values of boundary values can bespecified. For the pipe flow problem, the boundary values are (1) no slip at thewall, (2) velocity at the inlet, and (3) pressure at the outlet.The no-slip condition is the default condition for all surfaces. Therefore,there is no need to change the boundary value on the pipe wall.
7CREATE A MESH CONTINUUM131. Expand the Physics Values node and select Constant2. Set the Value to 0.24 m/s7Create a Mesh ContinuumIn this tutorial we will first use the polyhedral mesher with prism layers, which isthe mesh type commonly used for complex geometries. Although the polyhedralmesher is easy to use, for this problem it creates a mesh that is topologicallymore complex than necessary for the simple pie flow. In follow-up exercises, wewill explore different meshing models. Our immediate goal is to walk throughthe basic CFD analysis procedure from start to finish, not to use the optimalmesh.It’s a good idea to define the regions before defining the mesh because thetype of boundary (not the boundary values) influences the allowable types ofmesh adjacent to the boundary.7.1Specify the mesh type1. Right click on the Continua node and choose New Mesh Continuum.2. Right click on the newly created Mesh 1 node and choose Select MeshingModels. . .3. In the Model Selection dialog box, make the following choices Surface Remesher Polyhedral Mesher Prism Layer Mesher4. Click “Close”5. Set the Base sizea. Open the Reference Value node under the Mesh 1 nodeb. Select the Base Size nodec. In the Properties Pane, set the base size value to 0.005 m7.2Generate the mesh1. Set the Base sizea. Open the Reference Value node under the Mesh 1 nodeb. Select the Base Size nodec. In the Properties Pane, set the base size value to 0.005 m2. Click on the Generate Solid Mesh icon3. Open a Mesh Scene to view the mesh
8SOLVE THE FLOW FIELD14a. Right click on the Scenes node at the top level of the Simulation treeand select New Scene Meshb. Expand the newly created Mesh Scene 1 node to inspect propertiesc. Rotate and zoom in the new graphics pane for Mesh Scene 18Solve the flow fieldNow that the physical domain and boundary conditions (region), fluid physics(physics continuum) and mesh (mesh continuum) are defined, we can tell StarCCM to solve the numerical model. For complex problems, the solution maynot converge, or the solution may yield results that are not sufficiently resolved.For those reasons and others, we may try a solution and decide to modifythe definitions of the regions, physics continuum or mesh continuum. In otherwords, for most problems of interest, we will need to iterate through a rangeof adjustments until the solution is acceptable. The pipe flow problem is verysimple and as long as the preceding steps were completed correctly, the solutionshould be obtained relatively easily and quickly.8.1Adjust the stopping criteria for the simulationThe default setting is to have the solver complete 1000 iterations. For thepipe flow problem, that is more than necessary. Instead, we’ll start with 100iterations.1. Open the Stopping Criteria Node2. Change the Maximum Steps property to 1008.2Prepare to monitor the solutionIt’s possible to begin the solution immediately, but it is often helpful to havea way to visualize the solution as it is happening. We’ll do that by creating adisplay of the fluid pressure.8.3Open a Scalar Scene1. Right-click the Scene node and select New Scenes Scalar2. Open the Displayers3. Select the Scalar Field node of the Scalar 1 node4. In the Properties panel, click on the ¡Select Function¿ pop-up and (scrolldown to) select Pressure.8.4Create a reports to monitor the pressureIn addition to plots, we may want to extract numerical quantities from thesolution. Numerical results, like overall pressure drop, or total shear stress ona surface, are obtained by creating reports.
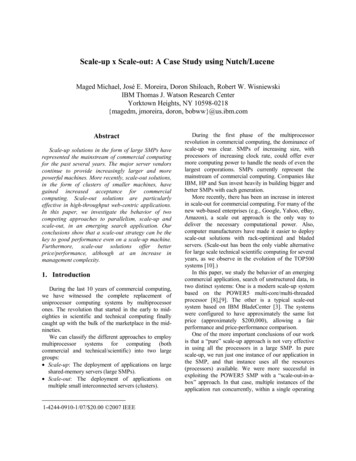
8SOLVE THE FLOW FIELD151. Right-click Reports and select New Report Maximum2. Click on the Maximum 1 node that was just created3. Rename the report to Maximum Pressure4. Click on the Scalar Property and select Pressure from the pop-up menu forscalar Properties5. Click on the [ ] value for the Parts Property (or click the [.] icon.)6. A dialog box opensa. Select the Region 1b. Click OK7. Right-click on Reports and select New Report Minimum8. Repeat the steps for the maximum pressure report. This time the outputof the report will be the minimum pressure.8.5Make the Monitor Plot visibleSelect the Plots Maximum Pressure Plot node in the Simulation Tree8.6Run the simulationClick the run button in the row of menu icons at the top of the screen. The runbutton is the second from the end of the solver buttons.mesh buttons8.7solver buttonsResidual PlotWhile the simulation is running, inspect the residual plot. Figure 7 show theresidual plot at the end of 200 iterations. As a solution progresses the residual plot is one of the best indicators of whether the solution converges. Atconvergence, the residuals are several orders of magnitude smaller than 1.
9INSPECT THE SOLUTION16Figure 7: Residual plot9Inspect the solution9.1Monitor Plot – Maximum PressureFigure 8: Maximum pressure value in the domain during iterations toward convergence9.2Scalar plot – pressure on pipe wall1. Select Scalar Scene 12. Open the Displayers node and select the Scalar 1 node3. Expand the Parts nodea. Make the Pipe wall visibleb. In the Parts property, click on the [ ] value
9INSPECT THE SOLUTION17c. Select wall and click the icon to move the wall from the Select Fromlist to the Selected listd. Click close4. Select Scalar Field node in the Scalar 1 scene. The result should be ashaded surface plot of the pressure on the pipe wall.9.3Velocity Vector PlotBy default, scalars and vectors are only viewable on the surfaces of the fluidRegions. To display the velocity vectors inside the domain, we first need tocreate a surface on which the vectors are displayed. The simplest surface is aplane aligned with one of the coordinate axes.1. Click on the Derived Parts node and Select New Plane Section.2. In the New Section dialog box, leave defaults for Plane Parameters (oradjust as necessary to put the plane through the center)3. Scenes New Scene GeometryWith a new (derived) part ready to be selected, create the velocity field plot asa Vector Displayer1. Right click Scenes node and select New Vector Displayer2. Click createFigure 9: Velocity Vectors9.3.1Modify vector length1. Under the Geometry Scene 2 node2. Open the Displayers
9INSPECT THE SOLUTION183. Select Section Vectors4. Select Relative Length5. In the properties pane, set the Glyph Length (%) to a new value, say 29.4Plots to add1. Velocity Profile plot2. Pressure along pipe axis9.5Exporting plots and data for use in model documentationShow how to export the profile data
10FUTURE UPDATES TO THE TUTORIAL1010.119Future Updates to the TutorialModify the model and rerun itChange the inlet BC from uniform velocity to a mass flow rate11Explore alternative mesh models1. Use a polyhedral mesh without the prism layersa. Change the mesh models to de-select the prism layerb. Delete the current mesh and create a new volume meshc. Re-run the analysis2. Use a trimmed mesh3. Use a generalized cylinder mesh12Engineering AnalysisThe images created in post-processing with STAR-CCM usually need to beincorporated into a report or used in a presentation. It is important to know howto display the CFD simulation results in a way that contributes to engineeringanalysis. The three-dimensional velocity vector plots and surface contour plotsare impressive and useful for obtaining a qualitative picture of the flow field.However, engineering analysis requires quantitative information such as pressuredrop or total heat transfer rate, or the net aerodynamic force on an object.12.1To do1. Add steps to the tutorial on how to extract engineering data2. Write up a separate, short paper that shows these engineering resultsproperly formatted and discussed3. Interpret the engineering analysis write-up in terms of good practice fordocumentation and in terms of expectations for homework.Plot velocity profile at axial locations.1. Show how to plot velocity profiles in StarCCM 2. Show how to export the data and create the plot in MatlabPlot pressure along the centerline.1. Show how to plot pressure along the centerline in StarCCM 2. Show how to export the data and create the plot in MatlabDiscuss whether the flow is fully-developed.1. Velocity profiles are not invariant along the length of the pipe
13HOMEWORK202. How does the velocity profile at the exit compare to the model of fullydeveloped laminar flow (parabolic profile)?3. Pressure drop becomes linear almost immediately after the entrance (?)Questions for further model development1. How might mesh be refined to improve the result?2. Does the domain need to be lengthened?13Homework1. Refine the mesh2. Add prism layers3. Use cylindrical mesh elementsDoes the inlet boundary condition affect the result? Compare the solutionresults for uniform inlet velocity versus total mass flow rate at the inlet.Compare quantitative measures:1. Pressure gradient at the inlet. Extract pressure gradient as a numericalvalue (line fit?)2. pressure distribution over the inlet (p f (r))Compare numerical friction factor to theoretical friction factor1. Rerun the model for different inlet velocities2. Tabulate and plot dp/dx versus mdot3. Compute fRe from dp/dx assuming that the flow is fully-developed4. Repeat with a 2D model
Pipe Flow Tutorial for STAR-CCM ME 448/548 Gerald Recktenwald January 19, 2018 gerry@pdx.edu 1 Overview This tutorial provides a recipe for simu-lating laminar ow in a pipe with STAR-CCM . The focus in on the procedure for creating a model and visualizing the results. The ow eld itself is trivial. The schematic to the right depicts ow