Transcription
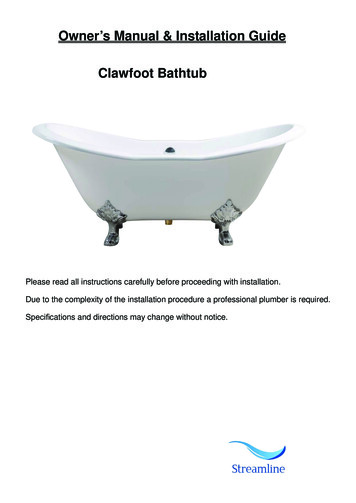
Owner’s Manual & Installation GuideClawfoot BathtubPlease read all instructions carefully before proceeding with installation.Due to the complexity of the installation procedure a professional plumber is required.Specifications and directions may change without notice.
Table of Contents:1. Installation Guide Applicable Bathtub Models .12. External Drain Configuration . 23. External Drain and Overflow Installation . 34. Claw foot Configuration, Installation, Replacement 45. Bathtub Installation. 66. Product Care and Maintenance . 7
Drain Model A-DWF-GLD and A-DWF-CH are used with below D-FM
2
1. Connect Drain Strainer & Drain Ell. Use silicone sealant. DO NOT use plumbers putty to seal.2. Insert tailpiece into trap inlet. The tail piece may need to be cut for proper fit, 1" - 2" of thetailpiece should fit inside the trap. Slip the flange over the tail piece and slide down to floor.3. Assemble tee section to tailpiece, overflow ell and drain ell using coupling nuts and O-ringsthat are provided.4. Attach the tapered rubber gasket to the overflow ell. Align the overflow ell with the overflowhole and secure drain to the tub with overflow plate and screw provided.5. Make sure a watertight seal exists on all bath drain connections.3
Applicable models:R-CFL01-CH / R-CFL01-WH / R-CFL01-GLDR-CFL02-CH / R-CFL02-WH / R-CFL02-GLDR-CFL03-CH / R-CFL03-WH / R-CFL03-GLDR-CFL04-CH / R-CFL04-WH / R-CFL04-GLDR-CFL06-CH / R-CFL06-WH / R-CFL06-GLDR-CFL08-CH / R-CFL08-WH / R-CFL08-WHR-CFL10-CH / R-CFL10-WH / R-CFL10-GLDR-CFL16-CHBathtub is pictured upside down4
Clawfeet: R-CFL03, R-CFL04, R-CFL06 have specific foot placement. Each foot in the set isunique. Inside each foot is labeled with a letter to help you find the proper location on the tub forinstallation. Match up the letters on the clawfeet with the letters on the underside of the tub. Theletters on the tub will be the same as what are on the clawfeet and will match accordingly.5
1. Lift the bathtub and fit the drain pipe with the floor waste drain.2. Put the waste pipe and put it into floor drain.3. Pull the flange to cover the floor drain.4. Adjust the leveling feet to level the tub with floor.6
1. In order to clean the bathtub, please only use soft towel or soft sponge. Neveruse an abrasive materials such as a brushes to clean the tub.2. Rinse or soak the tub for 10 minutes in warm water not exceeding 40 degreesCelsius, then wipe the surface with a soft towel to dry. Try to keep the surface dryafter every use.3. If deep cleaning is necessary, rinse or soak the tub in warm water for 30 minutesand add a bit of liquid soap or dish soap to the water. Rinse and dry with a softtowel.7
Step 1Step 2Faucet installation21Checking and testing132112Hot water1Cold water280MMDrill one hole of 130mmX130mm max anddrill 3 holes with 80mm diameter as shown.41Align the base① with the holes exactly asshown.523Insert the expansion anchors① into the holeson the base② with a hammer,tighten withadjustable wrench.Remove the aerator ② with aerator wrench,take out the o-ring ① too.Turn the faucethandle all the way on, turn on hot and coldwater supply and flush water lines for oneminute.Reinstall aerator with aerator wrench.6412Step 3Check all connections at arrows for leaks,re-tighten it if necessary.BUT DON'T OVERTIGHTENMaintenance3A.If there is splash or low flow rate,please remove the aerator with the wrench and clean the debris.Hot water41Cold waterInstallationlocationTighten the shower holder① into faucetbody④ with a screw② and Allen key③.Connect hot and cold supply lines and test byopening water lines.If there are no leaks, remove the 3 screws (1)with the Allen key (2), then remove plate (3)and nuts (4) as shown.788B.If faucet leaks from the handle or drips from spout, please replace cartridge following the following steps:132122411311232Connect hot water flexible hose(1) and coldwater flexible hose(1) to the base (2) correctlyas shown.Insert 3 screws (1) into holes on the plate(2),tighten with allen key(3).Put down cover (1) and completeinstallation.Disassemble the screw② withallenkey①, take out the handle③,then remove the trim cap④.Unscrew the cartridge nut① withadjustable wrench, then take outthe old cartridge②.Place a new cartridge in the cartridgeseat, then screw the cartridge lock nutand assemble the handle by securingthe screws.Repeat the above steps forthe other cartridge if necessary.
StepStep 44CleaningCleaning andand carecareH-100-TFMSHCHDaily cleaning and care are required in order to keep the product shining andproperly working.1 Clean it with water and dry it with soft cloth.RECOMMENDED TOOLS2 Clean the product with gentle liquid or glass cleaner.3 Don't use acid cleaner.4 Don't clean with abrasive material, abrasive paper or knife.Step 5ScrewdriverChannel LocksGogglesWARNING:Please keep thetool for futureuse!Parts list13Hammer12 11810 97654321SINGLE HANDLE FREESTANDINGTUB&SHOWER FAUCETAdjustable WrenchTeflon tapeAllen keyAttention:for easy installation, you will need:1.To read all the installation instruction completely beforebeginning.2.To read all the warning, attention and maitenanceinformation.The tools might be applied to the following places:24252623182227282930 473132343346
Step 1Step 2Faucet installation213Checking and testing12Remove aerator by coin and open thehot and cold water supplies. Check forleaks. Turn on faucet handle for oneminute to flush debris from faucet.Check all connections at arrows for leaks,re-tighten it if necessary.1Hot water1Cold water280MMDrill one hole of 130mmX130mm max anddrill 3 holes with 80mm diameter as shown.Align the base① with the holes exactly asshown.54Insert the expansion anchors① into the holeson the base② with a hammer,tighten withadjustable wrench.BUT DON'T OVERTIGHTEN12Step 3Maintenance3A.If there is splash or low flow rate,please remove the aerator with by coin and clean the debris.Hot water41Cold waterConnect hot and cold supply lines and test byopening water lines.If there are no leaks, remove the 3 screws (1)with the Allen key (2), then remove plate (3)and nuts (4) as shown.76B.If faucet leaks from the handle or drips from spout, please replace cartridge following the following steps:31234113122221Connect hot water flexible hose(1) and coldwater flexible hose(1) to the base (2) correctlyas shown.Insert 3 screws (1) into holes on the plate(2),tighten with allen key(3).Disassemble the screw② withallenkey①, take out the handle③,then remove the trim cap④.Unscrew the cartridge nut① withadjustable wrench, then take outthe old cartridge②.Place a new cartridge in the cartridgeseat, then screw the cartridge lock nutand assemble the handle by securingthe screws.Repeat the above steps forthe other cartridge if necessary.
Step 4Cleaning and careH-120-TFMSHCHDaily cleaning and care are required in order to keep the product shining andproperly working.1 Clean it with water and dry it with soft cloth.RECOMMENDED TOOLS2 Clean the product with gentle liquid or glass cleaner.3 Don't use acid cleaner.4 Don't clean with abrasive material, abrasive paper or knife.Step 5ScrewdriverChannel LocksGogglesHammerWARNING:Please keep thetool for futureuse!Parts list1SINGLE HANDLE FREESTANDINGTUB&SHOWER FAUCET8 9 10 11 12 13 14 15 16 e tools might be applied to the following places:424344454647Teflon tapeAllen keyAttention:for easy installation, you will need:1.To read all the installation instruction completely beforebeginning.2.To read all the warning, attention and maitenanceinformation.21222324Adjustable Wrench565748495051 52 53 54
Step 1Step 2Faucet installation21Checking and testing132112Hot water1Cold water280MMDrill one hole of 130mmX130mm max anddrill 3 holes with 80mm diameter as shown.Align the base① with the holes exactly asshown.54123Insert the expansion anchors① into the holeson the base② with a hammer,tighten withadjustable wrench.Remove the aerator ② with aerator wrench ,take out the o-ring ① too.Turn the faucethandle all the way on, turn on hot and coldwater supply and flush water lines for oneminute.Reinstall aerator with aerator wrench.641Step 32Check all connections at arrows for leaks,re-tighten it if necessary.BUT DON'T OVERTIGHTENMaintenanceA.If there is splash or low flow rate,please remove the aerator with the wrench and clean the debris.115324InstallationlocationHot waterCold waterTighten the shower holder① into faucetbody④ with a screw② and Allen key③.Slide the flange④ into the welded rack③as shown, and connect the flexible hose②to the faucet body①, then assemble thewelded rack③ to the faucet body① and fixit with screws⑤.781123Connect flexible hose① to the connector②correctly as shown,tighten with adjustablewrench.B.If faucet leaks from the handle or drips from spout, please replace cartridge following the following steps:1232341Insert 3 screws② into holes on the plate④,tighten with Allen key③.Cover it with flange①.Assemble the shower hose③ to hand shower②and connector under the shower holder① asshown.Then finish the installation of the faucet.12423Remove the handle screw② with Allen key③, take out the handle①, then remove thetrim cap④.Unscrew the cartridge locknut ① withAdjustable Wrench, then take out the oldcartridge ②.Place a new cartridge in the cartridgeseat, then screw the cartridge locknutand assemble the handle by securingthe screws.
Step 4Cleaning and careH-140-TFMSHCHDaily cleaning and care are required in order to keep the product shining andproperly working.1 Clean it with water and dry it with soft cloth.RECOMMENDED TOOLS2 Clean the product with gentle liquid or glass cleaner.3 Don't use acid cleaner.4 Don't clean with abrasive material, abrasive paper or knife.Step 5ScrewdriverChannel LocksGogglesHammerWARNING:Please keep thetool for futureuse!Parts listSINGLE HANDLE FREESTANDINGTUB&SHOWER FAUCET2427Adjustable WrenchTeflon tapeAllen key23Attention:for easy installation, you will need:1.To read all the installation instruction completely beforebeginning.2.To read all the warning, attention and maitenanceinformation.2622282521292030193118The tools might be applied to the following 21
3 1. Connect Drain Strainer & Drain Ell. Use silicone sealant. DO NOT use plumbers putty to seal. 2. Insert tailpiece into trap inlet. The tail piece may need to be cut for proper fit, 1" 2" of the -


