Transcription
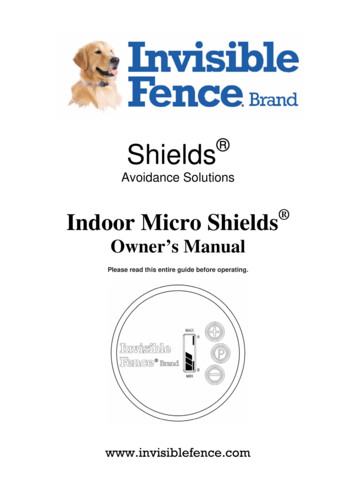
Shields Avoidance SolutionsIndoor Micro ShieldsOwner’s ManualPlease read this entire guide before operating.www.invisiblefence.com
Important Precautions Invisible Fence Brand pet containment systems have contained over two million pets. However, there are someprecautions you should take. Read and retain manuals: Read the entire Owner’s Manual before using your new Indoor Micro Shields solution.If you have any questions after reading this manual, call your Invisible Fence Brand dealer. Adhere to all warnings and cautions contained in any Invisible Fence Brand manual.Explanation of Attention Words and Symbols used in this guideThis is the safety alert symbol. It is used to alert you to potential personal injury hazards.Obey all safety messages that follow this symbol to avoid possible injury or death.WARNING indicates a hazardous situation which, if not avoided, could result indeath or serious injury.CAUTION used with the safety alert symbol, indicates a hazardous situation which,if not avoided, could result in minor or moderate injury.NOTICE is used to address safe use practices not related to personal injury. Not every pet can be trained to avoid the established boundary. Sometimes even a properly trained pet may crosstheboundary. Therefore, Invisible Fence, Inc., as well as Invisible Fence Brand Distributors and Dealers cannotguaranteethe system will, in all cases, keep a customer’s pet within the established boundary. Accordingly, if acustomer has reasonto believe that their pet may pose a danger to others, or harm itself, the customer should notrely solely upon the InvisibleFence Brand system to keep the pet from crossing the boundary. Do not install, connect, or remove your system during a lightning storm. If the storm is close enough for you tohearthunder, it is close enough to create hazardous surges. Read and follow the important tips on how to avoid pressure necrosis in your Invisible Fence Brand ComputerCollar unit manual. Train your pet according to the instructions in the Invisible Fence Brand training manuals. Complete allstepsbefore allowing your pet to run free. Do not become overly confident if your pet has become conditioned totheInvisible Fence Brand pet containment system sooner than expected. Your Invisible Fence Brand dealer has professionally installed your pet containment system and ensured it isworkingproperly. You will want to perform periodic maintenance checks to make sure the system is properlyfunctioning for yourpet’s safe containment. Check the Invisible Fence Brand transmitter periodically to make sure it is operating properly. To do this, simplybring theComputer Collar unit to the edge of the signal field to verify function. Do not attempt to service any Invisible Fence Brand equipment. Refer all service to your authorized InvisibleFence Brand dealer. Only your authorized Invisible Fence Brand dealer should make adjustments to your petcontainmentsystem. All Invisible Fence Brand pet containment systems are designed for domesticated animal use only. Neverattempt to usethis product for any purpose not specifically described in this manual.2
Congratulations on your purchase of the Indoor Micro Shields solution. Please read and review thisentire manual to become familiar with Indoor Micro Shields solution components and its operation. It isstrongly recommended you review this information before using the product.The Indoor Micro Shields solution gives you control over the areas a pet or pets have access to insideyour home. It is designed to work independently or to complement your Invisible Fence Brand BoundaryPlus and/or 800 Series digital electronic pet containment system. The Indoor Micro Shields transmitteris designed for indoor use only. For information on or about Outdoor Shields products, please contactyour local Invisible Fence Brand dealer or visit us at www.invisiblefence.com. This device is notdesigned to operate as acontainment transmitter.Table of ContentsImportant Precautions. 2Components. 4How the Systems Works .4Operating Guide.5Charging.5Adjust Signal Field Range.5Verify Signal Field Range.5Changing the Channel Setting on the Indoor Micro Shields transmitter.6Multi-Area Shielding.7Programming the Computer Collar unit.7Training Guide.8For Pets Trained to the Invisible Fence Brand Outdoor Pet Containment System.8For Pets New to Invisible Fence Brand .8Troubleshooting.9Battery Disposal.10Perchlorate Battery.10Important Recycling Advice.10Compliance.113
ComponentsHow the System WorksIndoor Micro Shields TransmitterThe transmitter is the heart of the system. It is placed in areas you want to protect from your pet, or protect your petfrom. The lightweight, portable design is easy to use and powered by a rechargeable battery pack. You may use theincluded AC adapter for locations near an electrical outlet. The adapter is also used for charging* the transmitter.The transmitter sends a signal field up to 4feetin diameter or as a 2 foot radius.Your pet wears a ComputerCollar unit that detects areas you have protected and delivers a correction when your pet enters those areas.The Transmitter has three control buttons: Two for controlling the signal field range (RANGE UP & RANGE DOWN). These buttons also control powerON andOFF during normal use. One for use when programming the Computer Collar unit to the Indoor Micro Shields transmitter.The LCDdisplay shows the signal field range and Channel A, Channel B, or Channels A and B mode.AC AdapterThe AC adapter (RAC00-13701) is intended for long-term use or for recharging the Indoor Micro Shields transmitter. Use the AC adapter to charge the battery pack for a minimum of 4 hours prior to first use.Note: A correction is a training term used to describe an action taken to discourage unwanted pet behavior. TheComputer Collar unit delivers a correction when your pet enters a protected area or crosses the boundary of anInvisible Fence Brand system.4
Operating GuideImportant: To ensure your pet does not receive an unintended correction, make sure your pet is notwearingthe Computer Collar unit when turning ON or adjusting the Indoor Micro Shields transmitter.1. Charging To charge the battery, plug one end of the AC adaptor (RAC00-13701) into a standard wall outlet and the otherend into the power jack located on the edge of the Indoor Micro Shields transmitter. Allow the unit to charge a full 4 hours before first use. A charge time of 2 hours is required after the first charge. Fully charge the Indoor Micro Shields transmitter for 4 hours after storage. Battery life of approximately 30 days can be expected from a fully charged battery.2. Adjust signal field range Determine the desired location and the signalfield range required (10 in/5cm minimumradius up to 2ft /.61 m maximum radius). With the unit ON, press the RANGE UP( ) or the RANGE DOWN (-)buttons toincrease or decrease the signal field range.The first segment ofthe range indicator equals10 in / 25 cm radius of signal field. Eachadditional segment represents approximately 3 in /8 cm radius of range. Once the range is set, place the Indoor Micro Shields transmitter in thedesired area.3. Verify signal field range Turn the Indoor Micro Shields transmitter ON. Holding the Computer Collar unit, start outside the range and moveslowly towards the Indoor Micro Shields transmitter. Do not touch thecorrection posts at this time. The Computer Collar unit will beep as it approaches the outer range ofthe signal field width set in Step 2. Thebeeping will be followed by acorrection. If the Computer Collar unit fails to beep, see the troubleshooting chartfound on page 9. Adjust range and/or relocate the Indoor Micro Shields transmitter untildesired area is protected.5
Operating Guide4. Changing the Channel Setting on the Indoor Micro Shields transmitter1. Press and release the RANGE DOWN (-) button until no barsappear on the LCD.2. Turn the unit over and remove the bottom lid by rotatingcounter-clockwise.3. Locate the switch for the Channel (A), Channel (B) andChannels (A B). (Figure 1)4. Select the desired setting. Note: The Indoor Micro Shields transmitter will not enter into programming mode if this switch isset to A B.5. Replace the bottom lid and turn clockwise until the lid stops.Note: Ensure the O-ring is in the top housing and seated in thechannel before replacing the bottom lid. Failure to do so may allow moisture leakage and failure ofthe device.(Figure 1)O‐ringChannelSwitchFigure 16
Operating GuideMulti-Area ShieldingYour Indoor Micro Shields Transmitter and the Computer Collar unit are preset to operate on Channel A (CH.A).For homes with two or more pets, this setting is usually sufficient as long as all pets are required to avoid the sameprotected areas like keeping all pets away from the trash, off the counter tops off the sofa, etc. In some multi-pethomes, it may be desired to allow one pet access to an area while denying access to another pet. When set to Channel A (CH.A), the Indoor Micro Shields transmitter denies access to pets wearing aComputer Collar unit programmed to Channel A. (Channel A is the default setting for the ComputerCollar unit.) When set to Channel B (CH.B), the Indoor Micro Shields transmitter denies access to pets wearing aComputer Collar unitprogrammed to Channel B. When set to Channel A-B (CH. A and CH.B), the Indoor Micro Shields transmitter denies access to allpets wearing a Computer Collar unit.Programming the Computer Collar unit1.2.3.4.5.6.Ensure all Computer Collar units are removed from pets and are atleast 3 feet from the Indoor Micro Shields transmitter.Follow procedure above, Changing the Channel Setting on theIndoor Micro Shields transmitter, to select Channel A orChannel B to program into the Computer Collar unit. Note: TheIndoor Micro Shields transmitter will not enter into programmingmode if this switch is set to A B.Turn the unit back over and set itdown on a flat surface.Press and hold the PROGRAM button while lowering the ComputerCollar unit from directly above the IndoorMicro Shields transmitter.Stop lowering when the Computer Collar unit begins to flickeryellow and release the PROGRAM button when theComputer Collar unit begins to flash green.The Computer Collar unit is now programmed to the desiredchannel.Verify operation by turning ON the Indoor Micro Shields transmitter and listening for Computer Collar unit activation.Note: Make sure any Computer Collar units you do not wish to program are more than 3 feet from the IndoorMicro Shields transmitter or have the Power Cap Battery removed. Do not perform this procedure while theComputer Collar Unit is on a pet.7
Training GuideFor pets trained to the Invisible Fence Brand system Use Invisible Fence Brand training flags to mark theoutside of the signal field range. This gives your pet avisual marker, similar to how they learned the signalfield range of the outdoor pet containment system. Allow your pet to enter the protected area. By alreadybeing familiar with the training flags and the warningbeep, your pet should react immediatelyby movingaway from the protected area. It may take several timesfor your pet to recognize and avoid the protected area. Praise your pet for leaving the protected area. You may need to adjust the signal field range soyourpet receives the warning beep earlier.For pets new to the InvisibleFence Brand system Use Invisible Fence Brand training flags to mark the edge of thesignalfield range.This gives your pet a visual marker. Use Invisible Fence Brand correction post covers, or safety posts, on theComputer Collar Unit for the first training session. This will introduceyour pet to the idea of leaving the protected area when he hearsthe warningbeep. Attach a long lead to your pet’s collar strap and show your pet how to avoidthe protected area by gently guiding the pet out of the range when thewarningbeep sounds.Note: Do not attach a lead to the Computer Collar unit strap. This canresultin Pulling the Correction Posts too tightly against your pet’s neck.Attach a lead to a separate, nonmetallic collar or harness, making sure theextra collarstrap does not put pressure on the Correction Posts. Praise your pet for leaving the protected area. Repeat this process until your pet reacts to the warning beep on their ownby moving away from the protected area. Remove the post covers, or safety posts, on the Computer Collar unit.Allow your pet to enter the protected area. Your pet should reactimmediately to the warning beep and correction by moving away from theprotectedarea. It may take several times for your pet to recognize and avoidthe protected area. After training is complete, remove your pet’s Computer Collar unit eachnight to prevent irritation. However, if this is not possible, please check thetightness of the collar each time you feed your pet by removing the collarand then.8
TroubleshootingIndoor MicroShields doesnot appear towork Check for low battery (audible chirp once every 30 seconds and flashing LCD). If lowbattery is indicated, plug the AC adapter into the unit and charge for 2 hours. Check/replace the Power Cap Battery in the Computer Collar unit. The Indoor Micro Shields transmitter power could be completely drained. Apply power tothe Indoor Micro Shields transmitter using the AC adapter to verify operation. If using AC adapter for power, check connections. Check the Computer Collar unit fit to ensure posts have direct skin contact. Ensure the Computer Collar unit is programmed to same Indoor Micro Shields transmitterLCD is black Operating the Micro Shields transmitter in direct sunlight may cause the LDC to overheatand turn completely black. The LCD will return to normal when the temperature dropsbelow 150 F/65 C. Operating the transmitter when the LCD is black will not damage thedevice.Range is toolow or toohigh Check for low battery (audible chirp once every 30 seconds and flashing LCD). If lowbattery is indicated, plug the AC adapter into the unit and charge for 2 hours. Adjust the Indoor Micro Shields transmitter to increase/decrease signal field range. SeeStep 2 on page 5 (Adjust signal field range). Metal objects may distort the transmitter’s range. Consider alternate location for the IndoorMicro Shields transmitter.Pet seems toreceive nocorrection Check/replace the Power Cap Battery in the Computer Collar unit. Check the signal field range on the Indoor Micro Shields transmitter. Ensure post covers are removed from the Computer Collar unit after trainingComputerCollar Unitfails to soundwarning beep Check/replace the Power Cap Battery in the Computer Collar unit. Ensure the Computer Collar unit is set to same Indoor Micro Shields transmitterCHANNEL setting. See Multi-Area Shielding Section on page 7Need additional help? Contact your local Invisible Fence Brand dealer. Call 1-800-578-3647 or visitwww.invisiblefence.com to find your local dealer.9
Battery DisposalSeparate collection of spent batteries is required in many regions; check the regulations in your area beforediscarding spent batteries. The Computer Collar unit operates on one (1) Lithium (Li-MnO2) battery with a 3 Volt,160 mAh capacity, replace only with equivalent battery that may be obtained from your Invisible Fence Branddealer. The transmitter operates on 1 rechargeable Lithium Ion Polymer (Li-ion) battery pack with a 3.7 Volt, 420mAh capacity.Perchlorate BatteryPerchlorate Material – special handling may apply. See nt Recycling AdvicePlease respect the Waste Electrical and Electronic Equipment regulations in your country. This equipment must berecycled. If you no longer require this equipment, do not place it in the normal municipal waste system. Pleasereturn it to whereit was purchased in order that it can be placed in our recycling system. If this is not possible, pleasecontact your InvisibleFence Brand dealer.10
ComplianceUS and CanadaFCC ID: KE3-3002563IC: 2721A-3002563This device complies with Industry Canada rules. This device complies with part 15 of the FCC Rules. Operation issubjectto the following two conditions: (1) This device may not cause harmful interference, and (2) this device mustaccept any interference received, including interference that may cause undesired operation.Le présent appareil est conforme aux CNR d’Industrie Canada applicables aux appareils radio exempts de licence.Cet appareil est conforme à la partie 15 des régles FCC. L’exploitation est autorisée aux deux conditions suivantes :(1) l’appareil ne doit pas produire de brouillage, et (2) l’utilisateur de l’appareil doit accepter tout brouillageradioélectrique subi, même si le brouillage est susceptible d’en compromettre le fonctionnement.Modification or changes to this equipment not expressly approved by Radio Systems Corporationmay void the user’s authority to operate the equipment.NOTE: This equipment has been tested and found to comply with the limits for a Class B digital device, pursuant topart 15 of the FCC Rules. These limits are designed to provide reasonable protection against harmful interference ina residential installation. This equipment generates, uses, and can radiate radio frequency energy and, if not installedand used in accordance with the instructions, may cause harmful interference to radio communications. However,there is no guarantee that interference will not occur in a specific installation. If interference does occur to radio ortelevision reception, which can be determined by turning the equipment off and on, the user is encouraged to try tocorrect the interference by one or more of the following measures: Reorient or relocate the receiving antenna. Increase the separation between the equipment and the Computer Collar Unit. Connect the equipment to an outlet on a circuit different from that to which the Computer Collar Unit isconnected. Consult the dealer, or an experienced radio/TV technician for help.This Class B digital apparatus complies with Canadian RSS-210.Cet appareil numérique de la classe B est conforme à la norme RSS-210 du Canada.AustraliaThis device complies with the applicable EMC requirements specified by the ACMA (Australian Communicationsand Media Authority).European UnionThis equipment has been tested and found to comply with relevant EU Electromagnetic Compatibility, Low Voltageand R&TTE Directives. Before using this equipment outside the EU countries, check with the relevant local R&TTEauthority. Unauthorized changes or modifications to the equipment that are not approved by Radio SystemsCorporation are in violation of EU R&TTE regulations, could void the user’s authority to operate the equipment,and void the warranty.This product is in full compliance with the provisions of the R&TTE - Directive 1999/05/EEC. The Declaration ofConformity can be found at: ations-of-conformity.asp.11
Dealer Name:Dealer Phone:System Frequency:Notes:800-578-3647 (USA)(865) 777-5404 (International) 2012 Radio Systems Corporation Need to remove the symbol here.All rights reserved.Protected by Patents:U.S.: 7,046,152; 7,068,174; 7,204,204;7,278,376; 7,495,570www.invisiblefence.com12
For pets new to the Invisible Fence Brand system Use Invisible Fence Brand training flags to mark the edge of thesignal field range.This gives your pet a visual marker. Use Invisible Fence Brand correction post covers, or safety posts, on the Computer Collar Unit for the first training session. This will introduce