Transcription
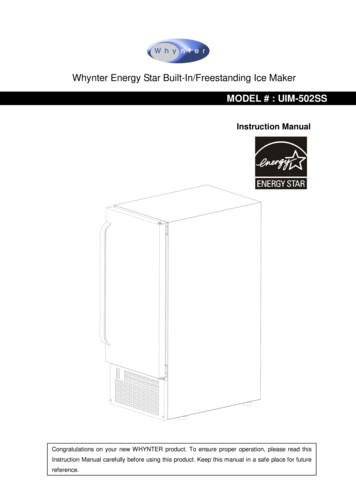
Whynter Energy Star Built-In/Freestanding Ice MakerMODEL # : UIM-502 SSInstruction ManualCongratulations on your new WHYNTER product. To ensure proper operation, please read thisInstruction Manual carefully before using this product. Keep this manual in a safe place for futurereference.
TABLE OF CONTENTSPARTS AND FEATURES3SAFETY PRECAUTIONS4INSTALLATION INSTRUCTIONS5-6ELECTRICAL REQUIREMENTS AND INSTALLATION7-9OPERATION INSTRUCTIONS10 - 11CARE AND MAINTENANCE12 - 13SETTINGS14 - 15TROUBLESHOOTING16WARRANTY INFORMATION172
PARTS AND FEATURESHingeDistrbution TubeDoorIce MoldWater TroughFloatIce BinSelector SwitchLeveling FootControl PanelPower PlugWater InletDrain OutletIce ScoopWater Supply3Drain Hose
WARNING TO REDUCE THE RISK OF FIRE, ELECTRICALSHOCK, OR INJURY WHEN USING YOUR ICEMAKER, FOLLOW THESE BASIC PRECAUTIONS:READ ALL INSTRUCTIONS BEFORE USING THE ICE MAKER.WARNING: RISK OF DANGER TO SMALL CHILDREN AND SMALL ANIMALS.ENTRAPMENT AND SUFFOCATION DANGER IF NOT PROPERLY SECURED. DISPOSEDOR ABANDONED APPLIANCES ARE STILL DANGEROUSBEFORE YOU DISPOSE OF YOUR ICE MAKER: REMOVE THE DOOR TO PREVENTCHILDREN FROM CLIMBING INTO THE UNIT.NEVER ALLOW CHILDREN TO OPERATE, PLAY WITH, OR CRAWL INTO THE APPLIANCE.NEVER CLEAN ICE MAKER PARTS WITH FLAMMABLE FLUIDS. THE FUMES CANCREATE A FIRE HAZARD.DO NOT STORE OR USE GASOLINE OR ANY OTHER FLAMMABLE VAPORS AND LIQUIDSIN THE VICINITY OF THIS OR ANY OTHER APPLIANCE. THE FUMES CAN CREATE A FIREHAZARD.SAFETY PRECAUTIONSRead all of the instructions before using this appliance. When using this appliance, always exercisebasic safety precautions, including the following: Do not use if the power supply cord is damaged. If damaged, it must be replaced by qualifiedtechnician/electrician. Ensure the ice maker is unplugged before cleaning or if not in use. To clean the ice maker use only mild detergents or glass cleaning products. Never use harshchemicals or solvents. Do not use this ice maker with an extension cord or power strip. Please ensure that theappliance is plugged directly into the electrical outlet. Close the ice maker door immediately after opening. Avoid placing the ice maker near external heat sources or direct sunlight. Make sure the ice maker is placed on a flat, level, and solid surface. Make sure that the surface on which the ice maker is placed is strong enough to hold the icemaker once it is fully loaded with ice. The ice maker is an electrical appliance. To avoid serious injury from electrical shock, do notoperate the ice maker with wet hands, while standing on a wet surface, or while standing inwater. Do not expose this appliance to rain or excessive moisture. Do not turn the ice maker upside down, on its side, or 45 or more off level. Never pull the power cord to disconnect the unit from an outlet. Grasp the plug directly and pullit from the outlet. This ice maker is designed for non-commercial use only. Do not plug this ice maker into the power socket before setup is completed. The cord should be secured behind the unit and should not be left exposed or dangling. Do not move this ice maker without securing the door. Performance may vary based on operational and ambient conditions.4
INSTALLATIONExcessive Weight HazardUse two or more people to move and install icemaker. Failure to do so can result in back or other injury.Remove packaging materialsIMPORTANT: Do not remove any permanent instruction labels or the data label on your icemaker.Remove tape and glue from your icemaker before using To remove any remaining tape or glue, rub the area briskly with your thumb. Tape or glueresidue can also be easily removed by rubbing a small amount of liquid dish soap over theadhesive with your fingers. Wipe with warm water and dry. Do not use sharp instruments, rubbing alcohol, flammable fluids, or abrasive cleaners toremove tape or glue. These products can damage the surface of your icemaker.Cleaning before useAfter you remove all of the packaging materials, clean the inside of your icemaker before using it. Seethe "Interior cleaning" in the Cleaning and Maintenance section.Location RequirementsINSTALLATION CLEARANCES: (Unit shown in an enclosed setup) This icemaker should be installed by a licensed plumber only.Before connecting the ice maker to the power source, let it stand upright for approximately 4hours. This will reduce the possibility of a malfunction in the cooling system from handlingduring transportation.To ensure proper service access and ventilation, allow at least 4” clearance at rear, and 1” attop and sides. The installation should allow the icemaker to be pulled forward for servicing ifnecessary.5
When installing the ice maker under a counter, follow the recommended spacing dimensionsshown. Place electrical and water supplies and drain fixtures in the recommended locations asshown.This unit MUST be installed in an area protected from the elements, e.g., wind, rain, waterspray or drips. Do NOT use the ice maker in outdoor setting.The icemaker should not be located next to ovens, grills or other high heat resources.Too much humidity in the air will cause frost to form quickly on the evaporator requiring morefrequent defrosting of the ice maker.The ice maker requires a continuous water supply with a minimum pressure of 15 psi and astatic pressure not to exceed 80 psi.The ambient operational temperature should be between 50 F and 100 F. The input water temperatureshould be between 41 F and 90 F. Operation outside these temperatures may result in loweredproduction or other adverse effects. In general, it is always a good idea to filter the water. A water filter can remove taste and odorsas well as particles. Where water is very hard, softened water may result in white, mushy cubesthat stick together. Deionized water is not recommended.The ice maker must be installed with all electrical and water connections in accordance withstate and local codes.The unit should be located on a hard and level surface that can support the unit when it is full. Itis important for the ice maker to be level in order to work properly. If needed, you can adjust theheight of the ice maker by turning the feet. See the “Leveling the Ice Maker” section.A standard electrical supply (115 VAC only, 60 Hz, 15 A), properly grounded in accordance withNational Electrical Code and local codes and ordinances is required.IMPORTANT: Do not kink or pinch the power supply cord between the ice maker and wall orcabinet.Extension CordBecause of potential safety hazards under certain conditions, it is strongly recommended that you donot use an extension cord with this ice maker.Technical InformationElectrical input:Power consumption:Ice-making/ Ice-harvest rated current:Unit width x depth x height:Unit weight:Ice storage capacity:Ice-making capability:115VAC 60Hz12.2kWh/100 lbs of ice3.0A/ 3.6A14.6” x 23.6” x 32.8”76 lbs25 lbs50 lbs/dayNOTE: Technical data and performance information provided for reference only. Specifications aresubject to change. Check the rating label on the ice maker for the most accurate information. The actualquantity of ice produced per day will vary with room and water conditions.6
Electrical RequirementsElectrical Shock HazardPlug into a grounded 3-prong outlet.Never remove the grounding prong from the plug.Never use an adapter.Never use an extension cord.Failure to follow these instructions can result in fire, electrical shock, or death.Before you move your icemaker into its final location, it is important to make sure you have the properelectrical connection: A standard electrical supply (115V, 60Hz, 15A), properly grounded in accordance with theNational Electrical Code and local codes and ordinances, is required. It is recommended that a separate circuit, serving only your icemaker, be provided. Usereceptacles that cannot be turned off by a switch or pull chain. The fuse (or circuit breaker) size should be 15 amps.Recommended grounding methodFor your personal safety, this appliance must be grounded. It is equipped with a power supply cordhaving a 3-prong grounding plug. To minimize possible shock hazard, the cord must be plugged into amating 3-pronged and grounding-type wall receptacle, grounded in accordance with the NationalElectrical Code and local codes and ordinances.Leveling the Ice MakerIt is important for the icemaker to be leveled inorder to work properly. It can be raised or loweredby turning the four feet on the bottom of themachine. We recommend using a carpenter’slevel to check the machine.1. Place a carpenter’s level on top of the product tosee if the ice maker is level from front to back andside to side.2. Adjust the height of the feet as follows: Turn the leveling feet to the right to lowerthat side of the ice maker Turn the leveling feet to the left to raisethat side of the ice maker.Reversing the Door SwingThis appliance has the capability of the door opening from either the left or right side. Should you desireto reverse the opening direction, please follow the following instructions.Tools needed: Flathead screwdriver, Phillips screwdriverIMPORTANT: Before you begin, unplug the ice maker or disconnect power.7
To remove door from hinges:1. Using a flathead screwdriver, separate the hinge axis from hinge 1.2. Open the door about 20 . Lift the door off the bottom hinge 2 and set the door aside.To replace door on hinges:1. Using a flathead screwdriver, remove the plug buttons from the screw holes opposite the doorhinges, top and bottom.2. Replace the hinge axis on door hinge 1 and tighten it firmly. Remove door hinge 1 and place it onthe opposite bottom side.3. Remove door hinge 2, place on the opposite top side. Separate the axis from hinge 2 and set itaside.4. Keep the handle apart from the hinge side. Align the door on the bottom hinge 1 and replace axison the hinge 2. Tighten it firmly.5. Push the plug buttons into the original screw holes.See Figure below:Water Supply ConnectionsThe water supply should be ready at the point of installation. The water supply pressure should be aminimum of 15 psi with a static pressure not more than 80 psi. (A wall outlet directly behind the icemaker will make installation easier.)IMPORTANT:1. All installations must be in accordance with local plumbing code requirements.2. Make certain that the pipes are not pinched or kinked or damaged during installation.3. Check for leaks after connection.Tools required: ½ in. open-end wrench, Phillips screwdriverConnecting the water line:1. Turn off main water supply. Turn on nearest faucet long enough to clear line of water.2. Find a ½ in. to ¾ in. vertical cold water pipe near the installation location. The distance should be lessthan 9 feet. The water supply hose provided with the ice maker is about 9 feet long.3. A shut-off valve must be installed to the main water supply. If the water pipe has a plain piece ofcopper tubing, attach a ¼” O.D. compression union to the tubing and remove the nut.8
4. Connect nuts of the water supply hose to tap and water inlet valve. Tighten firmly by hand, thenone-half turn with wrench.5. Turn on main water supply and tap. Check for water supply connection leaks. Tighten everyconnection (including connections at the water inlet).IMPORTANT: When you connect the water supply hose, pay attention to the indications of “Water inlet”on the machine.DrainingNOTE: There is a drain line on the ice maker. Please drain water to your drain through the drain lineprovided with ice maker.1. Locate the floor drain near the ice maker. The distance should be less than 5 feet since the length ofthe long drain hose provided is about 5 feet.2. Find the drain hose on the back of ice maker, and then insert the other side of the hose into the drainline.3. All horizontal runs of drain lines must have a fall of 1/4” per foot. An air gap will likely be requiredbetween the ice maker drain hose and the drain/waste receptacle. A stand pipe with a trap below itwould be acceptable for the drain/waste receptacle. A floor drain is also acceptable.4. Pour 1 gallon of water into the ice storage bin to check for proper drainage.Note: a condensate pump can allow for installation further from your drain. Consult your plumber foradvice.Installation TypesThis ice maker is designed for free-standing, recessed, or built-in installation. In every setting, theremust be adequate ventilation and access for service. Never install or operate the unit in an enclosedarea, such as a closed cabinet.Free-standing installation:A free-standing installation will allow you to install the icemaker in any place you desire provided youhave access to a water supply and a drain. You must follow the stated instructions for:a - Electrical requirementsb - Water supply and drainc - Leveling the icemakerRecessed installation:A recessed installation will allow you to install the ice maker under a counter or in a kitchen cabinetprovided the required clearance space around the ice maker is respected. This installation has thesame requirements as a built-in installation.Built-in installation:If this method of installation is chosen, it will still be necessary to allow adequate ventilation spacearound the unit (make sure there is at least some ventilation room for the back of the unit). The followingadditional items must be observed.1. Place ice maker in front of installation location. Remove the feet and place the unit flat on the flooror on a platform depending on your installation requirements.2. The water supply pipe must be plumbed before connecting to the ice maker. Install the drain lineinto your drain.3. Turn on main water supply and tap. Check for water supply connection leaks. Tighten anyconnections (including connections at the tie-in).4. If electrical outlet for the ice maker is behind the cabinet, plug in the ice maker.5. Push the ice maker into position.6. Seal all around the cabinet to the floor with an approved caulking compound.9
OPERATIONFinal Check List before Operation1. Have all packing materials and tape been removed from the interior and exterior of the ice maker?2. Did you clean the ice storage bin? We recommend cleaning the interior surface with lukewarm waterusing a soft cloth.3. Have the installation instructions been followed, including connecting the machine to electricity, watersupply and water drainage?4. Is the ice maker level?5. Is the ice maker in an indoor site where the ambient temperature is between 50º F and 100ºF and theinput water temperature between 41º F and 90º F all year round?6. Has the water supply pressure been checked to ensure a minimum of 15 psi with a static pressure notto exceed 80 psi?7. Is there a clearance of at least 4” at the rear, 1” at the top and sides for proper air circulation?8. Has the power supply voltage been checked or tested against the rating label at the back of the unit?And has proper grounding been installed for the ice maker?9. Is the ice maker plugged in?10. Have the main water supply and the tap turned on?11. Have you checked for leaks at all water supply connections and at the drain?Operating Method1. Turn on the water tap, let the water to fill. Then switch the ICE/OFF/WASH switch on the front panelto the ICE position. The ice maker will start working automatically2. After three minutes, the machine will automatically go to the ice making stage, and the sound offlowing water will be heard.3. When the batch of ice is fully formed, ice will automatically be harvested to the ice storage bin.4. When the ice storage bin is full, the sheet of ice cubes will not fall completely and will hold the ice-fullprobe open. The machine will stop making ice automatically.5. The unit will start making ice again after the ice cubes are removed or melted. At that time, the ice-fullprobe swings back to operating position.IMPORTANT: Although the unit has been tested and cleaned at the factory, due to long-term transit andstorage, throw away all ice cubes made during the first 3 hours of operation. Never turn the water supply tap off when the ice maker is operating. Never touch the evaporator when the ice maker is running. Except to take ice from the unit, keep the door closed to reduce melting and ensure proper iceformation.10
How the machine makes iceThere are two distinct cycles: Freeze and Harvest.Freezing: During the freezing cycle, the compressor pumps refrigerant, the fan motor blows air and thewater pump circulates water. When the batch of ice has been fully formed, the ice maker stops thefreezing cycle and begins the harvest cycle.Harvest: During the harvest cycle, the compressor is still operates, but the water pump stops. The hotgas valve opens, diverting hot refrigerant gas into the evaporator. The gas warms the evaporator,causing the cubes to fall, as a unit, off the evaporator and into the storage bin. The freezing cycle willrestart when all the cubes have been harvested. A complete cycle can take 15 to 40 minutes,depending on water temperature and ambient conditions.How the machine uses the waterThe ice maker begins with a fixed charge of water that is contained in the water trough. As the waterflows to the freezing evaporator surface, the portion of water that does not contain mineral impurities willfreeze and stick to the ice cube mold. The water containing impurities falls back into the trough. Duringthe ice-making process, fresh water enters the water trough continuously as the water from the troughfreezes continuously on the evaporator.Normal SoundsYour new ice maker may make sounds that are not familiar to you. Hard surfaces like the floor, walls canmake the sounds seem louder than they actually are. The following describes the kinds of sounds thatmight be new to you and what may be making them. Ratting noises may come from the flow of the refrigerant or the water line, items stored on top ofthe icemaker can also make noises. The high efficiency compressor may make a pulsating or high-pitched sound. Water running from the evaporator to the water bin may make a splashing sound. As each cycle ends, you may hear a gurgling sound due to the refrigerant flowing in your icemaker. You may hear air being forced over the condenser by the condenser fan. During the harvest cycle, you may hear the sound of ice cubes falling into the ice storage bin11
CARE AND MAINTENANCEBefore proceeding with cleaning and maintenance operations, make sure the power line of the unit isdisconnected and the water line is shut off. (EXCEPTION: Cleaning of ice-making system)Preparing the Ice Maker for Long StorageIf the ice maker will not be used for a long time, or is to be moved to another place, it will be necessaryto drain the system of water.1. Shut off the water supply at the main water source.2. Disconnect the water supply line from the water inlet.3. Shut off the electric supply at the main electrical power source.4. Take out the ice storage bin to remove ice and water.5. Pull down the drainage tube of the water trough to drain off all water.6. Leave the door open to allow for circulation and to prevent mold and mildew.7. Leave the water supply line and power cord disconnected until ready to reuse.IMPORTANT: Do not touch the power plug when your hands are wet. Never unplug the unit by pulling on the plug.12
CAUTIONThe ice maker must be thoroughly cleaned if it has been left unused for a long time.Periodic cleaning and proper maintenance will ensure efficiency, performance and life expectancy ofthe ice maker. The maintenance intervals listed are based on normal conditions. You may want toshorten the intervals if you have pets, or there are other special considerations.IMPORTANT:Never keep anything in the ice storage bin that is not ice: objects like wine or beer bottles are not onlyunsanitary, but the labels may slip off and clog up the drain.There are 5 things to keep clean: The exterior The interior The condenser Water distribution tube The ice-making systemExterior CleaningThe door and cabinet may be cleaned with a mild detergent and warm water solution such as 1 oz. ofdishwashing liquid mixed with 2 gallons of warm water. Do not use solvent based or abrasive cleaners.Interior CleaningThe ice storage bin should be sanitized occasionally. Clean the water trough before the ice maker isused for the first time and reused after stopping for an extended period of time. It is usually convenientto sanitize the trough after the ice making system has been cleaned and the ice storage bin is empty. Donot use solvent based or abrasive cleaners.1. Disconnect power to the unit.2. Open the door and take out the removable storage bin. With a clean cloth, wipe down the interior ofthe unit with a sanitizing solution made of 2 tablespoons of baking soda and a quart of warm or hotwater.3. Pull off the drain hose of the water trough to drain off all water.4. Rinse thoroughly with clean water.5. After draining off all water, put back the drain hose of the watertrough to the original location.6. Put the cleaned and empty ice storage bin back inside the unit.7. Reconnect power to the unit.Right location ofThe ice scoop should be washed regularly.the drain hoseCondenser CleaningA dirty or clogged condenser prevents proper airflow, reduces ice making capacity and may lead tocomponent failure. Have the condenser cleaned at least once every six months.1. Unplug the ice maker or disconnect power.2. Remove the 2 screws at the bottom of the frontcover and gently pull it off.3. Remove dirt and lint from the condenser and theunit compartment with a brush attachment on avacuum cleaner.4. Reassemble the front cover.5. Plug in the icemaker or reconnect power.Water Distribution Tube cleaningWhen you find that the ice cubes are incompletely formed or the output of ice cubes is low, the water13
distribution tube may be blocked.1. Shut off the water supply.2. Disconnect the water hose from the distribution tube.3. Gently take out the distribution tube.4. With a brush, clean the tube with a dilute solution of warm water and baking soda or white vinegar.After removing the dirt and lint from the surface, rinse the tube with clean water.5. Replace the distribution tube.6. Reconnect the water supply.Ice-making system cleaningMinerals that are removed from water during the freezing cycle will eventually form a hard scaly depositin the water system. Cleaning the system regularly helps remove the mineral scale buildup. How oftenyou need to clean the system depends upon how hard your water is or how effective your filtration maybe. With hard water of 15 to 20 grains/gal. (4 to 5 grains/liter), you may need to clean the system asoften as every 6 months.1. Make sure that all the ice is off the evaporator. If ice is being made, wait for cycle completion, thenturn the machine “OFF” at the ICE/OFF/WASH selector switch.2. Remove all ice from the storage bin.3. Keep the ice maker connected to the water supply, Pour 8 oz. (230g) of Nickel-Safe Ice MakerCleaner Solution into the water trough. After about 5 minutes, initiate the wash cycle at theICE/OFF/WASH selector switch by the switch in the “WASH” position. The machine will run theAutomatic Clean Mode.4. Allow 30 minutes for proper cleaning. After cleaning, turn the machine “OFF”, then drain off thecleaning water to a container by the drain pipe in the left of the water trough.5. Repeat steps 3 and 4 (without Ice Maker Cleaning Solution) to rinse the ice making system 3 times. Note: The use of the Ice Maker Cleaner Solution in the water bin during the rinse is not needed.The ice machine cleaner contains acids.DO NOT use or mix with any other solvent-based cleaner products.Use rubber gloves to protect your hands. Carefully read the material safety instructions on the containerof the ice machine cleaner.Discard the first batch of ice produced after cleaning.6. Prepare a sanitizing solution made of 2 tablespoons of baking soda and a quart of warm or hotwater. Wipe the entire bin inside and out, covering every wall surface.7. Repeat step 6 to rinse the ice making system.8. Switch to the “ICE” position. The machine will return to the regular ice making mode. Discard thefirst batch of ice.Control Box (rear of unit)14
Descriptions of LEDs and buttons:Red LED: Ice Full indicator light.When this LED is lit, the ice storage bin is full of ice or there is something between the two arms of theice-full sensor in the ice storage bin. The unit will stop working. When ice cubes are taken out of theice storage bin, clearing the sensor, the red LED will keep flashing for 3 minutes. Then the unit willrestart and return to the ice making mode.Green LED: Ice making indicator light.When this LED is lit, the unit is working in the Ice Making mode controlled by a temperature probe onthe evaporator. When the green LED is flashing, the unit is working in the Ice Making mode controlledby a fixed timer.Yellow LED: Ice Harvest indicator light.When this LED is lit, the unit is working in the Ice Harvest mode controlled by a temperature probe onthe evaporator. When the yellow LED is flashing, the unit is working in the Ice Harvest modecontrolled by a fixed timer.Clean buttonWhen this button is pressed, the unit enters the Cleaning mode. The green and yellow LEDs flashtogether. To stop the Cleaning mode, just press the button again.Mode buttonWhen this button is pressed, unit can change from Ice Making mode to Ice Harvest mode or from IceHarvest mode to Ice Making mode.Ice Size Adjustment Guide1. Press and hold the “Adjust” button for at least 3 seconds. The unit will enter the IceSize Adjustment mode. The “ICE Making” LED (green) will be blinking continuouslyduring the ice size adjustment. Release the button when the LED blinks continuously toadjust the ice size.2. While in the Ice Size Adjustment mode, press the “Clean” button or the “Mode” buttonfor the desired ice size.Smaller ice settingBy pressing the “Clean” button, you can decrease the size of the ice cubes. The “ICE FULL” LED (red)will flash as you lower the ice size and will finally be blinking at the setting of smallest ice size.Larger ice settingBy pressing the “Mode” button, you can increase the size of the ice cubes. The “ICE HARVEST” LED(yellow) will flash as the larger size is set and will blink when the setting of largest ice size has beenreached.After 10 seconds without any operation, the unit will automatically memorize the current state and returnto the previous mode.NOTE: During the ice size adjustment, the “ICE FULL”, “ICE MAKING” and “ICE HARVEST” LEDSlights blink at the same time, the unit is in the factory preset medium thickness ice setting.When the machine is in the cleaning stage or ice full stage, the ice adjustment function is notavailable.15
TROUBLESHOOTINGMany common ice maker problems are easily resolved. Try the troubleshooting suggestions below tosee if the problems can be resolved before having to contact the service department.ProblemPossible CauseThe machine won'toperate. The water doesn't feed inafter the ice maker starts.Machine makes ice, but bindoes not fill up with iceThe icemaker is unplugged.The fuse is blown.The icemaker power switch isOFF.The ice storage bin is full of ice.Probable Correction Plug the ice maker in. Replace fuse. Turn the ice maker power switch toICE (ON) Take away some ice cubes; makethe ice full probe is free of ice. The water supply tap is turn off.The water supply pipe is notproper connected. Turn on the water supply tap.Reconnect the water supply pipe. The condenser may be dirty.The air flow to the ice maker maybe obstructed.The ambient temperature andwater temperature are high, or itis near with some heat source. Clean the condenser. Check the installation.Run the unit for longer period of time. The feet are not leveled andlocked.Certain sounds are normal. Under some conditions, humiditymay condense on the door. Considermoving the unit or just be morecareful when you open the door.Tighten fitting. See “Connecting thewater line”.Check if the water supply pressure isbelow 15 psi.Check water supply--filter may berestricted.Check for a water leak at the watertrough.Level and lock the feet. See Levelingthe Ice Maker.See “Normal Sounds.” The electricity is off. Reconnect the power supply line. The room temperature is out ofthe stated range.Cut off the electricity and let the icemaker stop working until thetemperature returns within the statedrange.The body of the ice makeris electrified The ground line isn't in thesocket. Use the correct plug and outlet.Scale builds up quicklyinside the machine. The calcium level in the water istoo high. Use a water softening apparatusinstalled in front of the water inletvalve. Water is leaking out theunit. A few water droplets are on thedoor.The water supply connection isleaking. Cubes are partiallyformed--are white at thebottom. Noise during operationThe icemaker stopssuddenly while making ice.Not enough water in the waterbin.16
ONE YEAR LIMITED WARRANTYThis WHYNTER Ice maker is warranted, to the original owner within the 48 continental states, for oneyear from the date of purchase against defects in material and workmanship under normal use andservice. Should your ice maker prove defective within one year from the date of purchase, return thedefective part or unit, freight prepaid (within two months of purchase; after two months to one year,customer will be responsible for freight cost to Whynter’s service department), along with anexplanation of the claim to Whynter LLC. Please package the ice maker carefully in its originalpackaging material to avoid damage in transit. Please retain the original box and packaging material.Under this warranty, Whynter will repair or replace any parts found defective. This warranty is nottransferable. After the expiration of the warranty, the cost of labor and parts will be the responsibility ofthe original owner of the unit.THIS WARRANTY DOES NOT COVER: Acts of God, such as fire,
copper tubing, attach a ¼" O.D. compression union to the tubing and remove the nut. 1. Using a flathead screwdriver, separate the hinge axis from hinge 1. 2. Open the door about 20 . Lift the door off the bottom hinge 2 and set the door aside. 1. Using a flathead screwdriver, remove the plug buttons from the screw holes opposite the door
