Transcription
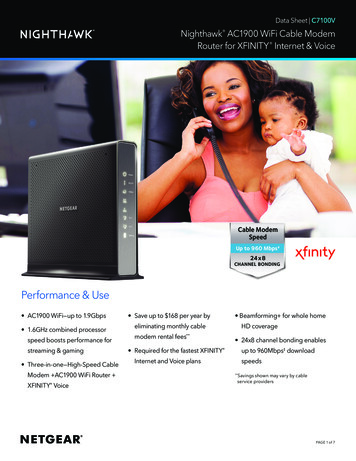
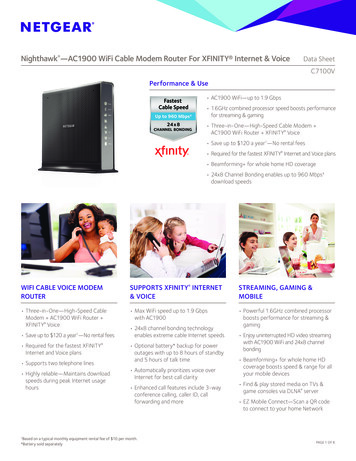
AC1900 Cable Modem Voice RouterModel C7100VUser ManualJanuary 2018202-11722-07350 East Plumeria DriveSan Jose, CA 95134USA
AC1900 Cable Modem Voice RouterSupportThank you for purchasing this NETGEAR product. You can visit www.netgear.com/support to register your product, get help,access the latest downloads and user manuals, and join our community. We recommend that you use only official NETGEARsupport resources.ConformityFor the current EU Declaration of Conformity, visit http://kb.netgear.com/app/answers/detail/a id/11621.ComplianceFor regulatory compliance information, visit http://www.netgear.com/about/regulatory.See the regulatory compliance document before connecting the power supply.CAUTION:To reduce the risk of fire, use only a No. 26 American wire gauge (AWG) or larger (such as 24AWG) UL or CSA certified telecommunication line cord.Trademarks NETGEAR, Inc., NETGEAR and the NETGEAR Logo are trademarks of NETGEAR, Inc. Any non-NETGEAR trademarks areused for reference purposes only.2
AC1900 Cable Modem Voice RouterChapter 1Hardware OverviewPackage Contents . . . . . . . . . . . . . . . . . . . . . . . . . . . . . . . . . . . . . . . . . . . . . . . . . . . . 8Front Panel . . . . . . . . . . . . . . . . . . . . . . . . . . . . . . . . . . . . . . . . . . . . . . . . . . . . . . . . . . 8Top Panel WPS Button . . . . . . . . . . . . . . . . . . . . . . . . . . . . . . . . . . . . . . . . . . . . . . . 10Rear Panel . . . . . . . . . . . . . . . . . . . . . . . . . . . . . . . . . . . . . . . . . . . . . . . . . . . . . . . . . . 10Product Label . . . . . . . . . . . . . . . . . . . . . . . . . . . . . . . . . . . . . . . . . . . . . . . . . . . . . . . 11Install an Optional Battery . . . . . . . . . . . . . . . . . . . . . . . . . . . . . . . . . . . . . . . . . . . . 12Replace the Battery. . . . . . . . . . . . . . . . . . . . . . . . . . . . . . . . . . . . . . . . . . . . . . . . . . 12Position Your Modem Router . . . . . . . . . . . . . . . . . . . . . . . . . . . . . . . . . . . . . . . . . . 13Install and Activate Your Modem Router . . . . . . . . . . . . . . . . . . . . . . . . . . . . . . . . 14Connect Your Modem Router to a Computer . . . . . . . . . . . . . . . . . . . . . . . . . . 14Call Comcast XFINITY to Activate Internet Service and Register the Voice TelephoneLines . . . . . . . . . . . . . . . . . . . . . . . . . . . . . . . . . . . . . . . . . . . . . . . . . . . . . . . . . . . . 15Perform a Speed Test . . . . . . . . . . . . . . . . . . . . . . . . . . . . . . . . . . . . . . . . . . . . . . 16Set Up the Modem Router in Bridge Mode . . . . . . . . . . . . . . . . . . . . . . . . . . . . . . 16Chapter 2Connect to the Network and Access the Modem RouterConnect to the Network. . . . . . . . . . . . . . . . . . . . . . . . . . . . . . . . . . . . . . . . . . . . . . 19Wired Connection . . . . . . . . . . . . . . . . . . . . . . . . . . . . . . . . . . . . . . . . . . . . . . . . . 19WiFi Connection . . . . . . . . . . . . . . . . . . . . . . . . . . . . . . . . . . . . . . . . . . . . . . . . . . 19Types of Logins . . . . . . . . . . . . . . . . . . . . . . . . . . . . . . . . . . . . . . . . . . . . . . . . . . . . . 20Log In to the Modem Router . . . . . . . . . . . . . . . . . . . . . . . . . . . . . . . . . . . . . . . . . . 21Access the Modem Router With the NETGEAR genie App . . . . . . . . . . . . . . . . . 22Chapter 3Specify Your Internet SettingsSpecify the Cable Connection Starting Frequency . . . . . . . . . . . . . . . . . . . . . . . 24View Modem Router Initialization. . . . . . . . . . . . . . . . . . . . . . . . . . . . . . . . . . . . . . 25Manually Set Up the Internet Connection . . . . . . . . . . . . . . . . . . . . . . . . . . . . . . . 26Specify an IPv6 Internet Connection . . . . . . . . . . . . . . . . . . . . . . . . . . . . . . . . . . . 27Change the MTU Size . . . . . . . . . . . . . . . . . . . . . . . . . . . . . . . . . . . . . . . . . . . . . . . . 28Chapter 4Control Access to the InternetSet Up Parental Controls. . . . . . . . . . . . . . . . . . . . . . . . . . . . . . . . . . . . . . . . . . . . . . 32Block Access to Your Network. . . . . . . . . . . . . . . . . . . . . . . . . . . . . . . . . . . . . . . . . 33Use Keywords to Block Internet Sites. . . . . . . . . . . . . . . . . . . . . . . . . . . . . . . . . . . 34Delete a Keyword . . . . . . . . . . . . . . . . . . . . . . . . . . . . . . . . . . . . . . . . . . . . . . . . . 35Block Services From the Internet . . . . . . . . . . . . . . . . . . . . . . . . . . . . . . . . . . . . . . 36Schedule When to Block Internet Sites and Services . . . . . . . . . . . . . . . . . . . . . . 37Avoid Blocking on a Trusted Computer . . . . . . . . . . . . . . . . . . . . . . . . . . . . . . . . . 38Set Up Security Event Email Notifications . . . . . . . . . . . . . . . . . . . . . . . . . . . . . . . 39Manage Services . . . . . . . . . . . . . . . . . . . . . . . . . . . . . . . . . . . . . . . . . . . . . . . . . . . . 40Enable or Disable NAT . . . . . . . . . . . . . . . . . . . . . . . . . . . . . . . . . . . . . . . . . . . . . . . . 42Chapter 5Share USB Devices Attached to the Modem RouterUSB Storage Device Requirements . . . . . . . . . . . . . . . . . . . . . . . . . . . . . . . . . . . . . 443
AC1900 Cable Modem Voice RouterConnect a USB Storage Device to the Modem Router . . . . . . . . . . . . . . . . . . . . 44Access a USB Drive Connected to the Modem Router From a Windows Computer45Map a USB Device to a Windows Network Drive . . . . . . . . . . . . . . . . . . . . . . . . . 46Access a USB Storage Device That Is Connected to the Modem Router From a Mac46Control Access to the USB Storage Device . . . . . . . . . . . . . . . . . . . . . . . . . . . . . . 47Use FTP Within the Network . . . . . . . . . . . . . . . . . . . . . . . . . . . . . . . . . . . . . . . . . . 48View Network Folders on a USB Storage Device . . . . . . . . . . . . . . . . . . . . . . . . . 50Add a Network Folder on a USB Storage Device . . . . . . . . . . . . . . . . . . . . . . . . . 51Edit a Network Folder on a USB Storage Device. . . . . . . . . . . . . . . . . . . . . . . . . . 52Approve USB Devices . . . . . . . . . . . . . . . . . . . . . . . . . . . . . . . . . . . . . . . . . . . . . . . . 52Access the USB Storage Device Through the Internet. . . . . . . . . . . . . . . . . . . . . 54Set Up FTP Access Through the Internet. . . . . . . . . . . . . . . . . . . . . . . . . . . . . . 54Access the USB Storage Device Through the Internet With FTP . . . . . . . . . . 56Safely Remove a USB Storage Device . . . . . . . . . . . . . . . . . . . . . . . . . . . . . . . . . . 56Chapter 6 Share a USB PrinterInstall the Printer Driver and Cable the Printer. . . . . . . . . . . . . . . . . . . . . . . . . . .Download the ReadySHARE Printer Utility . . . . . . . . . . . . . . . . . . . . . . . . . . . . . .Install the ReadySHARE Printer Utility . . . . . . . . . . . . . . . . . . . . . . . . . . . . . . . . . .Use the Shared Printer . . . . . . . . . . . . . . . . . . . . . . . . . . . . . . . . . . . . . . . . . . . . . . .View or Change the Status of a Printer . . . . . . . . . . . . . . . . . . . . . . . . . . . . . . . . .Use the Scan Feature of a Multifunction USB Printer . . . . . . . . . . . . . . . . . . . . .Change NETGEAR USB Control Center Settings . . . . . . . . . . . . . . . . . . . . . . . . . .59596061626364Chapter 7 Voice Telephone LinesConnect a Telephone Line . . . . . . . . . . . . . . . . . . . . . . . . . . . . . . . . . . . . . . . . . . . .View the Voice Status . . . . . . . . . . . . . . . . . . . . . . . . . . . . . . . . . . . . . . . . . . . . . . . .View the MTA Call List . . . . . . . . . . . . . . . . . . . . . . . . . . . . . . . . . . . . . . . . . . . . . . .View the EMTA Event Log . . . . . . . . . . . . . . . . . . . . . . . . . . . . . . . . . . . . . . . . . . . .67676869Chapter 8 Specify Network SettingsView or Change WAN Settings . . . . . . . . . . . . . . . . . . . . . . . . . . . . . . . . . . . . . . . .Set Up a Default DMZ Server . . . . . . . . . . . . . . . . . . . . . . . . . . . . . . . . . . . . . . . . .Manually Configure LAN Switch Ports . . . . . . . . . . . . . . . . . . . . . . . . . . . . . . . . . .Change the Modem Router’s Device Name. . . . . . . . . . . . . . . . . . . . . . . . . . . . . .Change the LAN TCP/IP Settings . . . . . . . . . . . . . . . . . . . . . . . . . . . . . . . . . . . . . .Specify the IP Addresses That the Modem Router Assigns . . . . . . . . . . . . . . . .Disable the DHCP Server Feature in the Modem Router. . . . . . . . . . . . . . . . . . .Manage LAN IP Addresses . . . . . . . . . . . . . . . . . . . . . . . . . . . . . . . . . . . . . . . . . . . .Reserve an IP Address . . . . . . . . . . . . . . . . . . . . . . . . . . . . . . . . . . . . . . . . . . . . .Edit a Reserved IP Address Entry . . . . . . . . . . . . . . . . . . . . . . . . . . . . . . . . . . . .Delete a Reserved IP Address Entry. . . . . . . . . . . . . . . . . . . . . . . . . . . . . . . . . .Improve Network Connections With Universal Plug-N-Play . . . . . . . . . . . . . . .Use the WPS Wizard for WiFi Connections . . . . . . . . . . . . . . . . . . . . . . . . . . . . . .Specify Basic WiFi Settings . . . . . . . . . . . . . . . . . . . . . . . . . . . . . . . . . . . . . . . . . . .Change the WiFi Security Option . . . . . . . . . . . . . . . . . . . . . . . . . . . . . . . . . . . . . .4717273747475777777787979808183
AC1900 Cable Modem Voice RouterSet Up a Guest Network . . . . . . . . . . . . . . . . . . . . . . . . . . . . . . . . . . . . . . . . . . . . . . 84Control the WiFi Radios . . . . . . . . . . . . . . . . . . . . . . . . . . . . . . . . . . . . . . . . . . . . . . 85Use the WiFi On/Off Button . . . . . . . . . . . . . . . . . . . . . . . . . . . . . . . . . . . . . . . . 85Enable or Disable the WiFi Radios. . . . . . . . . . . . . . . . . . . . . . . . . . . . . . . . . . . . 86Specify WPS Settings . . . . . . . . . . . . . . . . . . . . . . . . . . . . . . . . . . . . . . . . . . . . . . . . 87Chapter 9Manage Your NetworkChange the admin Password . . . . . . . . . . . . . . . . . . . . . . . . . . . . . . . . . . . . . . . . . . 89View Modem Router Status . . . . . . . . . . . . . . . . . . . . . . . . . . . . . . . . . . . . . . . . . . . 90Display Internet Port Statistics . . . . . . . . . . . . . . . . . . . . . . . . . . . . . . . . . . . . . . 90Check the Internet Connection Status. . . . . . . . . . . . . . . . . . . . . . . . . . . . . . . . 92View the Battery Status . . . . . . . . . . . . . . . . . . . . . . . . . . . . . . . . . . . . . . . . . . . . . . 93View and Manage Logs of Modem Router Activity . . . . . . . . . . . . . . . . . . . . . . . 93View Event Logs . . . . . . . . . . . . . . . . . . . . . . . . . . . . . . . . . . . . . . . . . . . . . . . . . . . . 95Run the Ping Utility . . . . . . . . . . . . . . . . . . . . . . . . . . . . . . . . . . . . . . . . . . . . . . . . . . 96Run the Traceroute Utility . . . . . . . . . . . . . . . . . . . . . . . . . . . . . . . . . . . . . . . . . . . . 97Monitor Internet Traffic . . . . . . . . . . . . . . . . . . . . . . . . . . . . . . . . . . . . . . . . . . . . . . 98View Devices Currently on the Network . . . . . . . . . . . . . . . . . . . . . . . . . . . . . . . . 99Manage the Modem Router Configuration File. . . . . . . . . . . . . . . . . . . . . . . . . . 100Back Up Settings . . . . . . . . . . . . . . . . . . . . . . . . . . . . . . . . . . . . . . . . . . . . . . . . . 100Restore Configuration Settings. . . . . . . . . . . . . . . . . . . . . . . . . . . . . . . . . . . . . 101Erase the Current Configuration Settings . . . . . . . . . . . . . . . . . . . . . . . . . . . . 102View Wireless Access Points in Your Area . . . . . . . . . . . . . . . . . . . . . . . . . . . . . . 102View or Change the Modem Router Wireless Channel . . . . . . . . . . . . . . . . . . . 103Dynamic DNS . . . . . . . . . . . . . . . . . . . . . . . . . . . . . . . . . . . . . . . . . . . . . . . . . . . . . . 104Specify a DNS Account . . . . . . . . . . . . . . . . . . . . . . . . . . . . . . . . . . . . . . . . . . . 105Change the Dynamic DNS Settings . . . . . . . . . . . . . . . . . . . . . . . . . . . . . . . . . 105Remote Management . . . . . . . . . . . . . . . . . . . . . . . . . . . . . . . . . . . . . . . . . . . . . . . 106Chapter 10Specify Internet Port SettingsSet Up Port Forwarding to a Local Server . . . . . . . . . . . . . . . . . . . . . . . . . . . . . . 109Add a Custom Port Forwarding Service. . . . . . . . . . . . . . . . . . . . . . . . . . . . . . 110Edit a Port Forwarding Service . . . . . . . . . . . . . . . . . . . . . . . . . . . . . . . . . . . . . 111Delete a Port Forwarding Entry . . . . . . . . . . . . . . . . . . . . . . . . . . . . . . . . . . . . 112Application Example: Make a Local Web Server Public . . . . . . . . . . . . . . . . . 112How the Modem Router Implements the Port Forwarding Rule . . . . . . . . . 113Set Up Port Triggering . . . . . . . . . . . . . . . . . . . . . . . . . . . . . . . . . . . . . . . . . . . . . . 113Add a Port Triggering Service . . . . . . . . . . . . . . . . . . . . . . . . . . . . . . . . . . . . . . 114Application Example: Port Triggering for Internet Relay Chat . . . . . . . . . . . 115Chapter 11TroubleshootingTroubleshoot with the LEDs . . . . . . . . . . . . . . . . . . . . . . . . . . . . . . . . . . . . . . . . . . 117Power LED Is Off. . . . . . . . . . . . . . . . . . . . . . . . . . . . . . . . . . . . . . . . . . . . . . . . . 117LEDs Never Turn Off. . . . . . . . . . . . . . . . . . . . . . . . . . . . . . . . . . . . . . . . . . . . . . 117Internet LED Is Off . . . . . . . . . . . . . . . . . . . . . . . . . . . . . . . . . . . . . . . . . . . . . . . 117Troubleshoot the Cable Internet Connection . . . . . . . . . . . . . . . . . . . . . . . . . . . 1175
AC1900 Cable Modem Voice RouterCannot Log In to the Modem Router . . . . . . . . . . . . . . . . . . . . . . . . . . . . . . . . . . 118Changes Not Saved . . . . . . . . . . . . . . . . . . . . . . . . . . . . . . . . . . . . . . . . . . . . . . . . . 119WiFi Connectivity . . . . . . . . . . . . . . . . . . . . . . . . . . . . . . . . . . . . . . . . . . . . . . . . . . 119Phone Does Not Get a Dial Tone . . . . . . . . . . . . . . . . . . . . . . . . . . . . . . . . . . . . . . 120Use LEDs to Troubleshoot . . . . . . . . . . . . . . . . . . . . . . . . . . . . . . . . . . . . . . . . . . . 120Troubleshoot Your Network Using the Ping Utility . . . . . . . . . . . . . . . . . . . . . . . 121Test the LAN Path to Your Modem Router . . . . . . . . . . . . . . . . . . . . . . . . . . . 121Test the Path From Your Computer to a Remote Device. . . . . . . . . . . . . . . . 122Appendix A Supplemental InformationFactory Settings . . . . . . . . . . . . . . . . . . . . . . . . . . . . . . . . . . . . . . . . . . . . . . . . . . . 124Technical Specifications . . . . . . . . . . . . . . . . . . . . . . . . . . . . . . . . . . . . . . . . . . . . . 1256
1.1Hardware OverviewThe modem router provides you with an easy and secure way to set up a WiFi home networkwith fast Internet access through a coaxial cable and two VoIP telephone lines. The modemrouter battery (sold separately) provides up to five hours of talk time and eight hours or idle timefor voice service during a power outage.The modem router delivers combined WiFi connection speeds. High-powered amplifiers withantennas provide WiFi coverage anywhere around your home, inside or out.To set up your new modem router, use the installation guide. This chapter providessupplemental information that can help you with the setup.This chapter contains the following sections: Package Contents Front Panel Top Panel WPS Button Rear Panel Product Label Install an Optional Battery Replace the Battery Position Your Modem Router Install and Activate Your Modem Router Set Up the Modem Router in Bridge Mode7
AC1900 Cable Modem Voice RouterPackage ContentsYour package includes the following items.Power cordPhone cableEthernet cableModem routerFigure 1. Package contentsFront PanelThe front panel contains status LEDs. Use the LEDs to verify status and connections.Power LEDDS/US LED (downstream and upstream)Online LED2.4 GHz WiFi LED5 GHz WiFi LEDTel (voice) port 1 LEDTel (voice) port 2 LEDBattery LEDFigure 2. Front panel LEDsHardware Overview8
AC1900 Cable Modem Voice RouterYou can use the LEDs to verify status and connections. The following table lists anddescribes each LED and the WPS button on the front panel.Table 1. Front panel LEDs and button of the modem routerLEDIconDescriptionPower Solid white. The modem router is receiving power and is functioning normally.Off. The modem router is not receiving power.Red. The modem router is too warm and might overheat. For more informationabout this condition, see Use LEDs to Troubleshoot on page 120.DS/US Solid white. One or more downstream channels are locked.Slow blinking. Downstream locking is in progress.Fast blinking. Upstream locking is in progress.Off. No downstream channel is locked.Online Solid white. The modem router is connected to the Internet.Blinking. The modem router is downloading a configuration file from the cableprovider’s CMTS.Off. The modem router is not connected to the Internet. 2.4 GHz WiFi 5 GHz WiFi Tel (voice)port 1 andTel (voice)port 2 Battery Solid white. The 2.4 GHz WiFi radio is functioning and available for use.Slow blinking. At least one computer or WiFi device is connected to the 2.4GHz network or someone pressed the WPS button.Fast blinking. At least one computer or WiFi device is sending or receivingdata on the 2.4 GHz network.Off. The 2.4 GHz WiFi radio is disabled. (If the radio is disabled, see Controlthe WiFi Radios on page 85.)Solid white. The 5 GHz WiFi radio is functioning and available for use.Slow blinking. At least one computer or WiFi device is connected to the 5 GHznetwork or someone pressed the WPS button.Fast blinking. At least one computer or WiFi device is sending or receivingdata on the 5 GHz network.Off. The 5 GHz WiFi radio is disabled. (If the radio is disabled, see Control theWiFi Radios on page 85.)Solid white. The telephone line is provisioned and ready to use.Slow blinking. Registration is in progress for the telephone line or the phone isoff the hook.Off. The telephone line is not registered or is not provisioned.Solid white. The battery is charged.Fast blinking. The battery power is low, or the modem router detected agrounding error or a problem with the voltage.Off. The battery is not working.Hardware Overview9
AC1900 Cable Modem Voice RouterTop Panel WPS ButtonThe WPS button is on the top panel.WPS buttonPress the WPS buttonto connect to the WiFi network without typing the WiFi password.For more information about using WPS, see WiFi Connection on page 19.Rear PanelThe rear panel contains ports, connectors, and a recessed button.Reset buttonUSB ports (2)Voice ports (2)Ethernet LAN ports (4)Coaxial cable connectorPower inputFigure 3. Rear panel connections and buttonThe rear panel contains the following components, viewed from top to bottom: Reset button. To set the modem router to the original factory settings, press and hold theReset button for at least seven seconds. For more information, see Factory Settings onpage 124.Hardware Overview10
AC1900 Cable Modem Voice Router USB ports. The USB ports lets you connect a USB hard drive, flash drive, or printer to themodem router. Tel (voice) ports. Connect Voice over IP (VoIP) telephone lines. Four Ethernet LAN ports. These ports support 1000 Mpbs, 100 Mpbs, and 10 Mpbsconnections. Use the Ethernet LAN ports to connect local computers to the modemrouter’s Ethernet LAN. Coaxial cable connector. Attach a coaxial cable to the cable service provider’sconnection. Power input connector. Attach the power cord to this input.Product LabelThe label on the modem router shows the login information, MAC addresses, serial number,WiFi network names, and WiFi password (key).CM MAC addressEMTA MAC addressSerial numberWiFi network name (SSID)WiFi network passwordFigure 4. Modem router labelHardware Overview11
AC1900 Cable Modem Voice RouterInstall an Optional BatteryA battery is not included with the modem router, but you can purchase a NETGEAR modemrouter battery (sold separately) and install it. The battery can give you five hours of additionaltalk time and eight hours of idle time for voice service during a power outage. Battery accessis on the bottom of the modem router. To install the battery:1. Make sure that the modem router is unplugged.2. Open the battery compartment door.3. Insert the battery into the modem router.Do not attempt to remove the battery’s plastic tab. The plastic tab allows you to easilyremove the battery later if it must be replaced.4. Close the battery compartment door.Replace the BatteryBattery access is on the bottom of the modem router. To replace the battery:1. Unplug the modem router.2. Open the battery compartment door.3. Pull the plastic tab to remove the battery.4. Insert the replacement battery and close the battery compartment door.Hardware Overview12
AC1900 Cable Modem Voice RouterPosition Your Modem RouterThe modem router lets you access your network from anywhere within the operating range ofyour WiFi network. However, the operating distance or range of your WiFi connection canvary significantly depending on the physical placement of your modem router. For example,the thickness and number of walls the WiFi signal passes through can limit the range.For best results, place your modem router according to the following guidelines: Place your modem router on an upper floor of a multifloor home or office. Place your modem router near the center of the area where your computers and otherdevices operate, and within line of sight to your WiFi devices. Make sure that the modem router is within reach of an AC power outlet and near Ethernetcables for wired computers. Place the modem router in an elevated location, minimizing the number walls and ceilingsbetween the modem router and your other devices. Place the modem router away from electrical devices such as these: -Ceiling fans-Home security systems-Microwaves-Computers-Base of a cordless phone-2.4 GHz cordless phonePlace the modem router away from large metal surfaces, large glass surfaces, insulatedwalls, and items such as these:-Solid metal doors-Aluminum studs-Fish tanks-Mirrors-Brick-ConcreteWhen you use multiple access points, it is better if adjacent access points use different radiofrequency channels to reduce interference. The recommended channel spacing betweenadjacent access points is five channels (for example, use Channels 1 and 6, or 6 and 11).Hardware Overview13
AC1900 Cable Modem Voice RouterInstall and Activate Your Modem RouterThe modem router provides a connection between your cable Internet provider’s network andyour computer, router, or WiFi router.Connect Your Modem Router to a ComputerDuring the installation and activation, you must connect the modem router directly to acomputer.Cable modemCablewalloutletPower cordEthernetcableCoaxcablePhone cableFigure 5. Connect the modem router directly to a computerNote: Before you connect your modem router and contact your cable Internetprovider, collect your cable account number, account phone number,and login information (your email address or user name and password). To connect your modem router directly to a computer:1. Connect a coaxial cable.Use the coaxial cable that your cable company provided to connect the cable port on themodem router to a cable wall outlet. Make sure that the cable is tightly connected.2. Turn off the computer to which you intend to connect the modem router.3. Use the Ethernet cable provided in the package to connect the Gigabit Ethernet port on themodem router to an Ethernet port on the computer.4. Connect one end of the phone cable to the Tel (Voice) port on the rear panel of the modemrouter and the other end of the phone cable to the telephone.5. Turn on the computer.Hardware Overview14
AC1900 Cable Modem Voice Router6. Connect the power cord provided in the package to the modem router and plug the powercord into an electrical outlet.When the startup procedure is completed, the Power LEDlights white.7. Wait for the modem router to come online.It takes at least 10 minutes for the modem router to come online on the network. Duringthis time, the LED behavior is as follows: The Downstream/Upstream LEDblinks slowly when the modem router is lockingone or more downstream channels, the LED blinks fast when the modem router islocking one or more upstream channels, and it lights solid white when one or moredownstream channels are locked. After the modem router registers with your cable Internet provider, the Internet LEDlights white.Even though an Internet connection is established, Internet service is available only after youset it up with your cable Internet provider.For information about how to activate your Internet service and register your telephone lines,see Call Comcast XFINITY to Activate Internet Service and Register the Voice TelephoneLines on page 15.Call Comcast XFINITY to Activate Internet Service and Registerthe Voice Telephone LinesBefore you start the activation process, make sure that your account number, account phonenumber, and login information (your email address or user name and password) are nearby. To activate your Internet connection with Comcast XFINITY’s self-activation process:1. Call Comcast XFINITY customer service at 1-800-XFINITY (1-800-934-6489).2. When asked, provide your account information and provide the modem router’s modelnumber and MAC address, which are on the modem router label.For more information, see Product Label on page 11.3. Wait for Comcast XFINITY to confirm that your modem router is active.If you do not get an Internet connection with the modem router, ask Comcast XFINITY tolook for your modem router online, and do one of the following depending on whatComcast XFINITY tells you about your modem router: If the modem router is not visible, Comcast XFINITY can give you instructions toverify why the modem router does not connect with your high-speed Internet service. If the modem router is visible to Comcast XFINITY, reboot the modem router. Checkyour online status again.4. If you connected telephone lines, ask Comcast XFINITY to register your voice telephonelines.Hardware Overview15
AC1900 Cable Modem Voice RouterThe Tel (Voice) LED blinks while the phone is being registered and then lights solid whiteonce it is registered.After the voice line is registered, you can hear a dial tone when the phone is off-hook.For information about voice telephone lines, see Chapter 7, Voice Telephone Lines.Perform a Speed TestTo determine the accurate Internet speed, visit the speed test website of your cable Internetprovider and perform a speed test.If your actual speed is lower than your subscribed speed, contact your cable Internetprovider.Set Up the Modem Router in Bridge ModeDuring the installation and activation, you must connect the modem router directly to acomputer. After installation and activation, you can connect the modem router to a router andset up your modem router in bridge mode.If you want to connect your modem router to a router, you must disable router mode. Withrouter mode disabled, the modem router works as a bridge and the router behind it obtains aWAN IP address from your cable Internet provider. To set up the modem router in bridge mode:1. Launch a web browser from a computer or mobile device that is connected to themodem router network.2. Type http://routerlogin.net or http://192.168.0.1.A login window opens.3. Enter the modem router user name and password.The user name is admin. The default password is password. The user name andpassword are case-sensitive.The BASIC Home page displays.4. Select ADVANCED Administration Router Mode.The Router Mode page displays.5. Select the No radio button.With this setting, the modem router works as a bridge and the router behind it obtains aWAN IP address from the Internet service provider.6. Click the Apply button.Your settings are saved.Hardware Overview16
AC1900 Cable Modem Voice RouterNote: When your modem router is in bridge mode, use http://192.168.100.1to log in to your modem router.7. Follow the instructions that came with your router to connect it to the modem router.Hardware Overview17
2.Connect to the Network andAccess the Modem RouterThis chapter contains the following sections: Connect to the Network Types of Logins Log In to the Modem Router Access the Modem Router With the NETGEAR genie App182
AC1900 Cable Modem Voice RouterConnect to the NetworkYou can connect to the modem router’s network through a wired or WiFi connection. If youset up your computer to use a static IP address, change the settings so that it uses DynamicHost Configuration Protocol (DHCP).Wired ConnectionYou can connect your computer to the modem router using an Ethernet cable and join themodem router’s local area network (LAN). To connect your computer to the modem router with an Ethernet cable:1. Make sure that the modem router is receiving power (its Power LED is lit).2. Connect an Ethernet cable to an Ethernet port on your computer.3. Connect the other end of the Ethernet cable to one of the numbered Ethernet ports.Your computer connects to the local area network (LAN). A message might display onyour computer screen to notify you that an Ethernet cable is connected.WiFi ConnectionYou can connect to the modem router’s WiFi network with Wi-Fi Protected Setup (WPS) oryou can find and select the WiFi network. To use WPS to connect to the WiFi network:1. Make sure that the modem router is receiving power (its Power LED is lit
350 East Plumeria Drive San Jose, CA 95134 USA January 2018 202-11722-07 AC1900 Cable Modem Voice Router Model C7100V. User Manual
