Transcription
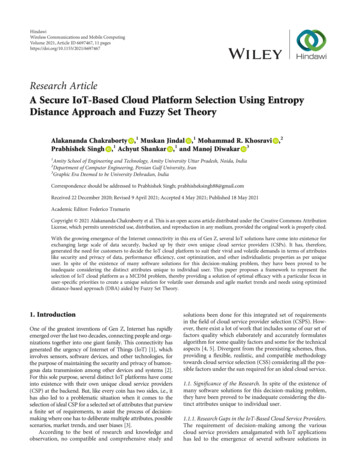
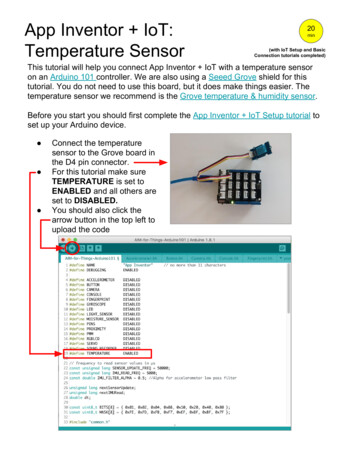
App Inventor IoT:Temperature Sensor20min(with IoT Setup and BasicConnection tutorials completed)This tutorial will help you connect App Inventor IoT with a temperature sensoron an Arduino 101 controller. We are also using a Seeed Grove shield for thistutorial. You do not need to use this board, but it does make things easier. Thetemperature sensor we recommend is the Grove temperature & humidity sensor.Before you start you should first complete the App Inventor IoT Setup tutorial toset up your Arduino device. Connect the temperaturesensor to the Grove board inthe D4 pin connector.For this tutorial make sureTEMPERATURE is set toENABLED and all others areset to DISABLED.You should also click thearrow button in the top left toupload the code
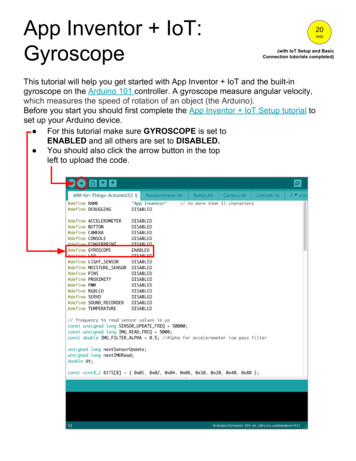
Next, you should complete the App Inventor IoT Basic Connection tutorial tomake a basic connection to the Arduino device. If you prefer, you can downloadthe completed .aia file here.The remaining steps all build off of the the starter code for Basic Connectiontutorial and .aia: Drag a Label from the User Interface Palette and drop it betweenLabelStatus and ListBLE Rename the Label "LabelData". Change its text to “Data: “. In the Palette window, click on Extension at the bottom and then on"Import extension" and click on "URL". Paste in this s/edu.mit.appinventor.iot.arduino101.aix Add the Arduino101Humidity extension to your app by dragging it onto theViewer (the humidity sensor measures both humidity and temperature).
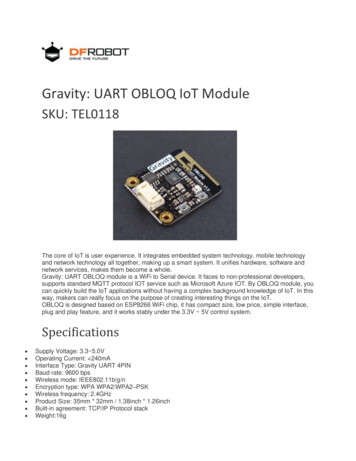
Next, we need to let App Inventor know which pin on the Grove board thetemperature sensor is connected to. Click on Ardunio101Humidity1 in the Components pane.In the Properties pane, click on BluetoothDevice and select BlutetoothLE1.Under Pin, enter the digital pin that matches the one the temperature sensoris plugged into on the Grove board (in this case D4). Note: You only need to put the number (4), not the letter 'D'
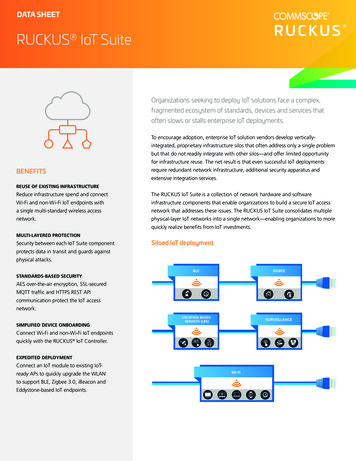
Now switch to the Blocks Editor viewFirst, we want to request data updates when the sensor value on the Arduinochanges. from Arduino101HumiditySensor1 in the Blocks pane, addcall Arduino101Humidity1.RequestTemperatureUpdates to the existingwhen BluetoothLE1.Connected block from the Basic Connection tutorial.Next, we need to store the data we receive from the sensor. From the Variablesdrawer in the docs pane, drag an initialize global name to block and name it"Temperature". From the Math drawer add a number block and set it to "0". We'lluse this to keep track of the sensor value.Let's make a new procedure to display the current readings in the LabelDatawhen we get new data. You can create a procedure by dragging out a purpleprocedure block from the Procedures drawer in the Blocks pane. Let's rename itupdateDataLabel. from LabelData in the Blocks pane, add set LabelData.Text to. from the Text drawer connect a join block. From the Text drawer, connect a text block and type"Temperature: " From the Variables drawer connect a get global Temperature.
Finally, we need to call the procedure when this data is received. From the Arduino101Humidity1 drawer in the Blocks pane, dragwhen Ardunio101Humidity1.TemperatureReceived from the Variables drawer, add set global Temperature. Hover over the orange "temperature" in .TemperatureReceived to seethe get temperature block. Drag the get temperature block from thiswindow and snap to set global Temperature. from the Procedures drawer, add call updateDataLabel.Your app should now be working! Connect your Arduino device using the MITAI2 Companion (if you haven't already). Test it out by closing your hand aroundthe sensor, or placing it under a lamp. If it is working, you should see the datalabel change. If it is working, you should see the data label change (but probablyvery slowly).
App Inventor IoT: Temperature Sensor This tutorial will help you connect App Inventor IoT with a temperature sensor on an Arduino 101 controller. We are also using a Seeed Grove shield for this tutorial. You do not need to use this board, but it does make things easier. The temperature sensor we recommend is the Grove temperature & humidity .