Transcription
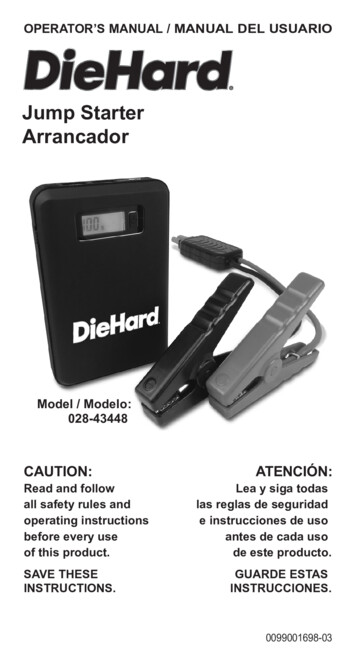
OPERATOR’S MANUAL / MANUAL DEL USUARIOJump StarterArrancadorModel / Modelo:028-43448CAUTION:Read and followall safety rules andoperating instructionsbefore every useof this product.SAVE THESEINSTRUCTIONS.ATENCIÓN:Lea y siga todaslas reglas de seguridade instrucciones de usoantes de cada usode este producto.GUARDE ESTASINSTRUCCIONES.0099001698-03
DIEHARD LIMITED WARRANTYFOR ONE YEAR from the date of sale, this product is warrantedagainst defects in material or workmanship when it is operatedaccording to all supplied instructions.WITH PROOF OF SALE, return a defective productto the retailer from which it was purchased for free replacement.This warranty is void if this product is ever used while providingcommercial services or if rented to another person.This warranty gives you specific legal rights, and you mayalso have other rights which vary from state to state.Schumacher Electric Corporation, Mount Prospect, IL 60056FOR CUSTOMER ASSISTANCE OR REPLACEMENT PARTS,CALL 1-800-621-5485 TOLL-FREEDieHard is a registered trademark of KCD IP, LLC,in the United States, and Sears Brands, LLC in other countries,used under license.GARANTÍA LIMITADA DIEHARDDURANTE UN AÑO desde la fecha de venta,este producto está garantizado contra defectosde materiales o mano de obra cuando se operade acuerdo a las instrucciones provistas.CON EL COMPROBANTE DE VENTA, devolver unproducto defectuoso a la tienda donde fue compradopara el reemplazo gratuito.Esta garantía no es válida si el producto se utilizaen cualquier momento durante la prestación de servicioscomerciales o si se alquila a otra persona.Esta garantía le otorga derechos legales específicos, asícomo otros derechos, que varían de estado a estado.Schumacher Electric Corporation, Mount Prospect, IL 60056PARA ASISTENCIA AL CLIENTE O REPUESTOS,LLAME GRATIS: 1-800-621-5485DieHard es una marca registrada de KCD IP, LLC,en los Estados Unidos de América, y Sears Brands, LLCen otros países, usada bajo licencia.
1. IMPORTANT SAFETY INSTRUCTIONSSAVE THESE INSTRUCTIONS.WARNING – RISK OF EXPLOSIVE GASES.WORKING IN THE VICINITY OF A LEAD-ACID BATTERY ISDANGEROUS. BATTERIES GENERATE EXPLOSIVE GASESDURING NORMAL OPERATION. IT IS IMPORTANT THAT YOUFOLLOW THESE INSTRUCTIONS EACH TIME YOU USE THE UNIT.To reduce the risk of battery explosion, follow these instructions andthose published by the battery manufacturer and the manufacturerof any equipment you intend to use in the vicinity of a battery.Review cautionary markings on these products and on the engine.WARNING! RISK OF ELECTRIC SHOCK OR FIRE.1.1 Read the entire manual before using this product. Failure to do socould result in serious injury or death.1.2 Keep out of reach of children.1.3 Do not put fingers or hands into any of the unit’s outlets.1.4 Do not expose the unit to rain or snow.1.5 Use only recommended attachments. Use of an attachment notrecommended or sold by the manufacturer of the 028-43448 may resultin a risk of fire, electric shock or injury to persons or damage to property.1.6 To reduce the risk of damage to the electric plug or cord, pull by theadaptor rather than the cord when disconnecting the unit.1.7 Do not operate the unit with damaged cables or clamps.1.8 Do not operate the unit if it has received a sharp blow, been dropped orotherwise damaged in any way; take it to a qualified service person.1.9 Do not disassemble the unit; take it to a qualified service person whenservice or repair is required. Incorrect reassembly may result in a risk offire or electric shock.WARNING! RISK OF EXPLOSIVE GASES.1.10 To reduce the risk of a battery explosion, follow these instructions andthose published by the battery manufacturer and the manufacturer ofany equipment you intend to use in the vicinity of the battery. Reviewthe cautionary markings on these products and on the engine.1.11 Do not set the unit on flammable materials, such as carpeting,upholstery, paper, cardboard, etc.1.12 Never place the unit directly above battery being jumped.1.13 Do not use the unit to jump start a vehicle while charging the internal battery. 3
2. PERSONAL PRECAUTIONSWARNING! RISK OF EXPLOSIVE GASES. A SPARK NEAR THEBATTERY MAY CAUSE A BATTERY EXPLOSION. TO REDUCE THERISK OF A SPARK NEAR THE BATTERY:2.1 NEVER smoke or allow a spark or flame in the vicinity of a battery or engine.2.2 Remove personal metal items such as rings, bracelets, necklaces andwatches when working with a lead-acid battery. A lead-acid batterycan produce a short-circuit current high enough to weld a ring tometal, causing a severe burn.2.3 Be extra cautious, to reduce the risk of dropping a metal tool onto thebattery. It might spark or short-circuit the battery or other electricalpart that may cause an explosion.2.4 Do not permit the internal battery of the unit to freeze. Never charge afrozen battery.2.5 To prevent sparking, NEVER allow clamps to touch together orcontact the same piece of metal.2.6 Consider having someone nearby to come to your aid when you worknear a lead-acid battery.2.7 Have plenty of fresh water, soap and baking soda nearby for use, incase battery acid contacts your eyes, skin, or clothing.2.8 Wear complete eye and body protection, including safety goggles andprotective clothing. Avoid touching your eyes while working near thebattery.2.9 If battery acid contacts your skin or clothing, immediately washthe area with soap and water. If acid enters your eye, immediatelyflood the eye with cold running water for at least 10 minutes and getmedical attention right away.2.10 If battery acid is accidentally swallowed, drink milk, the whites of eggsor water. DO NOT induce vomiting. Seek medical attention immediately.2.11 Neutralize any acid spills thoroughly with baking soda before attemptingto clean up.2.12 This product contains a lithium ion battery. In case of fire, youmay use water, a foam extinguisher, Halon, CO2, ABC dry chemical,powdered graphite, copper powder or soda (sodium carbonate)to extinguish the fire. Once the fire is extinguished, douse theproduct with water, an aqueous-based extinguishing agent, or othernonalcoholic liquids to cool the product and prevent the battery fromre-igniting. NEVER attempt to pick up or move a hot, smoking, orburning product, as you may be injured. 4
3. PREPARING TO USE THE UNIT3.13.23.33.4WARNING! RISK OF CONTACT WITH BATTERY ACID. BATTERYACID IS A HIGHLY CORROSIVE SULFURIC ACID.Make sure the area around the battery is well ventilated while the unitis in use.Clean the battery terminals before using the jump starter. Duringcleaning, keep airborne corrosion from coming into contact with youreyes, nose and mouth. Use baking soda and water to neutralize thebattery acid and help eliminate airborne corrosion. Do not touch youreyes, nose or mouth.Determine the voltage of the battery by referring to the vehicleowner’s manual and make sure that the output voltage is 12V.Make sure that the unit’s cable clamps make tight connections.4. FOLLOW THESE STEPS WHEN CONNECTING TO A BATTERY4.14.24.34.44.54.64.74.8WARNING! A SPARK NEAR THE BATTERY MAY CAUSE A BATTERYEXPLOSION. TO REDUCE THE RISK OF A SPARK NEAR THE BATTERY:Plug the clamps into the unit, and then attach the output cables tothe battery and chassis as indicated below. Never allow the outputclamps to touch each other.Position the DC cables to reduce the risk of damage by the hood, doorand moving or hot engine parts. NOTE: If it is necessary to close the hoodduring the jump starting process, ensure that the hood does not touch themetal part of the battery clips or cut the insulation of the cables.Stay clear of fan blades, belts, pulleys and other parts that can cause injury.Check the polarity of the battery posts. The POSITIVE (POS, P, ) batterypost usually has a larger diameter than the NEGATIVE (NEG, N, -) post.Determine which post of the battery is grounded (connected) to thechassis. If the negative post is grounded to the chassis (as in mostvehicles), see step 4.6. If the positive post is grounded to the chassis,see step 4.7.For a negative-grounded vehicle, connect the POSITIVE (RED) clampfrom the jump starter to the POSITIVE (POS, P, ) ungrounded postof the battery. Connect the NEGATIVE (BLACK) clamp to the vehiclechassis or engine block away from the battery. Do not connect theclamp to the carburetor, fuel lines or sheet-metal body parts. Connectto a heavy gauge metal part of the frame or engine block.For a positive-grounded vehicle, connect the NEGATIVE (BLACK)clamp from the jump starter to the NEGATIVE (NEG, N, -) ungroundedpost of the battery. Connect the POSITIVE (RED) clamp to the vehiclechassis or engine block away from the battery. Do not connect theclamp to the carburetor, fuel lines or sheet-metal body parts. Connect toa heavy gauge metal part of the frame or engine block.When finished using the jump starter, remove the clamp from the vehiclechassis and then remove the clamp from the battery terminal. Disconnectthe clamps from the unit. 5
5. FEATURES4839101176212511. 028-434482. Micro USB-USBcharging cable3. Carrying case4. Green and redsmart cable LEDs5. Battery clampswith smart cable6. LCD display7. ON/OFF switch8. Micro USB input portfor recharging9. USB port – 2.1A10. USB port – 1A11. Jump start output socket12. Display ON/OFF button13. LED light (on back)6. CHARGING THE JUMP STARTER6.11.2.3.6.21.2.IMPORTANT! CHARGE IMMEDIATELY AFTER PURCHASE,AFTER EACH USE AND EVERY 30 DAYS, OR WHEN THECHARGE LEVEL FALLS BELOW 85%, TO KEEP THE INTERNALBATTERY FULLY CHARGED AND PROLONG BATTERY LIFE.CHECKING THE LEVEL OF THE INTERNAL BATTERYSlide the ON/OFF switch to the ON position. The LCD display will showthe battery’s percentage of charge. A fully charged internal battery will read100%. Charge the internal battery if the display shows it is under 85%.To reduce the risk of electric shock, unplug the unit’s charging cable froma USB or wall charger before attempting any maintenance or cleaning.Simply turning off the controls will not reduce this risk.When charging the internal battery, work in a well ventilated area and donot restrict the ventilation in any way.CHARGING THE INTERNAL BATTERYNOTE: Use a 2A USB charger (sold separately), or a 2A USBcharging port to quickly recharge the jump starter. Using a chargerwith less than 2A will increase charge time.Plug the Micro USB end of the charging cable into the input port. Next,plug the USB end of the charging cable into a charger’s USB port.Plug your charger into a live AC or DC power outlet. 6
3. The LCD display will light, the digit begins to flash and show “IN”, indicatingthat charging has begun.4. The jump starter will fully charge in 2-3 hours. When the unit is fullycharged, the display will show “100%”.5. When the battery is fully charged, disconnect your charger from theoutlet, and then remove the charging cable from the charger and theunit. Slide the ON/OFF switch to the OFF position, if you are not usingthe unit immediately.6. Charge the unit as soon as possible after use.7. OPERATING INSTRUCTIONS7.1 JUMP STARTING A VEHICLE ENGINEIMPORTANT: Do not use the jump starter while charging its internal battery.IMPORTANT: Using the jump starter without a battery installed in thevehicle will damage the vehicle’s electrical system.NOTE: The internal battery must have a charge if at least 40% tojump start a vehicle.1. Turn the ignition OFF.2. Plug the battery clamp cable into the jump starter’s output socket.3. Lay the DC cables away from any fan blades, belts, pulleys and othermoving parts. Make sure all of the vehicle’s electrical devices are turned off.4. For a negative-grounded vehicle, connect the POSITIVE (RED) clampfrom the jump starter to the POSITIVE (POS, P, ) ungrounded postof the battery. Connect the NEGATIVE (BLACK) clamp to the vehiclechassis or engine block away from the battery. Do not connect theclamp to the carburetor, fuel lines or sheet-metal body parts. Connectto a heavy gauge metal part of the frame or engine block.5. For a positive-grounded vehicle, connect the NEGATIVE (BLACK)clamp from the jump starter to the NEGATIVE (NEG, N, -) ungroundedpost of the battery. Connect the POSITIVE (RED) clamp to the vehiclechassis or engine block away from the battery. Do not connect theclamp to the carburetor, fuel lines or sheet-metal body parts. Connect toa heavy gauge metal part of the frame or engine block.6. Slide the ON/OFF switch to the ON position. The green LED on the smartcable should light.NOTE: If the vehicle battery is extremely discharged, the initial currentdraw from the jump starter may activate short circuit protection in thesmart cable. When the condition is corrected, the smart cable willautomatically reset.7. After a proper connection has been made, crank the engine. If the enginedoes not start within 5-8 seconds, stop cranking and wait at least 1 minutebefore attempting to start the vehicle again.NOTE: If the car does not crank a second time, check the smart cableto see if the green LED is lit. If an LED is flashing, refer to section 10,Troubleshooting, and note which error code is in effect. When thecondition is corrected, the smart cable will automatically reset.NOTE: Cold weather may affect the performance of the jump starter’slithium battery. If you hear only a click and the engine does not turnover, try the following: 7
8.9.7.21.2.3.4.5.7.31.2.3.4.5.6.With the jump starter connected to the car battery and the green LEDilluminated on the smart cable, turn on all lights and electrical accessories forone minute. This draws current from the jump starter and warms the battery.Now try to crank the engine. If it does not turn over, repeat the procedure.Extremely cold weather may require two or three battery warmings beforethe engine will start.IMPORTANT: DO NOT attempt to jump start your vehicle morethan three consecutive times. If the vehicle will not start after threeattempts, consult a service technician.After the engine starts, disconnect the black clamp (-) and the redclamp ( ), in that o
Jump Starter Arrancador OPERATOR’S MANUAL / MANUAL DEL USUARIO Model / Modelo: 028-43448 CAUTION: Read and follow all safety rules and operating instructions before every use of this product. SAVE THESE INSTRUCTIONS. ATENCIÓN: Lea y siga todas las reglas de seguridad e instrucciones de uso antes de cada uso de este producto. GUARDE ESTAS INSTRUCCIONES.
