Transcription
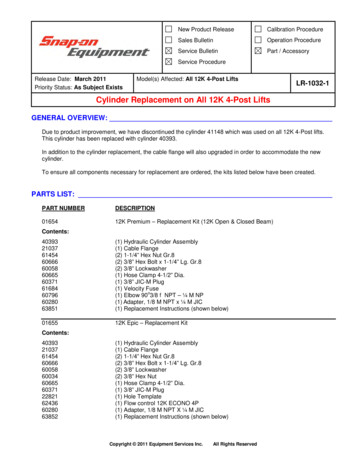
New Product ReleaseCalibration ProcedureSales BulletinOperation ProcedureService BulletinPart / AccessoryService ProcedureRelease Date: March 2011Priority Status: As Subject ExistsModel(s) Affected: All 12K 4-Post LiftsLR-1032-1Cylinder Replacement on All 12K 4-Post LiftsGENERAL OVERVIEW:Due to product improvement, we have discontinued the cylinder 41148 which was used on all 12K 4-Post lifts.This cylinder has been replaced with cylinder 40393.In addition to the cylinder replacement, the cable flange will also upgraded in order to accommodate the newcylinder.To ensure all components necessary for replacement are ordered, the kits listed below have been created.PARTS LIST:PART NUMBERDESCRIPTION0165412K Premium – Replacement Kit (12K Open & Closed 1684607966028063851(1) Hydraulic Cylinder Assembly(1) Cable Flange(2) 1-1/4” Hex Nut Gr.8(2) 3/8” Hex Bolt x 1-1/4” Lg. Gr.8(2) 3/8” Lockwasher(1) Hose Clamp 4-1/2” Dia.(1) 3/8” JIC-M Plug(1) Velocity Fuseo(1) Elbow 90 3/8 f NPT – ¼ M NP(1) Adapter, 1/8 M NPT x ¼ M JIC(1) Replacement Instructions (shown below)0165512K Epic – Replacement 7122821624366028063852(1) Hydraulic Cylinder Assembly(1) Cable Flange(2) 1-1/4” Hex Nut Gr.8(2) 3/8” Hex Bolt x 1-1/4” Lg. Gr.8(2) 3/8” Lockwasher(2) 3/8” Hex Nut(1) Hose Clamp 4-1/2” Dia.(1) 3/8” JIC-M Plug(1) Hole Template(1) Flow control 12K ECONO 4P(1) Adapter, 1/8 M NPT X ¼ M JIC(1) Replacement Instructions (shown below)Copyright 2011 Equipment Services Inc.All Rights Reserved
LR-1032-1Page 2 of 9March, 2011KIT 01654 -12K 4-POST CYLINDER REPLACEMENT – OPEN & CLOSED BEAMThe purpose of this kit is to replace the 12K Cylinder and Cable flange on all 12K Open and Closed Beam 4-Post lifts.This kit included the following: (1) Assembly hydraulic cylinder(1) Velocity fuse(1) Elbow 90 degree 3/8 F NPT – ¼ M NPT(1) Adapter, 1/8 M NPT X ¼ M JIC(1) Cable Flange(2) 1-1/4” Hex Nut(2) 3/8” Hex Bolt x 1-1/4” Lg(2) 3/8” Lock washer(1) Cable Clamp(1) 3/8” Plastic PlugRefer to the installation and operation manual shipped with the lift, for the full installation procedure.WARNING:Lift should be raised to a height which can be supported by auxiliary stands. The stands mustbe placed at the front and back of both runways ensuring contact will be with the traverse beams.Lower the lift onto the auxiliary stands. Ensure that lift is properly supported on the axle stands.Removal of ComponentsRemove the cable clamp and unhook all wire ropes. Unscrew and remove the 1” hex nuts on the cylinder rod andremove the cable flange.Disconnect the end of the hydraulic hose attached to the cylinder. Insert the 3/8” plastic plug provided in kit to the endof the hydraulic hose. Unbolt the cylinder from the mount and remove the hydraulic cylinder from the liftInstallation of New Components ( fittings elbows and velocity fuse)Install new components 61684 Velocity fuse, 60796 Elbow 90 degree, 60280 Adapter in cylinder where it is shown asshown in Figure 2.NOTE: Apply teflon tape on the NPT fitting that installs into the cylinder. See figure 2Figure 1Copyright 2011 Equipment Services Inc.All Rights Reserved
LR-1032-1Page 3 of 9March, 2011Figure 2Remove the plastic plug from the end of the hydraulic hose and attach the hose on the new cylinder, do not overtighten.NOTE: The cylinder rod must be extended in order to install the non-threaded end of the cables to the cable flange onthe rod.Remove the breather plug at the base of the hydraulic cylinder. Use an air chuck and blow air into the breather hole inthe base of the cylinder to extend the rod. As shown in figure 3Copyright 2011 Equipment Services Inc.All Rights Reserved
LR-1032-1Page 4 of 9March, 2011Figure 3Install 60280 adapter. As shown in Figure 4Figure 4NOTE: As the rod extends oil from the cylinder returns to the powerpack. The release handle on the powerpackneeds to be held down (open) to allow oil to return to the powerpack.Continue to extend the rod until the non-threaded ends of the wire ropes are reached.Install the cable flange onto the cylinder rod with the counterbores facing towards the hydraulic cylinder.Install the cables as shown in the, Cable and Routing Diagram in the Installation ManualInstall and tighten the hose clamp on the cable flange to secure all the wire ropes. Ensure that the two retaining nutsare positioned as shown. Use two wrenches to lock the retaining nuts against each other.Copyright 2011 Equipment Services Inc.All Rights Reserved
LR-1032-1Page 5 of 9March, 2011NOTE: The decks will need to be leveled and wire ropes will need to be adjusted. Please refer to “Leveling Procedure– Cables and leveling procedure safety ladder” in the installation manual, for the full procedure.Copyright 2011 Equipment Services Inc.All Rights Reserved
LR-1032-1Page 6 of 9March, 2011KIT #0-1655: 12K 4-POST CYLINDER REPLACEMENT – EPICScope:The purpose of this kit is to replace the 12K Cylinder and Cable flange on 12K Epic 4-Post lifts.This kit included the following: (1) Hydraulic Cylinder Assembly (1) Flow control 12K Econo (1) Adapter 1/8 M NPT (1) Cable Flange (2) 1-1/4” Hex Nut (2) 3/8” Hex Bolt x 1-1/4” Lg. (2) 3/8” Lockwasher (1) Cable Clamp (1) 3/8” Plastic Plug (1) Hole template (2) 3/8” Hex Nut (2) SHCS, 3/8”-16UNC x 1-1/2” Lg.Not included in kit – required for installation: 1-5/8” Hole Saw Lubrication for drilling / sawingRefer to the installation and operation manual shipped with the lift, for the full installation procedure.WARNING:Lift should be raised to a height which can be supported by auxiliary stands. The standsmust be placed at the front and back of both runways ensuring contact will be with the traversebeams. Lower the lift onto the auxiliary stands. Ensure that lift is properly supported on the axlestands.Removal of ComponentsRemove the cable clamp and unhook all wire ropes. Unscrew and remove the 1” hex nuts on the cylinder rod andremove the cable flange.Disconnect the end of the hydraulic hose attached to the cylinder. Insert the 3/8” plastic plug provided in kit to the endof the hydraulic hose. Unbolt the cylinder from the mount and remove the hydraulic cylinder from the liftRework of Cylinder Mount ( If required)NOTE: Newer lifts will already have the correct holes in the cylinder mount to fit the larger cylinder and rotate theofitting to the 45 position shown in Figure 1. If this is the case , the cylinder mount does not be to be reworked.Bolt the hole template provided in the kit into place on the cylinder mount, using the 3/8” bolts just removed, alongwith the 3/8” nuts provided in the kit. Follow figure 1 to orient the drilling template.Copyright 2011 Equipment Services Inc.All Rights Reserved
LR-1032-1Page 7 of 9March, 2011Figure 11. Using the 1-5/8” Hole saw and lubrication enlarge the hole in the cylinder mount to the size of the template.Deburr any rough edges and remove the template.2. Drill 2 13/32 “ holes on the 45o3. Remove the 3/8 bolts and remove the hole template.Installation of New Components1. Apply Teflon tape to the NPT side of the flow control that installs into the cylinder2. Connect the flow control to the hydraulic cylinder.3. Remove the plastic plug from the end of the hydraulic hose and attach to the flow restrictor on the newcylinder. Do not over tighten.NOTE: The cylinder rod must be extended in order to install the non-threaded end of the cables to the cable flange onthe rod.4. Remove the breather plug ( Figure 2) at the base of the hydraulic cylinder. Use an air chuck and blow air intothe breather hole in the base of the cylinder to extend the rod.Copyright 2011 Equipment Services Inc.All Rights Reserved
LR-1032-1Page 8 of 9March, 2011Figure 2NOTE: As the rod extends oil from the cylinder returns to the powerpack. The release handle on the powerpackneeds to be held down (open) to allow oil to return to the powerpack.5. Continue to extend the rod until the non-threaded ends of the cables are reached.6. Install the 60280 adaptor ( Figure 3)Figure 3NOTE: Apply teflon tape on fittings before installing. Figure 4Copyright 2011 Equipment Services Inc.All Rights Reserved
LR-1032-1Page 9 of 9March, 2011Figure 4o7. Use the new 3/8” bolts attach the cylinder to the runway in the new 45 holes drilled earlier.8. Install the cable flange onto the cylinder rod with the counterbores facing towards the hydraulic cylinder.9. Install the cables as shown in the, Cable and Routing Diagram in the Installation Manual10. Install and tighten the hose clamp on the cable flange to secure all the cables. Ensure that the two retainingnuts are positioned as shown ( Figure 5). Use two wrenches to lock the retaining nuts against each other.Figure 5NOTE: The decks will need to be leveled and the cables will need to be adjusted. Please refer to, “LevelingProcedure – Cables” and “Leveling procedure safety ladders” in the installation manual, for the full procedure.Copyright 2011 Equipment Services Inc.All Rights Reserved
This kit included the following: (1) Assembly hydraulic cylinder (1) Velocity fuse (1) Elbow 90 degree 3/8 F NPT - ¼ M NPT (1) Adapter, 1/8 M NPT X ¼ M JIC (1) Cable Flange (2) 1-1/4" Hex Nut (2) 3/8" Hex Bolt x 1-1/4" Lg (2) 3/8" Lock washer (1) Cable Clamp (1) 3/8" Plastic Plug