Transcription
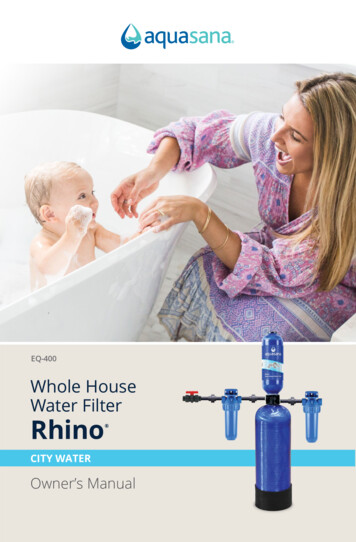
Whole HouseRhino Filter REPLACEMENTOwner’s Manual
21BEFORE INSTALLINGSafety Precautions DO NOT install this filter where the line pressure may exceed 100 psi.The operating pressure range for this filter is between 20psi – 100psi. Install on cold water lines only (40 – 90 F). Installation of the filtration system must comply with existing state andlocal plumbing codes. Aquasana and its manufacturer are not liable forconsequential or incidental damages due to improper installation. DO NOT install the unit on its side. It must be installed uprightto maximize contact with media bed. NSF certified plumber's tape (thread sealing tape) is the only sealerthat can be used on threaded fittings. DO NOT use pipe dope or PVCprimer/glue on threaded fittings. Exposure to these compounds willdamage nipples causing leaks.CleaningThe exterior of your filtration system can be cleaned with warm, soapywater. Rinse well with fresh, clean water.A Pre-Filter is included with your system. Sediment levels vary from onelocation to another. It is recommended to replace your Pre-Filter every2 months. If the flow rate has noticeably decreased, replace your filtercartridge sooner.NOTE: Never use chemical cleaning products on thesystem’s exterior surface as they may damage the housing.
INSTALLATION STEPS1Pre-Condition Rhino TankNOTE: It’s imperative that this system is flushed properly prior to finalinstallation. The granular carbon used in the bottom tank contains 1-2% byvolume of carbon fines that must be flushed out prior to use. Surge flushingis the best method for purging these carbon fines from the media bed.1. Once out of the box, keep the tank upright at all times as to notapply pressure to divider. Remove shipping caps from inlet andoutlet ports. Using supplied adapter, connect a garden hose tothe inlet port so the water will flow into the system and out ofthe outlet port.2. Slowly turn faucet on and allow discolored water to flow fromoutlet into a suitable drainage area. The first few gallons willappear black and cloudy due to carbon fines.TIP: You may need to slightly shake the tank to help remove carbon fines.3. After an initial 15-minute flushing, begin a period of “surgeflushing” by turning water supply on for 30 seconds and thenoff for 30 seconds, repeating cycle for 15 minutes or until initialsurge of water is completely clear and free from discolorationand cloudiness.4. Disconnect the system from the garden hose, be sure the whitewashers are properly set inside the inlet and outlet ports, andposition the system for installation.2
23INSTALLATION STEPS2Shut Off Water Supply1. Turn off the main water source prior to tank replacement or turn offthe shut-off valve.2. Drain water from lines to relieve pressure by turning on a faucet insideyour home. If using your bypass valve, shut off both sides of the bypassvalve. When using this method, you do not need to drain water fromthe lines.WARNINGELECTRICAL SHOCK HAZARDIf you have copper pipes - leave your grounding clamps installed. Do not disconnect at any time whilechanging the tank. Failure to follow this instruction can result in death or electric shock.3Remove Tank from System1. Loosen the unions on both sidesof the Rhino Tank. Slide the entiretank (pipe nippes and halves ofunions included) away from thesystem.2. Unscrew the pipe nipplesfrom the tank.3. Dispose of the old RhinoTank properly.4Reconnect Fittings1. Clean the threads on the pipe nippes andre-apply new NSF certified plumbers tape.2. Connect pipe nipples to your newRhino tank.1122
2INSTALLATION STEPS5Plumb In New Rhino TankSlide the new tank back into the system and re-attach the unions.6Final System CheckAfter plumbing the new Rhino Tank back into the system, slowlyturn the water back on. If you used a bypass system, return bothbypass valves into the on position. Inspect the system for leaks.After inspecting for leaks, turn on the faucet closest to theinstalled unit and allow water to run for 5-10 minutes for thefinal flushing period.4
RHINO WATER FILTERLIMITED WARRANTYWho is coveredAQUASANA AND ITS SUPPLIERS, (herein collectively referred to as “Manufacturer”) warrantsto the owner of the home where the water filter is initially installed (hereinafter “Owner”).The warranty is restricted to the water filter used in a single-family residence in the UnitedStates of America and is void if moved from the original installation location.What is coveredThis Warranty covers defects in materials or workmanship during the limited warranty periodof your of your Aquasana Rhino Whole House Filtration System including sub-componentspurchased with original system (may or may not include pre-filter, post-filter, and fittings),except as provided below. The water filter is warranted only when it is installed, operatedand maintained in accordance with the instructions accompanying the water filter found onAquasana.com. A water filter should be installed in such a manner that, if the tank or anyconnection thereto should leak, the resulting flow of water will not cause damage to the areain which it is installed. For detailed instructions read the manual accompanying the water filterand review drawings in the manual.For how longThis warranty runs for months specified in chart below from the date of purchase by aconsumer (herinafter "Warranty Period"). No warranty coverage will be provided if the claimantis unable to provide proof of purchase. Water conditions and use rates may limit the functionallifespan of your filter. This Limited Warranty does not extend to the full estimated life span ofthe filter.What Aquasana will do1. If necessary, the Manufacturer will provide a replacement that fulfills the remainingestimated lifespan/capacity (see chart) of your original purchase and send it to youwith installation instructions. If industry standards, product improvements or productobsolescence prohibit Manufacturer from furnishing an identical model replacement waterfilter under this warranty, the Owner will be furnished with a new water filter of comparableremaining capacity and functionality; however, the Owner will be charged for the additionalvalue of the item(s) which Manufacturer has incorporated in the replacement water filter.RHINO SYSTEM WARRANTY COVERAGEModelLifespan/CapacityEQ-3003 Years / 300,000 GallonsEQ-4004 Years / 400,000 GallonsEQ-6006 Years / 600,000 GallonsEQ-100010 Years / 1,000,000 GallonsEQ-AST-WH / EQ-AST-WH-C6 Years / 600,000 GallonsEQ-WELL-UV5 Years / 500,000 GallonsInstallation Kit(includes pre-filter, post-filter, and fittingspurchased with original system)1 YearThis warranty does not include the UV FIlter. See full warranty information for the UV Filter in the original UV manual.
2. Component Part – If any component part proves to Manufacturer’s satisfaction to bedefective in material or workmanship within the warranty period listed on the dataplate label, the Manufacturer will furnish the Owner with a replacement for thedefective part(s).3. Return of Defective Water Filter and Component Parts – Manufacturer reserves the rightto examine the alleged defect in the water filter or component part(s), and it will be theOwner’s obligation to return the water filter and/or component part(s) to the Manufacturerat the Manufacturers request.a. When returning a water filter, it must include all component parts.b. W hen returning component part(s), they must be individually tagged and identified withthe water filter’s model number, date of purchase, and date of installation.What is not covered1. This warranty does not cover filter cartridges and any systems that were not installedin compliance with the instructions or that have been abused or operated incorrectly.2. The Limited Warranty stated herein is in lieu of any and all warranties, express orimplied (whether written or oral), including, but not limited to, the implied warrantiesof merchantability and fitness for a particular purpose.3. Manufacturer shall not be liable for any incidental, consequential, special, or contingentdamages or expenses, arising, directly or indirectly, from any defect in the water filter or theuse of the water filter.4. Manufacturer shall not be liable for any water damage arising, directly or indirectly, fromany defect in the water filter or component part(s) or from its use.5. Manufacturer shall not be liable for any damage or product failures caused by any of thefollowing: The water filter or any of its component parts have been subject to misuse, alteration,neglect or accident. The water filter has not been installed in accordance with the applicable localplumbing and/or building code(s) and/or regulations or in their absence. The water filter is not installed, operated and maintained in accordance with the printedManufacturer’s instructions, including if the water filter has any additional aftermarketequipment introduced into the sealed system not approved by the manufacturer. The water filter is exposed to highly corrosive conditions. The water filter is not continuously supplied with potable water. The water filter is not operated within the factory calibrated temperature limits. The water filter is removed from its original installation location. The water filter is installed in direct sunlight or exposed to freezing temperatures. The water filter or any of its component parts fail due to iron or sediment build-up. Clogging due to purchaser’s failure to replace the Pre-Filter cartridge. Damage caused by fire, flood or acts of God. Damage caused by over-pressurization in the water line.
6. This warranty does not cover damage caused by the use of parts that are not genuineAquasana parts. This includes, but is not limited to replacement filters, faucets, and/ordiverter valves.7. Except when specifically prohibited by the applicable state law, the Owner, and not theManufacturer, shall be liable for and shall pay for all charges for labor or other expensesincurred in the removal, repair or replacement of the water filter or any componentpart(s) claimed to be defective or any expense incurred to remedy any defect in theproduct. Such charges may include, but are not necessarily limited to:a. All freight, shipping, handling and delivery costs of forwarding a new water filter orreplacement part(s) to the owner.b. All costs necessary or incidental in removing the water filter or component part(s) andinstalling a new water filter or component part(s).c. Any material required to complete, and/or permits required for, installation of a newwater filter or replacement part(s), andd. All costs necessary or incidental in returning the water filter or component part(s) to alocation designated by the manufacturer.How to get serviceTo receive service under this Warranty, you must contact Aquasana (A. O. Smith WaterTreatment (North America), Inc.) at 1-866-662-6885 or warranty@aquasana.com within theWarranty Period to describe the problem to a customer service representative who willverify that the product is under warranty and determine whether a part or the system willbe replaced and whether you must send back the unit. You will be required to provide proofof purchase and proof of proper installation.
2Replace your filters on time, without worry — auto-deliveredto you, for less.It’s important to change your filters using genuine Aquasana replacements forcontinued water filtration and optimum system performance. This is why we offerour no contract, auto-ship filter replacement program called Water for Life .Free ShippingReplacements shipped directly t o you, rightwhen you need t hem, at no extra cost.Discount ReplacementsLock in a 15% discount o n filters toensure you always g et the best price.Extended WarrantyOur performance promise to you –free replacement parts, just in case.No ContractReplacing your filters is serious – but your commitment d oesn’t have to be.CONTACT US TO LEARN MORE866-662-6885waterforlife@aquasana.com
LOVE IT?NEED HELP?Let us know with areview on Amazon.866-662-6885 andGive us a call attell us what's going on.Aquasana, Inc.6310 Midway RoadHaltom City, Texas 76117866.662.6885 USA877.332.7873 Canadawww.aquasana.comRHINO-REPLACEMENT OM 011921
23 INSTALLATION STEPS Remove Tank from System 1. Loosen the unions on both sides of the Rhino Tank. Slide the entire tank (pipe nippes and halves of unions included) away from the system. 2. Unscrew the pipe nipples from the tank. 3. Dispose of the old Rhino Tank properly. Reconnect Fittings 1. Clean the threads on the pipe nippes and

