Transcription
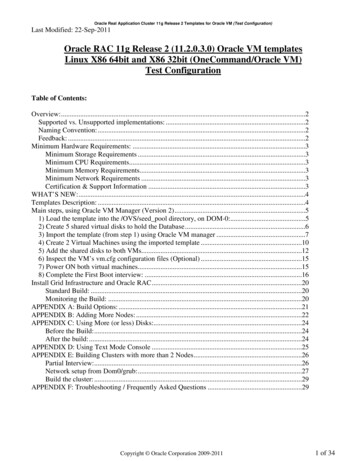
Oracle Real Application Cluster 11g Release 2 Templates for Oracle VM (Test Configuration)Last Modified: 22-Sep-2011Oracle RAC 11g Release 2 (11.2.0.3.0) Oracle VM templatesLinux X86 64bit and X86 32bit (OneCommand/Oracle VM)Test ConfigurationTable of Contents:Overview:.2Supported vs. Unsupported implementations: .2Naming Convention:.2Feedback: .2Minimum Hardware Requirements: .3Minimum Storage Requirements .3Minimum CPU Requirements.3Minimum Memory Requirements.3Minimum Network Requirements .3Certification & Support Information .3WHAT’S NEW:.4Templates Description: .4Main steps, using Oracle VM Manager (Version 2).51) Load the template into the /OVS/seed pool directory, on DOM-0:.52) Create 5 shared virtual disks to hold the Database.63) Import the template (from step 1) using Oracle VM manager .74) Create 2 Virtual Machines using the imported template .105) Add the shared disks to both VMs.126) Inspect the VM’s vm.cfg configuration files (Optional) .157) Power ON both virtual machines.158) Complete the First Boot interview: .16Install Grid Infrastructure and Oracle RAC.20Standard Build: .20Monitoring the Build: .20APPENDIX A: Build Options: .21APPENDIX B: Adding More Nodes: .22APPENDIX C: Using More (or less) Disks:.24Before the Build:.24After the build:.24APPENDIX D: Using Text Mode Console .25APPENDIX E: Building Clusters with more than 2 Nodes.26Partial Interview:.26Network setup from Dom0/grub:.27Build the cluster: .29APPENDIX F: Troubleshooting / Frequently Asked Questions .29Copyright Oracle Corporation 2009-20111 of 34
Oracle Real Application Cluster 11g Release 2 Templates for Oracle VM (Test Configuration)Overview:This document introduces the Oracle Real Application Clusters 11g Release 2 (11.2.0.3) Oracle VMTemplates. It explains the concepts of the templates and how to use the templates to build Oracle RACclusters. Two separate templates are provided base on: Oracle Linux 5 U7 32bit Linux Oracle Linux 5 U7 64bit LinuxFor the latest version of this document and more information on the benefits of Oracle RAC, Oracle VMand Templates, see OTN at: m/rac-template-11grel2166623.html and Note# 1185244.1 on My Oracle Support.Supported vs. Unsupported implementations:There are 2 separate scenarios for implementation of an Oracle RAC template Production – Supported: where the shared disk is configured as ‘phy’ devices passed through tothe guest Oracle VMs. For more details on running Oracle RAC in Oracle VM environment, pdf Test – Unsupported: where the shared disk is configured as ‘file’ devices – in this configurationboth guests can also run on one Oracle VM server.This document covers the Test (Unsupported) configuration. In test environments you may:a) Run both machines on the same Oracle VM Server (DOM-0)b) Use files in DOM-0 to emulate shared disks for the Oracle RAC Node Dom-UBoth are not allowed in Production environments; however they can be used as a sandbox / demoenvironment for functional testing using Oracle RAC.Naming Convention:This document describes both x86 (32bit) and x86-64 (64bit) environments. Template file & directorynames are as follows:32 bit: OVM OL5U7 X86 11203RAC PVM64 bit: OVM OL5U7 X86 64 11203RAC PVMScreenshots refer to templates as: OVM EL5U4 X86 11GR2RAC PVM, these are generic screenshots,substitute your version number, i.e. 11201, 11202 or 11203 based on release used.Feedback:Feel free to post feedback at the Oracle VM or Oracle RAC Forums on the Oracle Technology Network:Oracle VM: http://forums.oracle.com/forums/forum.jspa?forumID 823Oracle RAC: http://forums.oracle.com/forums/forum.jspa?forumID 62Or contact Oracle Support.NOTE: The Oracle RAC build scripts inside the template (under /u01/racovm directory) are only supportedinside the Oracle VM RAC Templates. Do not modify or run them in other environments.Copyright Oracle Corporation 2009-20112 of 34
Oracle Real Application Cluster 11g Release 2 Templates for Oracle VM (Test Configuration)Minimum Hardware Requirements:When running Oracle RAC in a test environment, as described in this document, all or some of the OracleRAC VM guest machines can run on the same Oracle VM Server. The physical resources required are asfollows:Minimum Storage RequirementsFilesystems that support SPARSE FILES1 reduce the required storage footprint, however due to variousfilesystem settings these numbers might be different (below values are from ext3)No Sparse file supportUnder /OVS:32bit or 64bitseed pool stored template29GBrunning pool image for RAC node129GBrunning pool image for RAC node229GBTotal under /OVS volume (DOM-0)87GBAny other filesystem:Temp space to unpack template2 3.8 3.8GBSparse file support (approx)32bit 64bit8.7GB 9.4GB8.7GB 9.4GB8.7GB 9.4GB26.1GB 28.2GB3.8 3.8GBAdditional space on shared disks to hold database, minimum 5GB.Minimum CPU RequirementsEach VM requires a minimum of 1 physical core, therefore a minimum of 2 physical cores for the hostingserver.Minimum Memory RequirementsEach VM requires a minimum of 1700MB of memory, 2GB or more is recommended, therefore a minimumof 4GB for the hosting server.Minimum Network RequirementsEach Guest requires 2 network devices, which are ‘virtualized’ from physical cards in the hosting server,therefore a minimum of 2 physical NICS for the hosting server. It is also possible, in the test configurationto use the templates with only 1 NIC, by assigning all guests’ NICs to the single bridge (xenbr0) ORcreating a second bridge (xenbr1) on a fake Dom0 NIC (eth1), also known as ‘Host-Only networking’which would disable the live-migration option.A minimum of 5 public IP addresses and 2 private IP addresses. If a DNS Server is used, 2 additional IPaddresses should be used to provide additional IPs for the SCAN name.Certification & Support InformationSee Note# 464754.1 on My Oracle Support for information on Certified Software on Oracle VM.1OCFS2 v1.4.4 bundled with Oracle VM Server 2.2 has sparse file support. Oracle VM Agent has sparse file support startingwith version 2.3-27 (might need to set disk.sparse.ratio 0 in /etc/ovs-agent/agent.ini). Ext3 filesystem has sparse file support.NFS depends if server filesystem supports sparse files or not. Space consumed by sparse files varies by filesystems’ minimumallocation unit often referred to as cluster size.2Template stored in a TGZ file inside a ZIP file hence size is listed twiceCopyright Oracle Corporation 2009-20113 of 34
Oracle Real Application Cluster 11g Release 2 Templates for Oracle VM (Test Configuration)WHAT’S NEW: Upgraded OS to Oracle Linux 5 Update 7Templates Description:These templates allow building clusters of any number of nodes with an Oracle RAC 11g Release 2(11.2.0.3.0) configuration, which includes Oracle Clusterware and ASM (11.2.0.3.0), Oracle Database 11gRelease 2 (11.2.0.3.0).See FAQ section for steps on how to add or remove patches before and/or after template deployment.Full opatch lsinventory output is provided in the zip file so there is no need to boot the VM or build acluster to see the full patch listings for all homes.The entire install is automated, with the user only providing the required input parameters (node names, IPaddresses, etc.) when guests are booted. Fully automated builds directly from Dom0 are also possible,including automated network setup to all VMs. The root password is 'ovsroot', oracle password is 'oracle' and sys/system password is 'oracle', all can bechanged during the build. These passwords should be changed post successful build, see FAQ#12.The OS image contains a minimal install of Oracle Linux 5. Only basic RPM packages are installed.The install is performed using root access. With ssh passwordless login temporarily enabled for root user.At the completion of the install (on both nodes), ssh for root will be disabled.Optionally, the entire install could be done as the Oracle user, provided that ‘sudo’ access is configuredon the first node only.During the installation process an Oracle RAC database instance is created on both nodes. It is possibleto skip this database creation and do software only install.The OS and Oracle image disks inside the template are sparse files (non allocated space is not countedagainst filesystem), meaning the size displayed via ‘ls -l’ is not the actual space consumed on-disk. Tosee actual space consumed use ‘ls -ls’. If /OVS filesystem has no sparse-file support then both sizes willbe the same (all space is allocated upfront).Each template (32bits or 64bits) is delivered as 2 ZIP files ( 3.8GB in size total), inside each ZIP is aTGZ (Tar gzip file, one is split into two parts), with very similar sizes, hence you will need 7.7GB oftemporary storage to fully expand each template. Once the template is imported into /OVS/seed pool,these zip/tgz files can be deleted.Copyright Oracle Corporation 2009-20114 of 34
Oracle Real Application Cluster 11g Release 2 Templates for Oracle VM (Test Configuration)Main steps, using Oracle VM Manager (Version 2)These steps are using Oracle VM Manager, however all of them could be done from the command line,using Oracle VM Command Line Interface (CLI).1) Load the template into the /OVS/seed pool directory, on DOM-0:# cd /tmp# unzip -q /tmp/p12694014 10 LINUX 1of2.zip & (for 64bit use: p12694014 10 Linux-x86-64 1of2.zip)# unzip -q /tmp/p12694014 10 LINUX 2of2.zip & (for 64bit use: p12694014 10 Linux-x86-64 2of2.zip)# wait# cd /OVS/seed pool# tar xzf /tmp/OVM OL5U7 X86 11203RAC PVM-1of2.tgz &# or X86 64 for the 64-bit version# tar xzf /tmp/OVM OL5U7 X86 11203RAC PVM-2of2.tgz &# or X86 64 for the 64-bit version# wait(When the above commands complete, the ZIP & TGZ files may be deleted from /tmp)This will create the following, e.g. on 32bit:/OVS/seed pool/OVM OL5U7 X86 11203RAC PVM(or X86 64 for the 64-bit version) - System.img (OS image file) - Oracle11203RAC x86-xvdb.img (database software image file) - vm.cfg (VM configuration file) - README.txt - These PDF documents - cdb-32bit (or 64bit) - utils (files to help with automated network setup and builds)While this is running, create the shared virtual disks.Copyright Oracle Corporation 2009-20115 of 34
Oracle Real Application Cluster 11g Release 2 Templates for Oracle VM (Test Configuration)2) Create 5 shared virtual disks to hold the DatabaseUsing Oracle VM manager (or any other method) in our example they are named: ASM1, ASM2, ASM3,ASM4, ASM5, you may choose any name you wish. As this is a test environment you can use files visiblein the Dom-0 environment to represent the shared disks. Select Resources- Shared Virtual DisksClick the Create button: Complete the fields on the form Click Next and Confirm on the following page.Repeat this step to create a total of 5 shared disks (Minimum size for each disk is 1024 MB)Copyright Oracle Corporation 2009-20116 of 34
Oracle Real Application Cluster 11g Release 2 Templates for Oracle VM (Test Configuration) When done creating all devices will have an Active status:3) Import the template (from step 1) using Oracle VM managerMake sure all unzipping/untarring operations completed before proceeding with these steps. Click Resources - Virtual Machine TemplatesClick Import buttonThis Oracle VM manager already knows about 2 existing templates. We are going to add a 3rd template.Copyright Oracle Corporation 2009-20117 of 34
Oracle Real Application Cluster 11g Release 2 Templates for Oracle VM (Test Configuration) Select “Select from Server Pool (Discover and register)”, click Next Pull-down the correct “Server Pool Name”Choose the newly untarred template from pulldown “Virtual Machine Template Name” titledOVM OL5U7 X86 11203RAC PVM or OVM OL5U7 X86 64 11203RAC PVM.Select “Oracle Enterprise Linux 5” or “Oracle Enterprise Linux 5 64-bit” for “Operating System”.Optionally enter Description or change username/passwordsClick Next and Confirm on the following page. Template name might be different in screenshot based on release usedCopyright Oracle Corporation 2009-20118 of 34
Oracle Real Application Cluster 11g Release 2 Templates for Oracle VM (Test Configuration) Wait for VM template to change from “Importing” to “Pending” then proceedSelect Pending VM template from radio box, and Click Approve button Template name might be different in screenshot based on release usedClick Approve Template name might be different in screenshot based on release usedThe VM Template is now imported and ready to be deployed as many times as needed.Copyright Oracle Corporation 2009-20119 of 34
Oracle Real Application Cluster 11g Release 2 Templates for Oracle VM (Test Configuration)4) Create 2 Virtual Machines using the imported templateIn our example we name the VMs racnode1 & racnode2, you may choose any name you wish.IMPORTANT – The only non-default item you will need is to change the second NIC to xenbr1 (thefirst NIIC on xenbr0 will automatically be configured, see following page) Select Virtual machinesClick on the Create Virtual Machine button Select the “Create virtual machine based on template” radio buttonClick Next, and select the correct Server Pool on the following page.Copyright Oracle Corporation 2009-201110 of 34
Oracle Real Application Cluster 11g Release 2 Templates for Oracle VM (Test Configuration) Select the Oracle RAC 11g Release 2 (11.2.0.3) template (32bit or 64bit)Click NextNote: Template name might be different in screenshot based on release used IMPORTANT: Assign the second network adapter to xenbr1Enter the Virtual Machine Name: racnode1 (or racnode2 for second node)Enter the password twice – this will be the VNC password for the consoleClick Next and Confirm on the following page.The VM will be built – This will take some time. Repeat this step for the second node.* Do not power up the VMs yet *Copyright Oracle Corporation 2009-201111 of 34
Oracle Real Application Cluster 11g Release 2 Templates for Oracle VM (Test Configuration)5) Add the shared disks to both VMs. Select the Virtual machines tabSelect the radio button for the first guest & Click the Configure button Select the Storage tabClick the Attach/Detach Shared Virtual Disk buttonCopyright Oracle Corporation 2009-201112 of 34
Oracle Real Application Cluster 11g Release 2 Templates for Oracle VM (Test Configuration)The OneCommand for Oracle VM build engine, Oracle RAC or ASM do not require that disks haveidentical names or ordering on all nodes, however, it might be easier for humans to deal with identicalnames and ordering. Therefore it is recommended to add disks in same order with same disk names toall VMs, e.g.; ASM1, ASM2, ASM3, ASM4, ASM5. Move at least 5 shared disks to the guest VM by clicking the appropriate Move buttons Click the OK buttonCopyright Oracle Corporation 2009-201113 of 34
Oracle Real Application Cluster 11g Release 2 Templates for Oracle VM (Test Configuration) Notice disk names: xvdc, xvdd, xvde, xvdf, xvdg. The automated Oracle RAC installprocess inside the templates depends on these exact device names. It is possible to use anydisk names, see Appendix C: Using More Disks. Repeat the attach steps for the second virtual machine in the clusterCopyright Oracle Corporation 2009-201114 of 34
Oracle Real Application Cluster 11g Release 2 Templates for Oracle VM (Test Configuration)6) Inspect the VM’s vm.cfg configuration files (Optional)These can be found on the Oracle VM Server in /OVS/running pool/*racnode1/vm.cfg and/OVS/running pool/*racnode2/vm.cfg. You should see the 5 shared disks which will be presented to theguests as /dev/xvdc /dev/xvdd /dev/xvde /dev/xvdf /dev/xvdg. They can be in any order on both nodes asdescribed in the previous section. You should also be able to spot the 2 NICs, xenbr0 and xenbr1. This is asample vm.cfg file:bootloader '/usr/bin/pygrub'disk ['file:/OVS/running pool/3 racnode1/System.img,xvda,w','file:/OVS/running pool/3 racnode1/Oracle11203RAC sk/ASM5.img,xvdg,w!',]memory '2048'name '3 racnode1'on crash 'restart'on reboot 'restart'uuid 'd98efba4-7445-8459-9326-adae28249200'vcpus 2vfb ['type vnc,vncunused 1,vnclisten 0.0.0.0,vncpasswd oracle']vif ['bridge xenbr0,mac 00:16:3E:5C:AE:24,type netfront','bridge xenbr1,mac 00:16:3E:24:D3:34,type netfront',]vif other config []If anything needs to change, use Oracle VM Manager to do so. Editing the file manually may put the repository out of sync.7) Power ON both virtual machines Select the Virtual Machines tabSelect the radio button for the first nodeClick the Power On button, repeat for second nodeCopyright Oracle Corporation 2009-201115 of 34
Oracle Real Application Cluster 11g Release 2 Templates for Oracle VM (Test Configuration) If the VNC plugin has been configured for Oracle VM manager you can connect to the console byselecting the radio button next to the node and clicking the Console button. Open both consoles.Alternatively, use vncviewer from any PC; First get the ports from Dom0:Dom0 # xm listName3 racnode14 (s)72.468.1Dom0 # xm list -l VM-full name or ID grep locationUse the port that appears on line as “location 0.0.0.0:5901” e.g.: vncviewer ovm server host :5901(substitute your OVM Server node name)A third alternative, for advanced users is described in APPENDIX D: Using Text Mode Console8) Complete the First Boot interview:First Boot is the time when a newly instantiated Guest VM is started for the first time.At this point in time the guest machines are identical – they have no personality e.g. no hostname, no IPaddress etc. First boot adds this personality.The following is displayed on the console of both guests. You must identify which node is going to be themaster; the interactive interview will run on that node. Oracle RAC 11.2.0.3.0 OneCommand for Oracle VM - template configuration (i686) NODE SELECTION Is this the first node in the cluster(YES/NO): []Figure 1Copyright Oracle Corporation 2009-201116 of 34
Oracle Real Application Cluster 11g Release 2 Templates for Oracle VM (Test Configuration)On Node1 Enter: YES(On Node2 Enter: NO)The configuration utility then waits until the NO response has been given on the second node.Node1 Oracle RAC 11.2.0.3.0 OneCommand for Oracle VM - template configuration (i686) NODE SELECTION Is this the first node in the cluster(YES/NO): [YES]IMPORTANT Please answer this question on the other node in the clusterWAITING.Figure 2Go to the Node2 console screenNode2 Oracle RAC 11.2.0.3.0 OneCommand for Oracle VM - template configuration (i686) NODE SELECTION Is this the first node in the cluster(YES/NO): [NO ]WAITING for NODE1 interview phase to be complete!.Figure 3Enter: NOYou may enter the responses in any order. This is all the interaction required on the second node. Allsubsequent configuration steps now take place on the first node.Copyright Oracle Corporation 2009-201117 of 34
Oracle Real Application Cluster 11g Release 2 Templates for Oracle VM (Test Configuration)After completing the node identification steps you must now provide information for first boot to complete.A simple data entry screen is displayed on Node1.Node1NODE DETAILSNODE 1NODE 2 ----------Public Name:[racnode1] [racnode2]Public IP :[10.10.10.200][10.10.10.201]Private Name[racnode1-priv] [racnode2-priv]Private IP :[192.168.1.200 ][192.168.1.201 ]VIP Nodename[racnode1-vip] [racnode2-vip]VIP IP:[10.10.10.202][10.10.10.203]GLOBAL DETAILS Domain Name :[us.oracle.com] DNS Server IP :[]Public Network Adapter Name :[eth0]Public Subnet mask:[255.255.255.0 ]Default Gateway IP:[10.10.10.200]Private Network Adapter Name:[eth1]Private Subnet mask:[255.255.255.0 ]CLUSTER DETAILS Enter the Cluster Name :[rac-cluster]Enter the SCAN name for this cluster :[rac-cluster][10.10.10.204Enter YES to accept the above values, NO to reenter: [YES]]DO YOU WANT TO CONFIGURE THIS CLUSTER YES/NO : YES Figure 4Enter the relevant values, basic user input validation is performed, if you make a mistake – at the reenterprompt enter ‘NO’ to cycle through the interview process.Step 1 & 2: Node1&2 details, use your own machines names / IP addressesBasic IP address and name validation is performed. Node names cannot contain dots (use domainname for that). All Public and VIP IPs must be on same subnet; similarly the Private IPs should beon the same subnet, no duplicate IPs or node names allowed.Step 3: Optionally enter Domain name and DNS Server IP. If no domain name is entered: “localdomain” isused. DNS Server IP is optional. If a DNS Server is specified you must configure the GridInfrastructure SCAN name/IP Addresses within the DNS ServerStep 4: NIC & general network details, use your own network detailsAdapter names must exist and be different from one another, typically they will be eth0 and eth1.Network masks must be in dot notation format, e.g. 255.255.252.0Step 5: Unique Clustername - 1 to 15 alphanumeric or hyphens – no spacesStep 6: The SCAN Name. If a DNS Server IP address was NOT entered previously then an IP Address forthe SCAN will be requested – this should be in the same subnet as the public/VIP networkStep 7: Opportunity to reenter the configuration data and a final chance to exit without savingCopyright Oracle Corporation 2009-201118 of 34
Oracle Real Application Cluster 11g Release 2 Templates for Oracle VM (Test Configuration)When you select YES at the final confirmation prompt you will see this on both VMs as the network fullyconfigures itself as per interview:Node1 and Node2Generating Network Configuration files.Modifying /etc/hostsModifying /etc/resolv.confModifying /etc/sysconfig/networkModifying /etc/sysconfig/network-scripts/ifcfg-eth0Modifying /etc/sysconfig/network-scripts/ifcfg-eth1Shutting down interface eth0:Shutting down interface eth1:Shutting down loopback interface:Bringing up loopback interface:Bringing up interface eth0:Bringing up interface eth1:Shutting down kernel logger:Shutting down system logger:Starting system logger:Starting kernel logger:Shutting down Avahi daemon:Starting Avahi daemon.Starting nscd:Reloading nscd:Template configuration K]]]]]]]]]]]]]]INFO (node:racnode1): Network configuration completed.Oracle Linux Server release 5.6Kernel 2.6.18-238.0.0.0.1.el5xen on an x86 64racnode1 login: rootPassword: ovsrootFigure 5Now login as root with the default password as ovsroot on node 1 only.If for some reason you entered incorrect data (no network between the two nodes) you may redo just thisinterview phase by logging in as root to both machines and invoking: /u01/racovm/netconfig.sh. Do notrun this after the installation of RAC software is complete.Copyright Oracle Corporation 2009-201119 of 34
Oracle Real Application Cluster 11g Release 2 Templates for Oracle VM (Test Configuration)Install Grid Infrastructure and Oracle RACYou have now completed the node preparation phase and the nodes are ready to install Oracle RAC as theyhave network access and shared storage configured.Standard Build:By default, the install will create an Oracle RAC database called ‘ORCL’ (sid ORCL1 & ORCL2) alldatabase passwords will be ‘oracle’. To proceed with the default build (for custom build see Appendix A:Build Options), on node1 only, login as root (default root password is ovsroot), and run the commands:[root@racnode1 ]# cd /u01/racovm[root@racnode1 racovm]# ./buildcluster.shAre you sure you want to install RAC?Do not run if software is already installed and/or running.[yes no]? yesIf you answer anything other than “yes” the installation will not continue. You do not need to run anythingon the second node.Monitoring the Build:There is an install log in the current directory named: buildcluster1.log (each run will get the lowest freenumbered file). By default the progress log is located at /tmp/progress-racovm.out.Typically the full install will take 30-45 minutes although this is dependant on the hardware used to hostthe VMs and the build options. You can watch the progress of the install by viewing progress logfile onnode1:[root@racnode1 racovm]# cat /tmp/progress-racovm.out2010-06-17 14:12:52:[buildcluster:Start:racnode1] Create 11gR2 RAC Cluster2010-06-17 14:12:52:[setsshroot:Start:racnode1] SSH Setup for the root user.2010-06-17 14:12:52:[setsshroot:Done :racnode1] SSH Setup for the root user completed successfully2010-06-17 14:12:52:[setsshroot:Time :racnode1] Completed successfully in 0 seconds (0h:00m:00s)2010-06-17 14:12:52:[copykit:Start:racnode1] Copy kit files to remote nodes2010-06-17 14:12:52:[copykit:Done :racnode1] Copy kit files to remote nodes2010-06-17 14:12:52:[copykit:Time :racnode1] Completed successfully in 0 seconds (0h:00m:00s)2010-06-17 14:12:52:[usrsgrpslocal:Start:racnode1] Verify Oracle users & groups (create/modify mode).2010-06-17 14:12:53:[usrsgrpslocal:Done :racnode1] Verify Oracle users & groups (create/modify mode).2010-06-17 14:12:53:[usrsgrpslocal:Time :racnode1] Completed successfully in 1 seconds (0h:00m:01s)2010-06-17 14:12:54:[usrsgrps:Time :racnode1] Completed successfully in 2 seconds (0h:00m:02s)2010-06-17 14:12:54:[printparams:Time :racnode1] Completed successfully in 0 seconds (0h:00m:00s)The install log printed to the screen will have all commands executed in verbose mode, so you can see as thevarious tools, like clone.pl, netca, dbca, emca are executed along with their output.Default Installation Specifications:SID: ORCL1 & ORCL2DB name: ORCLGrid Infrastructure Home: /u01/app/11.2.0/gridOracle RAC Home: /u01/app/oracle/product/11.2.0/dbhome 1ORACLE BASE: /u01/app/oracleCentral Inventory: /u01/app/oraInventoryRoot OS Password: ovsrootAll other passwords: oracleCopyright Oracle Corporation 2009-201120 of 34
Oracle Real Application Cluster 11g Release 2 Templates for Oracle VM (Test Configuration)APPENDIX A: Build Options:Before invoking /u01/racovm/buildcluster.sh you may edit /u01/racovm/params.ini to modify somebuild options (bottom part of the file). The top part of params.ini should not be modified unlessinstructed to by Oracle Support. Some of the options that may be modified
When running Oracle RAC in a test environment, as described in this document, all or some of the Oracle RAC VM guest machines can run on the same Oracle VM Server. The physical resources required are as follows: Minimum Storage Requirements Filesystems that support SPARSE FILES 1 reduce the required storage footprint, however due to various
