Transcription
Nipper – Beginner’s GuideMultiple Award Winning Security SoftwareTitania Nipper Version 2.6.2Published November 2019 Titania Limited 2019. All Rights ReservedThis document is intended to provide advice and assistance for the installation and running of Nipper software. While Titaniatakes care to ensure that all the information included in this document is accurate and relevant, customers are advised to seekfurther assistance from our support staff if required.No part of this documentation may be copied or otherwise duplicated on any medium without prior written consent of TitaniaLimited, publisher of this work.The use of Nipper software is subject to the acceptance of the license agreement.Titania LimitedSecurity HouseBarbourne RoadWorcesterWR1 1RSTelephone:( 44)1905 888 785Technical ania.comNipper Support: e 1 of 44
ContentsContents.2What is Titania Nipper? .3What is the Nipper Beginner’s Guide? .5Installing Nipper .6Installing Nipper - general information .8Installing Nipper on Windows Operating Systems .9Installing Nipper on Linux Operating Systems . 12SE Linux . 12CentOS 6 (x32) . 13CentOS 6 (x64) . 13CentOS 7 (x64) . 13Ubuntu. 13Fedora 32bit/64bit . 14Installing Nipper on Mac Operating Systems . 14Adding a license to Nipper . 16Navigating around Nipper . 18Obtaining device configuration files . 19Creating your first report with Nipper . 23Adding the configuration files . 23Adding files remotely to Nipper . 26Report options. 27Customizing Nipper Settings . 34Reports . 35Excluding Issues . 36IP Scoping Guide . 37Adding Issue Notes . 40Saving Your Reports . 41Report comparison. 42Managing licenses . 43Conclusion . 44Page 2 of 44
What is Titania Nipper?Nipper from Titania is an auditing tool which quickly identifies undiscoveredvulnerabilities in firewalls, switches and routers, automatically prioritizing risks to yourorganization.The reports are written in plain English and can be exported in machine-readableformats. Where relevant, the reports explain security vulnerabilities that are foundalong with ratings for how potentially dangerous they are.The following reports are currently available:Security AuditPerform a “best practice” security audit that combines checks from many differencesources including penetration testing experience.Vulnerability AuditCompares the device’s operating system version against the NIST NVD database forknown software vulnerabilities, which includes links to manufacturers and third-parties.CIS BenchmarksA CIS benchmark audit for Cisco IOS 12, IOS 15 and Cisco ASA.STIG ComplianceA DISA STIG compliance audit against specific STIG checklists.PCI DSS AuditA combination of our “Best Practice” Security Audit, Vulnerability audit, Configurationreport, and CIS benchmarks to meet the current PCI requirements.Filtering ComplexityExamines the network filtering rules and objects highlighting unused objects,overlapping and contradictory rules. Making sure your packet filtering is secure.Configuration ReportA precisely detailed report on how your device has been configured.Raw ConfigurationImports the actual full configuration of your network device into the audit.Raw Change TrackingHighlights any changes detected between the device’s current raw configuration and apreviously-saved raw configuration report.Page 3 of 44
Filtering DifferencesAnalyses Security Audit and raw differences between the current configuration and apreviously saved baseline file.Nipper is typically installed and run from a workstation and most customers chooseto manually retrieve their device configuration files, but there is support fornetwork-based collection of configuration files for some of our most popularsupported devices.Once collated, the configuration files are audited by the software (usually very quickly)and one or more reports are generated according to user’s choices.Nipper is not a scanner and does not create network traffic by default. It is aconfiguration analyser which will significantly aid you in auditing infrastructure security,or as part of a penetration test.Page 4 of 44
What is the Nipper Beginner’s Guide?The purpose of this document is to provide a beginner’s guide to Titania Nipper. Theintended audience is therefore either anyone new to the Nipper software or anyone whoneeds a refresher on the features. It may also be useful as a reference for users;however, the scope is limited by design to those who are less familiar with the software.There are many options in the software and it is not practical to include them all in thisGuide.This Guide will therefore explain how to install, run and activate Titania Nipper, and takeyou through some of its most common/popular features.This Beginner’s Guide is based on the original Nipper Manual, which is made obsoleteon the publication of this Guide.It is based on Nipper Release 2.6.1Should you have any further technical support questions about the software, pleasecontact us: support@titania.comPrepared November 2019 by the Titania Technical Services TeamPage 5 of 44
Installing NipperNipper can be downloaded on a number of platforms including Windows, Mac andvarious Linux distributions.Once you are a registered user of our website (https://www.titania.com), you candownload Nipper by logging in to view your dashboard.On this screen, you will be able to initiate the download process by navigating to YourDownload Area, clicking Go then clicking on View Downloads for the relevant product.Page 6 of 44
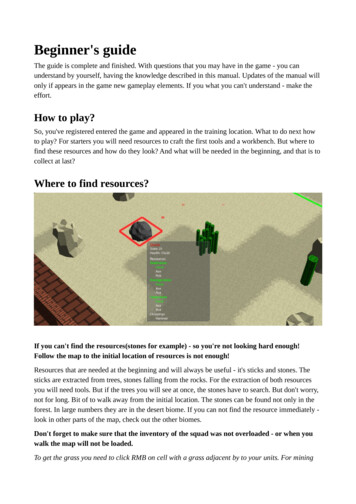
From the Download page you can choose your operating system and architecture for thedownload you require (Windows, MAC, Linux).Page 7 of 44
Installing Nipper - general informationNipper is installed and run from a local machine. That is, Nipper cannot be installed on aserver and accessed remotely.The software has been tested on server operating systems, but if installed as such youwould still be required to operate the software locally, working at the same machine onwhich Nipper is installed.The following chapter gives detailed instructions with screenshots on how to installNipper on Windows operating systems. There are then two briefer chapters explaininghow to install on Linux and Mac.Please note that on some Linux operating systems, further commands and installation ofdependencies may be required. This applies to Security Enhanced Linux and CentOS /Red Hat distributions. Please see the Linux installation chapter and/or the website fordetails.Nipper downloads come supplied with both SHA1 and MD5 hashes on the website,allowing you to check the integrity of the download.The packages are code signed wherever possible and are both built in a clean, secureenvironment undergoing rigorous testing before upload to our servers.Page 8 of 44
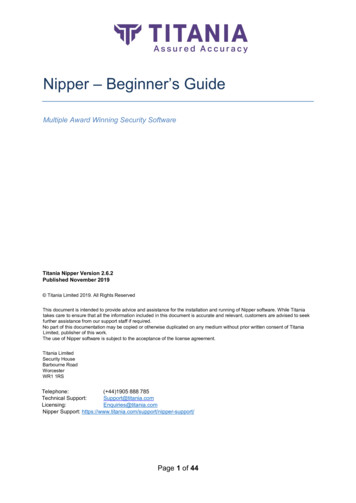
Installing Nipper on Windows Operating SystemsNB: We installed Nipper on Windows 10 x64 for this explanation. Naturally, Nipper isalso supported on other Windows versions.To install Titania Nipper, double-click on the Nipper download file and the WelcomeWizard box will appear. Click ‘Next’ to continue.Read and agree to the license and click ‘I Agree’ to continue.Page 9 of 44
You will then see the Install Options screen. Here you can choose whether Nipper isinstalled to the system path for the current user, all users, or not on the system path atall. Click ‘Next’ when ready.In the next window, choose where to install Titania Nipper. You can browse to a differentlocation if you wish, or if you are happy with the default location, click ‘Next’.Page 10 of 44
Next, you can choose the Start Menu folder where you want to install the shortcuts.Once you have done so, click ‘Next’ to continue.The next stage is to choose the components you want to install with Titania Nipper.Page 11 of 44
When you have selected your components and pressed ‘Install’, the software will installto your specifications and you will be taken to the final Nipper installation screen. Tocomplete, select ‘Finish’.Installing Nipper on Linux Operating SystemsOn Linux operating systems, the preferred method is to install via the GUI and allow thepackage manager to deal with the installation.SE LinuxIf you are using Security Enhanced Linux and Nipper fails to start, you will need toexecute the following commands as the root user:chcon -t texrel shlib t /usr/lib/libnipper2.*chcon -t texrel shlib t /usr/lib64/libnipper2.*for x in ls /opt/nipper/plugins/ ; do chcon -t texrel shlib t /opt/nipper/plugins/ x; donePage 12 of 44
Nipper requires version 5 of the Qt framework to run. Qt5 is not available in the defaultRHEL/CentOS repositories, but it is available in EPEL (Extra Package libraries forEnterprise Linux) repository, which is available free and simple to install.Installing the EPEL repository is a two-stage process, first you will need to download therpm package containing the repository files for your distribution, and then you will needto install the package using the rpm command line tool.You can copy and run the commands for your Linux distribution before attempting toinstall Titania Nipper, and the Qt5 dependencies should be resolved for you.CentOS 6 (x32)wget epel-release-6-8.noarch.rpmrpm -iv epel-release-6-8.noarch.rpmCentOS 6 (x64)wget http://download.fedoraproject.org/pub/epel/6/x86 64/epel-release-6-8.noarch.rpmrpm -iv epel-release-6-8.noarch.rpmCentOS 7 (x64)In order to install Nipper onto your machine, run the following commands:yum -y install epel-releaseyum -y updateyum -y install nipper-[rpm name].rpm (eg. nipper-2.6.1.2019-10-07-centos-7x86 64.rpm)If you still encounter issues installing Nipper on CentOS 7, use the following commandsto update the yum repository and enable the community repository.sed -i 's/enabled 0/enabled 1/g' /etc/yum.repos.d/CentOS-CR.repoyum -y updateyum -y install nipper-[rpm name].rpm (eg. nipper-2.6.1.2019-10-07-centos-7-x86 64.rpmUbuntuWith Ubuntu usually the dependencies are already met but if your Ubuntu machinedoesn’t install Nipper try to retrieve the QT5 dependencies:sudo apt-get install build-essentialsudo apt-get install libx11-xcb-dev libglu1-mesa-devPage 13 of 44
Fedora 32bit/64bitWhen installing Nipper via the command dnf it should automatically detect the requireddependenciesOnce you have installed the file, you will be able to install Titania Nipper, to do thisdownload the most recent Nipper version for OpenSuse, and simply click the file and itwill install.To install nipper through the CLI go to the directory that the file is held in andtype sudo zypper install nipper-* Nipper will then install.Installing Nipper on Mac Operating SystemsBefore installing Nipper on to your Mac device, you must first remove any previousversions of Nipper from the device. Using the terminal of the Mac with these commandssudo rm -rf /usr/bin/nipper*sudo rm -rf /usr/lib/libnipper*sudo rm -rf /Library/Frameworks/Qt*sudo rm -rf /Library/Frameworks/libnipper*sudo rm -rf /Applications/Nipper\Studio.app/sudo rm –rf /Library/Preferences/com.titania.*Page 14 of 44
To install Nipper go to the Titania website and download the latest Nipper program:https://www.titania.com/Now simply double click the Nipper file, which will begin the install process. The Mac willverify the download.You will now be shown a window with the Nipper logo and the Applications folder withinit, simply drag the Nipper icon into the application folder and this will install Nipper on tothe Mac.Following this, open the applications folder and launch Titania Nipper.Page 15 of 44
Adding a license to NipperThe first time you run Nipper you will need to add your license. When the add licensewizard appears click ‘Add License.’After you click ‘Add License’, you will be asked for your Serial Number and ActivationCode. This information will have been emailed to you when you purchased the license. Itcan also be accessed through the Titania website, www.titania.com by logging into youraccount and then going to ‘Your account’. Both the ‘Login’ and the ‘Your Account’buttons are on the upper right-hand side of the page.The ‘Show Options’ tick-box allows you to activate the license in multiple waysincluding online, offline or challenge & response modes.Enter the Serial Number an Activation Code details into the relevant boxes, as above,and click ‘Next’.You will then be asked to agree to our license, as below:Page 16 of 44
After a brief License Activation screen, the license will be added into the software. Click‘Finish’.Nipper is now fully installed and licensed on your machine, and you are ready to begin.Page 17 of 44
Navigating around NipperThis is the Nipper homepage:We have highlighted navigation icons on the top left of the page and the search toolbarat the bottom of the page.Also, when moving around Titania Nipper, for example when you have a report open,you can right click on the Nipper window to bring up a ‘Go Back’ icon which will takeyou back a screen.Page 18 of 44
Obtaining device configuration filesIn order to perform an audit of your devices, Nipper needs to access the nativeconfiguration file of the relevant devices.There are presently two ways to achieve this: You can manually extract the configuration files you need.For some devices you can access the configuration file over the network.Many of our customers still prefer to manually extract the configuration file from thedevice, because it is arguably more secure and does not increase network traffic. Forothers, the convenience of network access is a bonus.In the next section we will briefly demonstrate both methods. Here, we explain how youcan find instructions on how to manually retrieve your configuration files.Page 19 of 44
First open Titania Nipper, whereupon you will be presented with the homepage:Page 20 of 44
Click on ‘Help & Information’, which will present you with the following screen:Page 21 of 44
Click on ‘How do I get the configuration file from my network device?’ to bring upthe following screen:If you are an auditor preparing to visit a client site, it may be useful for you to adviseyour client how to retrieve the configuration themselves. The Titania website has copiesof these instructions on the Nipper support page, which can be accessed by anyone (nouser account required) at s/If you are unable to find the instructions to retrieve the configuration from a supporteddevice either in the Nipper software or on our website, please informsupport@titania.com . In the meantime, you should be able to find the relevant details inthe device’s documentationPage 22 of 44
Creating your first report with NipperAdding the configuration filesHere we will add files to Nipper and demonstrate how to create a report using remotefiles.From the Nipper home page, select ‘New Report’ (or File, New Report). You arepresented with the following screen:You can see the following four options:‘Add File’ looks for a single, manually exported device configuration file.‘Add Directory’ looks for a directory containing one or more manually exported deviceconfiguration files.‘Add Network’ will allow you to add the configuration files of supported devicesremotely.Page 23 of 44
Under ‘Network CSV Options’ there are two options:‘Import Network CSV’ will enable you to add multiple devices via a CSV input.‘Export Network Devices as CSV’ generates a CSV from the networks that areavailable in the format that can be re-imported using ‘Import Network CSV’.In this Guide, we will use the demonstration files supplied with Titania Nipper. If you areadding your own files, you will need to navigate to wherever you have stored the files.If you select ‘Add File’ on a new Nipper installation you should be able to see the ‘Demofiles’ directory. On older installations it is likely that you will have navigated away fromthis default installation directory. On Windows you will find this under C:\ProgramFiles[x86]\nipperstudio. On Linux systems it will be under /opt/nipper. On Macs it willalso be under /opt/nipper.The following screen-shot shows the screen after you have clicked on ‘Add File’ andopened the demo-files directory. Note that Nipper is expecting a single deviceconfiguration.Page 24 of 44
Nipper supports auditing multiple devices in a directory. The only limits to this are thecapabilities of your machine, although auditing a very large directory of configurationsmight take a considerable amount of time, and 64 bit architectures are preferred for thistype of operation. In the screen capture below, you see we have selected ‘AddDirectory’ and we are able to add the whole demo-files directory.Page 25 of 44
Adding files remotely to NipperSelecting ‘Add Network’ presents you with the following screen:The Device Type section allows you to choose the type of device you want to audit. Onlythose devices supported by Nipper for remote configuration collection will be displayedhere. The Version field can be left as ‘default’; this is included for future functionality.The Device Detai
Nipper from Titania is an auditing tool which quickly identifies undiscovered . Vulnerability Audit . Compares the device’s operating system version against the NIST NVD database for . Nipper is not a scanner and does not create network traffic by default. It is a