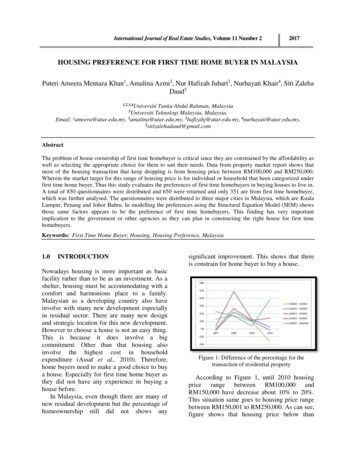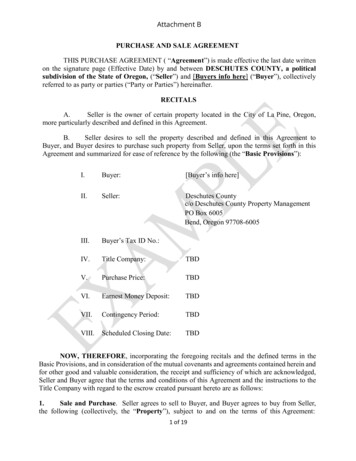
Transcription
Buyer GuideThis guide will review how to shop, create requisitions and track your requisitions, orders and invoicesContentsBuyer’s Guide . 1Logging In . 2My Account Settings . 3Key Concepts . 4Searching . 4Filling your Shopping Cart . 6Shopping by Catalog. 6Shopping by Round Trip (Punchout) . 7Shopping with Non-Catalog Items . 8Shopping Cart . 9Creating a Template of Frequently Ordered Products . 10Creating a Requisition . 112Tracking Requisitions . 17Reprocessing a Declined Requisition . 19Incomplete Requisitions from Browsers . 19Viewing Order . 200Exporting Order Reports . 211Canceling an Order. 211Changing an Order . 222
CTW OneSource Buyer GuideLogging In1. Open your web browser2. Log into WesPortal and find the link to OneSource in the Finance folderOR3. In the address field, type https://wesleyan.unimarket.com.4. Enter your Wesleyan username and passwordIf you experience any issues logging in, please contact purchasing@wesleyan.edu.The Buyer Role in CTW OneSourceEvery WFS User is assigned the “Buyer” role in CTW OneSource. The Buyer role gives users the authorityto make purchases using the University’s funds based on their SmartKey security. Buyers in theOneSource eProcurement system have the permissions for the following: Access suppliers in the online marketplace created specifically for Wesleyan UniversitySearch and browse the contracted pricing catalogs from the Wesleyan University suppliersRequest and receive quotes from preferred suppliers (Function initially only available uponrequest. Contact purchasing@wesleyan.edu)Fill an individual shopping cart for checkoutAccept and process requests from other users (Browsers) in the department that do nothave SmartKey authorityCreate requisitions for purchases against Wesleyan SmartKeysView the status and approval path of requisitionsView and export reports on purchase ordersIndicate that the goods or services were received and are approved to payView and track invoices against the purchase ordersCTW OneSource Buyer GuidePage 2Last Updated: 7/15/2019
CTW OneSource Buyer GuideMy Account SettingsWhen you initially log into OneSource it is recommended that you check your account details. You canfind the My Account page under the silhouette at the top right of the screen. Within the My Accountpage you can update your preferred first and last name, phone number (without hyphens) and emailaddress as well as set your default smartkey. Setting your default smartkey will make the checkoutprocess more efficient if you use the same smartkeys repeatedly. You can also access the online Helpprovided by Unimarket (the CTW OneSource vendor) in the Help page under the My Account menu.CTW OneSource Buyer GuidePage 3Last Updated: 7/15/2019
CTW OneSource Buyer GuideKey Concepts There are two types of suppliers found in OneSource:o Premium Supplier – supplier who has a catalog in the OneSource marketplace orprovides roundtrip/punchout access to their ecommerce site from OneSource.o Non-Catalog Supplier – supplier who does not have a hosted catalog on OneSource orprovide roundtrip/punchout access to their site and instead requires products to bemanually created on OneSource.Products to be ordered from a supplier can be accessed in one of three methods:oRoundtrip/Punchout – supplier products are found on the suppliers’ ecommercewebsite with a direct link to and from OneSource. Roundtrip/Punchout functionality willbe identified with the globe icon. A new window or tab will open in your internetbrowser and you will be signed into the Wesleyan account on the supplier’s ecommercesite.oHosted Catalog – supplier products are “hosted” on the OneSource website,meaning you do not leave the OneSource website to search and order these products.Hosted Catalogs are identified with the folder icon.Non-Catalog Items (Coming Soon!)– products requiring information to be enteredmanually. Even Premium Suppliers could have products that can be entered manually ifa product is not found in any of their catalogs. This functionality is currently unavailablebut will be coming soon.oSearchingProducts or Suppliers can be located by searching the loaded catalogs of suppliers using the searchoptions detailed below.Product Searching (Currently limited functionality until additional suppliers are loaded)Product searches can be completed using the search function in the title section of OneSource. Theloaded catalogs or supplier key words can be searched. This search field will also search for suppliernames. To search in this method, complete the steps listed below:1. From the title section, type the product name or key word search term in the search field.2. Click Search.3. Any products, supplier names or key words that match the criteria will appear in the searchresults.Searching Tips Search terms can be combined using the words AND and OR.o AND will search for both words/phrases.o OR will search for one word/phrase or the other.CTW OneSource Buyer GuidePage 4Last Updated: 7/15/2019
CTW OneSource Buyer Guide Wildcard searches can be performed if the exact search word/phrase is unknown.o ? will replace a single character; i.e. “Te?t” could be Test or Text.o * will replace multiple characters; i.e. “Test*” could be Tester or Testing.Advanced product searching allows the search to be narrowed by Product Tag, Supplier Tag, SupplierCategory, Supplier, or Product Category.1. After you have entered your search in the search bar and hit “enter” or clicked on themagnifying glass; your search results will populate and you will have the ability to filter thoseresults based on the advanced search filters.2. If desired, select a Product Tag, Supplier Tag, Category or Supplier from the drop down list.3. Click Search.4. Any products that match the criteria will appear in the search results.NOTE: Results will not return products from roundtrip suppliers unless they have additionalsearch functionality enabled such as an “Index Catalog”.Supplier SearchingIf you are searching for a specific supplier, there are multiple ways to locate the supplier and theproduct. From the Dashboard tab on the menu bar, click on the Supplier icon in the Recently UsedSuppliers list of the Information Section.From the Dashboard, click View all suppliers at the bottom of the Recently Used Suppliers list ofthe Information Section.Click on the Marketplace drop-down on the menu bar, click View Suppliers.Once you are on the Marketplace page you can search for the supplier by name.Requesting a New SupplierIf you do not find a supplier that you wish to order from, you can request that the supplier be added intoOneSource by clicking “Supplier Request” in the task menu on the right side. This will initially open tothe Unimarket Directory that is a list of all the suppliers that Unimarket currently has a relationship with.If a supplier you wish to add is part of the Unimarket Directory, click on “Request Access” which willbring up a box to add a reason for the request and any applicable attachments. Complete the “ForwardRequest To” box with Olga Bookas, our Director of Purchasing.CTW OneSource Buyer GuidePage 5Last Updated: 7/15/2019
CTW OneSource Buyer GuideIf you do not see your requested supplier in this list, simply click the “Request Supplier” button in theupper right corner of the page and complete the “Request New Supplier” panel. Note: new suppliersare reviewed and on-boarded on a monthly basis so you may not receive an immediate answer.Filling your Shopping CartShopping by CatalogIf a hosted catalog folder icon, appears () after clicking on the supplier name or icon, you will beselecting products from the supplier’s hosted catalog on OneSource. The supplier may havemultiple catalogs that appear.1. Click on the supplier catalog that you wish to shop.2. The products available within the catalog will appear.3. Browse items individually or use the search bar to search within the selected catalog.CTW OneSource Buyer GuidePage 6Last Updated: 7/15/2019
CTW OneSource Buyer Guide4. The sort by option defaults to relevant search term Name but can be changed to Code,Lowest Price, or Highest Price.5. Clicking on the product title or product image will give you more information about theproduct.6. When you have decided on a product to order, type the quantity in the Quantity field to theleft of the Add to cart button.7. Click the Add to cart button.8. A confirmation message will appear and the shopping cart will update to reflect the totalnumber of products.9. Repeat steps #3 – 9 for as many products as you need to order from this supplier.Shopping by Roundtrip (Punchout)If a globe icon appears () after clicking on the supplier name or icon, you will be sent to thesupplier’s website and logged into the Wesleyan University pricing catalog.1. Click the supplier that you wish to shop from the marketplace.2. Click the roundtrip icon or supplier name to go to the supplier’s website.3. Each supplier’s website will be different. Browse and search for products as if you had cometo the supplier’s website directly.4. Add products that you wish to order on the supplier’s website by clicking the Add button.NOTE: The terminology of the button to click will vary based on the supplier’s website.5. When finished shopping, click the Checkout or Submit Requisition button to return toOneSource.NOTE: The terminology of the button to click will vary based on the supplier’s website.CTW OneSource Buyer GuidePage 7Last Updated: 7/15/2019
CTW OneSource Buyer Guide6. You will be returned to your shopping cart in OneSource with the products you hadselected. The additional tab or browser window that opened for the supplier’s punchoutsite should close automatically. If this does not happen, email purchasing@wesleyan.edu orsubmit a ServiceNow ticket for ITS to look at your browsers settings.Shopping with Non-Catalog Items (Note: Limited availability initially)If a supplier does not provide a catalog, you can create a Non-Catalog Item. You will need to enterthe product’s information in the Non-Catalog form.1. Click the supplier that you wish to shop.2. Click the Create a Non-Catalog Item link to enter the products details.3. From the Item Name field, type in the name of the product to be ordered.4. Click the Next button.5. Any products similar to what you entered that are in a contract pricing catalog will appearon the screen. If one of these products could be ordered instead, type in the quantity andclick Add to Cart. If the products displayed are not what you need, click Next at the bottomof the screen to continue defining the product details.6. Type in the product information.NOTE: Fields marked with a red asterisk are required fieldsa. *Name - will be filled in from your previous entryb. *Unit Price – type in the single unit price of the product.c. *Unit of Measure - type in the Unit of Measure or select from the drop down list.Each (EA) is the most common unit of measure.d. Description – description of product to ensure the supplier knows what you areordering. The more detail, the better to ensure order accuracy.e. Product Code - supplier’s product number or SKU.f. Category – These are the UNSPSC international standard commodity codes. Type inthe category code or select it by starting to type a commodity and selecting fromthe dynamic list that will appear.CTW OneSource Buyer GuidePage 8Last Updated: 7/15/2019
CTW OneSource Buyer Guideg. Manufacturers Part ID – If the supplier is a reseller, you may enter the additionalproduct ID number that refers to the manufactures product.7. Next to the Add to cart button, type in the quantity to be ordered.8. Click the Add to cart button.9. You will be returned to the product screen to enter the next product line and a notificationon screen will let you know that the product was added to your cart.10. Repeat steps # 3 – 9 for each product line that you wish to order.Shopping CartThe shopping cart appears in the header bar at the top of the page. The number of products will appearin the cart.Reviewing the Shopping Cart1. Click the shopping cart icon to view the products that have been added and be taken to yourshopping cart.2. All products in the cart will appear by supplier with an individual supplier total.CTW OneSource Buyer GuidePage 9Last Updated: 7/15/2019
CTW OneSource Buyer Guide3. To adjust the quantity of any product, type the new quantity into the Quantity field of theproduct. The line item subtotal will update as you go.4. To remove any product from the cart, click the red X icon next to the Quantity field.5. To remove all products from the cart, click Clear Shopping Cart in the upper right hand portionof the screen.6. You are able to edit any of the Non-Catalog or Manual products that you have entered if younotice any incorrect information. Use the Edit button to the right of the Subtotal.7. The Move button will allow you to move the product from your cart to a saved or incompleterequisition. From the requisition view, the Move button will allow you to move the item to adifferent requisition or back to your cart.Creating a Shopping List of Frequently Ordered ProductsIf you have products that you regularly order, you can create a shopping list that can be reused everytime you need to order those products. The products to be added to the shopping list need to be in thecart before proceeding. This is a great way to save time when you enter the product(s) manually on afrequent basis.1. From the cart screen, click the Create Shopping List.CTW OneSource Buyer GuidePage 10Last Updated: 7/15/2019
CTW OneSource Buyer Guide2. The Create Shopping List screen will appear.3. The radio button for Create a new shopping list will be selected. Type a name for the shoppinglist in the field to the right.4. If a shopping list has already been created and needs to be changed, select Replace an existingshopping list and select the shopping list from the available options.5. Click OK.6. Once a shopping list has been created, it can be accessed by clicking on Marketplace in themenu bar and selecting Shopping Lists. The following options are available:a. Add selected to Cart – select the products you want from the shopping list and click Addselected to Cart to add the products to your cart.NOTE: Doing so will replace anything that is currently in the cart.b. Share Shopping List – allows the user to share the shopping list they created with otherorganization units.c. Delete Shopping List – click Delete Shopping List to permanently delete the template.A confirmation message will appear prior to deletion to confirm your selection.NOTE: When you use a Shopping List, the products will add to any current products that youhave in your shopping cart.CTW OneSource Buyer GuidePage 11Last Updated: 7/15/2019
CTW OneSource Buyer GuideCreating a Requisition1. Any products appearing in the shopping cart with a check in front of the product will beforwarded on to the checkout screen. If you do not wish to order a product yet but don’t wantto delete it from the shopping cart, click the checkbox to remove the check.2. Click Checkout to start the checkout and requisition process for the items being purchased forthis supplier.LocationsThe shipping and billing addresses will be selected in the Locations section of the checkout screen. Theseaddresses are preloaded in OneSource. Do not change the “Bill to” location but please double checkand change the “Ship To” location as needed as that is used by the supplier. If you select anotherlocation and complete the checkout, your selection will be your new default for your next checkoutprocess. You can type any part of the location name to navigate the dropdown list easily.Attn FieldThe Attention To field (Attn) is a free form field. It is very important in your checkout process to ensurethe accuracy of the delivery by the supplier. The most pertinent information for delivery should be first(left to right) in the "Attention To" field - i.e. lab or room # / Recipient last name / phone extension.CTW OneSource Buyer GuidePage 12Last Updated: 7/15/2019
CTW OneSource Buyer GuideExample:Organization (Department) SelectionBelow the Bill To and Ship To section of the checkout screen will be an Organization section. Thissection is for visibility and receiving capabilities across your organization to the supervisors andother users.Select the Organization that is appropriate for your purchase. Selecting the correct Organizationunit will allow others in your organization to view and perform any necessary receiving actionsfor this purchase order. You may only have one selection or you may have many to choose fromdepending on your organization’s structure.Checkout ItemsThe items that you selected from the shopping cart will be listed as separate lines in your checkoutitems. Each line item will show the product name, Unit Price/Unit of Measure, Quantity and Subtotal.You may remove the line items from the checkout screen using the buttons to the right of the products.Use the chartfield spaces to enter the value of the required SmartKey and Accounts.CTW OneSource Buyer GuidePage 13Last Updated: 7/15/2019
CTW OneSource Buyer Guidea. If you have set your default accounts in your My Profile Settings page, these fields willauto populate in every checkout instance. It is not recommended that you default theAccount field as that should change for each type of purchase that you are processing.The Fund and Dept will auto-populate after you make your Account selection.b. You can begin typing the number or description of the SmartKey element value and adynamic list will appear to be chosen from.c. Use the magnifying glass to open a search window if you have trouble finding theSmartKey that you are trying to use for the line item.d. You can use the Copy Down button to repeat your selected accounts to each line below.e. You can use the Split Account Code button to split the charge among multiple Smartkeysand/or Accounts.Delivery Datef. Delivery Date is an optional field on the line item that can be filled in as a suggested orpreferred delivery date to the vendor. For critical deliveries, please follow up with thesupplier directly to confirm the delivery date.Notes and AttachmentsEnter any notes or attach any related documents to your order in the Justification or Notes andAttachments section of the checkout screen.g. The Justification Notes and Attachment are for internal justification use and will not besent to the supplier. The Justification Notes will always be on the requisition and notcarried over to the Purchase Order.h. The Delivery Notes and Order Attachments are for sending information to the supplierand will be sent to the supplier with the final PO.NOTE: If a different address is needed for delivery, alert the system administrators byemailing purchasing@wesleyan.edu so they can add the new location to theprepopulated list. Adding a different address in the delivery notes will not guaranteethat the order is delivered to that address.CTW OneSource Buyer GuidePage 14Last Updated: 7/15/2019
CTW OneSource Buyer Guidei. You can attach as many documents as needed with a single file size limit of 50megabytesj. You can also attach a file in the Order Attachments and choose not to send it to thesupplier by clicking Unshare.Saving a CheckoutIf you need to enter more information and must come back to the checkout screen, you canSave your checkout progress.This will create an Incomplete Requisition that can be seen in the Task Menu.CTW OneSource Buyer GuidePage 15Last Updated: 7/15/2019
CTW OneSource Buyer GuideOnce your checkout screen is complete with all the needed information, click Checkout.Reassigning your cartIf you need to send this requisition to another buyer for more information or to complete therequisition and process for approval routing, click Reassign.A popup will prompt you to reassign your requisition to a Buyer. You can also include anyimportant notes to the Buyer here.A confirmation message will appear stating that the items have been forwarded to the designatedindividual. The Buyer will receive an email notification and the Incomplete Requisition will appear in theTasks Menu for the Buyer to complete the requisition and route for approval. You can see theincomplete requisition status if you look at the View Requisitions page.SmartKey Security CheckIf you do not have WFS access to purchase with the selected SmartKey, you will see the below error. Youwill not be able to continue and must contact your administrator.Note: you will not lose the products that you have added to your cart, they will be available in yourshopping cart. It is recommended to Save your checkout to preserve the information entered on thecheckout screen.CTW OneSource Buyer GuidePage 16Last Updated: 7/15/2019
CTW OneSource Buyer GuideTracking RequisitionsAfter you successfully create a requisition you will be able to monitor the progress from your Dashboardon OneSource or from the Requisitions page under the Orders menu.1. Click the Home button or the CTW OneSource logo.or2. Requisitions that have been submitted can be viewed in the Requisitions in Progress area of theinformation section of the Dashboard.3. Click on the requisition from the list.4. You may also click View all requisitions to see all of your requisition.a. The View Requisitions screen will appear.b. You can see the header level requisition information as well as the current approver(s).c. The top portion of the screen will allow you to search for a requisition. Select from oneor more of the following search options and then click the Search button.i. Requisition Numberii. Supplieriii. Created Dateiv. Statev. Buyervi. Organization Unitd. To select a requisition, click on the Requisition number from the list.5. To view the approval status of the requisition, click on the Approvals tab. You will see theapprovals that have happened, who the requisition is with now for approval and the nextapproval steps needed before the order is created.CTW OneSource Buyer GuidePage 17Last Updated: 7/15/2019
CTW OneSource Buyer Guide6. The various approval statuses include:a. Approved - approved and advanced to the next level to an orderb. Declined – was not approved and sent back to buyeri. Declined requisitions can be copied and edited for resubmittal by the buyer whooriginally created the requisitionc. Escalated – skipped an individual to advance to the next leveld. Skipped – skipped an individual to advance to the next levele. In Progress - current level of approval7. Once a requisition has been completely approved, a purchase order will be generated and sentto the supplier. An email from OneSource with the purchase order number and details of thepurchase order will be sent to the buyer and the originator of the requisition confirming that theorder was sent to the supplier. The buyer may also get a confirmation email directly from thesupplier, which is important to retain as that will have an order number.8. Every thirty minutes OneSource with send purchase order information to the WFS financialsystem and encumber budgeted funds.CTW OneSource Buyer GuidePage 18Last Updated: 7/15/2019
CTW OneSource Buyer GuideReprocessing a Declined RequisitionIf your requisition is declined for any reason you will receive an email notification with the requisitionnumber and details along with any notes that the declining approver provided. Follow the below stepsto Copy and resubmit the requisition with changes.1. Click the link to view the declined requisition from declined email notification or go to ViewRequisitions and search by Declined in the state search filter.2. At the top right of the requisition view page, under the Actions menu, you will see the option toCopy the requisition.3. When you copy the requisition, all information including the notes and attachments will becopied into a new Incomplete Requisition for you to edit and resubmit.4. When you Copy, you will be taken directly to the Incomplete Requisition. Make any needededits to the copied requisition and click Checkout to create the new requisition and route it forapproval.5. The new requisition will have a new number but will have a link and reference to the oldrequisition for historical information.NOTE: Most issues can be resolved by utilizing the Comment field. We encourage approvers to use thatrather than declining the requisition so that workflow on the other lines is preserved.Incomplete Requisitions from Browsers or Buyers1. The users in your department that do not have SmartKey authority will be able to shop as abrowser (upon request for access) and reassign their incomplete requisitions to you as thebuyer. As the buyer, you will be alerted by email, with any applicable notes, fromOneSource@ctwonesource.wesleyan.edu when an incomplete requisition has been assigned toyou. See example email alert below.2.CTW OneSource Buyer GuidePage 19Last Updated: 7/15/2019
CTW OneSource Buyer Guide3. To find and process this incomplete requisition, go to the Tasks menu and IncompleteRequisitions.4.5. In the Incomplete Requisitions page, you will see all requisitions that have been assigned to youfor completion. Click the requisition number to open and review the details or click Checkout tobegin the checkout for completion of the requisition and routing for approval.Viewing Order1. Orders that have been created can be viewed in the Orders area of the information section ofthe Dashboard or from the Order menu and View Orders page.2. If the order is visible, click on the order from the list.3. If the order is not visible, click View all orders to see all of your orders.a. The View Orders screen will appear.b. The top portion of the screen will allow you to search for an order. Select from one ormore of the following search options and the click the Search button.i. Order Numberii. Supplieriii. Created Dateiv. Order Typev. Buyervi. Receiving StatusCTW OneSource Buyer GuidePage 20Last Updated: 7/15/2019
CTW OneSource Buyer Guidevii. If the Order has been invoiced or notviii. Organization Unitix. Order Statusc. To select an order, click on the Order number from the list.Exporting Order ReportsFrom the View Orders page, you can use the down arrow on the search button to Export thecurrent search results into an excel spread sheet with the header level report or an export of theline item detail.Canceling an OrderAn order can only be canceled if the order has not been invoiced or marked as having any receivinghistory. Some suppliers with Order Integration ( ) can disable the ability to have a canceled order sincethey are processing the orders as quickly as possible. If an order needs to be canceled, contact thesupplier to cancel the order or return the order once received. This would be the supplier’s preferredprocess if they have disabled the ability to cancel an order in OneSource.CTW OneSource Buyer GuidePage 21Last Updated: 7/15/2019
CTW OneSource Buyer GuideTo cancel an order that has not been received against or invoiced:1. Locate and view the order from the View Orders screen2. Select Cancel from the Action options in the top right3. Confirm that you want to cancel the orderThe supplier will be notified via email that the order has been cancelled and you as the buyer will beCC’d for any added discussion through a reply all email. The order will also be canceled in WFS and theencumbered funds released.Changing an OrderAn order can only be changed if the order has not been invoiced or marked as having any receivinghistory. Some suppliers with Order Integration ( ) can disable the ability to have change orders donesince they a
The Buyer Role in CTW OneSource Every WFS User is assigned the "Buyer" role in CTW OneSource. The Buyer role gives users the authority to make purchases using the University's funds based on their SmartKey security. Buyers in the OneSource eProcurement system have the permissions for the following:

