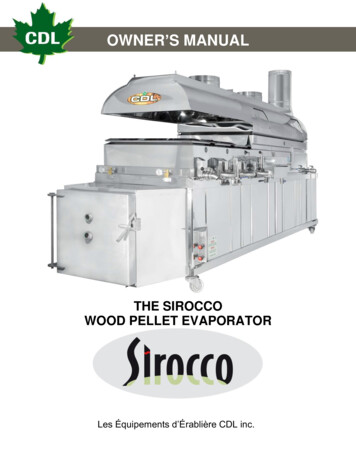
Transcription
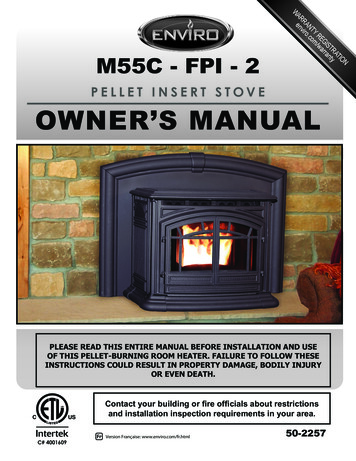
NTIORA yST ntGI rraRE /waTY omAN ro.cRR nviWA eM55C - FPI - 2PE LLE T I NSE RT S TOVEOWNER’S MANUALPLEASE READ THIS ENTIRE MANUAL BEFORE INSTALLATION AND USEOF THIS PELLET-BURNING ROOM HEATER. FAILURE TO FOLLOW THESEINSTRUCTIONS COULD RESULT IN PROPERTY DAMAGE, BODILY INJURYOR EVEN DEATH.Contact your building or fire officials about restrictionsand installation inspection requirements in your area.C# 4001609Version Française: www.enviro.com/fr.html50-2257
Table of ContentsIntroduction.3Rating Label Location.3Fuel Quality.3Emissions and Efficiencies.4Safety Warnings & Recommendations.5Operating Instructions.7Dimensions & Specifications.7Control Board Functions.8Automatic Safety Features of Your Pellet Stove.8Operating Your Pellet Stove.9Turning Your Pellet Stove Off.10Slider/Damper Set-Up.10Adjustable Auger Cover Set-Up.11Routine Cleaning and Maintenance.12Optional Service Rail Kit.15Installation Instructions.16Deciding Where to Locate Your Pellet Appliance.16Removing Pellet Stove From Pallet.16Installing the Inset Frame and Levelling .17Clearances to Combustibles.18Thermostat Installation.18Vent Termination Requirements.19Outside Fresh Air Connection.20Exhaust and Fresh Air Intake Locations.20Masonry Fireplace Installation.21Positive Flue Connection.22Built-In Installation.23Horizontal Exhaust Through Wall Installation.24Through Wall with Vertical Rise and Horizontal Termination Installation.25Outside Vertical Installation.26Inside Vertical Installation.27Troubleshooting.28Wiring Diagram.31Parts List.32Parts Diagram - Components.35Parts Diagram - Steel.36Notes.37Warranty.39Installation Data Sheet.402
Introduction* This manual is designed for the home owner in conjunction with the technical manual. *Rating Label Location:The rating label is located on the top of the hopper.Fuel Quality:Fuel quality is important, please read the following:Your Enviro pellet stove has been designed to burn ¼” (6mm) dia wood pellets and otherorganic fuels. DO NOT use this appliance as an incinerator. DO NOT use unsuitable and nonrecommended fuels, including liquid fuels as this will void any warranties stated in thismanual.The performance of your pellet stove is greatly affected by the type and quality of fuel beingburned. As the heat output of various quality fuels differs, so will the performance and heatoutput of the pellet stove.CAUTION: It is important to select and use only fuel that are dry and free of dirt or any impuritiessuch as high salt content. Dirty fuel will adversely affect the operation and performance of the unitand will void the warranty. The Pellet Fuel Industries (P.F.I.) has established standards for wood pelletmanufacturers. We recommend the use of pellets that meet or exceed these standards. Ask your dealerfor a recommended pellet type.ASH: The ash content of the fuel and operation of your stove will directly determine the frequency ofcleaning. The use of high ash fuels may result in the stove needing to be cleaned daily. A low ash fuelmay allow longer intervals between cleaning.CLINKERING: [clinkers are silica (sand) or other impurities in the fuel that will form a hard mass duringthe burning process]. This hard mass will block the air flow through the Burn Pot Liner and affect theperformance of the stove. Any fuel, even approved types, may clinker. Check the Burn-Pot Liner daily toensure that the holes are not blocked with clinkers. If they become blocked, remove the liner (when theunit is cold) and clean/scrape the clinkers out. Clean the holes with a small pointed object if required.Refer to the section Routine Cleaning and Maintenance.FUEL FEED RATES: Due to different fuel densities and sizes, fuel feed rates may vary. This may requirean adjustment to the slider damper setting (qualified technician only) or to the auger feed trim setting.Since Sherwood Industries Ltd. has no control over the quality of fuel that you use, we assume no liabilityfor your choice in fuels.FILLING FUEL HOPPER: Open lid on top of unit, check hopper for foreign objects, empty the bag intothe hopper, and ensure hopper lid closes completely.Store fuels at least 36” (1 m) away from the pellet stove.WARNING: Parts of the appliance, especially the external surfaces, will be hot to touchwhen in operation so use due care.FLAMMABLE LIQUIDS: Never use gasoline, gasoline-type lantern fuel, kerosene, charcoal lighterfluid, or similar liquids to start or “freshen up” a fire in the heater. Keep all such liquids well away fromthe heater while it is in use.3
Emissions and EfficienciesEmissions and Efficiency - M55C-FPI-2:Rates: This manual describes the installation and operation of the Enviro M55 pellet heater. This heateris U.S. ENVIRONMENTAL PROTECTION AGENCY Certified to comply with 2020 particulate emissionstandards. Under specific test conditions this heater has been shown to deliver heat at rates rangingfrom 38,437-7817 Btu/hr.Efficiency: 78.2% HHV (PFS TECO 21-703)*When connected to a 6” flueWARNING: This pellet heater needs periodic inspection and repair for proper operation. It is againstfederal regulations to operate this pellet heater in a manner inconsistent with operating instructions inthis manual.WARNING: This wood pellet has a manufacturer set minimum low burn rate that must not be altered.It is against federal regulations to alter this setting or otherwise operate this pellet heater in a mannerinconsistent with operating instructions in this manual.4
Safety Warnings & RecommendationsPlease read this entire Owner’s Manual before installing or operating your Enviro Pellet Stove.Failure to follow these instructions may result in property damage, bodily injury or even death.Any unauthorized modification of the appliance or use of replacement parts not recommendedby the manufacturer is prohibited. All national and local regulations and shall be complied withwhen operating this appliance.Caution: Do not connect to any air distribution duct or system.Warning: Never place wood, paper, furniture, drapes or other combustible materials within 48” (122cm)of the front of the unit, 12” (30.5cm) from each side, and 4” (10cm) from the back of the unit. Do not letchildren or pets touch it when it is hot.To prevent the possibility of a fire, ensure that the appliance is properly installed by adhering to theinstallation instructions. An Enviro dealer will be happy to assist you in obtaining information with regardsto your local building codes and installation restrictions.FIRE EXTINGUISHER AND SMOKE DETECTION:All homes with a pellet burning stove should have atleast one fire extinguisher in a central location known to all in the household. Smoke detectors and carbonmonoxide detectors should be installed and maintained in the room containing the stove. If either soundsthe alarm, correct the cause but do not deactivate. You may choose to relocate the detection devises withinthe room; DO NOT REMOVE THE SMOKE OR CARBON MONOXIDE DETECTORS FROM THE ROOM.CHIMNEY OR RUN AWAY FIRE: Call local fire department (or dial 911). Close the draft fully. Extinguishthe fire in the burn pot liner with a cup of water and close the door. Examine the flue pipes, chimney, attic,and roof of the house, to see if any part has become hot enough to catch fire. If necessary, spray with fireextinguisher or water from the garden hose. IMPORTANT: Do not operate the stove again until you arecertain the chimney and its lining have not been damaged.OPERATION: The door and ash drawer must be kept closed when the unit is in operation to preventfume spillage and for proper and safe operation of the pellet stove. Also ensure all gaskets on the doorare checked and replaced when necessary. Unit hot while in operation. Keep children, clothing andfurniture away. Contact may cause skin burns.CAUTION: When operating during adverse weather, if the unit exhibits dramatic changes in combustionstop using the unit immediately.FUEL: This stove is designed and approved to only burn wood pellets of any quality, corn, wheat, barley,and grass. Dirty fuel will adversely affect the operation and performance of the unit and may void thewarranty. Check with your dealer for fuel recommendations. THE USE OF CORDWOOD IS PROHIBITEDBY LAW. Do not burn garbage or flammable fluids such as gasoline, naptha or engine oil.SOOT: Operation of the stove with insufficient combustion air will result in the formation of soot which willcollect on the glass, the heat exchanger, the exhaust vent system, and may stain the outside of the house.CLEANING: There will be some build up of fly ash and small amounts of creosote in the exhaust. This willvary due to the ash content of the fuel used and the operation of the stove. It is advisable to inspect andclean the exhaust vent semi-annually or every two tons of pellets.The appliance, flue gas connector and the chimney flue require regular cleaning. Check them for blockageprior to re-lighting after a prolonged shut down period.ASHES: Disposed ashes should be placed in a metal container with a tight fitting lid. The closed containerof ashes should be on a non-combustible surface, well away from all combustible materials pending finaldisposal. If the ashes are disposed of by burial in soil or otherwise locally dispensed, they should be retainedin the closed container until all cinders have thoroughly cooled.5
Safety Warnings & RecommendationsELECTRICAL: The use of a surge protected power bar is recommended. The unit must be grounded.The grounded electrical cord should be connected to a standard 110-120 volts (4.2 Amps), 60 hertz electricaloutlet and also must be accessible. If this power cord should become damaged, a replacement power cordmust be purchased from the manufacturer or a qualified Enviro dealer. Be careful that the electrical cord isnot trapped under the appliance and that it is clear of any hot surfaces or sharp edges. This unit’s maximumpower requirement is 504 watts.GLASS: Do not abuse the glass by striking or slamming the door. Do not attempt to operate the stove withbroken glass. The stove uses ceramic glass. Replacement glass must be purchased from an Enviro dealer.Do not attempt to open the door and clean the glass while the unit is in operation or if glass is hot. To cleanthe glass, use a soft cotton cloth and mild window cleaner, gas or wood stove glass cleaner, or take a damppaper towel and dip into the fly ash. This is a very mild abrasive and will not damage the glass.KEEP ASH PAN FREE OF RAW FUEL. DO NOT PLACE UNBURNED OR NEW PELLET FUEL IN ASH PAN.A fire in the ash pan may occur.INSTALLATION: Contact your local building or fire official to obtain a permit and any information oninstallation restrictions and inspection requirements for your area.Be sure to maintain the structural integrity of your home when passing a vent through walls, ceilings, orroofs, and all construction meets local building codes. It is recommended that the unit be secured into itsposition in order to avoid any displacement. This appliance must be installed on a floor with an adequateload bearing capacity, if existing construction doesn’t meet load capacity, suitable measures (e.g. loaddistributing plate) must be taken to achieve it.DO NOT INSTALL A FLUE DAMPER IN THE EXHAUST VENTING SYSTEM OF THIS UNIT.DO NOT CONNECT THIS UNIT TO A CHIMNEY FLUE SERVING ANOTHER APPLIANCE.FRESH AIR: This unit uses large quantities of air for combustion; outside Fresh Air connection is stronglyrecommended. Fresh Air must be connected to all units installed in Mobile and “Air Tight Homes” (R2000)or where required by local codes.Consider all large air moving devices when installing your unit and provide room air accordingly. NOTE:Extractor fans when operating in the same room or space as the appliance may cause problems. Limited airfor combustion may result in poor performance, smoking and other side effects of poor combustion.The stove’s exhaust system works with negative combustion chamber pressure and a slightly positivechimney pressure. It is very important to ensure that the exhaust system be sealed and airtight. The ashpan and viewing door must be locked securely for proper and safe operation of the pellet stove.Do not burn with insufficient combustion air. A periodic check is recommended to ensure proper combustionair is admitted to the combustion chamber. Setting the proper combustion air is achieved by adjusting theslider damper located on the left side of the stove (qualified technicians only).Soot or creosote may accumulate when the stove is operated under incorrect conditions such as a rich burn(black tipped, lazy orange flames).If you have any questions with regards to your stove or the above-mentioned information, please feel freeto contact your local dealer for further clarification and comments.SINCE SHERWOOD INDUSTRIES LTD. HAS NO CONTROL OVER THE INSTALLATION OF YOURSTOVE, SHERWOOD INDUSTRIES LTD. GRANTS NO WARRANTY IMPLIED OR STATED FOR THEINSTALLATION OR MAINTENANCE OF YOUR STOVE. THEREFORE, SHERWOOD INDUSTRIESLTD. ASSUMES NO RESPONSIBILITY FOR ANY CONSEQUENTIAL DAMAGE(S).SAVE THIS INSTRUCTION MANUAL FOR FUTURE REFERENCE.6
SpecificationsDimensions:16 1/8"24 3/4"26 7/8"12"32 7/8"23"44"Figure 1: Dimensions of M55C-FPI.Specifications:Input rating when using: Wood Pellets/Corn - 55,000BTU (16.1KW hr) & Wheat/Barley - 53,000BTU (15.5KW hr).Table 1: M55C-FPI Specifications.DescriptionResidential Pellet HeaterFuel type6mm (¼”) dia. Pellets - wood, corn, wheat, & barley*Voltage110 - 120 VCurrent4.2 AmpsMax Power504 WattsFrequency60 HzHopper Capacityup to 50 lb (22.7 Kg)Consumption on Low1.5 lb/hr (0.68 Kg/hr)*Testing StandardASTM 1509-04Weight (with full hopper)370 lb (167.8 Kg)Consumption on High6.5 lb/hr (2.95 Kg/hr)**Note: Consumption will vary with the type of fuel used.7
Operating InstructionsControl Board Functions:Note: The Control Panel is located underneath the units Cast Hopper Lid which is attached to a safetyswitch that will immediatley stop the auger. The switch will stop operation of the stove and display a#4 flash code if the lid is not closed within two minutes.1. ON/OFF BUTTON: Used to turn the unit ON and OFF manually.2. HEAT OUTPUT INDICATOR: Shows the present Heat Level output setting and the Feed Trim whileit is being adjusted.3. THERMOSTAT SWITCH: Sets the unit’s control mode; AUTO/OFF or HIGH/LOW (when using aThermostat or Timer) or MANUAL.4. FUEL TYPE LIGHTS: Shows the present Fuel Type selected; Premium Pellets are Red, RegularPellets are Green, and Multi-fuel is Yellow. The Light flashes duringstart-up, and when the Thermostat is in control of the Unit. ThePremium PelletsLight stops flashing when the Exhaust Sensor closes.Regular 5COMBUSTIONAIR TRIM42FEEDTRIM673HEATLEVEL2811ON/OFFFigure 2: Circuit Board ControlPanel Decal5. FUEL TYPE BUTTON: Used to switch between three fuel typemodes: Premium Pellets for high grade wood pellets, Regularpellet for mid or low grade wood pellets, and Multi-Fuel for otherfuel types.6. COMBUSTION AIR TRIM BUTTON: Increases or Decreases theFan voltage by 2.5volts on all feed settings. When pressed all lightson Heat Level Indicator will come on except the one that is theset point. Hold Trim Button down and press the UP or DOWN HeatLevel Arrow to adjust setting. #3 Light is the default setting.Depending on Fuel quality Ignition problems may occur at higheraltitudes, this can be resolved by trimming the Combustion Fan toa higher setting.7. FEED TRIM BUTTON: Used in conjunction with the Heat LevelAdjustment Buttons to adjust the Feed Trim. It can be increasedby two (2) feed settings or it can be decreased by two (2) feedsettings. #3 Light is the default setting.8. HEAT LEVEL ADJUSTMENT BUTTONS: Changes the HeatSetting of the Unit from LO to HIGH. Press the Arrow Up button toincrease Heat, and Arrow Down to decrease Heat.Automatic Safety Features of Your Pellet Stove:A. EXHAUST TEMPERATURE SWITCH: The stove will shut off when thefire goes out and the exhaust temperature drops below 49 C (120 F). It will display a #3 flash code.B. HIGH LIMIT SAFETY SWITCH: If the temperature on the hopper reaches 93 C (200 F), the auger willautomatically stop, the stove will shut down, and it will display a #4 flash code. If this happens, callyour local dealer to reset the 93 C (200 F) high limit switch AND DETERMINE THE CAUSE OF THEOVERHEATING.C. VACUUM SWITCH: Notifies when the unit has lost vacuum. This can be caused by either a combustionfan/vent failure, or simply the unit’s ash pan door, pedestal door. It will display a #2 flash code.8
Operating InstructionsOperating Your Pellet Stove:THE UNIT WILL NOT OPERATE WITH THE DOOR OR ASH BOX OPEN. Open the hopper lid only to refuel or to adjust the controls. the unit will shut down if the hopper lid is left open for longer thantwo minutes.CAUTION: When operating during adverse weather, such as high winds or freezing rain, if the unit exhibitsdramatic changes in combustion stop using the unit immediately. Watch for blocked exhaust outlet.CAUTION: Radiant surfaces can become very hot and can cause burns when contacted.PRE-BURN CHECK: The burn pot liner holes must be clear and the liner installed properlyPremiumagainstthePelletsPelletsignitor tube and locked in place. Check the hopper for enough pellets to start the unit. RegularMulti-FuelNote: To change fuel type, ensure the Thermostat Switch is set to Manual Mode. Press the Off button andthen press the Fuel Type button to cycle through the available fuel types.FUELNote: The unit has an automatic cleaning cycle; every thirty minutes the agitatorwill turn continuously for one minute to help clean out the burn pot liner.MANUAL MODE:All control of circuit board function is adjusted at the circuit board.AUTO/OFFTYPEHIGH/LOWMANUALINITIAL START-UP: Press the ON / OFF button. The stove will turn on. Figure 3: ThermostatCOMBUSTIONSwitchTRIMThe Fuel Type Light will flash (the Auger Feed Rate is pre-programmed duringin5 MANUALAIRposition.start-up). The Heat Level Indicator will show the Heat Level that the stove willrun at after start-up.4FEEDIf this is the first time the unit has been started or the unit has run out of fuel, the auger mayTRIMneed to beprimed. The liner can be primed with a handful of pellets, or after the two minute prefeed,the unit can be3restarted.HEATThe agitator will not operate for the first five minutes after the ON button has been 2pressed. LEVELAfter the tenminutes it will pulse at the same interval as the feed auger.1When the start-up sequence is complete, the unit will switch to the designated heat setting.Once a fire has been established, the convection blower will turn on after ten minutes.To OPERATE: Press the Heat Level buttons to change the desired Heat Level Output setting.Premium PelletsON/OFFRegular PelletsThe speed of the convection blower is controlled by the setting of the heat level.Multi-FuelThe Feed Trim button pressed in conjunction with the Heat Level adjustment buttons can be used to adjust thefeed trim. It can be increased by two feed settings or it can be decreased by two feed settings.FUELHIGH/LOW MODE: (Requires a Thermostat or Timer)TYPEINITIAL START-UP: See MANUAL MODE above.AUTO/OFFHIGH/LOWOPERATION: When the thermostat calls for heat (contacts are closed) the stoveMANUALsettings are adjustable as per Manual Mode. When the thermostat contactsPremium PelletsRegular Pelletsopen, the HEAT LEVEL and Fans will drop down to the LOW setting until theMulti-FuelFigure4:Thermostat Switchthermostat contacts close again. The stove will come back to the previous HEATCOMBUSTIONin HIGH/LOWAIRposition.TRIM5LEVEL setting once the thermostat contacts close.AUTO/OFF MODE: (Requires a Thermostat or Timer)INITIAL START-UP: See MANUAL MODE above.AUTO/OFF4HIGH/LOWFUELTYPEFEEDTRIMOPERATION: When the thermostat contacts close, the unit will light3MANUALautomatically. Once up to temperature, the stove operates the same as inHEATMANUAL. When the thermostat contacts open, the stove’s HEAT LEVEL and Fans2LEVELSwitchwill drop down to the LOW setting for 30 minutes. If the thermostat contacts Figure 5: ThermostatCOMBUSTIONin 5AUTO/OFFAIRposition.TRIMclose within the 30 minutes, the HEAT LEVEL will return to the previous MANUAL14FEEDTRIM9
Operating Instructionssetting. If the thermostat contacts remain open, the stove automatically begins its shutdown routine. Thestove will re-light when the thermostat contacts close again.Turning Your Pellet Stove Off: MANUAL and HI / LOW mode: To turn the unit OFF, simply press the ON / OFF button. This will stop the feed ofpellets. The blowers will continue to operate and cool the stove down. When cool enough, the stove will turn off. AUTO / OFF mode: To turn the unit OFF, turn the Thermostat down or Timer off. On shut down the burn pot agitator will run continuously for five (5) minutes on premium mode, one (1) minuteon regular mode, and five (5) minutes on multi-fuel mode.DO NOT turn unit off during start-up or unplug unit while operating; this may lead tosmoke escaping from the stove.Slider/Damper Set-Up:This is used to regulate the airflow through the pellet stove and has been set at the factory.CONVECTIONFANEXHAUSTCHANNELEXHAUST SENSOR &REMOVABLE PLATESLIDERDAMPERNOTE: THE SURROUNDPANEL MOUNT WASREMOVED FOR CLARITYFigure 6: Slider/Damper Plate in Unit.Figure 7: Efficient Flame.This unit is designed to operate within a negative pressure range that may only be adjusted by a qualified technician.This can be measured using a Magnahelic pressure gauge once the unit has been running on heat level 5 settingafter one hour of burn time. This adjustment is necessary for varying venting configurations. The reading can betaken from the ⅛” hole located on the right side of the Ash Box.The Combustion Trim, Feed Trim and Fuel Type Functions can be used to compensate for varying fuel qualities.Refer to the Owners Manual for circuit board operation.If, after long periods of burning, the fire builds up or there is a build up of clinkers, this would be a sign that thefuel quality is poor - this requires more air.The easiest way to make sure that an efficient flame is achieved is to understand the characteristics of the fire. A tall, lazy flame with dark orange tips requires more air. A short, brisk flame, like a blowtorch, has too much air . If the flame is in the middle of these two characteristics with a bright yellow/orange, active flame with no blacktips then the air is set for proper operation, refer to Figure 7.10
Operating InstructionsSPECIAL NOTES:Fuel quality is a major factor in how the stove will operate. If the fuel has a high moisture content or ash content thefire will be less efficient and has a higher possibility of the fire building up and creating clinkers (hard ash build-up).Adjustable Auger Cover Set-up:The auger cover is located within the hopper.This adjustment allows for greater control of the feed rate than offered by the feed trim positions on thecontrol panel. Due to varying density by volume in fuels it may be necessary to adjust this cover either up ordown to control the maximum output of 55,000 BTU. Lowering the cover position will decrease output andraising it will increase output.CAUTIONIncreasing output too much can cause the high limit sensor to trip (flashing #4).If this occurs lower the position of the cover and manually reset the sensor beforecontinuing to operate the unit.11
Routine Cleaning and MaintenanceThe following list of components should be inspected and maintained routinely to ensure that theappliance is operating at its optimum and giving you excellent heat value. The appliance, flue gasconnector and the chimney flue require regular cleaning. Check them for blockage prior to re-lightingafter a prolonged shut down period.Check the Burn Pot Liner DAILYWeeklyBi-annually or 2 Tons of FuelBurn Pot and Liner - EmptyExhaust VentAgitatorFresh Air Intake TubeHeat Exchanger TubesBlower MechanismsDoor GlassHeat Exchanger TubesAsh Pan and Door GasketsBehind Firebox LinersInside FireboxAll HingesDoor LatchPost Season Clean-upTOOLS REQUIRED TO CLEANUNIT:Torx T-20 Screwdriver, ¼”, 5/16” ⅜”,& 7/16” wrench and/or socket, Brush,Soft Cloth, and Vacuum with finefilter bagBURNER POT AND LINER (Checked Daily/Emptied Weekly)This is the ‘pot’ where the pellets are burned. Only clean when the unit is cold.Note: If, after long periods of burning, the fire continually builds up and overflows the burn pot or thereis a build up of clinkers, this is an indication that the pellet fuel quality is poor or the stove may needcleaning. Check the stove for ash build up (clean if required)1.Open the door using the door handle located on the right-hand side of the stove.2. Lift the lever on burn pot to unlock the fire grate and remove it.3. The agitator locks at the right; rotate the top of the agitator towards the back of the firebox to unlockit, slide it to the left, and lift it out of the burn pot liner.4. Lift the burn pot liner out of the stove.5. Lift the burn pot from the firebox by gently lifting it up at the front of the burn pot, then slide it outfrom around the air intake tube and the ignitor cartridge.6. Remove any build up on the agitator (calcium build-ups are common when burning corn). Using ametal scraper, remove material that has accumulated or is clogging the liner’s holes and dispose ofthe scraped ashes from the liner and from inside the burn-pot.Fire Grate7. Place the burn-pot back into the stove, there are hooks at thefront of the burn pot that sit in a mount in the firebox. EnsureAgitatorthat the air intake tube and the ignitor cartridge are properlyinserted into the burn pot.8. Place the liner back into the burn-pot, making sure that theBurn PotLinerignitor hole in the liner is aligned with the ignitor tube.9. Slide the agitator back into place and turn rotate the topSpringtowards the front of the stove to lock it in.LoadedIgnitor10. Set the fire grate in place, it should sit level on the front andback of the burn pot liner. Lock it in with the lever on the burnAir IntakeTubespot.Burn Pot11. Close the doorFigure 8: M55C-FPI Burn Pot Assembly.12
Routine Cleaning and MaintenanceHEAT EXCHANGER TUBES (Weekly)The exchanger tube scraper rod handle is located abovethe firebox door. Move the handle all the way in and outa few times (ONLY WHEN THE UNIT IS COLD) in orderto clean away any fly ash that may have collected onthe heat exchanger tubes. As different types of
3 Introduction * This manual is designed for the home owner in conjunction with the technical manual. Rating LabeL Location: The rating label is located on the top of the hopper. FueL QuaLity: Fuel quality is important, please read the following: Your Enviro pellet stove has been designed to burn ¼" (6mm) dia wood pellets and other