Transcription
USER’S MANUALNight Owl ConnectComputer ManagementSoftware (CMS)MAC and Windows Operating Systemwww.NightOwlSP.com
TABLE OFCONTENTS2
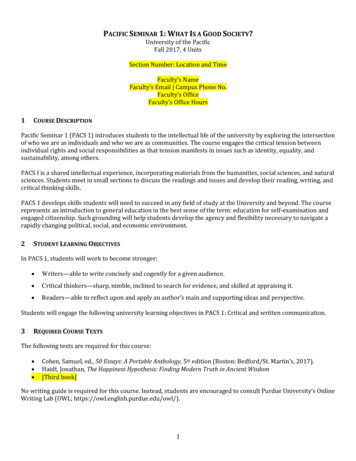
Table of ContentsChapter 1: System Requirements and Device Compatibility. 5Chapter 2: Download Instructions. 8Chapter 3: Installation Guide.11Chapter 4: Welcome Screen.15Chapter 5: Get Started.17Chapter 6: Sign In.20Chapter 7: Forgot Password.22Chapter 8: Home Page.258.1 Sign Out.258.2 View Mode.268.3 Snapshot.278.4 Record.288.5 Sound On/Off.298.6 Zoom.298.7 Refresh.308.8 Collapse and Expand Device List.318.9 Play/Pause Device(s) and Cameras on Live View.328.10 Calendar.338.11 Events.34Chapter 9: Settings.38Chapter 10: Appendix.4010.1 Using Night Owl Connect.4010.2 App Overview.4310.2.1 Add Device.4410.2.1.1 Adding a Standalone Camera.4410.2.1.2 Adding a Night Owl Doorbell.4810.2.1.3 Adding a Night Owl Wireless Gateway.5110.2.1.3 (a) Adding a Doorbell to the Wireless Gateway.5210.2.1.3 (b) Adding a Wireless Camera to the Wireless Gateway.5410.2.1.4 Adding a Night Owl DVR/NVR.57Customer Support.Back CoverTHIS MANUAL WAS ACCURATE AT THE TIME IT WAS COMPLETED. DUE TO OUR ONGOING EFFORT TOCONSTANTLY IMPROVE OUR PRODUCTS, FUNCTIONS MAY HAVE BEEN ADDED OR CHANGED.3
CHAPTER 1System Requirementsand Device Compatibility4
Chapter 1: System Requirements and Device CompatibilitySystem RequirementsSYSTEM VERSIONMAC Operating Systems Details MAC OS X – 10.12.6 and aboveWindows Operating Systems Details Windows 105
Device CompatibilitySecurity Systems (Sold Separately)HC20X SeriesC20X Series and C50X SeriesWNVRC20 SeriesIC8 SeriesWireless Security (Sold Separately)Smart DoorbellGatewayIndoor CameraOutdoor Camera6
CHAPTER 2Download Instructions7
Chapter 2: Download Instructions1Go to the Night Owl’s Support Site by clicking the following link or copy and paste the link into your ing the search bar, enter “Night Owl Connect”.3Select “Search”.4Select “Night Owl Connect CMS Download”. You will be redirected.8
6Select “Night Owl Connect (PC & Mac)” link shown below.7Finally, select “Download” to download the CMS!9
CHAPTER 3Installation Guide10
Chapter 3: Installation GuideMAC INSTRUCTIONS1From the downloads folder, select the “.dmg file.”2When the software opens, drag the Night Owl Logo into the Applications folder as shown below.3The CMS will finish installing.4To open, select the CMS in the Applications folder.11
WINDOWS INSTRUCTIONSNote: Night Owl Connect CMS is optimized for Windows 10 but may run on earlier versions.1From the downloads folder, select the setup file.2Select “I Agree,” then select “Install” to choose a location for the CMS installation.Note: You must accept the terms to use the CMS.12
3Once the CMS has finished downloading, select “Finish” to complete the setup and launch the CMS.4To open, select the CMS in applications.13
CHAPTER 4Welcome Screen14
Chapter 4: Welcome ScreenNote: Night Owl Connect CMS can use the same account to login as Night Owl Connect.To Create an Account:1Enter a valid Email Address.2Create a Password.3Select “Remember Password” if you would like your password to be stored.4Select “Auto-Login” if you would like to auto login when the software is initialized.15
CHAPTER 5Get Started16
Chapter 5: Get Started1From the Home Screen, select “Get Started”.2Read through the Terms and Conditionsand select “Agree” to continue.3Enter a valid Email Address, create apassword, and re-enter the password forconfirmation.4Select “Create Account”.17
56Select “OK” when the confirmation screen appears.Check your inbox for an email containing aVerification Code.Note: Check your Spam/Junk folder beforeselecting “Resend Code.”7Copy the code and enter it into the text box. Select “Resend Email” if you did not receive theverification email. Select “Submit” to finish creating and verifying your account.18
CHAPTER 6Sign In19
Chapter 6: Sign In1Enter the account’s Email Address and Password.2Select “Sign In” to load the CMS.20
CHAPTER 7Forgot Password21
Chapter 7: Forgot Password1On the Home Screen, select “Forgot Password?” to perform a password reset.2Enter the account’s email address and createa new password.322Select “Get Verification Code.”
4Find the verification code in your email and enter it into the “Enter Verification Code” field.5Select “Submit Verification Code”.6Congratulations! Your password has beenchanged. Select “OK”.Note: To return to the Home Screen, selectthe “Back Arrow” on the top of the page.23
CHAPTER 8Home Page24
Chapter 8: Home PageNote: To add cameras to Night Owl Connect CMS, you MUST use the Night Owl Connect Mobile App.For information on how to do this, see Appendix.8.1 Sign OutA SelectBat the top of the page.25Selectto sign out of the CMS.
8.2 View ModeA Select theBto change the View Mode.View Mode Options: 1, 4, 6, 8, 9, 16, and 2526
8.3 SnapshotA Select theBto take a snapshot of the Live View.A message box opens with the image file location. Select “Open” to view the folder.27
8.4 RecordA Selectto capture the Live View.BSelectagain to stop recording.CWhen a recording is stopped, a notification appears with the video’s locationand the option to open it.28
8.5 RecordA Click theto turn the sound on and off for the selected channel.Sound OnSound Off8.6 ZoomA To zoom in or out, hover the mouse over the any desired view in any layout.BUsing the mouse, scroll forward on the selected Live View to zoom in.CTo zoom out, scroll the mouse’s wheel backwards on a selected live view.29
8.7 RefreshA SelectBSelect theto update the camera’s and device’s status (either “Online” or “Offline”).button to reload the camera’s live view.30
8.8 Collapse and Expand Device ListA Select theBSelectto open the device list.to close the device list.31
8.9 Play/Pause Device(s) and Cameras on Live ViewA Selecting “Play” on a device loads the Live View for all connected channels.BSelect “Play” again to stop the Live View on all cameras.CSelecting “Play” on an individual channel loads the Live View for that specific device.D Select “Play” again to stop the Live View.32
8.10 CalendarA Click theBto open the Calendar.Use the Calendar to search for recorded events on a specific day.33
8.11 EventsA TheBtab shows all the devices that have been added to Night Owl Connect.When a device is selected, a list view of recordings from the highlighted date appears.34
CSelectto view the recording.D To download a recording, selectfound in the bottom right corner of each thumbnail.35
EEvent Player Controls:Snapshot: Capture and save a snapshot image from the recordingPlay/Pause: Toggle to Play and Pause the recordingSound On/Off: Toggle to turn sound controls on or offStop: Select the “X” to stop viewing the recording36
CHAPTER 9Settings37
Chapter 9: SettingsA Access the Settings Menu by clickingicon in the top right corner of the CMS window.1234561Account: Displays the account name and password information2Management: Change the View Mode or edit the Storage Settings for snapshots, local recordings,and downloads3Live View Video Quality: Select Standard or High Definition resolution4Help: Access Night Owl’s Support Site for the latest Manuals, Self-Help Videos, andTroubleshooting Articles5About: Displays information about the latest software version6Subscriptions: Displays active Night Owl Cloud subscription plans38
CHAPTER 10Appendix39
Chapter 10: Appendix10.1 Using Night Owl Connect1Download the appropriate app from the App Storeor Google Play Store and install the application onyour device.Note: Setup is the same for Smartphone and Tablet.2Create an account using an email addressfor the username and a password between6-20 characters.3After completing the account setup andverification process, sign into the app andtap the “ ” symbol to add a device.The Night Owl Application will lead youthrough the rest of the setup process.40
Connecting and Adding your DeviceNote: When adding a new device, it may take 5-10 minutes before you begin receiving notifications.A device can be added to the Night Owl Connect App by using the application’s Smart Auto Detectionor through a QR Code Setup. With Smart Auto Detection, your DVR/NVR will automatically be detectedby the Night Owl Connect software, making connecting easy! To use this preferred method, ensure yourSmart Device and DVR/NVR are both on the same network.Wi-FiEthernet Cable4Adding a DeviceTo begin adding a new device, first select theyellow plus sign within the Device menu. Thenselect your device type from the Device list andfollow the on screen instructions.4A Smart Auto DetectionIf your DVR/NVR and Smart Device arerunning Night Owl Connect on the samenetwork, the Smart Auto Detection willfind your DVR/NVR. If this method is notavailable, please use the QR Code Setupfrom step 4B below.4B QR Code SetupTo use the QR Code Setup, select “SetupDevice by QR Code” and hover your SmartDevice camera lens over the QR Codelocated on the top of your DVR/NVR.41
Log into your App5On the Device Login screen, enter the login information for the DVR/NVR (Remember, the DVR/NVR login and Night Owl Connect App login are different). The DVR/NVR username is admin bydefault. If you are not the admin, login with your username credentials.admin is case sensitive(all lowercase).The password will be the same password you created during the StartupWizard and should be stored in your Quick Setup Guide. You must keythe DVR/NVR password verbatim to add it to the app.Note: This is the password of your DVR/NVR, NOT the password used to log into the Night Owl Connect App.42
10.2 App OverviewLive ViewDisplays real-timefootage of your system.Add DeviceAdd connected devicesto your DVR/NVR.43AccountManage accountsettings, add a shareddevice, and changepassword.
10.2.1 Add DeviceEach Night Owl device is unique and different in their setup process. Please follow the instructionsclosely for your device.10.2.1.1 Adding a Standalone Camera1Select the “ ” symbol on the Home Page.2Select “Standalone Camera.”3Select “Connect To Home Wi-Fi” or“Connect To Night Owl Gateway.”4If the Status Light is flashing, select “Yes,it is flashing,” and proceed to Step 6.Otherwise select “No it’s not flashing,”and continue to Step 5.44
5Select the “Camera Type” as shown in Step 5.5A For Device Type 1:Locate the Sync/Reset hole on the backof the camera. Insert the reset pin andpress until you hear “Please be patient,camera is resetting”. Wait until you hear,“Camera is in pairing mode,” then selectNext to continue.5B For Device Type 2:Locate the Sync/Reset hole on the backof the camera. Insert the reset pin andpress until you hear “Please be patient,camera is resetting”. Wait until you hear,“Camera is in pairing mode,” then selectNext to continue.45
6Once the Status Light is flashing, tap theSmart Device’s “Home Button.” Navigateto the Wi-Fi Menu within the SmartDevice’s settings.7Select the camera’s network (starts with“NOIP”), and return to Night Owl Connect.9Select your “Wi-Fi Network” and enter thepassword. Select “Next” when finished.For an Android device, select thecamera beginning with “NOIP”and continue to Step 9.8Be patient as the App connects to camera.Do not exit the App during this process.46
11 Name the device (e.g., Living Room Cam)and select “Complete Setup” to finish.Once done, you are returned to theHome Page.10 Hold tight! Connecting to the Wi-Finetwork may take up to 2 minutes.Note: If the setup fails, skip step 11 andproceed to step 12.12 If the Setup Failed page appears, please repeat the process from the beginning.47
10.2.1.2 Adding a Night Owl Doorbell1To add a Doorbell, select the “ ” symbolon the Home Page.2Select the “Doorbell.”3Select “Connect To Home Wi-Fi” or“Connect To Night Owl Gateway.”4Verify the doorbell is in pairing mode(indicated by a white status light spinningclockwise). If the doorbell is not in pairingmode, press and hold the reset button on theside of the doorbell to enter pairing mode.48
5Watch the in-App video on how tofinish your wireless Doorbell setup andselect “Next.”6Once the Status Light is flashing, tap theSmart Device’s “Home Button.” Navigateto the Wi-Fi Menu within the SmartDevice’s settings.8Be patient as the App connects to theDoorbell. Do not exit the App duringthis process.For Android users, select“Doorbell” from the list ofdevices and continue to step 9.7Once in the Wi-Fi menu, select the“Doorbell Network,” and return toNight Owl Connect.49
910 Hold tight! Connecting to the Wi-Finetwork may take up to 2 minutes.Select your “Wi-Fi Network” and enter thepassword. Select “Next” when finished.Note: If the setup fails, skip step 11 andproceed to step 12.11 Name the device (e.g., Front Door) andselect “Complete Setup” to finish. Oncedone, you are returned to the Home Page.12 If the Setup Failed page appears, pleaserepeat the process from the beginning.50
10.2.1.3 Adding a Night Owl Wireless Gateway1To add a Wireless Gateway, select the“ ” symbol on the Home Page.2Select “Gateway.”3Night Owl Connect provides onscreen instructions to connect theGateway to Night Owl Connect.Select “Next” to continue.4Hold tight, Night Owl Connect isestablishing a connection.Note: The Smart Device MUST be on thesame network as the Gateway.51
5Select your “Wi-Fi Network” and enter the password. Select “Next” when finished.Note: If the setup fail, please repeat the process from the beginning.10.2.1.3 (a) Adding a Night Owl Doorbell to the Wireless Gateway12To add a Doorbell, select one of the “ ”symbols on the Home Page.52Select “Doorbell.”
3Select “Connect Doorbell to yourNight Owl Gateway.”4Verify the doorbell is in pairing mode(indicated by a white status light spinningclockwise). If the doorbell is not in pairingmode, press and hold the reset button onthe side of the doorbell to enter pairingmode. Then select “Next”.5Press and hold the “Sync” button onthe side of the Gateway until you hearthe voice prompt. Then select “Next”.6Be patient as the Doorbell connects to theGateway. After hearing the voice promptfrom the Doorbell, select “Next.”53
78The Gateway’s voice prompt letsyou know when it’s connected to thedoorbell. Select “Next” after hearingthe voice prompt say, “WooHoo!Setup is complete.”Select “Finish” to end the setup processand return to the Home Page.10.2.1.3 (b) Adding a Wireless Camera to the Wireless Gateway12To add a Camera, select one of the “ ”symbols on the Home Page.54Select “Standalone Camera.”
3Select “Connect to Night Owl Gateway.”4If the Status Light is flashing, select “Yes,it is flashing,” and proceed to Step 5.Otherwise select “No it’s not flashing,” andfollow the in-App instructions.5Make sure the camera is no farther than 3 ft.from the Gateway and select “Next”.6Press and hold the sync button on the sideof the Gateway for 3 seconds. Wait for thevoice prompt and select “Next.”55
87Be patient as the camera connects tothe Gateway. When the camera’s voiceprompt confirms setup is complete,select “Next.”9Select “Finish” to end the setup process and return to the Home Page.56The Gateway’s voice prompt lets you knowwhen it’s connected to the camera. Select“Next” after hearing the voice prompt say,“WooHoo! Setup is complete.”
10.2.1.4 Adding a Night Owl DVR/NVR1To add a DVR/NVR, select the “ ”symbol on the Home Page.2Select “DVR/NVR.”3The App is searching for your device.When the device is found, select itand continue to Step 6. If the deviceis not found, continue to Step 4.4If the DVR/NVR is not found, it can beadded manually. Select the “Add Manually”button on the bottom of the page.57
5The Smart Device’s camera opens, and you are directed to scan the QR code. The QR code islocated in the DVR/NVR menu under “System” and then “Device Info.” There is also a QR codesticker located on the body of the DVR/NVR.OR6Once Night Owl Connect detects the QR Code:6A Create a name.6B Enter the DVR/NVR Password.Note: This is the password for the DVR/NVR created during the Startup Wizard and not thepassword for Night Owl Connect.6C Select “Add” to complete setup.58
Need Help?For system manuals, troubleshooting guides, FAQs, videotutorials and more:1Please visit www.NightOwlSP.com.2Click the Support tab.3Enter your product’s model number in the search bar.4Access the support material needed.Contact UsPHONEEMAILWEBSITETechnical SupportTechnical Support24/7 Product Support1.866.390.1303Support@NightOwlSP.comLive Chat 24/7, 365 days a yearSales Support How-To Videos ManualsPre-Sales SupportSales@NightOwlSP.com(English, Spanish & French)1.866.979.0580www.NightOwlSP.comiPhone, iPad, Mac and Mac OS X are registered trademarks of Apple Inc.Windows, Windows XP, Windows Vista, Windows 7, Windows 8 andWindows 10 are registered trademarks of Microsoft Corporation in theUnited States and/or other countries.FCC RADIATION NORMFCCThis device complies with Part 15 of the FCC Rules. Operation is subject to the following two conditions: (1) this device may not cause harmfulinterference, and (2) this device must accept any interference received, including interference that may cause undesired operation.FCC Compliance StatementThese limits are designed to provide reasonable protection against frequency interference in residential installation. This equipment generates,uses, and can radiate radio frequency energy, and if not installed or used in accordance with the instructions, may cause harmful interference toradio communication. However, there is no guarantee that interference will not occur in television reception, which can be determined by turningthe equipment off and on. The user is encouraged to try and correct the interference by one or more of the following measures: Reorient or relocate the receiving antenna. Increase the separation between the equipment and the receiver. Connect the equipment into an outlet on a circuit different from that to which the receiver is connected. Consult the dealer or an experienced radio/TV technician for help.CAUTION!The Federal Communications Commission warns the user that changes or modifications to the unit not expressly approved by the party responsiblefor compliance could void the user’s authority to operate the equipment.This equipment should be installed and operated with a minimum distance of 8 inches between the radiator and your body.Rev 190816
Note: Night Owl Connect CMS can use the same account to login as Night Owl Connect. To Create an Account: Enter a valid Email Address. Create a Password. Select "Remember Password" if you would like your password to be stored. Select "Auto-Login" if you would like to auto login when the software is initialized. 1 2 3 4
