Transcription
USER MANUAL27972-01A
48 MONTH “GOLD MEDAL” WARRANTYYour ETS Distributor (including ETS, LLC if purchased directly), through a manufacturer’s warranty, warrants your tanningunit to be free of structural defects in material and workmanship, under normal use, for its lifetime. Your ETS Distributorwill, at its discretion, repair any structural defect which materially affects the performance of the tanning unit, or replace thetanning unit.For forty-eight (48) months following the purchase date of your tanning unit, your ETS Distributor will provide replacements for parts that prove to be defective in material or workmanship, with the following exceptions: gas springs, ballastsand electronic lamp starters are warranted against manufacturer’s defects for a period of one (1) year; “glow tube” lampstarters and cracked or broken endcaps are warranted against manufacturer’s defects for a period of ninety (90) days; fluorescent lamps are warranted against manufacturer’s defects for a period of thirty (30) days; acrylics are warranted againstmanufacturer’s defects for a period of one (1) year (prorated) following the purchase date of your tanning unit. Shippingcharges will be covered during the first ninety (90) days following the purchase date.Your ETS Distributor (including ETS, LLC if purchased directly), also extends to you a two (2) year parts warranty on allT-Max remote system components. External voltage transformers (buck-boosters) are covered by a one (1) year parts andlabor warranty, provided you send back the defective transformer.Labor costs associated with repair or replacement work covered by this warranty will be reimbursed for repair or replacementwork required to be performed for a period of ninety (90) days following the shipping date of your tanning unit. Normalwear and tear, damage from misuse or abuse, damage incurred in transit or damages resulting from unauthorized repairs ormodifications are not covered by this warranty. Warranty coverage does not include cosmetic abnormalities such as scratches, nicks, dents, or other cosmetic changes that do not materially interfere with the function of the tanning unit.THIS 48 MONTH “GOLD MEDAL” WARRANTY IS EXPRESSLY MADE IN LIEU OF ANY OTHER WARRANTIES,EXPRESS OR IMPLIED, INCLUDING ANY IMPLIED WARRANTIES OF MERCHANTABILITY AND FITNESS FOR APARTICULAR PURPOSE, WHICH ARE HEREBY DISCLAIMED. No one has the authority to change or modify this 48Month “Gold Medal” Warranty in any respect. To obtain service under this 48 Month “Gold Medal” Warranty, contact yourauthorized ETS Distributor (or ETS, LLC if purchased directly). Proof of purchase, including serial number, is required.IN NO EVENT SHALL YOUR DISTRIBUTOR OR THE MANUFACTURER BE LIABLE AT LAW OR IN EQUITY FOR ANYLOSS, LIABILITY, DAMAGE OR EXPENSE IN AN AMOUNT IN EXCESS OF THE PURCHASE PRICE RECEIVED, ORFOR LOSS OF USE OR PROFITS, LOSS OF TIME, INCONVENIENCE, RENTAL OR SUBSTITUTE PRODUCTS, LOSS OFBUSINESS, LOSS OF INCOME, OR ANY OTHER INCIDENTAL, INDIRECT, SPECIAL OR CONSEQUENTIAL DAMAGES. Some states do not allow the exclusion or limitation of incidental or consequential damages, and the above limitationor exclusion will not apply to residents of some states. This 48 Month “Gold Medal” Warranty gives you specific, legal rightsand you may have other rights which may vary from state to state.All warranty service must be performed by an authorized service person using only ETS authorized replacement parts. Useof non-authorized parts may void your warranty. All labor charges must be authorized by your ETS Distributor prior to thestart of repairs and must not exceed the established rates and time allotment policies established by your ETS Distributor. Ifyour tanning unit must be returned for service within thirty (30) days from the purchase date, freight charges will be paidfor by your ETS Distributor, after which all freight charges shall be at your expense. Contact your ETS Distributor for theauthorized Service Center nearest you. This warranty is serial number specific and only applies to tanning units purchasedthrough an authorized ETS Distributor. This warranty is extended to the individual or legal entity whose name appears onthe original sales document and may not be transferred to any other individual or legal entity. This warranty is void if thetanning unit is modified in any manner from its original design.iETS, LLC 7445 Company Drive, Indianapolis, IN 46237-92961-800-449-3605 In Canada call 1-800-661-6292 or 519-421-121227972-01ATo obtain warranty service, contact your place of purchase. Proof of purchase, including serial number, is required for verification. Contact ETS, LLC only if you purchased your equipment directly.
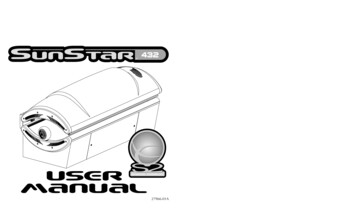
WelcomeCongratulations on your purchase of this technologically advanced sun tanning unit. It has beendesigned to provide years of dependable service for you.Please read all the instructions in this booklet before using the unit. Always be sure to observe allsafety precautions.27972-01AContentsSafety Information . . . . . . . . . . . . . . . . . . . . . . . . . . . . . . . . . . . . . . . .iiiInstallation . . . . . . . . . . . . . . . . . . . . . . . . . . . . . . . . . . . . . . . . . . . . . .1Pre-Installation Planning . . . . . . . . . . . . . . . . . . . . . . . . . . . . . . .1Unpacking and Inspection . . . . . . . . . . . . . . . . . . . . . . . . . . . . . .2Package Contents . . . . . . . . . . . . . . . . . . . . . . . . . . . . . . . . . . . . .2Operation . . . . . . . . . . . . . . . . . . . . . . . . . . . . . . . . . . . . . . . . . . . . . .3Before You Tan . . . . . . . . . . . . . . . . . . . . . . . . . . . . . . . . . . . . . . .3Exposure Times . . . . . . . . . . . . . . . . . . . . . . . . . . . . . . . . . . . . . .3Using Your Sunbed . . . . . . . . . . . . . . . . . . . . . . . . . . . . . . . . . . .4Setup . . . . . . . . . . . . . . . . . . . . . . . . . . . . . . . . . . . . . . . . . . . . . . . . .6Stereo Installation . . . . . . . . . . . . . . . . . . . . . . . . . . . . . . . . . . . .6Remote Connections . . . . . . . . . . . . . . . . . . . . . . . . . . . . . . . . . .7Care and Maintenance . . . . . . . . . . . . . . . . . . . . . . . . . . . . . . . . . . . .11Cleaning After Use . . . . . . . . . . . . . . . . . . . . . . . . . . . . . . . . . . .11Thorough Periodic Cleaning . . . . . . . . . . . . . . . . . . . . . . . . . . . .11Mechanical Inspection . . . . . . . . . . . . . . . . . . . . . . . . . . . . . . . .11Lamp and Acrylic Replacement . . . . . . . . . . . . . . . . . . . . . . . . .12Inside the Bench . . . . . . . . . . . . . . . . . . . . . . . . . . . . . . . . . . . .18Technical Information . . . . . . . . . . . . . . . . . . . . . . . . . . . . . . . . . . . . .19Setting Operating Parameters . . . . . . . . . . . . . . . . . . . . . . . . . . .19Troubleshooting . . . . . . . . . . . . . . . . . . . . . . . . . . . . . . . . . . . . .22Power Hookup . . . . . . . . . . . . . . . . . . . . . . . . . . . . . . . . . . . . .25ii
Safety InformationLABELING NOTICE: Labels are affixed on all systems to inform the user of possible dangers. Regulations are stated in 21 CFR, Section1040.20, and require that all products manufactured after September 8, 1986 which use sunlamps must display the following:DANGERUltraviolet radiation. Follow instructions. Avoid overexposure. As with natural sunlight, overexposure can causeeye and skin injury and allergic reactions. Repeated exposure may cause premature aging of the skin and skincancer. WEAR PROTECTIVE EYEWEAR; FAILURE TO MAY RESULT IN SEVERE BURNS OR LONGTERM INJURY TO THE EYES.Medications or cosmetics may increase your sensitivity to the ultraviolet radiation. Consult physician before using sunlamp if you areusing medications or have a history of skin problems or believe yourself especially sensitive to sunlight. If you do not tan in the sun, youare unlikely to tan from the use of this product. Children, the elderly, or fair skinned people who always burn easily and either never tanor tan minimally should not use this equipment.To use, lie down under canopy and pull down as far as adjustment will allow maintaining at least 6.5 inches (16.5 centimeters) betweenyour body and canopy clear plastic panel and side tanner clear plastic panel, otherwise overexposure may occur. Minimum use distanceelsewhere is touching the clear plastic panels. Do not use without clear plastic panels in place. Untanned persons should not tan on consecutive days during their first week of tanning. Never tan more than once a day. Tanning normally appears after the first few sessionsand maximizes after approximately four weeks. Tan once or twice per week thereafter to maintain appearance. Persons already havinga base tan may begin at advanced levels corresponding to the extent of their base tan.RECOMMENDED EXPOSURE TIMES IN MINUTESSkin Type:I Sensitive SkinII LightIII NormalIV DarkMAXIMUM EXPOSURE TIME IS 10 MINUTESLevel 1/Week 11st-3rd Sessions(Burns easily and severely and does not tan.)(Burns easily and severely and tans minimally.)(Burns moderately and tans average.)(Burns minimally, tans easily and above average.)234Level 2Level 3Level 4NOT RECOMMENDED FOR TANNING46857106810SubsequentMaximum101010WARNING: Read the instructions booklet before using this sunlamp product. All persons in the room should wear protective eyewearwhen lamps are on. Recommended eyewear: provided eyeshields or equivalent eyewear as defined under 21 CFR 1040.20. Other typesof eyewear may not provide adequate protection. Failure to use protective eyewear may result in severe burns or other eye injury. If discomfort develops, discontinue use and consult a physician.ONLY THE FOLLOWING LAMPS HAVE BEEN CERTIFIED FOR USE IN THIS EQUIPMENT:BRONZING SUN HPK90 Wolff Model BSHPK90 71-T12-200W VS-RBRONZING SUN GOLD Wolff Model BSG 71-T12-200W VS-R BI-PINHeraeus OH 30/50 or Heraeus OH 24/50 (facial unit)MARQUIS, Wolff System Model CF26W (shoulder unit)DISCONNECT POWER BEFORE ATTEMPTING TO CLEAN, RELAMP, OR ENGAGE IN THE MAINTENANCE OF THIS PRODUCT.THIS EQUIPMENT MUST BE EARTH GROUNDED.88465iii27972-01AThis product is in conformity with performance standards for sun lamp products under 21 CFR PART 1040.20 andANSI/UL Standard 482. Certified to CAN/CSA Standard C22.2 NO. 224.
Renseignements sur la sécuritéDANGERRayonnement ultraviolet. Veuillez suivre les instructions. Évitez une exposition excessive. Tout comme pour lesrayons du soleil, une exposition excessive peut causer des blessures aux yeux et à la peau et provoquer desréactions allergiques. Une exposition répétée peut causer le vieillissement prématuré de la peau et provoquer le cancer de la peau.PORTEZ DES LUNETTES PROTECTRICES: LE NON-RESPECT DE CETTE CONSIGNE DE SÉCURITÉ PEUT ENTRAÎNER DEGRAVES BRÛLURES OU DES LÉSIONS OCULAIRES À LONG TERME. Les médicaments ou les produits cosmétiques peuvent augmenter votre sensibilité au rayonnement ultraviolet. Consultez un médecin avant d’utiliser la lampe solaire si vous prenez des médicaments, si vous souffrez d’une maladie cutanée ou si vous croyez être particulièrement sensible aux rayons du soleil. Si vous ne bronzezpas au soleil, il est peu probable que vous bronzerez sous une lampe solaire. Les enfants, les personnes âgées et les personnes qui ontune peau claire qui brûle facilement, ne bronze jamais ou alors très peu, ne devraient pas utiliser cette lampe.Étendez-vous sous la partie supérieure, puis abaissez celle-ci aussi bas que possible, en veillant cependant à conserver un espace d’aumoins 6,5 pouces (16,5 centimètres) entre le corps et le panneau de plastique transparent de la partie supérieure et le panneau de plastique transparent de l’appareil de bronzage latérales, afin d’éviter une exposition excessive. Les autres parties du corps peuvent toucherles panneaux de plastique transparents. N’utilisez pas la lampe sans les panneaux de plastique transparents. La première semaine de bronzage, les personnes qui n’ont pas un hâle initial ne doivent pas se faire bronzer tous les jours. Ne vous faites jamais bronzer plus d’une foispar jour. Le bronzage commence normalement à apparaître après les premières séances : il atteint son apogée au bout d’environ quatresemaines. Les personnes qui ont déjà un teint hâlé peuvent commencer à des niveaux plus élevés, selon l’importance de leur hâle initial.TEMPS D’EXPOSITION RECOMMANDÉ EN MINUTES LE TEMPS D’EXPOSITION MAXIMAL EST DE 10 MINUTESType de peau:I Peau sensibleII Peau claireIII Peau normaleIV Peau foncéeÉlevé 1/Semaine 1Élevé 2ere e1 -3(brûle facilement et ne bronze pas)(brûle facilement et bronze très peu)2(brûle et bronze de façon modérée)3(brûle très peu, bronze plus facilement que la moyenne) 4456Élevé 3Élevé 4Sem. suivantesTemps maximalNON RECOMMANDÉ67881010101010AVERTISSEMENT : Lisez le livret d’instructions avant d’utiliser cette lampe solaire. Les autres personnes présentes dans la piècedoivent aussi porter des lunettes protectrices lorsque les lampes sont allumées. Coquilles de protection pour les yeux recommandées:Les coquilles de protection fournies ou l’équivalent, tel que le stipule le document 21 CFR 1040.20. Les autres types de lunettes protectrices peuvent ne pas assurer une protection adéquate. Utilisé sans lunettes protectrices, ce produit peut causer des brûlures oulésions oculaires graves. Si vous souffrez d’un malaise, arrêtez l’utilisation et consultez un médecin.SEULES LES LAMPES SUIVANTES ONT ÉTÉ HOMOLOGUÉES POUR CET ÉQUIPEMENT :BRONZING SUN HPK90 Wolff Modèle BSHPK90 71-T12-200W VS-RBRONZING SUN GOLD Wolff Modèle BSG 71-T12-200W VS-R BI-PINHeraeus OH 30/50 ou Heraeus OH 24/50 (unité faciale)MARQUIS, Wolff System Modèle CF26W (unité en bandoulière)Débrancher l’alimentation électrique avant de nettoyer l’appareil , d’en faire l’entretien ou de changer les lampes.27972-01ACET ÉQUIPEMENT DOIT ÊTRE MIS À LA TERRE.Ce produit est conforme aux normes de rendement pour les lampes solaires dans le documents 21 CFR, partie1040.20 , ANSI/UL 482 , CAN/CSA C22.2 N 224.88465iv
InstallationPre-Installation PlanningBefore your sunbed is installed, you should observe the following considerations.DANGERShock hazard.Disconnect power beforeservicing. The SS755 requires a dedicated circuitcapable of providing either 49 Amp, 3phase service (3 wire plus ground) or85A, 1-phase service (2 wire plusground) at 220VAC. This unit must behardwired directly to a junction boxon a dedicated circuit. We recommend connection by a professionalelectrician. Consult local and/ornational codes for proper circuitbreaker and wire gauge. The subwoofer in the bench requires astandard 110VAC outlet near the backof the unit.1Always wear protective eyewearwhen unit is on.Failure to may result in severe burnsor longterm injury to the eyes.CAUTIONUse of a voltage source above 230VAC (with unit running) may preventproper operation of the sunbed andcould cause damage and void thewarranty.CAUTIONAir from the room is used to coolthe sunbed. Maximum ambientroom temperature should be 80 F.Place your sunbed no closer than6” from side walls. May be positioned against back wall. Make surenothing obstructs the airflow into orout of the fan openings. A poorlyventilated room may cause the unitto become hot and cause discomfort to the user.27972-01A IMPORTANT! Operating voltage mustbe below 230V AC or may require aBuck Booster.WARNING
Installation - Unpacking and InspectionUnpacking and InspectionPackage ContentsYour sunbed arrives fully assembled. In addition to a pillow and a few items leftSome disassembly may be necessary to over from the assembly, the following itemstransport the unit into your salon. Due to are provided for use and maintenance.the size and weight of the unit we recommend installation by professional technicians.After unpacking, inspect the unit to makesure it is free from any visible damage.Report the extent of any damage to thetransportation company.Record the serial number, located on therear of the unit, in the area providedbelow. This information will be requiredwhenever you call Customer Service.Safety GogglesQuantity 15/16” Hex key (for acrylic latches)Quantity 1Record this information for ease of service:Date of purchase:Silver Touch-up Paint(bottle may vary)27972-01ASerial number:2
OperationBefore You TanDANGERSome medication may increase your sensitivity to ultraviolet light. It is recommendedthat you consult a physician before usingthis sunbed if taking any medication or if yoususpect that your skin might be especiallysensitive to sunlight.Before using your sunbed, please note thefollowing important precautions. Your skin should be free of cosmetics,oils, or other body lotions prior to tanning except for those specificallymade for use with tanning devices.However, do not remove natural bodyoils by bathing or showering immediately before tanning.DANGERShock hazard.Do not operate this device near wateror while you are wet.Exposure Times Your hair should be free of gels,mousses, sprays, or other hair productsprior to tanning. These products cancause damage to the sunbed acrylic.As an alternative, a shower cap ortowel can be worn to keep treated hairaway from the sunbed surfaces.Follow the guidelines for skin type andexposure times as shown in the tablebelow. Untanned persons should not tanon consecutive days during their first weekof tanning. Never tan more than once aday. Tanning normally appears after the firstfew sessions and maximizes after approximately four weeks. Tan once or twice per This unit intended for individual use. week thereafter to maintain appearance.Only one pair of eyewear is included. Persons already having a base tan maybegin at advanced levels corresponding tothe extent of their base tan.RECOMMENDED EXPOSURE TIMES IN MINUTES3(Burns easily and severely and does not tan.)(Burns easily and severely and tans minimally.)(Burns moderately and tans average.)(Burns minimally, tans easily and above average.)234Level 2Level 3Level 4NOT RECOMMENDED FOR Skin Type:I Sensitive SkinII LightIII NormalIV DarkMAXIMUM EXPOSURE TIME IS 10 MINUTESLevel 1/Week 11st-3rd Sessions
Operation - Using Your SunbedUsing Your SunbedA12345BCA Timer button - Turns bed on. Timer dis- 1 Shoulder Tanner Status - ON or OFF.play shows remaining time. If a lesser2 Face tanner status - OFF - LOW - HItime is desired, press timer button untildesired time is displayed.3 Remaining timeB Timer display - Displays session status. 4 Body fan status - LOW - MED - HI(See right)C Stop button - Interrupts tanning session.5 Volume status - OFF, 1-10Shoulder tanner control - TurnsSee next page for operating instructions.The timer is programmed at the factoryFace tanner control - Adjusts intensi- with start-up defaults. To modify these, seety of Face Tanner.Setting Operating Parameters.Shoulder Tanner on and off.Body fan control - Controls the speedof the body fan during use.27972-01AVolume control - Adjusts music level.WARNINGWear protective eyewear.Failure to may result in severe burns orlongterm injury to the eyes.4
Operation - Using Your Sunbed(Operation as a stand-alone unit or connected to (Operation while connected to a T-Max remotea remote system using a control relay. If using T- system. If using other remotes or no remote system, see left.)Max see right.)527972-01A1. Lift the canopy, lie down on the bench 1. Lift the canopy, lie down on the bench(face up) and lower the canopy toward(face up), lower the canopy towardyour body using the canopy handle.your body using the canopy handle.Maintain at least 6.5” (16.5 centimeMaintain at least 6.5” (16.5 centimeters) between the canopy and yourters) between the canopy and yourbody.body.2. Put on your safety goggles.2. Put on your safety goggles.3. Assuming the remote system has been3. Press the START button (see previousset to allow a pre-tanning delay time,page) to begin the tanning session. Thethe timer display will read “Press startunit will turn on and the timer willwhen ready:” and the remaining delaybegin to count down. If a lesser time istime. Press the START button (see predesired, press the START button untilvious page) or wait until the delay timethe desired time is displayed.has expired to begin the tanning session. The unit will turn on and the timer4. When the timer reaches “0:00” thewill begin to count down.lamps turn off. If you want to stop yoursession before time expires, press the 4. When the timer reaches “0:00” thelamps turn off. If you want to stop yourSTOP button. You will have ten secsession before time expires, press theonds to restart with the remainingSTOP button.time, otherwise the session will end.5.Raise the canopy by pushing up on the5. Raise the canopy by pushing up on theouter edge of the canopy. Do not pushouter edge of the canopy. Do not pushup on the acrylic shield. The coolingup on the acrylic shield. The coolingfans run for 10 minutes after the lampsfans run for 10 minutes after the lampsshut off. The timer will indicate ashut off to aid in cooling the sunbed.reminder to clean the sunbed. Afterthe sunbed is cleaned, press theSTART button and the display willreturn to the “welcome” screen.
SetupStereo InstallationThe SS755 accepts an input from a stereosource. The unit contains speakers insidethe Shoulder Tanner and a subwoofer in thebench. Volume control is convenientlylocated on the timer keypad (see Using YourSunbed).SPEAKER LEVEL INPUTS27972-01ALocate the small, black box tethered to theback of the unit with cables (see right). Thereare three sets of inputs, three remote ports(explained on the next page), speaker levelinput spring connectors and line level RCAinput jacks. Connect the output from astereo source (receiver, CD player, “boombox”, etc.) to either of the last two inputs.Whenever possible, use the RCA input jacksas this will eliminate problems with volume.RCA INPUTJACKSadjust it in the future. Two default volumelevels, one lower level for when the unit isidle and a slightly higher level when theunit is turned on, keep the music audibleyet not too loud for other tanners. SeeSetting Operating Parameters to change thedefaults. Music may play continuouslythrough the sunbed during the day. Thesunbed controls only the volume, so if thesource is a CD player (or tape, etc.) youOnce a source is connected, apply power to must control the music at the source unit.the sunbed (do not turn the sunbed on).Remove the Shoulder Tanner Acrylic andmake sure the small LED light on the frontspeaker is on. If not, press the power button FRONT SPEAKERon the speaker. Adjust the speaker volumeto around half, using the knob on the speak- POWER BUTTONer. This is the baseline setting. Install theShoulder Tanner Acrylic If using the RCA “ON” INDICATORjacks, setup is complete. If using the speakLIGHTer terminals, adjust the volume on thesource unit. Once a pleasant volume level VOLUME CONTROLis reached, use only the timer keypad to6
Setup - Remote ConnectionsRemote ConnectionsT-Max ProductsYour sunbed incorporates advanced circuitryallowing it to connect and communicate withmost remote control systems. If a remote systemis to be used, first determine whether the remotesystem is a T-Max System or a standard remotesystem operating with a control relay. The following pages outline many different remote connection scenarios. Find the scenario that best fits yourapplication.Three remote ports on the tethered box allowconnection to the remote system, two RJ-22 (4wire) ports and one RJ-11 (6-wire) port. Both RJ22 remote ports are identical, allowing connection of multiple units in a “daisy chain” configuration. The RJ-11 port is intended for the new TMax wireless remote system. A Remote ControlBypass plug is already installed in one of the RJ-22remote ports to bypass the remote functionality,otherwise known as “stand-alone” operation. Yoursunbed will not operate without the Remote ControlBypass plug or a remote system connected.WIREDREMOTEPORTS (RJ-22)WIRELESSREMOTEPORT (RJ-11)The T-Max remote systems offer the ultimate insunbed control, while allowing the tanner easystraightforward operation. Your sunbed is configured to directly connect to this system, includingthe new wireless remote system. The circuitry insideyour sunbed eliminates the need for the T-Max 1Aor 3A when connecting to the T-Max Managerseries. Your sunbed supports the auto addressingfeature of the latest T-Max Manager models andmany parameters. See Setting Operating Parametersand your T-Max manual for descriptions of theseparameters and how they function.T-Max Wireless Remote SystemThe T-Max AP-900 eliminates wires in yoursalon, allowing easy setup without hiring anelectrician to run wires. It also protects yourinvestment from damage by isolating eachunit from one another. Your sunbed arrives“wireless ready”, which means it connectsdirectly to the T-Max wireless system. Oldertanning beds, and T-Max managers, also utilize this system but require a T-Max “PowerInjector” (PI) to provide the needed power tothe wirless unit.Remote System Hook-up ScenariosFollow the diagrams on the next page to seethe many different scenarios for hooking upyour salon. If you need further assistance, callT-Max directly at (417) 338-5101.27972-01A7
Setup - Remote ConnectionsScenario 1 - T-Max ManagerSeries with Complete WirelessConnect one AP-900 (with PowerInjector) to the Manager and oneAP-900 to each of the tanning beds. Installas many beds as you like with this configuration. Units that do not communicate with T-Maxwill need an AP-900 with Power Injector and an additional 3A to operate. If you have an older T-Max Manager that doesn’t supportauto addressing, set the address of each sunbed manually as described in Settingthe address manually. You can place your sunbed at any location in the series.Scenario 2 - Single Bed wired to T-Max 3AIn single sunbed installations, the T-Max 1A and3A can offer the same control as the T-Max Manager, eliminating the need for a Manager. Ifyou’re using a 1A in this manner, it must have achip labelled “master” installed on its circuitboard. The remote control bypass plug must not beused in this configuration. The 3A may be used asa “master” with no modification.After you have setthe T-Max 1A’s,or 3A’s, address to“0” (refer to your TMax user’s guide)and the sunbed’saddress to “1”, simply connect one AP-900 (withPower Injector) to the T-Max 3A and one AP-900to the tanning bed.27972-01AScenario 3 - T-Max Manager Series withWireless comboWireless can be easily added to an existingsalon already utilizing T-Max . Connectone AP-900 (with Power Injector) to theManager and one AP-900 to each wirelessready tanning bed. The rest of the salon maybe “daisy-chained” together and connectedto the Manager.8
Setup - Remote ConnectionsScenario 4 - T-Max Manager Series withWireless comboConnect one AP-900 (withPower Injector) to the Managerand one AP-900 to a wireless ready tanning bed. The rest of the salon may be“daisy-chained” together and connectedto the wireless equipped tanning bed, eliminating the need to wire the Manager to thetanning beds.Scenario 5 - T-Max Manager Series with wiresAs always, this tanning bed is fully compatiblewith a wired T-Max system. Simplyconnect the RJ-22 modular cable(s),described in the T-Max Manager manual, into the remote port(s) located on the tethered input box and follow the instructions thatcame with your remote system.Scenario 6 - Single Bed wired to T-Max 3AIn single sunbed installations, the T-Max 1A and3A can offer the same control as the T-Max Manager, eliminating the need for a Manager. Ifyou’re using a 1A in this manner, it must have achip labelled “master” installed on its circuitboard. The remote control bypass plug must not beused in this configuration. The 3A may be used asa “master” with no modification.After you have set the T-Max 1A’s, or 3A’s, addressto “0” (refer to your T-Max user’s guide) and thesunbed’s address to “1”, simply connect the RJ-22modular cables, described in the T-Max user’sguide, directly into either of the smaller ports located on the tethered input box and either port on theback of the T-Max 1A or3A.927972-01ANOTE: A T-Max 1A with a“master” chip can be substitutedfor a 3A.
Setup - Remote ConnectionsScenario 7 - Non T-Max Remote System wiredto unitMost non-T-Max remote systems control thesunbed by the use of a relay. The relay operatesthe sunbed by connecting and disconnecting apair of wires leading from the sunbed. Refer to theuser’s manual provided with your remote systemto determine if it operates in this way. To connectyour sunbed to this type of system a remote interface kit is required. Contact your place of purchaseto obtain the kit. The illustration below details atypical connection. Follow the instructions provided with the kit and from the remote’s manual tomake the necessary connections.Auto Addressing with T-Max Your T-Max Manager manual will explain how toget into auto address mode. Once auto address hasbeen activated, the bed display will show “Autoaddress active press start key to address.” Wait 10seconds for the system to communicate properlyand press the START button. The display will indicate “waiting for address” and return to the welcome screen when it has accepted the address.Setting the address manuallyBefore connecting your sunbed to the T-Max Manager or T-Max 1A or 3A, the address of yoursunbed must first be set. Set the “id” manually asdescribed below.Setting the address (parameter 1)CAUTION27972-01AThe remote connection is not designed to supplyor accept high voltage, nor can it provide powerto an external timer. The sunbed’s remote interface circuitry operates on 5 volts, attempting toconnect it to any higher voltages will damage thesunbed as well as void your warranty.1. Press and hold the STOP button, located on thesunbed display, until the display enters the “settings”
tanning unit is modified in any manner from its original design. To obtain warranty service, contact your place of purchase. Proof of purchase, including serial num-ber, is required for verification. Contact ETS, LLC onl y if you purchased your equipment directly. ETS, LLC 7445 Company Drive, Indianapolis, IN 46237-9296 1-800-449-3605 In Canada call 1-800-661-6292 or 519-421-1212. 27972-01A ii .