Transcription
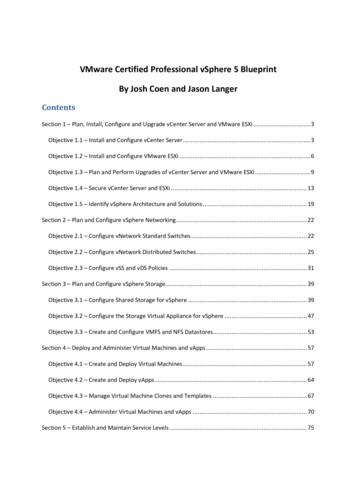
VMware Certified Professional vSphere 5 BlueprintBy Josh Coen and Jason LangerContentsSection 1 – Plan, Install, Configure and Upgrade vCenter Server and VMware ESXi . 3Objective 1.1 – Install and Configure vCenter Server . 3Objective 1.2 – Install and Configure VMware ESXi . 6Objective 1.3 – Plan and Perform Upgrades of vCenter Server and VMware ESXi . 9Objective 1.4 – Secure vCenter Server and ESXi . 13Objective 1.5 – Identify vSphere Architecture and Solutions . 19Section 2 – Plan and Configure vSphere Networking . 22Objective 2.1 – Configure vNetwork Standard Switches . 22Objective 2.2 – Configure vNetwork Distributed Switches . 25Objective 2.3 – Configure vSS and vDS Policies . 31Section 3 – Plan and Configure vSphere Storage . 39Objective 3.1 – Configure Shared Storage for vSphere . 39Objective 3.2 – Configure the Storage Virtual Appliance for vSphere . 47Objective 3.3 – Create and Configure VMFS and NFS Datastores. 53Section 4 – Deploy and Administer Virtual Machines and vApps . 57Objective 4.1 – Create and Deploy Virtual Machines . 57Objective 4.2 – Create and Deploy vApps. 64Objective 4.3 – Manage Virtual Machine Clones and Templates . 67Objective 4.4 – Administer Virtual Machines and vApps . 70Section 5 – Establish and Maintain Service Levels . 75
Objective 5.1 – Create and Configure VMware Clusters . 75Objective 5.2 – Plan and Implement VMware Fault Tolerance . 87Objective 5.3 – Create and Administer Resource Pools . 91Objective 5.4 – Migrate Virtual Machines . 96Objective 5.5 – Backup and Restore Virtual Machines . 100Objective 5.6 – Patch and Update ESXi and Virtual Machines . 106Section 6 – Perform Basic Troubleshooting and Alarm Management . 116Objective 6.1 – Perform Basic Troubleshooting for ESXi Hosts . 116Objective 6.2 – Perform Basic vSphere Network Troubleshooting . 117Objective 6.3 – Perform Basic vSphere Storage Troubleshooting . 118Objective 6.4 – Perform Basic Troubleshooting for HA/DRS Clusters and vMotion/Storage vMotion 120Section 7 – Monitor a vSphere Implementation . 125Objective 7.1 – Monitor ESXi, vCenter Server, and Virtual Machines . 125Objective 7.2 – Create and Administer vCenter Server Alarms . 133
Section 1 – Plan, Install, Configure and Upgrade vCenter Server andVMware ESXiObjective 1.1 – Install and Configure vCenter ServerKnowledge Identify available vCenter Server editions vCenter Server Essentials – Provides the same features as vCenter Foundation, integratedwith the Essentials and Essentials Plus kits vCenter Server Foundation – Provides powerful management tools for smaller environments(up to 3 vSphere hosts) looking to rapidly provision, monitor, and control virtual machines vCenter Server Standard – Provides large scale management of VMware vSpheredeployments for rapid provisioning, monitoring, orchestration, and control of virtualmachinesIncludesManagement ServerDatabase ServerSearch EngineVMware vSphere ClientVMware vCenter API’s and .NETExtensionvCenter OrchestratorvCenter Server Linked ModevCenter ServerEssentialsXXXXXvCenter ServerFoundationXXXXXvCenter ServerStandardXXXXXXXFurther details see page 8 of the VMware vSphere 5.0 Licensing, Pricing and Packaging whitepaper Deploy the vCenter Appliance As an alternative to installing vCenter Server on a Windows machine, you can download theVMware vCenter Server Appliance. The vCenter Server Appliance is a preconfigured Linuxbased virtual machine optimized for running vCenter Server and associated services.Microsoft SQL Server and IBM DB2 are not supported for the vCenter Server Appliance. ThevCenter Server Appliance does not support Linked Mode configuration nor does it supportIPv6For further information see page 201 of the vSphere Installation and Setup document and pages41 thru 48 of the vSphere Server and Host Management document
Install vCenter Server into a virtual machine When installing vCenter Server on a virtual machine the “hardware” recommendations andsoftware prerequisites do not change. The following are advantages when doing so: Rather then dedicating a separate server to the vCenter Server system, you can placeit in a virtual machine running on the same host where your other virtual machinesrun You can provide high availability for the vCenter Server system by using vSphere HA You can migrate the virtual machine containing the vCenter Server system from onehost to another, enabling maintenance and other activities You can create snapshots of the vCenter Server virtual machine and use them forbackups, archiving, and so on Size the vCenter Server Database The size of your vCenter Database is dependent on how many host you have, have many VM’syou have, and the level of statistics you are using. From within vCenter Server underAdministration - vCenter Server Settings - Statistics there is a section for Database Size.You can plug in your environments specifics and get a DB size. Also, on VMware’s websitethere is a Database Sizing Calculator. Currently available is the calculator for vSphere 4 Install additional vCenter Server components Besides vCenter Server there are several additional components you may wish to install. Fulldetails on pages 204 thru 211 of the vSphere Installation and Setup document. vSphere Client- Windows program that you can use to configure the host and tooperate its virtual machines vSphere Web Client – Allows you to connect to a vCenter Server system to manage anESXi host through a web browser Update Manager Server – Allows for the patching of ESXi hosts as well as virtualmachines. Can be installed on the same computer as vCenter Server or a differentcomputer. vSphere ESXi Dump Collector – ESXi can be configured to dump its vmkernelmemory to a network server instead of writing it to disk when the system has had acritical failure (Purple Screen of Death). ESXi Dump Collector can be used as thenetwork server vSphere Syslog Collector – Allows ESXi hosts to be configured for their system logsto be captured on a network server vSphere Auto Deploy – Allows for the deployment and customization of ESXi hostsby loading the ESXi image into the hosts memory vSphere Authentication Proxy – Enables ESXi hosts to join a domain without usingActive Directory credentials. Enhances security for PXE-booted hosts and hosts thatare provisioned using Auto Deploy, by removing the need to store Active Directorycredentials in the host configuration. Install/Remove & Enable/Disable vSphere Client plug-ins After the server components of a plug-in is installed and registered with vCenter Server, itsclient component is available to vSphere clients. Client component installation andenablement are managed through the Plug-in Manager dialog box. The Plug-in Manager letsyour perform the following actions:
View available plug-ins that are not currentl installed on the clientView installed plug-insDownload and install available plug-insEnable and disable installed plug-insSee page 27 of the vCenter Server and Host Management document for step by step License vCenter Server To license a single vCenter Server 5.0, you need a vCenter Server 5.0 license key with acapacity for one instance. If you have vCenter Server systems in Linked Mode group, you canpurchase a vCenter Server license key with a larger capacity and assign the key to all vCenterServer systems in the group.See pages 70 thru 97 of the vCenter Server and Host Management document for additionalinformation and procedures. Determine availability requirements for a vCenter Server in a given vSphereimplementation Obviously you want as little down time as possible for your vCenter server. Just be aware ofthe options to allow vCenter Server to highly available Run vCenter Server in a VM to take advantage of VMware HA/DRS vCenter Server Cluster Heartbeat Cold standby vCenter Server (virtual or physical) Determine use case for vSphere Client and Web Client vSphere Client – As VMware Administrators we are quite familiar with the traditionalvSphere Client. It is the one stop shop to configure and maintain your entire environment.Using this client may not be suitable for non-administrators (think VM owners or Operationsstaff). Web Client – Better suited for your non-administrative users. Uses a java based web page toallow for the basic tasks of managing VM’s.See page 17 of the vCenter Server and Host Management document for further detailsTools VMware vSphere Basics GuidevSphere Installation and Setup guidevCenter Server and Host Management guide
Objective 1.2 – Install and Configure VMware ESXiKnowledge Perform an interactive installation of ESXi ESXi can be installed either using CD/DVD or USB flash drive. Regardless of which mediatype you use, the following prerequisites should be applied:1.Verify that the server hardware clock is set to UTC in the system BIOS2.Verify that a keyboard and monitor are attached to the machine on which the ESXisoftware will be installed. Alternatively, use a remote management application3.Consider disconnecting your network storage. This action decreases the time it takesthe installation to search for available disk drives. I thought about including screen shots, but as I assume most are familiar with the ESXiinstallation I will outline the general procedure:1.Place the CD/DVD into the ROM drive of the host or connect your USB flash drivethat contains the ESXi installer files2.Boot the host (if needed set the appropriate BIOS boot order, CD/DVD drive or USB)3.Press Enter to select ESXi 5 Installer or allow the timer to finish counting down4.Press Enter on the "Welcome to the VMware ESXi 5.0.0 Installation" screen5.Read and press F11 to Accept the End User License Agreement (EULA)6.Highlight the appropriate disk on the "Select a Disk to Install or Upgrade" and pressEnter to continueNote – If the drive you are installing to currently has an installation of ESXi you willbe provided with additional choices:Upgrade ESXi, preserve VMFS datastoreInstall ESXi, preserve VMFS datastoreInstall ESXi, overwrite VMFS datastoreSelect the appropriate option for your host installation and press Enter tocontinue7.8.Select the appropriate keyboard layout, press Enter to continueSet a root password (note this is not required but recommended), press Enter tocontinueSee pages 37 thru 40 of the vSphere Installation and Setup document for further information Deploy an ESXi host using Auto Deploy vSphere Auto Deploy is a new feature of vSphere 5 that allows for provisioning ESXi hosts ona large scale. With this feature you are able to install ESXi on a new host (first boot), reboothosts, or reimage an existing host with an upgraded image. The procedure to install on a newhost (first boot):
1.2.Power on the host – The host will attempt to contact the DHCP server and downloadthe gPXE. The Auto Deploy server will install the new host with the image specifiedand apply a Host Profile if one is provided. To finish up, Auto Deploy will add thehost to vCenter(Optional) – If Auto Deploy applies a host profile that requires user input such as anIP address, the host is placed in maintenance mode.The brief description is just a very small part of the functionality of Auto Deploy and alsodoes not discuss the infrastructure setup to implement this feature. Refer to pages 57 thru115 of the vSphere Installation and Setup document for further reading. Also, DuncanEpping @ Yellow-Bricks.com has an excellent write up on setting Auto Deploy in yourhome lab. Link HERE - ere-5auto-deploy-in-your-home-lab/ Configure NTP on an ESXi Host Via the vSphere Client you can configure the startup mode for the NTP service as well as listthe hosts you wish to query:1.Within the vSphere Client select the host and click the Configuration tab2.Under Software select Time Configuration3.Click Properties in the upper right4.Click Options and select Start and stop with host5.In left hand pane you can select NTP Settings to add your list of NTP hosts6.Click OK Configure DNS and Routing on an ESXi Host Via the vSphere Client you can configure the DNS servers your host will use as well as thedefault gateway:1.Within the vSphere Client select the host and click the Configuration tab2.Under Software select DNS and Routing3.Click Properties in the upper right4.Under Use the following DNS server address set your DNS servers5.Click the Routing tab6.Specify the default gateway for the VMkernel7.Click OK Enable/Configure/Disable hyperthreading1.Within the vSphere Client select the host and click the Configuration tab2.Under Hardware select Processors3.Click Properties in the upper right4.Select or Deselect Enable Hyperthreading5.Click OKNote – For this option to be available your CPU’s need to support hyperthreading and itneeds to be enabled in the system BIOS
Enable/Size/Disable memory compression cache One of the memory management techniques ESXi uses is Memory Compression. When a giveESXi host is under memory strain ESXi will compress virtual pages and store them inmemory. Using this memory management technique allows for better performance theaccessing memory that has been swapped to disk. You can all set the size of the compressioncache as percentage of the assigned memory to a VM. Enable/Disable Memory Compression1.Within the vSphere Client select the host and click the Configuration tab2.Under Software select Advanced Settings3.In the left hand pane select Mem and scroll down till you find Mem.MemZipEnable4.The default value is 1 (enabled), to disable change the value to 0 (disabled)5.Click OK Sizing the Memory Compression Cache1.Within the vSphere Client select the host and click the Configuration tab2.Under Software select Advanced Settings3.In the left hand pane select Mem and scroll down till you find Mem.MemZipMaxPct4.The default value is 10 with a minimum of 5 and a maximum of 100. Set the value todesired percentage5.Click OKLicense an ESXi host You can assign a license to a host in one of two ways, either with using vCenter Server orwithout. With vCenter Server1.Within the vSphere Client click Inventory in the navigation bar2.Expand the inventory tree and select the location were you would like to add the newhost3.Right-click and select Add Host4.When completing the Add New Host Wizard at the licensing screen allocate anexisting license key or add a new key if needed Without vCenter Server1.Within the vSphere Client select the host and click the Configuration tab2.Under Software select Licensed Features3.Click Edit in the upper right hand corner4.Configure a license key either with an existing key or select Assign a new key to thishost5.Click OKFor further information about ESXi licensing refer to pages 65 thru 94 of the vCenter Server andHost Management documentation
Tools VMware vSphere Basics guidevSphere Installation and Setup GuidevCenter Server and Host Management guideObjective 1.3 – Plan and Perform Upgrades of vCenter Server and VMwareESXiKnowledge Identify upgrade requirements for ESXi hosts1. Hardware Requirementso Supported server platform – Check the Hardware Compatability List (HCL)o ESXi 5. 0 will install and run only on servers with 64-bit x86 CPUso ESXi 5.0 requires a host machine with at least two coreso ESXi 5.0 supports only LAHD and SAHF CPU instructionso Known 64-bit processorso 2GB RAM minimumo One or more Gigabit or 10GB Ethernet controllers – Again check the HCLo Any combination of one or more of the following controllerso Basic SCSI controllerso RAID controllerso SCSI disk or a local, non-networked, RAID LUN with unpartitioned space for thevirtual machineso For Serial ATA (SATA), a disk connected through supported SAS controllers orsupported on-board SATA controllers2. ESXi 5.0 supports installing on and booting from the following storage systems:o SATA disk drives – SATA disk drives connected behind supported SAS controlles orsupported on-board SATA controllers (See page 12 of the vSphere Upgrade Guide forfull listing)o Serial Attached SCSI (SAS) disk driveso Dedicated SAN disk on Fibre Channel or iSCSIo USB Device – Check the HCL for supported devices Identify steps required to upgrade a vSphere implementation See each perspective environment is different, the vSphere Upgrade documentation outlinesseveral example upgrade scenarios. Including the following: Upgrading environments with Host Clusters Upgrading environments without Host Clusters Moving virtual machines using vMotion during an upgrade Moving powered off or suspended virtual machines during an upgrade withvCenter Server Upgrading to vCenter Server on a new machine Migrating ESX 4.x or ESXi 4.x hosts to ESXi 5.0 in a PXE-booted Auto DeployInstallation
Upgrading vSphere components separately in a VMware View environmentThese examples are discussed on pages 159 thru 165 of the vSphere Upgrade documentation Upgrade a vNetwork Distributed Switch1. Within the vSphere Client from the Home screen select Networking from the Inventorysection2. In the left hand pane select the virtual Distributed Switch to be upgraded3. Under the Summary tab in the right hand pane click Upgrade next to Version4. The wizard Upgrade vDS to newer version will launch5. Select the vSphere Distributed Switch version to upgrade toNote – Depending on what version you currently running your upgrade options maybedifferentOptionvSphere Distributed Switch Version: 4.1.0vSphere Distributed Switch Version: 5.0.06.DescriptionCompatible with ESX/ESXi versions 4.1 and laterCompatible with ESXi version 5.0 and laterClick NextThe upgrade wizard lists the hosts associated with the vDS and whether or not they arecompatible with the upgraded vDS. You can only continue with the upgrade if all hosts arecompatible7.8.Click NextVerify that the upgrade information listed is correct and click FinishFor further information read pages 24 thru 25 of the vSphere Networking documentation Upgrade from VMFS3 to VMFS5 Prerequisites If you use a VMFS2 datastore, you must first upgrade to VMFS3 prior to upgrading toVMFS5 All hosts accessing the datastore must support VMFS5 Verify that the volume to be upgraded has at least 2MB of free blocks available and 1 freefile descriptor Procedure1.Within the vSphere Client select a host and click on the Configuration tab2.In the left hand pane under Hardware select Storage3.In the right hand pane select the VMFS3 datastore you wish to upgrade4.Click the link that says Upgrade to VMFS5 in the lower right5.Click Ok on the Upgrade to VMFS-5 dialog box6.Verify that the Upgrade VMFS task has completed7.Rescan all hosts that are presented the datastore
For further information read pages 120 thru 124 of the vSphere Storage documentation Upgrade VMware Tools Since VMware supports several client operating systems, I will only be covering the processfor upgrading VMware tools on Windows based guest. For further examples and instructionsfor other operating systems refer to pages 137 thru 158 of the vSphere Upgradedocumentation. Prerequisites Make sure that the VM is powered on and booted into the operating system Verify the current running version of VMware tools on the Summary tab of the VM Installation1.Within the vSphere Client select the VM you wish to install VMware Tools2.Right click on the VM and select Guest - Install/Upgrade VMware Tools3.Select if you would like to do an Interactive Tools Upgrade or a Automatic ToolsUpgrade. For this example we will be selecting Interactive Tools Upgrade4.Once the VMware tools ISO has been mounted connect to the system via console orRDP5.If autorun has not been enabled, manually lunch the CD-ROM6.Click Next on the VMware Tools welcome screen7.After the installer has completed click Finish8.Click Yes if now is a good time to reboot the system. If not click No9.After the system reboot verify that the upgraded version of VMware Tools is displayedon the Summary tab of the VM Upgrade Virtual Machine Hardware Hardware version 8 is the newest version in ESXi 5. VMware recommends that all VM’srunning on a ESXi 5 host run hardware version 8. Prerequisites Create a backup or snapshot of the virtual machine. If you have a snapshot of the VMit is possible to reverse the upgrade if there are issues Upgrade VMware Tools first. On Microsoft Windows VM’s if you upgrade thehardware prior to upgrading VMware Tools, networking settings maybe lost Verify that all .vmdk files are available to the ESX/ESXi hosts on a VMFS3, VMFS5,or NFS datastore Determine the current version of the virtual hardware by selecting the VM’sSummary tab and checking the VM Version value Installation1.Within the vSphere Client select the VM you wish to upgrade2.Power down the VM3.Right click on the VM and select Upgrade Virtual Hardware4.Click Yes on the Confirm Virtual Machine Upgrade dialog box5.Verify the upgrade task has completed and power on the VM6.For Windows operating systems upon boot up new hardware devices will be detectedrequiring another system reboot.7.Within the vSphere Client select the VM and verify on the Summary tab that the VMVersion has been updated
For further information read pages 154 thru 156 of the vSphere Upgrade documentation Upgrade an ESXi Host using vCenter Update Manager This is a long section to discuss. In the effort of saving time and space be sure to read pages92 thru 103 of the vSphere Upgrade documentationTools VMware vSphere Basics GuidevSphere Installation and Setup GuidevSphere Upgrade Guide
Objective 1.4 – Secure vCenter Server and ESXiKnowledge Identify common vCenter Server privileges and roles Common PrivilegesCreate a Virtual MachineOn the destination folder or datacenter: Virtual Machine.Inventory.Raw CreateVirtual Machine.Configuration.Add New Disk (If creating new VMDK)Virtual Machine.Configuration.Add Existing Disk (If using existing VMDK)Virtual Machine.Configuration.Raw Device (If using a RDM)On the destination host, cluster or resource pool: Resource.Assign Virtual Machine to Resource PoolOn the destination datastore or folder containing a datastore: Datastore.Allocate SpaceOn the network that the virtual machine will be assigned to: Take a virtual machine snapshotNetwork.Assisgn NetworkOn the virtual machine or a folder of virtual machines: Virtual Machine.State.Create SnapshotsOn the destination datastore or folder of datastores Mirgrate a VM with Storage vMotionDatastore.Allocate SpaceOn the virtual machine or folder of virtual machines: Resource.MigrateOn the destination datastore Move a host into a clusterDatatstore.Allocated SpaceOn the host: Host.Inventory.Add Host to ClusterOn the destination cluster Host.Inventory.Add Host to ClusterFor further examples of common privileges see pages 56 thru 58 vSphere Security documentation
RoleNo AccessDefault Roles in ESXi and vCenter ServerRoleTypesystemDescription of User CapabilitiesCannot view or change the assigned objectvSphere Client tabs associated with an object appear without content.Can be used to revoke perissions that would otherwise be propagated to an object from a parentobjectAvailable in ESXi and vCenter ServerRead OnlysystemView the state and details about the objectView all the tab panels in the vphere Client except the Console tabCannot perform any actions through te menus and toolbarsAvailable on ESXi and vCenter ServerAdministratorsystemAll privileges for all objectsAdd, remove, and set access rights and privileges for all the vCenter Server users and all the virtualobjects in the vSphere environmentAvailable in ESXi and vCenter ServerVirtual MachinePower UsersampleA set of privileges to allow the user to interact with and make hardware changes to virutal machines,as well as perform snapshot operations. Privileges granted include: All privileges for the scheduled task privileges groupSelected privileges for global items, datastore, and virtual machine privileges groupsNo privileges for folder, datacenter, network, host, resource, alarms, sessions,performance, and permissions privileges groups.Usually granted on a folder that contains virtual machines or on individual virtual machinesAvailable on vCenter ServerVirtual MachineUsersampleA set of privileges to allow the user to interact with a virtual machine’s console, insert media, andperform power operations. Does not gratn privileges to make virtual hardware changes to the virtualmachine. Privileges granted include: All privileges for the scheduled taks privileges groupSelected privileges for the global items and virtual machines privileges groupsNo privileges for the folder, datacenter, datastore, network, host, resource, alarms,sessions, performance, and permissions privileges groupsUsually granted on a folder that contains virtual machines or on individual virtual machines.Available on vCenter ServerResource PoolAdministratorsampleA set of privileges to allow the user to create child resource pools and modify the configuration of thechildren, but not to modify the resource configuration of the pool or cluster on which the role wasgranted. Also allows the user to grant permissions to child resource pools, and assign virtualmachines to the parent or child resource pools. Privileges granted include:
All privileges for folder, virtual machine, alarms, and scheduled task privileges groupsSelected privileges for resource and permissions privileges groupsNo privileges for datacenter, network, host, sessions, or performance privileges groupsAdditional privileges must be granted on virtual machines and datastores to allow provisioning ofnew virtual machinesUsually granted on a cluster or resource poolAvailable on vCenter ServerDatastoreConsumersampleA set of privileges to allow the suer to consume space on the datastores on which this role is granted.To perform a space-consuming operation, such as creating a virtual disk or taking a snapshot, theuse msut also have the appropriate virtual machine privileges granted for these operationsUsually granted on a datastore or a folder of datastoresAvailable on vCenter ServerNetworkConsumersampleA set of privileges to allow the user to assign virtual machines or hosts to networks, if hteappropriate permissions for the assignment are alos granted on the virtual machines or hostsUsually granted on a network or folder of networksAvailable on vCenter Server Describe how permissions are applied and inherited in vCenter ServervSphere allows the assignment of permissions to objects in the vSphere Client. When assigningpermissions you select to have the permissions propagate down through the object tree or not. Ifyou allow for propagation objects lower in the tree “inherit” the set permissions. However, if apermission is set at the child object it will take prescedance over an inherited permission.For further information read pages 48 thru 53 (and the great diagram on pg 49) of the vSphere Securitydocument. Configure and administer the ESXi firewallEnable/Configure/Disable services in the ESXi firewall1. Within the vSphere Client select a host and click on the Configuration tab2. In the left hand pane under Software select Security Profile3. In the right hand pane select Properties to the right of the Firewall section4. Check or uncheck the services you wish to enable or disable5. (Optional) With a service highlighted click Options in the lower right6. (Optional) Select a Startup Policy from the following:a. Start Automatically if any ports are open, and stop when all ports are closedb. Start and stop with hostc. Start and stop manually7. (Optional) Click OK8. (Optional) Click the Firewall button in the lower right
9. (Optional) Select to Allow connections from any IP address or Only allow connectionsfrom the following networks10. (Optional) Click OK11. Click OKFor further information, including command line syntax, refer to pages 34 thru 40 of the vSphereSe
VMware vSphere Client X X X VMware vCenter API's and .NET Extension X X X vCenter Orchestrator X vCenter Server Linked Mode X Further details see page 8 of the VMware vSphere 5.0 Licensing, Pricing and Packaging white paper Deploy the vCenter Appliance
