Transcription
Reference guideCheck if the document is availablein the language of your choice.HPE SMALL BUSINESS SOLUTIONSDEPLOYMENT GUIDEMicrosoft Windows-based solutionsCONTENTSNotices. 2Revision history . 2Overview . 3Purpose. 3Disclaimer . 3Audience. 3Organization. 3Initial setup. 4Hardware configuration and operating system installation . 4On-premises use cases .10HPE Small Business Solutions for File and Backup with Microsoft Windows .10HPE Small Business Solution for Virtualization with Microsoft Windows .16HPE Small Business Solution for Small Office Deployment .22HPE Small Business Solutions for HCI (Hyperconverged Infrastructure) with Microsoft Storage Spaces Direct .37Support and other resources .52Appendix A: Migrating to Microsoft Windows Server 2019.54Migration considerations .54Migrating ADDS (P2P or P2V) .54Migrating file storage data (P2P or P2V migration) .55Migrating applications and databases (P2P or P2V migration) .55Converting applications and databases (P2V conversion).55
Reference guidePage 2NoticesThe information contained herein is subject to change without notice. The only warranties for Hewlett Packard Enterprise products andservices are set forth in the express warranty statements accompanying such products and services. Nothing herein should be construedas constituting an additional warranty. Hewlett Packard Enterprise shall not be liable for technical or editorial errors or omissionscontained herein.Confidential computer software. Valid license from Hewlett Packard Enterprise required for possession, use, or copying. Consistent withFAR 12.211 and 12.212, Commercial Computer Software, Computer Software Documentation, and Technical Data for Commercial Itemsare licensed to the U.S. Government under vendor’s standard commercial license.Links to third-party websites take you outside the Hewlett Packard Enterprise website. Hewlett Packard Enterprise has no control over andis not responsible for information outside the Hewlett Packard Enterprise website.Revision historyPublication dateEditionSummary of changesApr 20191Initial publication of the HPE Small Business Solutions Deployment GuideJun 20192Added HPE RDX Removable Disk Backup System installation instructionsJul 20193Included Microsoft Windows Server 2019Aug 20194New chapter on HPE Small Business Solutions for Hyperconverged Infrastructure (HCI) with Microsoft StorageSpaces DirectSept 20195Revision on Rapid Setup to include new features and functionsOct 20196Revision to include steps for migrating to Microsoft Windows 2019 in Appendix AFeb 20207Added section on protection option for Microsoft Hyper-V server and virtual machinesApr 20208New chapter on HPE Small Business Solutions for Small Office Deployment
Reference guidePage 3OVERVIEWPurposeHPE Small Business Solutions are part of the HPE SMB Offers portfolio. 1 They are based on HPE ProLiant Gen10 servers that are equippedto meet the needs of small businesses for a variety of company sizes and use cases. They are also the foundational on-premises componentof HPE Small Business Solutions used in hybrid cloud deployments.The HPE Small Business Solutions Deployment Guide for Microsoft Windows-based solutions is intended to provide SMBs with general,high-level instructions for deploying HPE Small Business Solutions.DisclaimerThis guide provides basic setup instructions for deploying HPE Small Business Solutions. There are many additional business considerationsthat are outside of the scope of this document, such as security policies, organizational user and group structure, regulatory compliance, etc.This guide is good for both Microsoft Windows Server 2016 and 2019 but there may be instances where there are subtle differences in thewording or order of the prompts.HPE claims no liability as a result of implementing procedures in this guide.AudienceImportant: The intended audience is IT professionals who are familiar with deploying small to midsized business (SMB) technologysolutions on variety of operating systems (OSs) in both on-premises and cloud environments.OrganizationThis HPE Small Business Solution Deployment Guide is a “living document” that is periodically updated as new HPE Small Business Solutionsare brought to market and new configurations and use cases are developed.The guide will help customers and partners quickly deploy HPE Small Business Solutions by providing high-level, step-by-step guidance thatis grouped into several modules that follow the typical workflow stages of deploying a server in an SMB environment.1HPE Small Business Solution offers are regionally released as “Smart Buy Express Offers” in the U.S. and Canada, “Top Value Offers” in Europe, and “Intelligent Buy Offers” inAsia Pacific and Japan.
Reference guidePage 4INITIAL SETUPHardware configuration and operating system installationThis chapter addresses the initial hardware configuration and setup of HPE Small Business Solutions running Windows Server 2016 and2019 operating system.NOTEIf you are installing or deploying an HPE Small Business Solution for HCI (Hyperconverged Infrastructure) with Microsoft Storage Spaces Direct,skip this section and go directly to the HPE Small Business Solutions for HCI with Microsoft Storage Spaces Direct section of this guide.Pre-deployment planningDeploying an HPE Small Business Solution is relatively simple. Following these four pre-deployment preparation steps will help lead to asmooth deployment.1. Plan to choose one of four RAID controller setup methods:a. Rapid Setup (Integrated with Intelligent Provisioning version 3.31 or later) is the latest automated setup feature that isembedded in HPE ProLiant Gen10 and later, 300 series and below servers. It greatly decreases the time required to deploy theserver, simplifies initial controller and disk drive configuration, and automates OS installation. HPE recommends this method for mostHPE Small Business Solution server deployments and is discussed in detail in the following section.NOTEHPE Integrated Lights Out (iLO) version 5 is a pre-requisite for HPE Intelligent Provisioning version 3.31 and Rapid Setup. Verifyyour HPE ProLiant Gen10 or later server has HPE Intelligent Provisioning version 3.31 or later firmware, and perform a firmwareupgrade if necessary, before proceeding with the Rapid Setup installation steps described belowNOTEThe new HPE ProLiant MicroServer Gen10 Plus features iLO 5 and as such can be configured using Rapid Setup as described in thisdocument. Note however the previous model—HPE ProLiant MicroServer Gen10—does not have iLO and thus cannot have theintegrated version of Rapid Setup described in this document. The MicroServer Gen10 can however be configured using theUSB-based Rapid Setup, refer to the HPE Rapid Setup Software Installation and Configuration Guide and the MicroServer Gen10User Guide at support.hpe.com, to configure storage and install the operating system on the MicroServer Gen10.NOTERapid Setup requires that the Microsoft Windows installation software not be an evaluation or MSDN version. These versions areconstantly updated by Microsoft and may not include necessary components to boot properly if installed using RSS. If using anevaluation or MSDN version, choose Intelligent Provisioning, not Rapid Setup, at the initial screen after pressing F10 at boot-up.You may need to provide additional hardware drivers using this alternate manual method.b. SMB Setup Software is the previous version of the automated setup feature embedded in HPE ProLiant Gen10 300 series serversand below. It is part of HPE Intelligent Provisioning version 3.30, which has been superseded by HPE Intelligent Provisioning 3.31and is not covered in this Deployment Guide. HPE highly recommends updating firmware for older HPE ProLiant Gen10 300 andbelow series servers to HPE Intelligent Provisioning 3.31 for a much more robust automated setup experience.
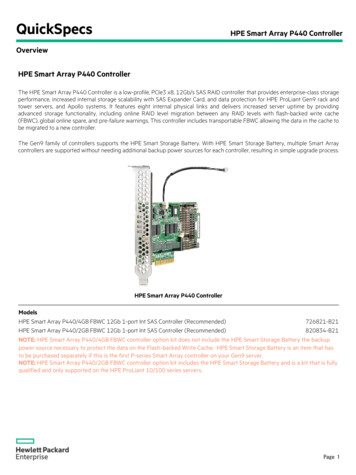
Reference guidePage 5c. Rapid Setup (USB Based) is the USB-based precursor to the integrated SMB and Rapid Setup functions. It provided limitedautomated setup of controller and disk configurations and prepared them for OS installation. The Rapid Setup (USB) method issuperseded by the integrated Rapid Setup (Intelligent Provisioning version 3.31). Therefore, it will not be covered in this guide. IfRapid Setup (USB Based) is the desired method, please refer to the HPE Rapid Setup Software Installation and Configuration Guide.d. Manual configuration: In some cases (such as when deploying a Microsoft Storage Spaces Direct server) you may not want tochoose an automated setup. You have two options to manually configure and install the operating system:I. For all HPE ProLiant Gen10 300 series servers and below, including MicroServer Gen 10 Plus, press F10 when prompted duringsystem power-on self-test (POST) to start Intelligent Provisioning, then select Rapid Setup. Walk through the Rapid Setupprocess and when it presents the recommended RAID configuration you may select “CONFIGURE MANUALLY”. Upon completionof manual configuration the utility will return to Rapid Setup to prompt for an operating system and you can complete theautomated configuration.II. Use the HPE Intelligent Storage Configuration feature of HPE Intelligent Provisioning. Intelligent Provisioning is accessible bypressing F10 during system power-on self-test (POST), or through the HPE Integrated Lights Out (iLO) toolIII. For the HPE ProLiant MicroServer Gen10: Use the UEFI storage utility.For manual configuration refer to your server’s user guide, which can be downloaded at support.hpe.com.2. Plan for the source of the Microsoft Windows Server 2016 or 2019 install files, which can be located:a. On physical media such as a USB flash drive or DVDb. In a shared folder on the network (Note: Requires the server to receive IP address settings for iLO via DHCP, and login credentials ofthe shared folder)3. Plan for the initial OS host settings:Depending on the target environment you may need to know the following:a. Host nameb. Host IP address (if not dynamically assigned via DHCP; a static IP address is recommended for servers in most cases)NOTERapid Setup Software features that need network connectivity requires the server be connected to a network that has existing DHCPservices. Once the server initial hardware configuration is complete, you can re-configure the host NIC to a static IP address via thehost operating system or iLO (recommended in most cases).c. Domain name (if joining a Windows domain) and domain credentials with join domain privileges4. Make sure the local area network (LAN) infrastructure is ready to add a server:Which may include:a. Active Directoryb. Domain name service (DNS—know the IP address of the DNS server if not using DHCP)c. Public and private IP addresses and network ranges (DHCP)d. Connectivity to the internet (know the default gateway address if not using DHCP)Server hardware configuration overviewHardware installationHPE Small Business Solutions may come with add-on components that are not preinstalled, such as memory DIMMs, Smart Array Controllers,disk drives, etc. For installation guidance, refer to the user guide for your specific system. These can be found at support.hpe.com.Server storage configuration planningHPE ProLiant servers are capable of a large variety of storage configurations. This deployment guide focuses on the few standardconfigurations that are common to HPE Small Business Solutions, which are typically:1. A pair of low-capacity solid-state drives (SSDs) or hard-disk drives (HDDs) for boot volume2. A separate set of high-capacity HDDs for data and application storage3. An HPE Smart Array Controller for managing and securing RAID volumes
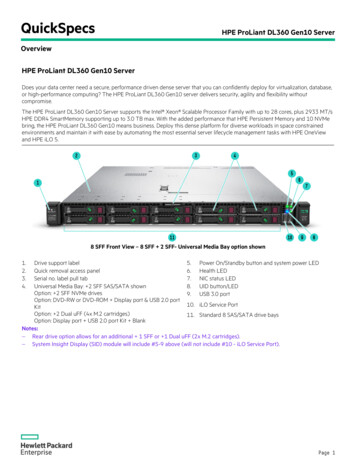
Reference guidePage 6The typical Smart Array Controller configuration is to create one RAID 1 volume from the two low capacity SSDs/HDDs, and one RAID 1,RAID 5, or RAID 6 volume from the high capacity HDDs/SSDs (RAID 1 for two HDDs/SSDs; RAID 5 for three or more HDDs/SSDs; or RAID 6for four or more HDDs/SSDs). There are exceptions to this typical configuration as identified in the following table. You can also get moreinformation from the HPE Smart Array SR Gen10 Configuration Guide.NOTEOne exception worth noting is the HPE ProLiant MicroServer Gen10. It is unique in that it features a Marvell embedded software RAIDcontroller, an optional 2.5” SSD slot (installed in the optional internal drive bay taking the place of the DVD/CD ROM drive bay), and fourstandard 3.5” LFF drive bays. If installed, the SSD in the optional internal drive bay is directly attached to the motherboard via a standardSATA port, and cannot be connected to the embedded Marvell RAID controller or to a HPE Smart Array Controller—and thus notconfigurable as a member of a RAID array. It is intended for the OS to be installed on the optional internal SSD and the remaining HDDsconfigured in a RAID. If redundant disks are required for the OS on this server, you must use two or more drives installed in the standarddrive bays and configure the RAID array accordingly.Refer to the HPE Rapid Setup Software Installation and Configuration Guide and the MicroServer Gen10 User Guide at support.hpe.com forcomplete configuration guidance as this model is no longer covered in this Deployment GuideThe recommended disk configuration for the most common HPE Small Business Solutions is shown in the following table.HPE ProLiant serverControllerOS volumeData volumeMicroServer Gen10 PlusE208 Smart Array Controller2 x HDD (RAID 1)2 x HDD (RAID 1); or all 4 x HDD (RAID5)ML30 Gen10 4 LFFE208 or P408 Smart Array Controller2 x HDD (RAID 1)2 x HDD (RAID 1); or all 4 x HDD (RAID5/6*)ML30 Gen10 8 SFFE208 or P408 Smart Array Controller2 x SSD/HDD (RAID 1)3 x to 6 x HDD (RAID 5/6*)ML110 Gen10 4 LFFE208 or P408 Smart Array Controller2 x HDD (RAID 1)2 x HDD (RAID 1); or all 4 x HDD (RAID5)ML110 Gen10 8 SFFE208 or P408 Smart Array Controller2 x SSD/HDD (RAID 1)3 x to 6 x HDD (RAID 5/6*)ML350 Gen10 4 LFFE208 or P408 Smart Array Controller2 x HDD (RAID 1)2 x HDD (RAID 1); or all 4 x HDD (RAID5)ML350 Gen10 8 SFFE208 or P408 Smart Array Controller2 x SSD/HDD (RAID 1)3 x to 6 x HDD (RAID 5/6*)DL20 Gen10 4 SFFP408 Smart Array Controller2 x SSD/HDD (RAID 1)2 x HDD (RAID 1)DL160 Gen10 8 SFFP408 Smart Array Controller2 x SSD/HDD (RAID 1)3 x to 6 x HDD (RAID 5/6*)DL180 Gen10 8 LFFP408 Smart Array Controller2 x SSD/HDD (RAID 1)3 x to 6 x HDD (RAID 5/6*)DL180 Gen10 8 SFFP408 Smart Array Controller2 x SSD/HDD (RAID 1)3 x to 6 x HDD (RAID 5/6*)DL325 Gen10 8 SFFP408 Smart Array Controller2 x SSD/HDD (RAID 1)3 x to 6 x HDD (RAID 5/6*)DL360 Gen10 8 SFFP408 Smart Array Controller2 x SSD/HDD (RAID 1)3 x to 6 x HDD (RAID 5/6*)DL380 Gen10 8 LFFP408 Smart Array Controller2 x SSD/HDD (RAID 1)3 x to 6 x HDD (RAID 5/6*)DL380 Gen10 8 SFFP408 Smart Array Controller2 x SSD/HDD (RAID 1)3 x to 6 x HDD (RAID 5/6*)DL385 Gen10 8 LFFP408 Smart Array Controller2 x SSD/HDD (RAID 1)3 x to 6 x HDD (RAID 5/6*)DL385 Gen10 8 SFFP408 Smart Array Controller2 x SSD/HDD (RAID 1)3 x to 6 x HDD (RAID 5/6*)DL380 Gen10 HCI**P408 Smart Array Controller2 x M.2 SSD (RAID 1)4 x HDD (No RAID—storage)2 x SSD (No RAID—cache)DL385 Gen10 HCI**P408 Smart Array Controller2 x M.2 SSD (RAID 1)4 x HDD (No RAID—storage)2 x SSD (No RAID—cache)ML350 Gen10 HCI**P408 Smart Array Controller2 x M.2 SSD (RAID 1)4 x HDD (No RAID—storage)2 x SSD (No RAID—cache)* RAID 6 requires P408 controller.** HPE Small Business Solutions for HCI (Hyperconverged Infrastructure) require the manual configuration method due to a unique requirement that disks used for thestorage volume not be in a RAID configuration, and that the boot volume be on disks that are not part of the storage volume.
Reference guidePage 7Storage configuration and Microsoft Windows installation using Rapid Setup Software 2.0This section details the step-by-step instructions for configuring the server storage and installing the Microsoft Windows Server OS.NOTEThe HPE MicroServer Gen10 does not have iLO, and therefore cannot take advantage of the Rapid Setup Software 2.0. Refer to the serverMicroServer Gen10 User Guide at support.hpe.com, and the HPE Rapid Setup Software Installation and Configuration Guide to configurestorage and install the Microsoft OS on the MicroServer Gen10. Note that the MicroServer Gen10 Plus does have iLO, and therefore youmay use the following instructions.NOTEThe following section refers to installing the Microsoft Windows OS on new physical servers. If you need to migrate existing ActiveDirectory-Directory Services (ADDS), file storage data, or applications and databases to Microsoft Windows 2019, please refer to theappendix for more information and guidance.The following example deployment walk-through assumes the Microsoft Windows Server install file is in one of two locations: In an .iso file located in the root directory of a USB stick and the USB is installed on an external USB port In an .iso file located in a folder on a network file share (Requires the iLO network port to receive IP address settings via DHCP, and logincredentials for the shared folder)This example also assumes the following hardware is installed, as is common for HPE Small Business Solutions: HPE Smart Array Controller One or more SSDs or HDDs installed in the standard drive bay(s)Instructions1. Install hardware and connect to the network (Requires the iLO network port to receive IP address settings via DHCP if installing the OSfrom a network share).2. Boot the server and press F10 during POST.3. The server will boot into the Intelligent Provisioning boot menu and automatically execute Intelligent Provisioning.4. At the startup screen, select Rapid Setup.5. Click the EULA “Accept” button to begin. Rapid Setup will perform an initial scan to detect the RAID controller and drives installed.6. Review the Azure Services “Learn More” page and click CONTINUE when ready to proceed.7. Review the Rapid Setup Software task list page and click CONTINUE when ready to proceed.8. Select whether or not you have a web proxy server in your environment. You can also see your current network settings.a. If you have a proxy server, click YES to open a pop-up and configure the proxy server settingsb. If you do not have a proxy server, click “No, it doesn’t”9. You will be presented one of two options depending on the detected hardware.a. Auto configuration: Rapid Setup will automatically recommend an array controller configuration based on the installed controllerand drives it detects in the initial scan. You can choose to accept the recommendation, in some cases choose an alternateconfiguration, or manually configure the controller.NOTERapid Setup will only automatically recommend a RAID configuration if it detects an S100i (embedded), E208i (PCIe or AROC), orP408i (PCIe or AROC) controller, and at least 1 HDD or SSD in the standard drive cage (M.2 and NVMe drives are not configured byRapid Setup). In all other cases, only the “Continue” option for Manual Configuration will be enabled.
Reference guidePage 8If a valid configuration is detected, Rapid Setup will inform you which controller is installed and present a graphical representation ofthe recommended configuration of array volumes and related drives.The table below lists the possible recommendations depending on installed controller, drives, and number of volumes desired:Single VolumeSelected by default if all drives are of the same type, speed, and capacity. User can opt to split 4 or more identical drives into Multiple VolumesInstalled disksS100i (Embedded) and E208 ControllerP408 Controller1 diskRAID 0RAID 02 disksRAID 1RAID 13 disksRAID 5RAID 54 or more disksRAID 5RAID 6Multiple VolumesSelected by default if any drives are of different type, speed, or capacity; or if user has opted to split a Single Volume into Multiple VolumesInstalled disksS100i (Embedded) and E208 ControllerP408 ControllerAll different disksEach disk in a separate RAID 0 VolumeEach disk in a separate RAID 0 Volume3 disks (2 identical)RAID 1 plus RAID 0RAID 1 plus RAID 04 disks (3 identical 1)RAID 5 plus RAID 0RAID 5 plus RAID 04 disks (2 identical 2 identical)RAID 1 plus RAID 1RAID 1 plus RAID 15 disksRAID 1 from the 2 smallest capacity identical drives.Remaining matching drives in one or more volumes inpriority order RAID 5, 1, or 0 as drive count allows.RAID 1 from the 2 smallest capacity identical drives.Remaining matching drives in one or more volumes inpriority order RAID 5, 1, or 0 as drive count allows.6 or more disksRAID 1 from the 2 smallest capacity identical drives.Remaining matching drives in one or more volumes inpriority order RAID 5, 1, or 0 as drive count allows.RAID 1 from the 2 smallest capacity identical drives.Remaining matching drives in one or more volumes inpriority order RAID 6, 5, 1, or 0 as drive count allows.NOTEThe drives in each volume (physical array) must be of the same: Type (SAS, SATA, HDD, SSD [including SSD durability: write intensive, mixed use, read intensive]) Speed (HDD RPM, Interface Transfer Rate) Raw data capacityExample: A system with 2 x 300 GB 10K 12G SAS HDDs and 3 x 1.2 TB 10K 12G SAS HDDs would be configured with a RAID 1(2 x 300 GB) volume and a RAID 5 (3 x 1.2 TB) volume.NOTESplitting a single volume when all the installed disks are identical:If 4 or more identical disks are present a prompt will appear asking “Do you want to separate OS volume?” A checkbox will bedisplayed and you can select this to create OS and data volumes separately. Otherwise all disks will be combined into one volume.b. Manual configuration: Click “Manual Configuration” if any of the following is true:I. You do not want to use the recommended automatic configuration.II. If no supported controller is detected (only the “Continue” button will be enabled).
Reference guidePage 9Upon clicking “Continue,” Rapid Setup will collect additional information you will begin setting up the desired storage configuration inIntelligent Storage Configuration.I. Click OK on the pop-up to acknowledge the instruction to click the “ ” previous button to resume setup after finishing theconfigurations.II. From the main page of Intelligent Storage Configuration screen, click “ Create Array.”III. Select the drives you want to include in the RAID array and select the drive usage. The drive bay representation will indicate thedrives selected and remaining.IV. Click “Next.”V. Enter a logical name.VI. Select a RAID Mode (for example, RAID 1 or RAID 5).VII. (Optional) Select a stripe size or just accept the default setting.VIII. Select an Accelerator if applicable or just accept the default setting.IX. (Optional) Select a RAID size.X. Click “Next” to review your settings and click “Submit.”XI. (Optional) Repeat steps 7–15 to create another array.XII. Click the “ ” button to continue Rapid Setup.XIII. Select the array that will be used for installing the OS and click “Next.”10. After accepting the recommended configuration, or performing manual configuration, select the OS to install—in this caseMicrosoft Windows Server—and click “Continue.”11. In the “Select” pop-up, choose the location of your Windows install media.a. Choose automatic scan if the media is on the DVD/CD ROM drive or on USB inserted in the external USB Port.b. Choose SMB/CIFS if the media is located on a network share and then enter the path and provide the credentials required to accessthe share.12. Rapid Setup will present a notice that the system will reboot. When the system reboots it will resume the Rapid Setup and copy theinstallation files to the selected array volume and reboot again.13. Once the server reboots the Windows setup wizard will begin so you can complete the Windows setup in the next section.Completing OS installationOnce the Windows setup starts (after the OS files are copied to the OS volume for installation), Windows setup will prompt you for thefollowing information. Regional settings: Language, time and currency format, and keyboard layout (for most U.S. deployments, you can accept the defaultsettings and click “Next”). Windows version to install: The Windows setup will present a list of Windows versions to choose from and prompt you to make aselection. Typically, the list looks like this:– Windows Server 2016/2019 Datacenter– Windows Server 2016/2019 Datacenter (Desktop Experience)– Windows Server 2016/2019 Standard– Windows Server 2016/2019 Standard (Desktop Experience)Select the desired version and click “Next.” For most SMB deployments you can select Windows Server 2016/2019 Standard (DesktopExperience). Type of installation (upgrade or custom): Choose custom installation.
Reference guidePage 10 Install location: This window will show two drives that were previously conf
It is part of HPE Intelligent Provisioning version 3.30, which has been superseded by HPE Intelligent Provisioning 3.31 and is not covered in this Deployment Guide. HPE highly recommends updating firmware for older HPE ProLiant Gen10 300 and below series servers to HPE Intelligent Provisioning 3.31 for a much more robust automated setup experience.
