Transcription
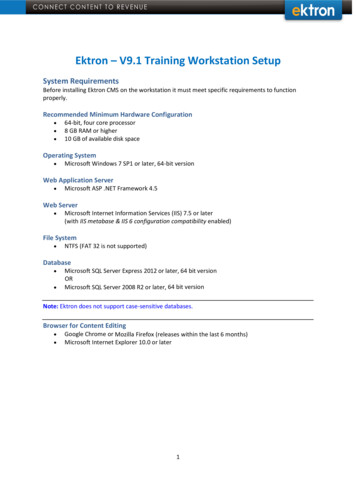
Ektron – V9.1 Training Workstation SetupSystem RequirementsBefore installing Ektron CMS on the workstation it must meet specific requirements to functionproperly.Recommended Minimum Hardware Configuration 64-bit, four core processor8 GB RAM or higher10 GB of available disk spaceOperating System Microsoft Windows 7 SP1 or later, 64-bit versionWeb Application Server Microsoft ASP .NET Framework 4.5Web Server Microsoft Internet Information Services (IIS) 7.5 or later(with IIS metabase & IIS 6 configuration compatibility enabled)File System NTFS (FAT 32 is not supported)Database Microsoft SQL Server Express 2012 or later, 64 bit versionORMicrosoft SQL Server 2008 R2 or later, 64 bit versionNote: Ektron does not support case-sensitive databases.Browser for Content Editing Google Chrome or Mozilla Firefox (releases within the last 6 months)Microsoft Internet Explorer 10.0 or later1
Microsoft SQL Express InstallationIf you do not already have Microsoft SQL Server installed, download a copy of SQL Server Express 2012 .aspx?id 29062The file needed is named: SQLEXPRWT x64 ENU.exe1. Right click on the file SQLEXPRWT x64 ENU.exe and ‘Run as administrator’2. On the first installation screen that appears, select the option ‘New SQL Server Stand-AloneInstallation or Add Features to an Existing Installation’2
3. Accept the license terms and click ‘Next’ to continue.4. On the next screen, leave the checkbox checked for ‘Include SQL Server Product Updates’and click ‘Next’.3
5. On the ‘Feature Selection’ & ‘Instance Configuration’ screens, accept the default settings.4
6. On the ‘Server Configuration’ dialog, accept the default settings and click ‘Next’.7. For the ‘Database Engine Configuration’ screen select the ‘Mixed Mode (SQL ServerAuthentication and Windows Authentication)’ radio button. Enter the ‘password’ of‘Training’.5
8. In the ‘Error Reporting’ screen click on ‘Next’ until the installation of SQL Express iscomplete.9. Once the install is completed you will be prompted to ‘restart your computer’, click on ‘OK’to Restart.Installing Pre-requisite Microsoft ComponentsEnsure that IIS is installed, and enable IIS 6 metabase compatibility and ASP.NET as follows:1. From the Windows Control Panel (For training purpose this Installation is on Windows 7),choose Programs.2. Choose Turn Windows Features On or Off.3. Expand Internet Information Services Web Management Tools IIS 6 ManagementCompatibility.4. Check ‘IIS Metabase and IIS 6 configuration compatibility’.5. Expand World Wide Web Services Application Development Features.6
6. Check ASP.NET 4.5.7. Click OK.If it is not already installed, download a copy of the Microsoft .NET Framework 4.5here: px?id 306531. Right click and ‘Run as administrator’ on the file dotNetFx45 Full setup file.2. Accept the default options and install.Downloading the CMS Base Installation FilesDownload the latest version of the Ektron Base Installer from the Ektron Support/Customer Portal:https://portal.ektron.com/ (you will need to be registered there)7
If you are an Ektron Partner you can login here instead http://partners.ektron.com/login.aspxInstalling Ektron CMS Base version 9.11. Right-click and select ‘Run as administrator’ on the downloaded CMS400Basev91.exe file.2. When prompted ‘Would you like the install to check for updates?’ click ‘No’.3. Please read and accept the Ektron License Agreement and click ‘I Accept’ to continue4. A dialog appears, checking that all pre-requisites are met.8
5. Select ‘Complete‘ to install all components.7. The ‘Ready to Install the Program screen appears. Click ‘Install’. The installation program copies files to theC:\Program Files (x86) folder, creating an Ektron install base for use by the Site Setup utility.8. At the end of the core install the user is prompted with a completion screen and whether they want to reboot theirPC. Leave the radio button on the default ‘Yes, I want to restart my computer now’ and click the ‘Finish’ button.9. When your computer reboots the Site Setup utility runs and offers to create a new website. Before continuing,follow the instructions below to add a web site within IIS.Adding a Web Site in IISIMPORTANT: You must be a member of the Administrators group on the local computer to perform thefollowing procedure (or procedures), or you must have been delegated the appropriate authority. As asecurity best practice, log on to your computer using an account that is not in the Administrators group, andthen use the Run as command to run IIS Manager as an administrator. From the command prompt,type runas /user:administrative accountname "mmc %systemroot%\system32\inetsrv\iis.msc".Adding a Web Site Using Website Creation Wizard with IIS79
1. Click on the ‘Start’ button and search for ‘iis’, then launch ‘Internet Information Service (IIS) Manager’.2. In the IIS Manager, expand the local computer, right-click the ‘Sites’ directory, and select ‘Add Web Site’.3. In the dialog that appears, enter ‘cms400min’ as both the site & host name:4. For the ‘Physical Path’ click on the box with the three dots in it, and navigate to c:\inetpub\wwwroot.Click the ‘Make New Folder’ button and name the folder cms400min, then click the ‘OK’ button.10
5. Next in IIS click on ‘Application Pools’.11
6. Right-click the ‘cms400min’ Application Pool and select ‘Basic Settings ’7. Set the Application Pool to use ‘.NET Framework v4.0’ and the click ‘OK’.8. Final step is to add an IP mapping in the Hosts file: C:\Windows\System32\drivers\etc\Hosts.Open the ‘Hosts’ file in Notepad and add:127.0.0.1cms400min12
13
Installing a CMS400min SiteHaving completed the last step your computer has rebooted and you are now being prompted to install a CMS400mincore website. Follow the steps below to create a new site that will run under localhost.1. The Setup Type screen appears.NOTE: You can also create a new site manually by choosing Start Programs Ektron CMS400vXX Utilities CMS400 Site Setup from your start menu.2. Choose the ‘CMS400 Full Installation’ option and click Next.3. When prompted for a license key, leave the field blank and click Next as this site will be run under localhost.14
4. If prompted to select a site, select ‘CMS400Min’ to install a core min website.5. Select cms400min from the drop-down lists for both site & host.6. Enter the destination folder for the site. The default reflects your selection in the previous dialog. Make sure the‘Destination Folder’ is pathed to C:\inetpub\wwwroot\cms400min, if needed browse toInetpub/wwwroot/cms400min and then click on Next.WARNING! Do not install under another application’s folder within the Web root.IMPORTANT: Ektron does not support the installation of nested sites, each having its own web.config file. Nestedsites can disrupt Ektron features, such as Aliasing, Menus, and eSync.15
OR, if needed, BROWSE to the location16
7. Accept the default paths for the Secure Asset Storage Location and the Site Options screens, and click ‘Next’.8. On the Search Provider screen, determine which search provider you will use with Ektron.Choose Apache Solr 4.0 and then click ‘Next’.9. On the Site Options screen, uncheck unwanted options, then click the ‘Install’ button.17
10. After choosing, click Install. The Moving Files dialog appears, and the following things happen.ofiles are copied to the siteopermissions are set for the site’s directoriesoASPNET, IIS WPG, or Network Service user and IUSR are given permissions to the directoriesothe site is set up to use .NET 4.0oweb.config settings are configuredoIIS is configuredNOTE: Continue with these steps after completing Installing a Site.11. You are asked if you want to set up a database. Click Yes.If you are using a separate database server, you need the following information:odatabase server host name or IP addressoif the database server is on the same domain as the application server, it must support Windows or SQLauthenticationoif the database server is on a separate domain from the application server, it must support SQL authenticationoyou must have database administrator or database creator privileges12. Enter the name of the database you are creating, here use the default name and click ‘Next’. The databasename should be unique for this machine.13. Next you are prompted for the ‘Username’ and Password’ for the ‘admin’ account. Leave the usernameas ‘admin’ and enter a password of ‘Training’ then click ‘Next’.18
14. Ektron also requires you to supply a username/password for your ‘builtin’ account.For training purposes it is recommended that you leave the username as ‘builtin’ but set a passwordof ‘Training’ and then click ‘Next’.19
15. The SQL Server DB Setup screen appears and prompts for database connection information.oServer—List the database server on this system. To setup the database on this server, accept the default.Otherwise, enter a SQL or SQL Express server that already exists. For SQL, this would typically be (local) if it’sinstalled on the local server. Otherwise, enter the Server’s name. For SQL Express enter (local)\SQLEXPRESS.oUsername—Enter the SQL username you will use to create the database.oPassword—Enter the SQL password you will use to create the database.NOTE: To use Windows authentication via a trusted connection, leave the username & password blank.After you complete the screen, the setup verifies the database connection information. If the database namealready exists, you are asked to assign a different name. When a connection is made and the name is available,the installation program creates a database using the provided information.16. If you installed SQL Server Express on this machine using the instructions found earlier in this document, leave theServer as (local)\SQLEXPRESS, enter ‘sa’ as the username and ‘Training’ as the password, then click ‘Next’.20
17. The next screen that appears allows a System Administrator to choose a lower level account that could beused by the CMS to connect to the database rather than the sa administrator account. Again, enter ‘sa’ asthe username and ‘Training’ as the password, then click ‘Next’.NOTE: If you do decide to use a different account that will be used by the CMS to connect to the databaseensure that the account has the following privileges:- DB Reader- DB Write- DB Executor- DDL Admin18. When the setup is finished, the following screen appears. Click Finish. The site and database setup portion ofthe install is now complete.19. The final screen to appear is with regards to the Apache Solr, we may set this up in a later Unit so click on ‘OK’.21
20. To test if the installation of the CMS website project was successful login to your CMS400Min site.To do this, launch a web browser and enter the URL http://cms400min/cmslogin.aspx21. Login with username ‘admin’ and password ‘Training’ and click the ‘Login’ button.22. Once logged in, click on the ‘Workarea’ button.23. In the Workarea see if you can navigate around ok by clicking on the tabs at the top of the page.22
File System NTFS (FAT 32 is not supported) Database Microsoft SQL Server Express 2012 or later, 64 bit version OR Microsoft SQL Server 2008 R2 or later, 64 bit version Note: Ektron does not support case-sensitive databases. Browser for Content Editing Google Chrome or Mozilla Firefox (releases within the last 6 months)
