Transcription
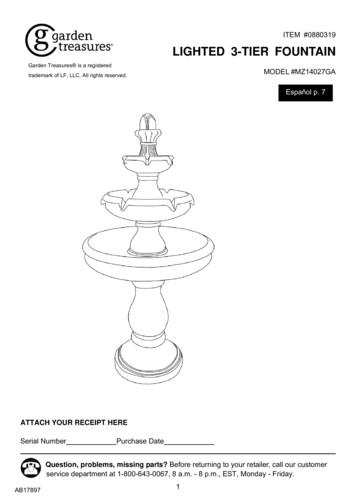
ITEM #0880319LIGHTED 3-TIER FOUNTAINGarden Treasures is a registeredMODEL #MZ14027GAtrademark of LF, LLC. All rights reserved.Espaňol p. 7ATTACH YOUR RECEIPT HERESerial NumberPurchase DateQuestion, problems, missing parts? Before returning to your retailer, call our customerservice department at 1-800-643-0067, 8 a.m. - 8 p.m., EST, Monday - Friday.AB178971
PACKAGE CONTENTSPARTDESCRIPTIONQUANTITYATop1BTop bowl with light1CMiddle bowl with light1DBig bowl spacer1EBig bowl with pump1FFountain base1GPipe1HRubber gasket1IThread12
SAFETY INFORMATIONPlease read and understand this entire manual before attempting to assemble, operate or install theproduct.CAUTION: As with any large container of water, fountains are to be used carefully with adultsupervision. They are not intended to be used as “kid pools” and present a risk to small children andinfants. Injury or accidental drowning could result. In addition, as with any electrical appliance, makesure the pump plug is dry before you plug it into an outlet, and make sure you are not standing in thewater - electrical shock could result. Filled fountain weighs a considerable amount. Make sureyour set-up area can support at least 300 lbs.For best results – Install the fountain on a flat, level surface close to an electrical outlet.Place the fountain in a location where any water spills or splashing will not reach any other electricalequipment or cause damage.Choose an appropriate location before installing the fountain. DO NOT lift or push/drag the waterbasin to relocate the fountain when it’s filled with water. Empty the water basin before lifting.Excessive weight or pressure on any of the fountain sections may cause it to tip or fall over. Keeppets and children away from any of the fountain sections.Some splashing may occur. To avoid injury from electrical shock, observe basic safety precautionsand comply with the following instructions:The pump on the fountain has no user serviceable parts. Only an authorized service representativeshould service the pump. Do not open the sealed pump housing as this may result in electricalshock. Refer to enclosed pump maintenance guide for cleaning. Always unplug the pump from the electric outlet before cleaning and handling. Use with clean water only. Do not place it in other liquids. Do not allow the pump to run dry. An adult should supervise children when they are around the pump. Use the proper power source as indicated on the pump label. Equip the electrical power for the pump with a ground fault circuit interrupter (GFCI).Keep the fountain away from high temperatures or heat sources.Do not use the pump in water above 86 F.Disconnect the power cord from the outlet by holding the plug. Do not lift, carry, or pull the pumpby the power cord. If the entire fountain falls into the water accidentally, turn off the circuit breaker immediately. If any leakage occurs around the pump housing, turn off the circuit breaker immediately andhave the pump serviced by a registered technician. Do not operate the fountain if the pump has been dropped or has a damaged power cord or plug.Do not replace the power cord. Keep the plug dry. Do not expose the plug to water or steam. Do not use the pump in swimmingpool or marine area. If the plug or the wall receptacle gets wet due to water dripping down the power cord or for anyother reason, do not remove the plug from the wall outlet untilGFCIthe circuit breaker is turned off.DRIP LOOPNOTE: Allow the pump power cord to hang at a lower levelthan the wall outlet to form a “drip loop.” This will helpprevent water from dripping down the power cord andgetting into the wall outlet. Do not expose the pump to direct sunlight or to lowtemperatures for any period of time. Use only a UL-approved extension cord of the correct rating to avoid overheating. Do not use attachments that are not provided by the manufacturer since they may cause anunsafe condition. Do not use the pump for anything other than its intended use.3
ASSEMBLY INSTRUCTIONS1. Place the big bowl with pump(E) on the fountain base (F) andturn clockwise to securetogether.16. Connect the long femaleplug from the pump (J) to themale plug found on the topbowl with light (B) and screwthe preassembled ring overthe cable to secure theconnection. Then place thetop bowl on the middle bowl(C).62. Run the cord from pump (J,preassembled) through the tubeon the big bowl (E) to come outfrom the bottom of fountainbase (F).Make sure the preassembledpump is set to the maximumwater flow position (indicated bya plus sign “ ”).27. Secure the fountain withrubber gasket (H) and top(A).73. Screw pipe (G) into mountingbracket on pump (J).38. Pour water gently into bigbowl (E), middle bowl (C)and top bowl (B).84. Place big bowl spacer (D) onthe big bowl (E).Run the two female plugscoming from pump (J) throughthe center of big bowl spacer(D) as shown.49. Plug the pump (J) into apower supply.910. OPTIONAL: To reduceexcess splashing and increaseflow time, a length of thread(I) can be used to help directthe water flow gently to thebowl below. Cut a length ofthread (16 in. for top bowl, 24in. for middle bowl) and placeeach of the threads onadjacent spouts as shown sothat the ends will hang downinto the bowl below.5. Connect the short female plug from 5the pump (J) to the male plug foundon the middle bowl with light (C) andscrew the preassembled ring over thecable to secure the connection.Then place the middle bowl on the bigbowl spacer (D). Run the long femaleplug from the pump through thecenter of the middle bowl as shown.410
CARE AND MAINTENANCE Check regularly that the water reservoir has sufficient water to cover the pump at all times. It will benecessary to check more frequently in warm or windy weather. Do not allow the pump to freeze. During cold spells, remove the pump from the water feature andplace in a water-filled container in a frost-free position. DO NOT store the pump dry. Periodically it will be necessary to change the water and clean the water feature and reservoir. Thefrequency of this will depend on the weather and location of the water feature. The outside of thewater feature can be cleaned using a soft cloth and clean water and the reservoir with a soft brush.A mild detergent can be used, but please note this will cause the water to foam and should beavoided unless strictly necessary. The pump rotor will require cleaning at approximately monthly intervals. A good indication will be ifthe water flow rate drops. Unplug the water feature, remove the pump from the water reservoir anddisconnect the water pipe. Remove the filtering cover and pressure-casing from the front of pumpbody. Clean the rotor and housing in clean water using cotton buds. Reassemble the pump,reconnect the water pipe and reassemble the water feature. Replacing the light.Step 1: Unfold the light clamp gentlyStep 2: Take off the light.to remove light from the fountainStep 3: Insert a new light into the light clamp.NOTE: To acquire replacement lights, pleaserefer to the Replacement Parts section. Onlybody.use the lights available for order there asreplacements.5
TROUBLESHOOTINGPROBLEMPOSSIBLE CAUSECORRECTIVE ACTION1. Pump is not covered with1. Add more water to the reservoir.water.2. Pump or fountain is blocked. 2. Disconnect fountain from power source,remove any obstruction, and clean bowl andtubing.Fountain is3. Pump is not secured3. Disconnect fountain from power source, pournotcorrectly.out any remaining water, and ensure thepumpingtubing in the reservoir is tightly secured towater.the pump outlet.4. Pump is not electrically4. Check to make sure pump is plugged in andconnected.the outlet is working.5. Pump may be “air locked.”5. Plug and unplug the pump several times toclear any air that may have been trapped.WARRANTY If this product fails due to a defect in materials or workmanship at any time during the first one yearof ownership, the manufacturer will replace it free of charge, postage-paid at their option. Thiswarranty does not cover products which have been abused, altered, damaged, misused, cut orworn. This warranty does not cover use in commercial applications. The manufacturer DISCLAIMSall other implied or express warranties including all warranties of merchantability and/or fitness fora particular purpose. As some states do not allow exclusions or limitations on an implied warranty,the above exclusions and limitations may not apply. This warranty gives you specific legal rights,and you may have other rights that vary from state to state. This warranty is limited to the replacement of defective parts only. Labor charges and/or damageincurred during installation, repair and replacement as well as incidental and consequentialdamages connected with the above are excluded. Any damage to this product as a result ofneglect, misuse, accident, improper installation or use other than the purpose SHALL VOID THISWARRANTY.REPLACEMENT PARTS LISTFor replacement parts, call our customer service department at 1-800-643-0067, 8 a.m. - 8 p.m.,EST, Monday - Friday.PARTDESCRIPTIONPART #GPump PipeMZ14027GA-1HRubber 4KSmall light ringMZ14027GA-5LBig light ringMZ14027GA-6Printed in China6
ARTÍCULO #0880319FUENTE DE 3 NIVELES CON LUCESMODELO # MZ14027GAGarden Treasures es una marca registrada de LF, LLC.Todos los derechos reservados.ADJUNTE SU RECIBO AQUÍNúmero de serieFecha de compra¿Preguntas, problemas, piezas faltantes? Antes de volver a la tienda, llame a nuestroDepartamento de Servicio al Cliente al 1-800-643-0067, de lunes a viernes de 8 a.m. a 8 p.m.,hora estándar del Este.7
CONTENIDO DEL PAQUETEPIEZADESCRIPCIÓNCANTIDADAParte cubierta1BDepósito superior con luz1CDepósito del medio con luz1DSeparador grande del depósito1EDepósito grande con bomba1FBase de la fuente1GTubo1HEmpaquetadura de goma1IEnrosque18
INFORMACIÓN DE SEGURIDADLea y comprenda completamente este manual antes de intentar ensamblar, usar o instalar elproducto.PRECAUCIÓN: Al igual que otros recipientes grandes de agua, las fuentes deben utilizarsecuidadosamente y con la supervisión de un adulto. Estas no están diseñadas para ser utilizadascomo “piscinas para niños” y representan un riesgo para los niños pequeños y los infantes. Podríanocurrir lesiones o ahogamiento. Además, como con cualquier electrodoméstico, compruebe que elenchufe de la bomba esté seco antes de enchufarlo en un tomacorriente y cerciórese de no teneragua bajo sus pies, ya que podría ocurrir una descarga eléctrica. Las fuentes llenas pesan bastante:Verifique que el área donde las va a colocar pueda sostener al menos 136,07 kg (300 lbs.).Para mejores resultados, coloque la fuente sobre una superficie plana y nivelada, cercana a untomacorriente.Coloque su fuente en una ubicación donde las salpicaduras o derrames de agua no lleguen a unequipo eléctrico o causen daño.Elija una ubicación adecuada antes de instalar la fuente. NO levante o empuje/arrastre el recipientede agua para reubicar la fuente cuando éste esté lleno de agua. Vacíe el recipiente antes delevantarlo.Un exceso de peso o de presión en cualquiera de las secciones de la fuente puede causar que sevuelque o caiga. Mantenga a los niños y las mascotas alejados de las secciones de la fuente.Se pueden producir algunas salpicaduras. Para evitar una lesión por descarga eléctrica, tenga encuenta las precauciones de seguridad básicas y cumpla con las siguientes instrucciones:La bomba de su fuente no contiene piezas reparables. Sólo un representante de servicio autorizadodebe realizar reparaciones en la bomba. No abra la carcasa sellada de la bomba ya que esto podríaocasionar una descarga eléctrica. Consulte la guía de mantenimiento de la bomba adjunta paraconocer el procedimiento de limpieza.Siempre desenchufe la bomba del tomacorriente antes delimpiarla y manipularla. Use sólo con agua limpia. No la coloque en otros líquidos. No deje que la bomba funcione enseco. Un adulto debe supervisar a los niños cuando se encuentran cerca de la bomba. Utilice la fuente de alimentación adecuada según las instrucciones de la etiqueta de la bomba. Equipe la alimentación eléctrica para la bomba con un interruptor de circuito de fallas de puesta atierra (GFCI, por sus siglas en inglés). Mantenga la fuente lejos de altas temperaturas y/o fuentes de calor. No utilice la bomba con agua que exceda los 30 C. Desconecte el cable de alimentación del tomacorriente sosteniendo el enchufe. No levante,traslade ni jale la bomba del cable de alimentación. Si toda la fuente se cae al agua accidentalmente, apague de inmediato el interruptor de circuito. Si ocurre alguna filtración alrededor de la carcasa de la bomba, apague de inmediato el interruptorde circuito y haga que un técnico registrado repare la bomba. No opere la fuente si la bomba se cayó o tiene un cable de alimentación o enchufe dañado. Noreemplace el cable de alimentación. Mantenga seco el enchufe. No exponga el enchufe al agua o vapor. No utilice la bomba en unapiscina o área marina. Si el enchufe o el tomacorriente de pared se humedecen debido al goteo de agua sobre el cablede alimentación o por cualquier otro motivo, no saque el enchufe del tomacorriente de pared hastaque se apague el interruptor de circuito.NOTA: Permita que el cable de alimentación de la bomba estésuspendido a un nivel inferior que el tomacorriente de pared para formarun "bucle de goteo”. Esto ayudará a evitar que el agua gotee en el cablede alimentación y entre en el tomacorriente de pared.INFORMACIÓN DE SEGURIDAD No exponga la bomba a la luz solar directa o a bajas temperaturas por ningún período de tiempo. Utilice solamente un cable de extensión aprobado por UL de la clasificación correcta para evitar elsobrecalentamiento. Use sólo los accesorios proporcionados por el fabricante, de lo contrario, podría causar unacondición insegura. No use la bomba para otro propósito que no sea el especificado.9
INSTRUCCIONES DE ENSAMBLAJE1. Coloque el depósito grandecon la bomba (E) a la base dela fuente (F) girándolo endirección de las manecillas delreloj para asegurarlos.2. Pase el cable de la bomba (J,preensamblada) a través deltubo en el depósito de la fuente(E) para que salga desde elfondo de la base de la fuente(F).6. Conecte el enchufehembra largo de la bomba(J) al enchufe macho que seencuentra en el depósitosuperior con luz (B) ycoloque el tornillo al anillopreensamblado sobre elcable para asegurar laconexión. Luego, coloque eldepósito superior en eldepósito del medio (C).1627. Asegure la fuente con laempaquetadura de goma(H) y la parte superior (A).73. Enrosque el tubo (G) en elsoporte de montaje de labomba (J).38. Vierta el aguasuavemente en el depósitogrande (E), el depósito delmedio (C) y el depósitosuperior (B).84. Coloque el espaciador deldepósito grande (D) en eldepósito grande (E).Pase los dos enchufes hembrade la bomba (J) a través delcentro del espaciador deldepósito grande (D) como semuestra.49. Conecte la bomba (J) alsuministro de electricidad.9Asegúrese de que la bombapreensamblada estéconfigurada en la posición deflujo de agua máximo (indicadocon un signo más “ ”).5. Conecte el enchufe hembra corto 5de la bomba (J) al enchufe machoque se encuentra en el depósito delmedio con luz (C) y coloque eltornillo al anillo preensambladosobre el cable para asegurar laconexión.Luego, coloque el depósito delmedio en el espaciador del depósitogrande (D). Pase el enchufe hembralargo de la bomba a través delcentro del depósito del medio comose muestra.10. OPCIONAL: para reducirlas salpicaduras en exceso eincrementar el tiempo deflujo, se debe utilizar uncarrete de hilo (I) para dirigirel flujo de agua suavementeal depósito de abajo. Corte elhilo (40,64 cm para eldepósito superior, 60,96 cmpara el depósito del medio) ycoloque cada uno de los hilosen las boquillas adyacentescomo se muestra de maneraque los extremos colgarán enel tazón de abajo.1010
CUIDADO Y MANTENIMIENTO Revise regularmente que el depósito de agua tenga suficiente agua para cubrir la bomba entodo momento. Será necesaria una revisión más frecuente durante los períodos de clima cálidoo ventoso. La bomba siempre debe estar completamente sumergida en el agua y no debe funcionar enseco, ya que esto causará un daño irreversible. No permita que la bomba se congele. Durante un período de frío, saque la bomba de la fuentede agua y ubíquela en un contenedor lleno de agua en un lugar donde no caigan heladas. NOguarde la bomba seca. Será necesario cambiar el agua periódicamente y limpiar la caída de agua y el depósito. Lafrecuencia de la limpieza dependerá del clima y de la ubicación de la fuente de agua. El exteriorde la fuente de agua se puede limpiar con un paño suave y agua limpia, mientras que eldepósito de agua se puede limpiar con un cepillo suave. Se puede usar un detergente suavepero tenga en cuenta que esto provocará espuma y se debe evitar a menos que seaestrictamente necesario. Es necesario limpiar el rotor de la bomba en intervalos mensuales aproximadamente. Si baja elcaudal de agua es una buena señal. Apague y desenchufe la fuente de agua, saque la bombadel depósito de agua y desconecte el tubo de agua. Retire la cubierta de filtrado y la carcasa depresión de la parte delantera del cuerpo de la bomba. Limpie el rotor y la carcasa en agualimpia usando hisopos. Reensamble la bomba, vuelva a conectar el tubo de agua y reensamblela fuente de agua.Válvula de control Reemplazo de la luz.Paso 1: despliegue el soportede la luz con suavidad pararetirar la luz del cuerpo de lafuente.Paso 2: retire la luz.11Paso 3: inserte una luz nueva en elsoporte de la luz. NOTA: Para adquirirluces de repuesto, consulte la secciónde piezas de repuesto. Solo utilice lasluces disponibles para el pedido comorepuesto.
SOLUCIÓN DE PROBLEMASPROBLEMALa fuente nobombeaagua.CAUSA POSIBLEACCIÓN CORRECTIVA1. La bomba no tiene1. Agregue más agua al depósito.suficiente agua.2. La bomba o la fuente están 2. Corte la alimentación de la fuente, retirebloqueadas.cualquier obstrucción y limpie el receptáculo yel tubo.3. La bomba no se fijó3. Corte la alimentación de la fuente, drene elcorrectamente.agua restante y asegúrese de que el tubo deldepósito esté firmemente sujeto a la salida dela bomba.4. La bomba no está4. Verifique y asegúrese de que la bomba estéconectada al suministroenchufada y que el tomacorriente esté estéeléctrico.funcionando.5. La bomba puede estar5. Enchufe y desenchufe la bomba varias veces“obstruida con aire”.para sacar el aire que puede estar atrapado.GARANTÍA Si este producto falla debido a un defecto en el material o la mano de obra en cualquiermomento durante el primer año de posesión del mismo, el fabricante lo reemplazará sin cargosy con el franqueo pagado a su discreción. Esta garantía no cubre productos que hayan sufridoabusos, modificaciones, daños, uso indebido, cortes o desgaste. Esta garantía no cubre el usocon fines comerciales. El fabricante RECHAZA todas las demás garantías expresas o implícitas,incluyendo todas las garantías de comerciabilidad e idoneidad para un fin en particular. Debidoa que algunos estados no permiten exclusiones o limitaciones en una garantía implícita, lasexclusiones y limitaciones anteriores pueden no aplicarse. Esta garantía le otorga derechoslegales específicos, pero podría tener también otros derechos que varían según el estado. Esta garantía se limita solo al reemplazo de piezas defectuosas. Quedan excluidos los cargosy/o daños por mano de obra incurridos durante la instalación, reparación o reemplazo, ademásde los daños incidentales o resultantes relacionados con estos. Cualquier daño a este productocomo resultado de negligencia, uso indebido, accidente, instalación inadecuada o cualquier otrouso distinto al descrito en el presente ANULARÁ ESTA GARANTÍA.LISTA DE PIEZAS DE REPUESTOPara obtener piezas de repuesto, llame a nuestro Departamento de Servicio al Cliente al1-800-643-0067, de lunes a viernes de 8 a.m. a 8 p.m, hora estándar del Este.PIEZAGDESCRIPCIÓNTubo de la bombaPIEZA #MZ14027GA-1HEmpaquetadura GA-4KAnillo de luzpequeñoMZ14027GA-5LAnillo de luz grandeMZ14027GA-6Impreso en China12
cable to secure the connection. Then place the middle bowl on the big bowl spacer (D). Run the long female plug from the pump through the center of the middle bowl as shown. 7. Secure the fountain with rubber gasket (H) and top (A). 8. Pour water gently into big bowl (E), middle bowl (C) and top bowl (B). 10. OPTIONAL: To reduce