Transcription
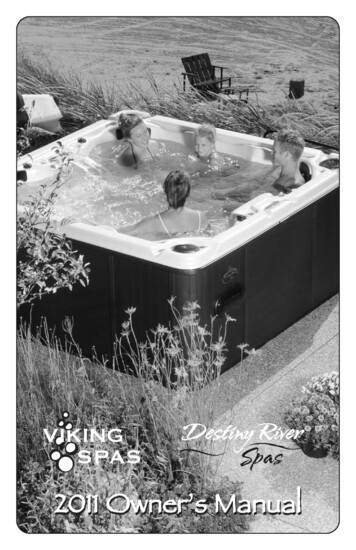
2011 Owner’s Manual
TABLE OF CONTENTS Important Safety InstructionsPersonal Safety PrecautionsInstallation and Set-Up InstructionsElectrical Requirements (VS-500 & 501)GFCI Wiring Installation (220v)Electrical Specifications255578 Operation Instructions9Topside Control Instructions (all single pump systems)10Topside Functions11Diagnostic Messages12Aurora III, Royale, Legacy, Legend & Heritage Features14Topside Control Instructions (Royale ETS, Legacy, Legend & Heritage) 15Spa Jets and Air Controls18 Spa Startup DirectionsFill the Spa With WaterSkimmer Side FilterAdd Start-Up Chemicals21212121 MaintenanceSpa DrainingSpa Surface CareLong-Term StoragePillow MaintenanceFilter CleaningSpa Cabinet Maintenance22222323232424 Ozonator26 Gallon Specifications26 Spa Situations & Solutions27 Trouble Shooting281
IMPORTANT SAFETY INSTRUCTIONSWhen installing and using this electrical equipment, basic safety precautions should always be followed, including the following:READ AND FOLLOWALL INSTRUCTIONS1.WARNING: To reduce the risk of injury, do not permitchildren to use this product unless they are closely supervisedat all times. Keep spa cover locked when not in use.2.A wire connector is provided on this unit to connect a minimumNo. 8 AWG (8.4mm2) solid copper conductor between thisunit and any metal equipment, metal water pipe or conduitwithin 5 feet (1.5m) of the unit.3.DANGER: Risk of Injury. The suction fittings in this spa aresized to match the specific water flow created by the pump.Should the need arise to replace the suction fittings or thepump, be sure that the flow rates are compatible. Neveroperate the spa if the suction fittings are broken or missing.Never replace a suction fitting with one rated less than the flowrate marked on the original fitting.4.DANGER: Risk of Accidental Drowning. Extreme Cautionmust be exercised to prevent unauthorized access by children.To avoid accidents, insure that children cannot use this spaunless they are supervised at all times.5.DANGER: Risk of Electric Shock. Install at least 5 feet (1.5m)from all metal surfaces. As an alternative, a spa may beinstalled within 5 feet of metal surfaces if each metal surface ispermanently connected by a minimum No. 8 AWG (8.4mm2)solid copper conductor to the wire connector on the terminalbox that is provided for this purpose.2
6.DANGER: Risk of Electric Shock. Do not permit anyelectrical appliance, such as a light, telephone, radio ortelevision within 5 feet (1.5m) of a spa.7.WARNING: To Reduce the Risk of Injury:a) Before using your spa you should check the watertemperature with a thermometer that is known to beaccurate. The water temperature in a spa should neverexceed 104 F (40 C). A water temperature of 104 F isconsidered safe for a healthy adult. Lower watertemperatures are recommended for young children andwhen spa use exceeds 10 minutes.b) Since excessive water temperatures have a high potential forcausing fetal injury during the early months of pregnancy,pregnant or possibly pregnant women should limit spa watertemperature to 100 F (38 C).c) The use of alcohol, drugs, or medication before or duringspa use may lead to unconsciousness with the possibility ofdrowning.d) Persons suffering from obesity or with a medical history ofheart disease, low or high blood pressure, circulatorysystem problems or diabetes should consult a physicianbefore using a spa.e) Persons using medication should consult a physician beforeusing a spa since some medication may induce drowsinesswhile other medications may affect heart rate, bloodpressure and circulation.8.The causes, symptoms and affects of hyperthermia may bedescribed as follows:Hyperthermia occurs when the internal temperature of the bodyreaches a level several degrees above the normal temperatureof 98.6 F. The symptoms of hyperthermia include an increasein the internal temperature of the body, dizziness, lethargy,drowsiness and fainting.The effects of hyperthermia include: Failure to feel heat Failure to recognize the need to exit the spa3
Unawareness of impending hazardsFetal injury in pregnant womenPhysical inability to exit the spa or hot tubUnconsciousness resulting in the potential of drowning9.WARNING: The use of alcohol, drugs or medication cangreatly increase the risk of fatal hyperthermia. If you suspecthyperthermia, immediately get medical help, lay the victim ontheir back with the head slightly elevated for easier breathing,cover the body with a blanket and apply ice packs to thehead.10.Never touch or come in contact with any electrical accessorywhen in your spa or when your body is wet.11.Prior to performing any service to the spa pack, turn off ALLpower to the system at the main power source breaker.NOTE: A READILY ACCESSIBLE DISCONNECTING MEANSSHALL BE PROVIDED DURING INSTALLATION.SAVE THESE INSTRUCTIONSPERSONAL SAFETY PRECAUTIONS1.2.3.4.5.4Please use the spa when others are present.Children should have spa access only with the permission andsupervision of an adult.To reduce the risk of child drowning, keep the spa filter cleanand unclogged. Do not modify the suction or filtrationsystems.Exercise caution when entering or leaving the spa. Whenmoving or changing positions, be sure of your footing beforeapplying your full weight as water refraction can bemisleading.Do not stay in the spa for extended periods of time. Set areasonable time limit after which you leave the spa, cooldown, take a shower, relax and then return for another stay inthe spa.
INSTALLATION AND SET-UP INSTRUCTIONSSURFACE AND PAD REQUIREMENTS Your new portable spa must be placed on a uniformly firm,flat and level surface. A concrete pad 4 inches thick is best. In order to prevent flooding of the electrical equipment, thepad must be such that water will drain away from the spa. If your spa is located near sprinklers, adjust or cap them soas not to hit the siding of the spa.NOTE: Do not put your spa on any soft surface such as sand, grass,crushed rock or dirt. Any settling surface will put an uneven pressure andtension to the spa structure and may void the warranty.BALCONIES AND DECK REQUIREMENTS Decking must be constructed to support 85 pounds per sq. ft. Balconies must be constructed to meet current state andlocal codes. Gates must be self-closing and self-latching. Name badge on rub rail indicates equipment location.ELECTRICAL REQUIREMENTS (VS-500 & 501)Royale, ETS, Aurora III)220v110vBreaker220v (Destiny River)CAPACITY60 amps50 amps40 amps 20-ampsPOLES2221# WIRES4443 Never tie ground and neutral together. Your 110-volt or 220-volt spa pack is designed to be“PERMANENTLY CONNECTED”. Your 110-volt spa pack requires an isolated* 110-volt, 20 ampGFCI (*no other appliances or lights on this circuit at any time) Use of any extension cord is dangerous and is not to be used inconjunction with the operation of the spa. Low voltage damagemay result and will void your warranty. It is the customer’s responsibility to acquire necessarypermits and to arrange for installation and hook up ofthe electrical power. Your spa comes set up from the factory to accept 220v.5
220-VOLTWHITE\BLACKREDGREEN**Green ground connection located on left side of control panel.6
GFCI WIRING INSTALLATION (220V)7
ELECTRICAL SPECIFICATIONSGENERALNOTICE: All spa electrical wiring must be performed bya qualified, licensed electrician in order to meet NEC(National Electrical Code) state and local codes.1.The lines carrying power to the spa must be dedicated to thespa and should not be shared with any other appliance(s).2.All electrical wiring lines must originate from the electricalpanel and terminate, hard wired, into the electrical wiringcompartment. The use of extension cords or improper plugtype termination is expressly prohibited and voids the warranty.3.Do not use aluminum wiring. Use only copper conductivewiring.4.Wire gauge must be in accordance with NECrequirements for the distance from current source to spa andthe current rating as stated on the ID label that is attached tothe equipment control enclosure.5.All wiring installed in conduit must be approved for usageby state and local codes. The conduit must terminate at theelectrical access compartment either from the bottom of thespa or through a hole in the side panel of the spa.NOTE: The Viking I, Viking II, Aurora I and Eclipse models are available with a 110v option. The Viking III, Aurora II, Aurora III,Supreme, Royale, Royale ETS, Legacy, Legend, Heritage models are220v only systems.8
OPERATION INSTRUCTIONSIt is very important to make sure that the spa is filled at least 3/4 wayup the skimmer opening. Make sure the gate valves are in theopen or up position.WARNING: Do not run spa with gate valves closed or run pump withno water circulating in spa for long periods. Damage could occur tothe spa equipment.9
TOPSIDE CONTROL INSTRUCTIONS(All Models Except Royale ETS, Legacy, Legend & Heritage)INITIAL START-UPWhen your spa is first activated, it will go into Priming mode, indicated by “Pr”. The priming mode will last for less than 5 minutes. Then,the spa will begin to heat and maintain the water temperature in theStandard mode indicated by “St”.TEMPERATURE (80 F - 104 F / 26 C - 40 C)The start-up temperature is set at 100 F/37 C. The last temperature isconstantly displayed on the LCD.Note: The last spa temperature displayed is current onlywhen the pump has been running for at least 2 minutes.Controls LowSpeed/High Speed PumpDisplays Temperature andDiagnostic MessagesTurns LightOn/OffSets WaterTemperatureHeat OnIndicator LightPress the “Temp” button to display the temperature previously set. Theset temperature flashes on the display. Pressing the “Temp” button asecond time, while it is still flashing, will cause the set temperature toincrease or decrease depending on what direction was last chosen.Each press to follow will change the set temperature in the same direction. If the opposite direction is desired, release the pad and let thedisplay revert to the actual water temperature. Press the button to display the set temperature, and press again to make the temperaturechange in the desired direction. After three seconds, the LCD willstop flashing and display the current spa temperature.10
TOPSIDE FUNCTIONSJETSPress the “Jets” button once to activate the low speed of the pump andagain for the high speed. Press the “Jets” button again to turn off thepump. If left running, the low speed of the pump will automaticallyturn off after 4 hours, and the high speed will automatically turn offafter 20 minutes.LIGHTPress the “Light” button to turn the light on and off. If left on, the lightautomatically turns off after 4 hours. In spas equipped with LEDlight, press the light button consecutively to change the color sequencing.MODEThe mode is changed by pressing the “Temp” button, then pressing the“Light” button.Standard Mode is programmed to maintain the desiredtemperature. Note that the last measured spa temperature displayedis current only when the pump has been running for at least 2minutes. “St” will be displayed momentarily when you switch intoStandard mode.Economy Mode heats the spa to the set temperature only duringfilter cycles. “Ec” will display solid when temperature is not current,and will alternate with temperature when temperature is current.Sleep Mode heats the spa to within 20 F/10 C of the settemperature only during filter cycles. “SL” will display solidwhen temperature is not current, and will alternate with temperaturewhen temperature is current.Preset Filter Cycles. The first filter cycle begins 6 minutes afterthe spa is energized. The second filter cycle begins 12 hours later.Filter duration is programmable for 2, 4, 6, 8 or (12 hourscontinuous filtration, indicated by “FC”). The default filter time is 2hours. To program, press “Temp,” then “Jets.” Press “Temp” toadjust. Press “Jets” to exit programming.11
DIAGNOSTIC MESSAGESMessage Meaning12Action RequiredTemperature UnknownAfter the pump has beenrunning for 2 minutes, thetemperature will be displayed.HH“Overheat” – The spahas shut down.One of the sensors hasdetected 118 F/48 Cat the heater.DO NOT ENTER THE WATER.Remove the cover and allowwater to cool. Reset by pushingany button.OH“Overheat” – The spahas shut down. One ofthe sensors has detectedthat the spa water is110 F/43 C.DO NOT ENTER THE WATER.Remove the spa cover andallow the water to cool. At107 F/42 C the spa shouldautomatically reset. If it does not,shut off the power to the spa andcall your dealer or serviceorganization.IC“Ice” – Potential freezecondition detected.No action required. The pump(s)will automatically activateregardless of spa status.SAThe spa has shut down.The sensor that isplugged into theSensor “A” jack is notworking.If the problem persists, contactyour dealer or service organization. (May appear temporarily in an overheat situation anddisappear when the heater cools.)SBThe spa has shut down.The sensor that isplugged into theSensor “B” jack is notworking.If the problem persists, contactyour dealer or service organization. (May appear temporarily in an overheat situation anddisappear when the heater cools.)
SnSensors are out ofIf the problem persists,balance. If alternating contact your dealer or servicewith spa temp, it may organization.just be a temporarycondition. If flashing byitself, spa is shut down.HLA significant difference Check water level in spa.between temperatureRefill if necessary. If the watersensors has beenlevel is okay, make sure thedetected. This couldpump(s) have been primed.indicate a flow problem.LFPersistent low flowFollow action required for “HL”problems. (Displayson the fifth occurrence ofHL message within 24 hrs.)Heater is shut down, butother spa functions continueto run normally.drPossible inadequatewater, poor flow orair bubbles detectedin the heater. Spais shut down for 15minutes.Check water level in spa. Ifwater level is okay, make surepump(s) have been primed.Press any button to reset or thismessage will automatically resetwithin 15 minutes.dyInadequate waterdetected in heater.(Displays on thirdoccurrence of “dr”message.) Spa is shutdown.Follow action required for “dr”message.WARNING! / Shock Hazard! / No User Serviceable Parts.Do not attempt service of this control. Contact your sparetailer or service organization for assistance. Installationand/or service must be performed by a licensed electricianand all grounding connections must be properly installed.13
“AURORA III”, “ROYALE”, “ROYALE ETS, “LEGACY”, “LEGEND” & “HERITAGE” FEATURESThe Aurora III, Royale, Royale ETS, Legacy, Legend, & Heritage models also feature a Waterfall jet, which allows the user to regulate theflow of water to the jet by simply turning the valve for the waterfallfrom “off” to “on”. (See illustration below)LED LIGHTING FEATUREThe Viking III, Aurora III, Royale, Royale ETS, Legacy, Legend, &Heritage Series models are also equipped with an LED light system.This lighting, which encompasses the interior of the spa, is also incorporated into the light in the foot well of these models. The LED Lightingsystem consists of a 9 position controller. The first time the light isturned on, it will begin to display all 9 colors available in an automatic rotating sequence. Each time you sequence the light on/off, all colors will be displayed individually. The last function of the cycle is aunique strobe feature. It may be necessary to wait 1-2 secondsbetween cycling the lights on and off in order to get to the next colorsequence.WaterfallOn/Off ControlRegulates Airinto JetsRoyale inWhite Pearl14
TOPSIDE CONTROL INSTRUCTIONS(Royale ETS, Legacy, Legend & Heritage)Controls LowSpeed/High SpeedPumpTurns LightOn/OffPump 2 Controls SecondaryPump, On and OffHeat OnIndicator LightDisplays Temperature andDiagnostic MessagesSets WaterTemperatureINITIAL START-UPWhen your spa is first activated, it will go into a Priming mode, indicated by “Pr”. The Priming mode will last for less than 5 minutes.Then, the spa will begin to heat and maintain the water temperature inthe Standard mode indicated by “St”.TEMPERATURE (80 F – 104 F / 26 C – 40 C)The start up temperature is set at 100 F/37 C. The last temperature isconstantly displayed on the LCD.Note: The last spa temperature displayed is current onlywhen the pump has been running for at least 2 minutes.Press the “Temp” button to display the temperature previously set. Theset temperature flashes on the display. Pressing the “Temp” button asecond time, while it is still flashing, will cause the set temperature toincrease or decrease depending on what direction was last chosen.Each press to follow will change the set temperature in the same direction. If the opposite direction is desired, release the pad and let thedisplay revert to the actual water temperature. Press the button to display the set temperature, and press again to make the temperaturechange in the desired direction. After three seconds, the LCD willstop flashing and display the current spa temperature.15
PUMP 1Press the “Pump 1” button once to activate the low speed of the primary pump and again for the high speed. Press the “Pump 1” buttonagain to turn off the pump. If left running, the pump’s high speed willautomatically turn off after 20 minutes. The low speed of the pumpruns when the secondary pump is on. It may also activate for at least2 minutes every 30 minutes to detect the spa temperature and then toheat to the set temperature, if needed, depending upon mode. Whenthe low speed turns on automatically, it cannot be deactivated from thepanel, however, the high speed may be started.PUMP 2This button is used to turn the secondary pump on and off. If left on,the pump automatically turns off after 20 minutes.LIGHTPress the “Light” button to turn the light on and off. If left on, the lightautomatically turns off after 4 hours. In spas equipped with LEDlight, press the light button consecutively to change the color sequencing.MODEThe mode is changed by pressing the “Temp” button, then pressing the“Light” button.Standard Mode is programmed to maintain the desiredtemperature. Note that the last measured spa temperature displayedis current only when the pump has been running for at least 2minutes. “St” will be displayed momentarily when you switch intoStandard mode.Economy Mode heats the spa to the set temperature only duringfilter cycles. “Ec” will display solid when temperature is not current,and will alternate with temperature when temperature is current.Sleep Mode heats the spa to within 20 F/10 C of the settemperature only during filter cycles. “SL” will display solid whentemperature is not current, and will alternate with temperature whentemperature is current.16
Preset filter cycles The first filter cycle begins 6 minutes after thespa is energized. The second filter cycle begins 12 hours later.Filter duration is programmable at the topside control for 2, 4, 6,8 hours, or 12 hours for continuous filtration, (indicated by “FC”).The default filter time is 2 hours. To program, press “Temp”, then“Jets”. Press “Temp” to adjust. Press “Jets” to exit programming.Note: The Secondary Pump purges for 30 seconds at the beginningof each filter cycle. The low speed of the primary pump runs during filtration and the ozonator (if installed) will be enabled.FREEZE PROTECTIONNote: For all other diagnostic messages, please refer tothe Balboa Operation Guide that came with your spa.Warning! / Shock Hazard! / No User Serviceable Parts.Do not attempt service of this control system. Contact yourdealer or service organization for assistance. Follow allowner’s manual power connection instructions. Installationmust be performed by a licensed electrician and allgrounding connections must be properly installed.17
SPA JETS AND AIR CONTROLSSPA JETSAdjustable Spa Jets may be turned off and on by rotating jet faceplateleft or right.Note: DO NOT TURN ALL SPA JETS OFF AT THESAME TIME. THIS MAY CAUSE DAMAGE TO THEPUMP AND MOTOR.Directional &Pulsating ClusterDirectional Mini, RotoStorm & 3 port Roto Mini(Destiny River only)Directional & Roto Adjustable PolySingle & Twin Adjustable RotoPower StormNote: To remove jet insert, turn jet face counter-clockwise to the shutoff point. Continue turning until the jet insert releases from body. Toreinstall the jet, locate the tab on the jet insert and line up with thegroove of the jet body. Insert and aggressively push on jet face until itlocks.18
TURBO (Whirlpool) JET / (VIKING IIONLY) & Volcano Jet (Heritage IIonly)The Turbo jet is located on the filter cavitywall is the Turbo jet. This jet is a combination valve and high capacity jet. To turnthe Turbo jet on, simply turn the face counterclockwise to the first stop position. To turn theTurbo jet off, turn the face clockwise to bring the mainjets back to full power.*The Volcano Jet operates on a valvelocated in the middle of the lounger. Turnthe valve to activate the jet. Note: this valvedirects one of the pumps and will effect the flowthis pump used to power other jets in the spa.* Due to the substantial amount of water pressure when the Turbo Jetis operating, you must turn the pump to the off or low speed cycleposition before attempting to rotate the jet face.AIR CONTROLSAir controls are adjusted by rotating the topside dial. These controlsserve to regulate the amount of air mixed with water when thewhirlpool or hydrotherapy jets are operating in the high pumpmode.Viking I & II OnlyAll other models (See illustration on page 14)19
SPA STARTUP DIRECTIONSAll Viking Spas require a solid, flat surface.* This is to ensure that thespa cabinet is not exposed to a pressure stress condition that may resultin cabinet damage and shell cracking. A concrete pad is the bestexample of a solid, flat surface, however, wood decking issuitable, provided it can withstand 85# per sq. ft. withoutdeflection.* FAILURE TO PROVIDE A PROPER, SOLID, FLAT SURFACE MAYDAMAGE YOUR SPA AND VOID YOUR WARRANTY.The following procedure should be followed on initial startup and whenever the spa is drained for maintenance. Read each step in its entiretybefore proceeding with that step. Please check with a licensed contractorand local codes prior to any construction.STEREO INFORMATIONIf you spa is equiped with a radio you will find the operating instructionsin the warranty package.FILL THE SPA WITH WATERa. Clear all debris from your spa.b.Remove filter elementc. Using a garden hose, place hose in filter chamber for filling. Donot fill higher than three quarters of the way up the skimmer openingd. DO NOT use softened water.e. As water level rises, check inside equipment compartments forwater leaks. It may be necessary to tighten loose unions and/orfittings.f. Make sure T-Handled Gate VALVES at pump and heater are open,and the valve handle retaining clips are in place. (Fully extended upposition).20
SKIMMER SIDE FILTERAll Viking spas have a skimmer side filter that does not require “airbleeding” on initial startup. If an air lock develops, loosen the union onreturn side of pump. See Diagram (A) below. Let small amount of waterdrain from connection while the pump is running. Once the waterbegins to flow out of the jets retighten the union. Make sure Gate Valveis in the “open” position and the black retainer clip is snapped intoplace.Clean spa filters are critical for proper operation. Dirty filters causewater restriction to the pump, which in turn may cause erratic heating ofthe spa. A starving pump will degrade performance, result in dirty ormurky water and may cause the heater to malfunction.ADD START-UP CHEMICALSAsk your spa retailer to HELP you set up a chemical maintenance program.The importance of chemical balance in your spa cannot be overemphasized.SANITIZING: Please refer to your dealer supplied sanitizing recommendations for your start up procedures.NOTE: If you live in an area where city water is not available, or yourspa water shows signs of calcium content, you will need to add a “stainn scale” chemical on initial fill and then once a week, thereafter.* Staining of shell due to improper use of chemicals(as recommended by chemical manufacturer) will not beconsidered a warranty defect by Viking Spas.(A)21
MAINTENANCESPA DRAININGEvery 90 days, depending upon water condition, you may need torenew the spa water. To drain your spa, power must be disconnectedat the circuit breaker. Locate the drain faucet inside the spa cabinet(for Viking I, II & III models) or on the corner near the bottom of theside panel next to the equipment (for all other models). 1. Twist cap offand attach a garden hose to the opening. 2. Turn the outside bodycounter clockwise until it stops. 3. Pull on the drain that the hose isconnected to until you hear a pop. 4. Drain the spa. 5. Reverse thisprocedure to shut the water off. Note: the drain will not remove all ofthe water in the spa. You may have to remove a small amount of waterby hand.DRAIN LOCATIONSWater Gate ValveDrain for Viking I, II &Viking III ModelsDrain for allother ModelsOperation instructions are virtually thesame for all of our models.22
SPA SURFACE CAREDo not use abrasive solvents or cleaners to clean spa surfaces. Only use the following: Lemon Juice, Amonia,Vinegar or Soap and Water.LONG-TERM STORAGE (90 days or more)We strongly urge you to contact your dealer to winterizeyour spa. If you are not going to use your spa for an extended period oftime, drain it as described above. You will also have to drain the pump.Water left in the spa during long-term storage may cause freeze damage.*To drain the pump, remove the drain plug from the face of the pump.Additional water removal is required to prevent freeze damage to thespa plumbing assembly. Remove the piping assembly between thepump and the heater by loosening the union at the pump and the unionat the heater. Once the piping is removed, use a wet/dry shop vac tovacuum water from both the pump side and the heater side openings.Once all water is removed from these lines, we also recommend thatyou place the vacuum over each jet and the suction fittings and vacuumany remaining water that may be trapped in these lines. You may nowreinstall the piping assembly that was removed earlier and reinstall thepump plug.NOTE: We also recommend vacuuming each jet opening to ensurethat all of the water is out of the plumbing lines.*FREEZE DAMAGE TO THE SPA PLUMBING IS NOT COVEREDUNDER THE WARRANTY.SPA PILLOW MAINTENANCE Your spa pillows need to be washed and rinsed periodically toremove any chemical residue. This should help to eliminate pillowsbecoming stiff and discolored. Note: Your spa pillows are not coveredunder your warranty. If the spa is not to be used for a period of time, pillows should beremoved. This will extend the life of the pillow.23
Always leave the cover open for 15 minutes every 30 days to prevent off gas from damaging your spa pillows, cover and other criticalcomponents. Signs of off gas damage include but are not limited to pillow peeling and bubbling, discoloration, cover failing prematurely,plastics or jet inserts failing. Note: These types of failures are not covered under your warranty.FILTER CLEANING(Viking I, Viking II & Viking III)Your filter should be replaced once a year. When filters are removedfrom the spa, make sure that no objects fall into the filter cavity. Theycan cause obstruction to water movement. Remove filter cartridges asshown in figures below.The filter must be cleaned every month, more often with heavy use, toget rid of objects and particles that are lodged in the filter pleats.Using a garden hose with a pressurized nozzle, push water from theinside to the outside of the filter pleats forcing all trapped particles out.If the filter is too dirty to be cleaned as described above, obtain filtercleaner material from your Viking Spa Retailer. Soak the filterovernight; then hose it down.A.C.Locate skimmer.Remove basket.B.Pull weir door open.D. Remove the two separate filtersand follow cleaning instructions above.SPA COVER MAINTENANCEPlease refer to the cover manufacturers care and maintenance formincluded in the box the cover came in. For proper installation of thecover the tiedown hardware must be installed.24
FILTER CLEANING(All Other Spas)Remove filter face cover by pulling straight up and slightly toward thespa on front plate/face cover. (As shown below.) Remove access basket and unscrew filter cartridge(s) from housing. To reinstall weir doorassembly, door must be placed through throat of skimmer prior to sliding assembly into place. Refer to filter cleaning procedure for Viking I,Viking II & Viking III on previous page. Note: Spas with this filter utilize 50 sq. ft. cartridge filters.A. Locate skimmer.C. Remove basket & filters.B. Remove front plate.D. Clean per instructions.SPA CABINET MAINTENANCEYour Viking spa cabinet is designed to be maintenance free. However,if dirt or grime should appear simply use a mild soap solution andclean with a rag.25
OZONATORIf your spa is equipped with an ozonator, it is factory set to filter during the filter cycles only. We recommend the F4 setting which meansyour spa will filter a total of 8 hours (4 hours twice a day). This shouldprovide adequate ozonation, provided there is proper chemical balance in the spa.NOTE: Please Do Not attempt to disassemble ozonator if it becomesinoperable. Ozonators contain no user serviceable parts. Please contact your spa retailer or service organization.120VOzonatorGALLON SPECIFICATIONSModelViking IViking II & Viking IIIAurora I, II & IIIEclipse, Supreme, Royale & ETSLegacyLegendHeritage26Gallons240 Gallons250 Gallons210 Gallons270 Gallons320 Gallons300 Gallons370 Gallons
SPA SITUATIONS & SOLUTIONSSituationCause or ResultProduct to useSolutionCalcium depositson surfaces ofheater, fittingsor plumbingHard waterStain n ScaleAdd 1oz. of Stain n ScalepH/total alkalinityout of adjustmentpH UppH DownTest water - adjust withpH Up or pH
Topside Control Instructions (all single pump systems) 10 Topside Functions 11 Diagnostic Messages 12 Aurora III, Royale, Legacy, Legend & Heritage Features 14 Topside Control Instructions (Royale ETS, Legacy, Legend & Heritage) 15 Spa Jets and Air Controls 18 Spa Startup Directions 21 Fill the Spa With Water 21 Skimmer Side Filter 21