Transcription
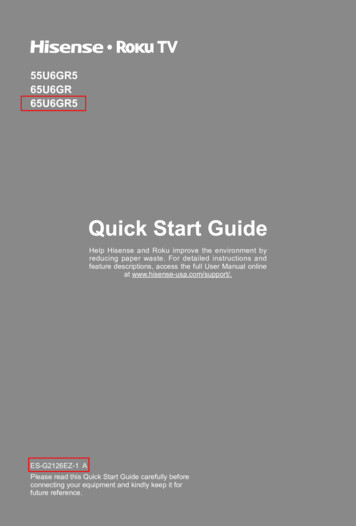
55U6GR565U6GR65U6GR5Help Hisense and Roku improve the environment byreducing paper waste. For detailed instructions andfeature descriptions, access the full User Manual onlineat www.hisense-usa.com/support/.ES-G2126EZ-1 APlease read this Quick Start Guide carefully beforeconnecting your equipment and kindly keep it forfuture reference.
2021 Hisense Company Ltd and Roku, Inc. All rights reserved. Hisense and theHisense logo are registered trademarks of Hisense. Roku, Roku TV and the Roku logoare trademarks and the property of Roku, Inc. Other channel logos, brand and productnames are trademarks or registered trademarks of their respective holders.All material in this Quick Start Guide is the property of Hisense Company Ltd. and RokuInc. and its subsidiaries, and is protected under U.S. and International copyright and/orother intellectual property laws. Reproduction or transmission of the materials, in wholeor in part, in any manner, electronic, print, or otherwise, without the prior written consentof Hisense Company Ltd. and Roku, Inc. is a violation of the rights of Hisense CompanyLtd. and Roku, Inc. rights under the aforementioned laws.No part of this publication may be stored, reproduced, transmitted or distributed, inwhole or in part, in any manner, electronic or otherwise, whether or not for a charge orother or no consideration, without the prior written permission of Hisense Company Ltd.and Roku, Inc.Requests for permission to store, reproduce, transmit or distribute materials may bemade to the following address:USA:Hisense USA Corporation7310 McGinnis Ferry RoadSuwanee, GA 30024
Your easy way to endless entertainment*Payment required for some channel content. Channels can change and vary by country.† Roku search is for movies and TV shows and does not work with all channels.# Limitations apply to the Roku mobile app. Please see support.roku.com for device compatibilityinformation.1
WELCOME TO THE HISENSE FAMILY!Congratulations on the purchase of your new Hisense Roku TV! ThisQuick Start Guide will walk you through a few easy steps to set up yourTV.Because we value your business, we want to keep you in the know of 'all thingsHisense'. Using your mobile phone, scan the Registration page QR code to registeryour TV. Depending on the make and model of your phone, you may need to downloada QR code scanning app.CountryCustomer CareCenterU.S.A Phone:1-888-935-8880 Hours of Operation:Monday - Friday: 9 AMto 9 PM ESTSaturday - Sunday:9 AM to 6 PM EST Service Email:Service@hisense-usa.comHisense STERYOUR imer: This Quick Start Guide is intended as a general guidelineto help you set up your Hisense Roku TV. Images throughout thisdocument are for illustrative purposes only and may differ from theactual product.2
Packaged contentsYour package in which you purchased your new TV contains the following items:TV2 AAA(1.5Vcc) batteriesRemote Control2 legs that form the TV standQuick Start Guide (this document)4 screws (M4 12)(55")4 screws (M5 12)(65")Power cordImportant Safety Information and Warranty Card leaflet1 RCA jack to AV CableIMPORTANT:To prevent accidentally discarding items that came with your TV, be sure to check ALLof the foam in the carton box.· Please check foam for accessories before discarding.· Veuillez vérifier la mousse pour qu'il n'y ait pas d'accessoires avant de la jeter.· Antes de desechar la espuma, asegúrese de retirar todos los accesorios.Required tools and devicesWireless router (not included) for Internet connectivityPhillips screwdriver (not included) to secure the TV standHDMI and other types of cables (not included) to connect external devices to the TVWall mount bracket and screws (not included) if you prefer to mount the TV to the wall3
Buttons and ports on the Hisense Roku TVBack View of the TVPower Input4
STEP 1. Attach the TV stand or wall mount bracket (notincluded)Attach the TV StandCAUTION:Be sure to disconnect the AC power cord before installing a stand or Wall-Mountbrackets.The LED display is very fragile and must be protected at all times when installingthe legs that form the stand. Be sure to protect the TV screen from gettingscratched or damaged by any hard objects. In addition, DO NOT exert pressure onthe front of the TV at any time because it could crack.After the installation is complete, make sure the TV is steady on a table or firmlyattached to a wall mount, before removing all protective film, if any.To attach the left and right leg that forms the stand:1. Carefully place your TV face down on a soft, flat surface to prevent the TV frombeing damaged or the screen from getting scratched.2. Remove the 2 legs from the foam and then insert the legs into the bottom slots ofthe TV.3. Use the screws that came inside the carton with your TV to secure each leg tightly.55"LegScrews: M4 12Screws: M4 12Leg65"Screws: M5 12LegScrews: M5 125Leg
Attach the wall mount bracket (not included)Before you begin the third-party manufacturer instructions, be sure to do the followingthings:1. Place the TV face down on a clean, safeand cushioned surface.Screw(not included)2. Remove the TV stand if you havealready attached it.3. Place spacers (not included) in thecorresponding bracket holes.Spacer(not included)Bracket(not included)CAUTION: Follow instructions provided with the wall mount bracket. If it is not correctly mounted,the TV may fall and cause property damage or personal injury. When you attach the mount, be sure to use spacers (provided by the third-partymanufacturer) between the TV and the bracket. To prevent internal damage to the TV and to ensure it is mounted securely, be sure touse fixing screws (not included) that are 9.5-11.5 mm in length when measured from theattaching surface of the rear cover. Make sure the tilt angle between the TV screen and the vertical surface is no morethan 15 degrees. 15 TV screen9.5-11.5 mmWall mount bracketVerticalsurfaceRear cover of the TVWall mount hole pattern(mm)300 200Wall mount screw sizeM6ScrewSpacerNOTE: If you have additional questions, please contact the wall mount manufacturer or theretailer from which you purchased the TV. The diameter and length of the screws differ depending on the wall mount bracket model.6
STEP 2. Connect devices to your TVCheck to ensure that you have selected the right cables for the ports and that they areconnected securely. Loose connections can affect the quality of the picture image andcolor. (Cables and External Equipment not included.)TV labelPortCableExternal EquipmentVHF/UHF AntennaANT/CABLEANT OUTAntennaVCRDVD Player/RecorderVideoCameraAV INWhite(L)Set-top BoxSatelliteantennacableSatellite ReceiverYellow(Video)DIGITALAUDIOOUTAudio AmplifierConnectan outdooror indoorantenna.Connect aHigh SpeedHDMI Cable froman externaldevice.HDMIRed(R)Brief DescriptionSpeakerConnect acompositevideo cableand left-rightaudio cablesfrom anexternal AVdevice.Connect adigital audiocable froman externaldigital audiosystem.Connectheadphone(soldseparately)for audio outof the TV.7
TV labelPortCableExternalEquipmentConnect a USB memory stick to enjoyits photos, music, and movies, or toenable Live TV Pause. Live TV Pauseis only available on the Antennainput of your Roku TV and requires adedicated USB 2.0 compatible flashdrive with at least 16GB of storage.Live TV Pause requires connecting tothe Roku service.USBRESETBriefDescriptionRestart or factory reset your TV.Connect an Ethernet cable to accessa network or the Internet. The TV alsohas a wireless connectivity feature.LAN8
Buttons on your TV remoteThe TV remote should feelright at home in your hand.We designed it to be incrediblyintuitive for watching TV andnavigating on-screen menus.13 OK: Select an option from a menu4 DIRECTIONAL KEYPAD: The left arrow will bringup the antenna TV channel list or Smart Guide. Theleft and right arrows are used in Live TV Pause toselect scenes.5 CHANNEL RECALL/JUMP BACK AND INSTANT1REPLAY: Change to the previous channelwhen viewing antenna or cable (no set-top box)programmingJump back one position in video when viewingstreaming contentBackspace one letter during menu entries, such asSearch162839456POWER: Turn your TV on or off2 BACK: Return to the previous screen6 REWIND: Rewind streaming video, jump to theprevious audio track or selection, jump up one pagein menus. This button is also used to rewind pausedlive TV using Live TV Pause10111213147157 PLAY/PAUSE: Pause or resume playback. Thisbutton is also used to activate and use the Live TVPause feature**8 HOME: Display your TV's Home screen / Stop play-back if you are watching TV or streaming content9VOLUME UP (Side view): Increase the volumeor un-mute the sound10VOLUME DOWN (Side view): Decrease thevolume11MUTE (Side view): Mute or un-mute the sound12 Voice button: Holding down the Voice Buttonactivate the microphone13 VIEW MORE OPTIONS: Give you easy access topicture settings, display options, and more / Presson any screen to access options14 FAST FORWARD: Fast forward streaming video,jump to the next audio track or selection, jump downone page in menus. This button is also used to fastforward paused live TV using Live TV Pause.15 STREAMING CHANNELS SHORTCUTS:Disclaimer:When you press a button: If you have not added the channel, display a signup page If you have added the channel, display thechannel's home page If your TV is off, turn on your TV and display thechannel’s home page* Remotes may vary.16 Receive The Voice** A 16GB USB is required.Maximum playback of 90 minutes.9
STEP 3. Begin using your remotePower up your TV remote by inserting the included batteries.CAUTION Dispose of the batteries in a designated disposal area. Do not throw them into afire. Remove old batteries immediately to prevent them from leaking into the batterycompartment. If you do not intend to use the remote control for a long time, remove thebatteries. Battery chemicals can cause a rash. If the batteries leak, clean the batterycompartment. If chemicals touch your skin, wash it immediately. Do not mix old and new batteries. Do not mix alkaline, standard (carbon-zinc) or rechargeable (for example, NiCd orNiMH) batteries. If your remote gets warm/hot during use, discontinue use and contact customersupport immediately at www.hisense-usa.com/support.Using Your Cable Set-top Box or Satellite ReceiverRemote as a ‘Universal Remote’.If you prefer to use your Cable Set-top Box or Satellite Receiver Remote as a ‘Universal Remote’, please refer to the manual that your cable or satellite service provided. Itwill include instructions on how to program their remote to your television. You can findcodes that work with your Hisense Roku TV and the most common cable and satelliteprovider’s universal remote control at www.roku.com/universalremote.10
Turn on the TVConnect the power cord to the power outlet.button on the remote to turn on the TV. A startup screen appearsPress the Powerthat displays the Hisense Roku TV logo.DeutschEspañolFrançaisChoose Set up for home use to access all TV features and maximize low power.NOTE: Only retailers that need to set up the TV for display should select Set up forstore use.Hisense Roku TV Text to Speech FunctionalitiesText-to-Speech and Video Description functionalities on the TVText-to-Speech (TTS) and Video Description can help you to navigate the menuson the screen and hear an audio description of relevant programs. Text-to-Speechcan convert written text into voice text to help visually impaired people listen to theinformation they are unable to read. In addition, the Video Description has an audionarration added to certain programs that will describe the main visual elements whichvisually impaired users may not be able to see.Follow the steps below to enable the functions:1. Press the Home button to access the Menu.2. Next, select Settings to enter the Settings Menu.3. Select Accessibility Audio Guide to turn the Audio Guide 'On' or 'Off'.When the Audio Guide is turned 'On', then the contents of each menu displayed can bebroadcasted out and you can hear the introduction of relevant v-text-to-speech-functionalities11
Connect your TV to the Internet to access thousands ofstreaming channels.Make any night a movie nightAccess thousands of movies and TV episodes across major streaming services likeNetflix, Hulu, HBO Now, VUDU and more. Choose from free, rental, and subscriptionservices.Stream sports on the big screenChoose from over 140 sports channels like ESPN, Red Bull TV and more.Explore loads of free channels and free trials**Your Hisense Roku TV has hundreds of popular free channels like The Roku Channel,ABC News, The CW and more. The Roku Channel features hundreds of Hollywoodhits, all free and available to watch whenever you want. From comedies, to awardwinners, to cult classics and more, No fees. And no login required.Explore your passionsYour Hisense Roku TV offers hundreds of streaming channels to fuel your passions– including fitness, kids & family, cooking, sports, religion, travel, Internationalprogramming and more.4K SpotlightThe Roku 4K UHD Spotlight channel features many movies and TV shows available in4K UHD resolution from streaming services such as Netflix, Smithsonian, VUDU andmore.*Payment required for some channel content. Channels can change and vary by country.**Cancel before the end of the free trial periods to avoid reoccurring monthly subscriptionfees. Credit card may be required. Free trials may only be available to new subscribersand other eligibility restrictions may apply.12
STEP 4. Complete guided setup and activationTip: Have your wireless network name and password handy.Follow the on-screen instructions on your Roku TV.Activate your Roku TV using your computer, smartphone, ortablet to link to a Roku account. You need a Roku accountto activate your Roku TV and access entertainment acrossthousands of streaming channels.NOTE: Roku doesn’t charge for activation support – beware of scams.Roku accounts are free and while a valid credit card number is not required to createa Roku account, saving your credit card information makes renting, purchasing, andsubscribing to entertainment from the Roku Channel Store fast and convenient.Once connected to your account, your TV will automatically update with the latestsoftware, and you can start streaming immediately.If you aren’t ready to connect your TV to a wireless network, you can still use it as aregular TV.Complete the rest of the on-screen prompts and setup is done. Congratulations!NOTE: Once you’re connected, your TV will automatically update with the latestsoftware—plus you can start streaming the entertainment you know and love. Unlikeother TVs, your new Hisense Roku TV automatically receives regular softwareupdates in the background when it’s connected to the Internet. This allows it to giveyou a better experience. For more information on setting up and using your Roku TVfeatures, go to https://support.roku.com/.All software, applications, services and content accessible through the Televisionbelong to providers who are not controlled by or affiliated with Hisense, are protectedby copyright, patent, trademark and/or other intellectual property laws and arethe sole property of their respective owners. Software, applications, services andcontent accessible through the Television are at the sole discretion and control ofsuch providers and are completely outside Hisense’s control. These services and/orcontent may be unavailable, discontinued or suspended by such providers, temporarilyor permanently, at any time, without liability and without notice to you. HISENSEAND ROKU EXPRESSLY DISCLAIM ANY AND ALL RESPONSIBILITY FOR THEAVAILABILITY, CONTINUITY OF SERVICE, OR THE CONTENT PROVIDED BY ANYOR ALL SUCH PROVIDERS.13
STEP 5. Personalize your Home screenEasily switch between streaming channels and inputs.The home screen menu lets you access a ton of streaming entertainment, search forstreaming movies and TV shows and change your settings.The grid of tiles on the right lets you visually choose among your favorite streamingchannels and the inputs where you have attached devices such as a DVR, gameconsole, antenna, or set top box.You can easily rearrange the order of the tiles on the Home screen to suit your viewingpreferences. Highlight the tile you wish to move and press the * button on your RokuTV remote.STEP 6. OptionalWatching local broadcast TV? How do you scan for channels?If you connected your TV to an antenna or cable wall jack (no box):1) When the setup wizard is complete, select the Live TV iconscreen.from the home2) Follow the on-screen instructions.3) Whenever you want to watch local broadcast TV, select the Live TV icon.4) Connect a USB memory stick to enjoy photos, music and movies or to enable LiveTV Pause. Live TV Pause is only available on the Antenna input of your Hisense RokuTV for up to 90 minutes when connected to a dedicated USB 2.0 compatible flashdrive with at least 16GB of storage.14
Product specificationsMODEL NAME55U6GR565U6GR / 65U6GR5Dimension48.3 28.2 3.5 inches(1227 716 88 mm)57.0 32.9 3.5 inches(1447 835 88 mm)WithStand48.3 30.4 8.9 inches(1227 773 226 mm)57.0 35.3 11.5 inches(1447 896 292 mm)WithoutStand32.4 lbs (14.7 kg)43.0 lbs (19.5 kg)WithStand32.8 lbs (14.9 kg)43.7 lbs (19.8 kg)Active Screen Size(Diagonal)54.6 inches64.5 inchesScreen Resolution3840 2160Without(W x H x D) StandWeightDISPLAYPanel SelectedUltra High Definition backlightPOWERPower SupplyAC 120V, 60HzStandby Consumption Less than 0.5WAudio Power10W 10WCHANNELS & SIGNALINGReceiving ChannelsVHF: 2 - 13, UHF: 14 - 69, CATV: 1 - 125Digital Terrestrial Broadcast (8VSB): 2 - 69Digital cable (64/256 QAM): 1 - 135Tuner TypeFrequency synthesizedReceiving SystemAnalog: NTSCDigital: ATSC/QAM15
Product specifications (continued)OTHER FEATURESHDMI InputRGB/60Hz (640 480, 800 600, 1024 768, 1280 1024,1360 768, 1440 900, 1680 1050, 1920 1080,3840 2160)YUV/60Hz (480i, 480p, 720p, 1080i, 1080p, 2160p)Parental ControlYesHD Supported Definitions480i, 480p, 720p, 1080i,1080p, 2160pSleep TimerYesWireless Built InYesEnvironmental ConditionsTemperature: 41 F - 95 F (5 C - 35 C)Humidity: 20% - 80% RHAtmospheric pressure: 86 kPa - 106 kPaStorage Temperature5 F to 113 F (-15 C to 45 C)Storage Humidity10% to 70%, non-condensing16
Quick problem-solving tipsWhen you experience an issue with your TV, turn it off and on again. If this does notresolve the problem, then refer to the tips below. If the problem is still not resolved,then contact us at one of the phone numbers on Page 2.SOUND OR PICTURE ISSUESPOSSIBLE SOLUTIONSYou do not see a picture whenturning on the TV Check if the LED light is on. If it is, then there ispower to the TV. The TV may be in Standby mode. Press the Powerbutton on the remote control to activate the unitfrom Standby. Check if the power cord is plugged into an activeelectrical outlet.You have connected an externalsource to your TV but can not findit on the Home screen Make sure your external source is turned on. Check to see if the correct input tile is selected onthe Home screen for the external source youwant to view. Check to see if the external source deviceconnection is snug and fully inserted into the TVport.When you turn on your TV, there isa delay for a few seconds beforethe picture appears This is normal. If you have already set up your TV,it is initializing and searching for previous settinginformation.You see a normal picture but donot hear any sound Check that volume is turned up. Check if “Mute” mode is ON. Turn off mute by pressingthe Mute button again, or pressing volume up.You hear sound but picture coloris faded or in black and white Check that the Color value is set to 50 or greater. Check the color on another channel or input tile.Your sound or picture is distortedor appears wavy Turn off and/or remove any electrical appliance thatmay be nearby the TV panel. Insert the power plug of the TV set into anotherpower outlet.Your sound or picture is blurry orcuts out If you are using an external antenna, check theconnections for a snug and tight fit. Adjust or reposition the antenna placement.You see horizontal/vertical stripeson the picture, or it is shaking Turn off and/or remove any electrical appliancethat may be nearby the TV panel. Insert the TV power cord into another electricaloutlet.17
Quick problem-solving tips (continued)CONNECTIVITY ISSUESYou cannot connect to yourwireless networkREMOTE CONTROL ISSUESYour remote control is notresponding to button pressesPOSSIBLE SOLUTIONS From the Roku TV home screen, press theDirectional Keypad down arrow to Settings.Press OK on the Directional Keypad.Press OK to select Network.Press the bottom Directional Keypad arrow toCheck Connection.Press OK to Check connection For additional help, visit www.hisense-usa.com/support.POSSIBLE SOLUTIONS Check that the TV is still on. Check that the batteries are good and are insertedproperly. Check that there are no obstacles between theremote control and the front of the TV. Try moving closer to the TV. If the LED on the TVflashes when you press any of the buttons on theremote control, the issue is not with the remotecontrol.18
Certification and ComplianceFCC NoticeThis device has been tested and found to comply with the limits for a Class B digital devicepursuant to Part 15 of the FCC Rules. These limits are designed to provide reasonable protectionagainst harmful interference in a residential installation. This device generates, uses, and canradiate radio frequency energy and, if not installed and used in accordance with the instructions,may cause harmful interference to radio communications.However, there is no guarantee that interference will not occur in a particular installation. If thisdevice does cause harmful interference to radio or television reception, which can be determinedby turning the device off and on, the user is encouraged to try to correct the interference by oneor more of the following measures:Reorient or relocate the receiving antenna.Increase the separation between the device and receiver.Connect the device into an outlet on a circuit different from that to which the receiver isconnected.Consult the dealer or an experienced radio/TV technician for help.NOTE: The manufacturer is not responsible for any radio or TV interference caused byunauthorized modifications to this equipment. Such modifications could void the user'sauthority to operate the equipment.The WiFi Module complies with FCC radiation exposure limits set forth for an uncontrolledenvironment. This device should be installed and operated with a minimum distance of 20centimeters between the radiator and your body.Declaration of ConformityTrade Name: HisenseModel: 55U6GR5 / 65U6GR / 65U6GR5Responsible Party: Hisense USA CorporationAddress: 7310 McGinnis Ferry Road, Suwanee, GA 30024Telephone Number: 678-318-9060This device complies with Part 15 of the FCC Rules. Operation is subject to thefollowing two conditions: (1) this device may not cause harmful interference, and (2)this device must accept any interference received, including interference that maycause undesired operation.19
Dolby, Dolby Vision, Dolby Atmos, and the double-D symbolare registered trademarks of Dolby Laboratories LicensingCorporation. Manufactured under license from DolbyLaboratories. Confidential unpublished works. Copyright 2012-2020 Dolby Laboratories. All rights reserved.The terms HDMI and HDMI High-Definition Multimedia Interface, and the HDMI Logo aretrademarks or registered trademarks of HDMI Licensing Administrator, Inc. in the United Statesand other countries. 2021. All rights reserved. Hisense and the Hisense logo are registered trademarks of Hisense.Other brand and product names are registered trademarks of their respective owners.20
21
REWIND: Rewind streaming video, jump to the previous audio track or selection, jump up one page in menus. This button is also used to rewind paused live TV using Live TV Pause. 7. PLAY/PAUSE: Pause or resume playback. This button is also used to activate and use the Live TV Pause feature** 8. HOME: Display your TV's Home screen / Stop play-