Transcription
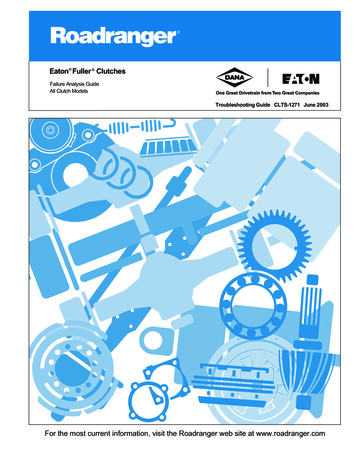
Eaton Fuller ClutchesFailure Analysis GuideAll Clutch ModelsTroubleshooting Guide CLTS-1271 June 2003For the most current information, visit the Roadranger web site at www.roadranger.com
IntroductionClutch DiagramsEasy-Pedal Heavy Duty Clutch
IntroductionSolo Adjustment-Free Heavy Duty ClutchIntroduction
Table of ContentsIntroductionClutch Diagrams. 1Factors that Effect Clutch Performance . 1Clutch Cover/Intermediate PlateClutch Cover/Intermediate Plate Failures. 3Clutch Disc AssemblyClutch Disc Assembly Failures . 15Adjusting Mechanisms andClutch BrakesAdjusting Mechanism and Clutch Brake Failures. 24Solo ClutchSolo Clutch Failures . 25MiscellaneousMiscellaneous Failures . 27Pilot BearingPilot Bearing Recommendations . 30TroubleshootingClutch Troubleshooting . 31GlossaryClutch Glossary . 39
IntroductionFactors that Effect Clutch PerformanceThe major cause of clutch failure can be summarized with two words: “EXCESSIVE HEAT”. Extreme operating temperatures (excessive heat) can cause the clutch to fail because the heat generated between the flywheel, driven discs, intermediate plate, andpressure plate are high enough to cause the metal to flow and the friction material to be destroyed.Heat or wear is practically nonexistent when a clutch is fully engaged. But, during the moment of engagement (when the clutch ispicking up the load), it generates considerable heat. An improperly adjusted or slipping clutch will generate sufficient heat to rapidly self-destruct.Proper training of drivers and mechanics can go a long way toward extending clutch life. Anyone who drives the truck, whetheron or off highway, should learn how to operate the vehicle properly. The most critical points to cover in driver training programsare: learning to start in the right gear, proper clutch engagement, recognizing clutch malfunctions, and recognizing the need forreadjustment.The most important areas to cover in the training programs that can affect clutch performance are:STARTING THE VEHICLE IN THE PROPER GEARAn empty truck can be started satisfactorily in a higher transmission gear ratio than when partially or fully loaded. If auxiliary transmissions or multi-speed axles are used, they must be in the lower ratios for satisfactory starts. Drivers should be shown whatratios can be used for safe starts when the truck is empty or loaded. Do not let the driver find out for himself; he can burn up theclutch by this experimentation. If the truck is diesel powered, a good rule of thumb for the driver to follow is: empty or loaded,select the gear combination that lets you take up the slack and start moving out with an idling engine or, if necessary, just enoughthrottle to prevent stalling the engine. After the clutch is fully engaged, the engine should be accelerated for the upshift into thenext higher gear.GEAR SHIFTING TECHNIQUESMany drivers upshift into the next gear-or even skip-shift into a higher gear-before the vehicle has reached the proper speed. Thistype of shifting is almost as damaging as starting off in a gear that is too high, since the engine speed and vehicle speeds are toofar apart, requiring the clutch to absorb the speed difference as heat (excessive slippage).EXCESSIVE VEHICLE OVERLOAD OR OVERLOADING THE CLUTCHClutches are designed and recommended for specific vehicle applications and loads. These limitations should not be exceeded.Excessive or extreme overloading can not only damage the clutch, but the entire vehicle power train as well. If the total gear reduction in the power train is not sufficient to handle excessive overloads, the clutch will suffer, since it is forced to pick up the loadat a higher speed differential.RIDING THE CLUTCH PEDALThis practice is very destructive to the clutch since a partial clutch engagement permits slippage and excessive heat. Riding theclutch pedal will also put a constant thrust load on the release bearing, which can thin out the lubricant and also cause excessivewear on the pads. Release bearing failures can be attributed to this type of operation.HOLDING THE VEHICLE ON AN INCLINE WITH A SLIPPING CLUTCHThis procedure uses the clutch to do the job normally expected of the wheel brakes. A slipping clutch accumulates heat faster thanit can be dissipated, resulting in early failures.COASTING WITH THE CLUTCH RELEASED AND TRANSMISSION IN GEARThis procedure can cause high driven disc R.P.M. through multiplication of ratios from the final drive and transmission. It canresult in “throwing” the facing off the clutch discs. Driven disc speeds of over 10,000 R.P.M. have been encountered in such simple procedures as coasting tractors down an unloading ramp. While an ample safety factor is provided for normal operation, theburst strength of the facing is limited.1Service ProcedureMaintenance personnel may want to attend driver training programs to see what driver misuse can do to clutch life. This trainingwill place them in a better position to spot and analyze failures during their clutch maintenance programs.
IntroductionENGAGING CLUTCH WHILE COASTINGThis procedure can result in tremendous shock loads and possible damage to the clutch, as well as the entire drivetrain.REPORTING ERRATIC CLUTCH OPERATION PROMPTLYDrivers should report erratic clutch operation as soon as possible, to give the maintenance personnel a chance to make the necessary inspection, internal clutch adjustment, linkage adjustments, lubrication, etc., thereby avoiding possible clutch failures andbreakdowns while on the road. The importance of free-pedal travel (sometimes referred to as pedal lash) should be brought to thedriver’s attention as well as the mechanic. This item should be included and commented on daily in the driver’s report, since clutchfree-pedal is the maintenance personnel’s guide to the condition of the clutch and the release mechanism.CLUTCH ADJUSTMENTSDrivers and mechanics should be made aware of the fact that Eaton Fuller Angle-Spring and Easy-Pedal Clutches have provisionsfor an internal clutch adjustment. This permits the clutch “itself” to be readjusted while it is in the vehicle. Details of the clutchadjustment are covered in the Eaton Fuller Installation Instructions packaged with each clutch assembly.When drivers and mechanics are properly trained, there are still certain problems that may occur. The following failure analysisand troubleshooting guide lists some common problems, their causes, and suggested corrective action. Note that some of theseproblems relate back to the previous discussion on poor driving and maintenance techniques.2
Clutch Cover/Intermediate PlateClutch Cover/Intermediate Plate FailuresFailure - Yoke Bridge Rubbing into CoverPossible CausesThe arrows in Figures 1 and 2 show the areas of contact betweenthe release yoke bridge and the clutch cover. Overstroking of theyoke, in an attempt to obtain the required 1/2’’ - 1’’ clutch brakesqueeze, is a typical cause of this failure.The reason that normal clutch brake squeeze cannot be obtainedmay be due to one or more of the following situations:Worn clutch brake Broken or missing clutch brake Worn or incorrect transmission bearing retainer cap(refer to Figure 3) Excessive wear on release bearing wearing pads and/orthe fingers of the yoke (refer to Figure 1) lmproper set up of the linkage system. Consult yourOEM service manual Incorrect yoke installedClutch Cover/Intermediate Plate Note: The clutch cover can be reused if the above items are corrected, a new yoke is installed, and there are no broken orcracked parts on the cover. The above failure is typicallypreceded by a noise complaint and/or vibrating clutch pedalat the point where the clutch pedal is fully depressed. Depending upon the amount of wear (at the bearing cap and/or yoke fingers/wear pads), it may be possible to adjust thelinkage to eliminate the noise complaint.TRANSMISSION BEARING RETAINER CAPDimension A, based on SAE standards, is 8.657” (219.9 mm)nominal, and should not be greater than 8.71” (221.5 mm) Ref.1990 S.A.E. handbook 4:36.1063
Clutch Cover/Intermediate PlateFig 4Failure - Yoke Fingers Rubbing into ClutchCoverPossible CausesFigures 4 - 5 show the damage that results when the release yokecontacts the clutch cover. More specifically, the fingers have become pinched between the clutch cover and release bearing, resulting in one or more of the following: A broken /cracked release bearing housing (not shown) Damage to the clutch cover (see arrows, Figure 4) Wear to the backside of the yoke fingers (see arrows inFigure 5, top yoke) Broken yoke finger(s) (see arrow in Figure 5 bottomyoke)Some causes of the above failure are:Fig 6 Linkage system broke, allowing the loose yoke to contact cover Linkage system was improperly reinstalled (example:forgetting to reinstall the cotter key, allowing the clevispin to come out) Adjusting the clutch with the linkage instead of internally using the adjusting ring Rotating the ring the wrong direction (counterclockwiseinstead of clockwise) when adjusting for clutch wearNote: The above conditions may be preceded by a noise complaint.Failure - Cracked/Broken Clutch CoverPossible CausesReferring to the arrow in Figure 6, this brand new clutch (EasyPedal 1402 S.D.) was damaged during transmission installation.More specifically, the release yoke “fingers” were elevated to the“straight out position” and were allowed to jam into the clutchcover. Subsequent damage might be a broken finger(s)(Figure 5)or bent release yoke / cross shafts. As a result, it is important thatthese parts be inspected for damage (and replaced if damaged)before installing a new clutch.Failure - Broken Retainer AssemblyPossible CausesFigure 7 shows what can happen when the levers break throughthe retainer’s nose. The primary cause of this failure is allowingthe transmission to hang unsupported in the driven disc duringtransmission installation.4
Clutch Cover/Intermediate PlateFailure - Clutch Cover Detached fromFlywheelFig 8Possible CausesThe broken mounting bolts, show in Figure 8, are the direct resultof insufficient torquing of these (8) bolts to the flywheel. Morespecifically, these bolts were loose enough to allow the clutchcover to hammer back and forth against each bolt until theybroke. Also, the (8) mounting bolt holes in the clutch cover were“egg-shaped” as a result of the constant hammering.Clutch Cover/Intermediate PlateAdditional damage occurred to both the clutch cover and the release yoke as a result of their interference with each other (referto the arrows in Figures 9 and 10). It is worth noting that this service clutch had accumulated 50,000 miles before it failed.Fig 9Another potential cause of the above failure would be the overtorquing of the mounting bolts. Doing so can cause the bolts tofracture and eventually separate from the flywheel. Combiningthis scenario with low grade mounting bolts will increase thechances of failure.Note: Refer to the Eaton Installation Instructions (packaged witheach clutch) to determine the proper mounting bolt torque,minimum grade of bolt, etc., for the specific Eaton FullerClutch model you are installing.Fig 105
Clutch Cover/Intermediate PlateFig 11Failure - Damaged Sleeve BushingPossible CausesFailure to center the input shaft with the sleeve of the releasebearing assembly, when installing the transmission, can causethis failure. If the transmission hangs up during installation, investigate the cause before preceding as excessive force can damage the bushing (see arrow in Figure 12). Allowing thetransmission to hang unsupported in the sleeve bushing candamage the bushing. The arrow in Figure 11 shows another example of sleeve bushing damage on a heavy duty clutch.Fig 12Failure - Damaged Intermediate or PressurePlatePossible CausesFigures 13 - 16 depict damaged clutch plates which resulted froman abnormal amount of clutch slippage/heat. Some causes of thisabnormal slippage/excess heat can be one or more of the following:1.Incorrect clutch applications. In otherwords, the engine’s torque rating exceeds the clutch’s torque rating. Driver abuse. (refer to Factors that Effect Clutch Performance Sections concerning the specific driver practicesthat can lead to excessive heat). Improper/ inadequate clutch adjustments. More specifically, operating the truck without free-play for extendedperiods of time; adjusting the clutch via the linkage instead of the required internal adjustment. Overloading of the vehicle.Figure 13 is an example of a cracked pressure plate. The heat flowwas so great that the metal could not dissipate it quickly enough.6
Clutch Cover/Intermediate PlateFailure - Damaged Intermediate of PressurePlate (Continued)Possible Causes (Continued)Figure 14 shows a broken intermediate plate. As in the previousexample, the heat flow was so intense that the metal could notdisperse the heat quickly enough.Clutch Cover/Intermediate PlateIn Figure 15, an area of the intermediate plate has been circled toreveal the damage of heat checks. These heat checks are actuallysmall cracks with raised ridges that are capable of shaving off thefacings of the driven disc.Finally, Figure 16 reveals an example of a burned or scorched intermediate plate in which the metal became so hot that it beganto flow. The typical evidence of such a failure will be one or moreof the following: High and low spots on the plate Partial transfer of the facing material (ceramic or organic) from the driven disc onto the plate A blue discoloration throughout the failed partTo view the resulting damage that can occur to the facing material of the driven discs, please refer to Figures 53-56 and 58.Failure - Grooved Pressure PlatePossible CausesThe groove (see arrow in Figure 17) worn into the face of thispressure plate was caused by the rivets of the driven disc facing.(For the related disc failure, see the description under Figure 70).The same damage can occur on both the intermediate plate andflywheel. A surface that is grooved can damage the new drivendiscs that are installed. As a result, a new clutch assembly shouldbe installed. Refer to the OEM service manual concerning flywheel resurfacing.7
Clutch Cover/Intermediate PlateFailure - Cocked Drive Pins (14" Pot-StyleClutches Only)Possible CausesThe groove worn in the face of the drive pin slots are on the uppersection of the face on one side of the slot (see arrow in Figure 18)and on the lower section on the opposite side of the slot. This indicates that the drive pins were cocked and causing the intermediate plate to hang-up. This will cause release problems andtherefore hard shifting. Do not file the slots of the intermediateplate to correct the problem. Instead, you must reset the drivepin(s) until they are square to the flywheel.Note: Always install new Eaton drive pins when installing a newEaton Fuller 14” Heavy Duty Clutch. This is important because worn drive pins (against the new intermediate plateslots) can prevent the clutch from releasing cleanly. Also,ensure that the drive pins are set squarely to the flywheel’sfriction surface (refer to the Eaton Installation Instrutionspackaged with each Eaton Fuller Clutch). Failure to set eachdrive pin squarely is the most prevalent reason for a “poorrelease complaint” on a recently installed clutch (AngleSpring and Easy-Pedal Plus 1402).Failure - Filed Drive SlotsPossible CausesAs indicated by the shiny areas on the drive slots, (see arrow Figure 19) the slots of this intermediate plate were hand filed. Eatondoes not recommend this practice since it can cause unequalloading on the drive pins in the flywheel. Instead, Eaton recommends that the drive pins be checked for squareness to the flywheel friction surface and reset if necessary (see EatonInstallation Instructions).8
Clutch Cover/Intermediate PlateFailure - Broken Drive Pins and Worn/BrokenDrive Slots (14" Pot-Style Clutches Only)Fig 20Possible CausesFigure 20 shows a broken drive pin head that has becomewedged into the intermediate plate’s drive slot. Figure 21 is thesame intermediate plate but with excessively worn and brokendrive slots. Figure 22 shows a broken drive pin. The above failures can be caused by one or more of the following:Failure to use the anti-rattle springs packaged with eachsuper-duty clutch Misapplication of the clutch Unequal loading on the drive pins as a result of filing thedrive slots.Clutch Cover/Intermediate Plate Fig 21Note: Failure to use the anti-rattle springs can cause other problems such as a noisy or poor releasing clutch.Fig 229
Clutch Cover/Intermediate PlateFig 23Failure - Anti-Rattle Springs Installed BackwardsPossible CausesAs shown in Figures 23 and 24, the intermediate plate was “hanging up” at the corners of the open sections of the anti-rattlesprings. The driver’s complaint was a clutch that would not release. It is important that the rounded sections of the anti-rattlesprings be installed TOWARDS the flywheel/ engine.Fig 24Failure - Interference Between Retainer Assembly and Rear Disc RivetsPossible CausesFigure 25 shows the damage done to the nose of the retainer assembly (see arrow) due to contact with the disc rivets. Figure 57shows the resulting damage done to the rear disc. Adjusting theclutch externally (with the linkage) instead of internally (rotationof adjusting ring) will cause the retainersleeve/release bearing assembly to move too far forward as theclutch wears, leading to this failure.An additional result from the above failure is that while the clutchis engaged, it can begin to slip due to the unloading conditioncreated by the disc and retainer interference. This, in turn, willcreate excessive heat and can cause the pressure plate to break(see Figure 25, black arrow on pressure plate) and /or the ceramic buttons to separate from the disc (see Figure 58). The abovefailure may also be preceded by a noise complaint.10
Clutch Cover/Intermediate PlateFailure - Broken LegPossible Causes Abusing the clutch during shipping and handling. Dropping the clutch during installation or removal.The photo in Figure 27 is a close-up of the broken leg shown inFigure 26. The arrow in this close-up shows where the leg contacted the concrete floor after the clutch was dropped.Clutch Cover/Intermediate PlateThe use of “guide studs” plus a “hydraulic clutch stand” will helpprevent this 150 lb. clutch from being dropped during installationand removal.Note: Eaton Clutch does not provide warranty coverage for thistype of failure.Failure - Release BearingPossible CausesA failed release bearing (see Figure 28) can usually be attributedto one or more of the following situations: A dry release bearing due to lack of periodic lubrication(does not apply to sealed bearings). Failure to fully release or riding the clutch pedal willplace a constant thrust load on the bearing, (see arrowsin Figure 29) leading to higher temperatures and consequential loss of lubricant. Failure to maintain free playup in the cab can also cause this condition. Not only willthe bearing begin to fail, constant contact in this areawill cause both the release yoke fingers (Figure 79), andthe wear pads (Figure 29), to wear excessively. A potential result of this wear is that the release yokewill force the bearing and sleeve assembly against theinput shaft. Consequently, this “side loading” conditioncan damage the bushing, sleeve, and input shaft (seeFigure 78). Failure to use the recommended high temperature lubricant can also cause a loss of lubricant, even under normal operating conditions. An impending release bearingfailure may be accompanied by noise.Note: In order to determine the proper greasing techniques, besure to consult the Eaton Installation Instructions packagedwith each Eaton Fuller Clutch.11
Clutch Cover/Intermediate PlateFailure - Oil Soaked CoverPossible CausesA leaking transmission or a leaky rear main engine seal can coatthe clutch cover with oil, as indicated in Figure 30. Figure 41shows the disc which was run with this cover.Failure - Bent/Damaged Positive SeparatorPinPossible CausesThe separator pin shown in Figure 31 became damaged (bent)when it was dropped during clutch installation. To prevent thisfrom occurring, Eaton recommends the use of two (2) guidestuds when mounting the intermediate plate and clutch cover tothe flywheel (refer to the Eaton Installation Instructions).The damage done to the separator pins in Figures 32 and 33 (seearrows) is the result of using the wrong tool combined with excessive force. All four pins (on each intermediate plate) weredamaged. When “setting” the four (4) roll pins, the proper toolwould be a 1/4” flat nose punch used in conjunction with a smallhammer (to help ensure light taps).A damaged pin(s) can prevent the intermediate plate from retracting evenly when the clutch is disengaged, leading to a “poorrelease” complaint from the driver. The same complaint can alsooccur if the mechanic forgets to “set” the four (4) positive separator pins upon installation of the clutch. In you forgot to set theseparator pins before installing the transmission, you can still setthem through the inspection opening of the transmission.12
Clutch Cover/Intermediate PlateFailure - Aluminum Spacer Ring on the Intermediate Plate is Broken (Eaton Fuller Solo and Stamped Angle Spring 1402 only)Possible CausesAs shown in Figure 34 (see arrow), the aluminum spacer ringbroke when it was bolted up backwards onto the flywheel. A clutch that will not release properly. The release bearing position may be closer than normalto the transmission bearing retainer cap immediatelyupon clutch installation. A “cracking” noise as you tighten the (8) mountingbolts that secure the cover to the flywheel.Clutch Cover/Intermediate PlateNote: The cover assembly mounting hole pads (see arrow in Figure 35) have made an indentation (see arrow in Figure 36)onto the spacer ring mounting hole pads (flywheel side).This evidence will confirm that the spacer ring/intermediateplate assembly was indeed installed backwards. The words“Flywheel side" (refer to Figure 37) will face the flywheelwhen properly installed. Mishandling of this assembly during installation and/or removal can also cause the spacerring to break. Some results of installing the intermediateplate backwards are as follows:13
Clutch Cover/Intermediate PlateFailure - Lever WearPossible CausesAs indicated by arrows in Figure 38, excessively worn levers aremost likely the result of lack of maintenance. More specifically,lever wear can be the result of one or more of the following conditions: A dry, seized, or broken throw out bearing. Typicalcauses of a damaged bearing are:a.Operating the truck without free-playb.Constant riding of the clutch pedalBoth items 1 and 2 can cause the thinning and loss of bearing lubricant. They can also cause rapid lever wear due to constantcontact with the bearing. A throw out bearing which fits too tightly on the frontbearing cap stem. As a result, the return spring(s) (attached to the linkage or throw-out bearing) may not becapable of retracting the throw-out bearing away fromthe clutch levers. This will cause contact between theseparts. Worn and/or binding linkages are causing the throw-outbearing to make “constant contact” with the clutch’sthree (3) release levers (Figure 38). Using a throw out bearing of inferior quality.Failure - Adjusting Linkage to Compensatefor Clutch WearPossible CausesFigure 39 shows the back of the pressure plate. This clutch hasbeen properly adjusted (internally, using the adjusting ring) because each of the 6 levers has more than one witness mark (orlever fulcrum point).Figure 40 depicts a clutch that has not been adjusted properly. Asshown, there is only one witness mark per lever indicating thatthe clutch was improperly adjusted using the linkage.WARNING: Continually adjusting for clutch wear via thelinkage can lead to the failures shown in Figures 4, 5,25, and 57-58.14
Clutch Disc AssemblyClutch Disc Assembly FailuresFailure - Oil Soaked Ceramic DiscPossible CausesAfter removal from the truck, the top half of this ceramic disc(Figure 41) was cleaned in order to reveal the contrast with thebottom half which is still oil soaked (Figure 30 shows the clutchcover that was run with this disc). Possible contributors to thiscondition are a leaking transmission and/or a leaking rear mainengine seal.Clutch Disc AssemblyFurthermore, oil on the disc buttons can cause the clutch to release poorly due to increased drag, and/or chatter/slip during engagement.Note: Eaton does not recommend the reinstallation of any discsthat are oil soaked because the button facings cannot besatisfactorily cleaned.Failure - NoneNormal Wear PatternsWhen troubleshooting Eaton Fuller Clutches, do not be concerned with the wear pattern (darkened areas) of the disc buttons(see Figure 42). More specifically, it is normal for the darkenedareas to vary in color, size, and their relative position upon eachbutton.The exception to the above wear pattern is described in detail inFigure 46. The title of this description is: “Failure - Abnormalwear pattern at middle of disc button”.15
Clutch Disc AssemblyFailure - Grease on Buttons of Ceramic DiscPossible CausesFigure 43 shows a disc with grease on its buttons, flywheel side.When this disc was removed from the truck, all four buttons hada heavy layer of grease on them. The left button has been cleanedto show the contrast with the grease-covered button on the right.Failing to remove the grease (rust preventative) from the flywheel(new or resurfaced) can cause this problem.Greasing the splined areas of either the input shaft or disc hub(s)is not recommended because the grease can be spun onto thefacing material of the driven disc(s) (refer to both arrows in Figure 44) . The circled area in Figure 45 reveals the numerous pathswhich the grease took as it moved toward the buttons (facingmaterial) of this ceramic driven disc. The photographs in Figures44-45 are of the same driven disc.Note: Eaton does not recommend the reinstallation of drivendiscs which have become contaminated with grease or oil.A contaminated driven disc can cause one or more of the following problems: Poor release Clutch chatters during engagement Slipping clutchAlso, grease on the splined areas of the input shaft/disc hub(s)will attract dirt, worn facing material, etc. which can impede thefree movement of the disc hub on the input shaft, potentiallycausing a “poor release” complaint.Failure - Abnormal Wear Pattern at Middle ofDisc ButtonPossible CausesAs shown by the dark areas of the three buttons in Figure 46, thisdisc was making major contact at the middle of each button onthe flywheel side. The buttons on the opposite side had normalwear patterns. This abnormal wear pattern is found on serviceclutches (not original equipment), and is usually caused by a flywheel that is worn unevenly. This condition may result from improper resurfacing of the flywheel.Before resurfacing any flywheel, consult your OEM service manual for proper procedures.16
Clutch Disc AssemblyFailure - Warped Driven DiscPossible CausesShown in Figure 47 is a brand new driven disc which was warpedduring transmission installation (as indicated by the dummy input shaft which is not perpendicular to the disc’s hub). More specifically, the transmission was allowed to hang unsupported inthe driven disc hub. A driven disc which has become bent due toimproper installation techniques should not be reused because ofthe potential for a “poor release” complaint.DiscandClutch Disc AssemblyFailure - FrontInterferenceFlywheelPossible CausesThis failure can be attributed to one or more of the following specific conditions: The rivets of the disc (Figure 48) have been contactingthe flywheel’s mounting bolts. Some potential causes ofthis particular interference are as follows:a.Loose flywheel mounting bolt(s) due to inadequatetorquing.b.Forgetting to tighten one or more or the mountingbolts when reinstalling the flywheel.c.Installing an extra washer under the flywheelmounting bolt.d.A flywheel which has been resurfaced too manytimes.The damper springs (see arrows, Figure 49 and 50)have been contacting the flywheel mounting bolts because the front driven disc was installed backwards.The driven disc (in Figure 49) had been wearing for aperiod of time before the interference occurred (as indicated by the full wear pattern on the ceramic buttons)while the one in Figure 50 was run for a very short period.17
Clutch Disc Assembly18 A disintegrating pilot bearing which is interfering withboth the hub and rivets of the driven disc (Figure 51). Installation of the wrong clutch. Figure 52 (see arrows)shows the points of interference that resulted when a10-spring driven disc was installed where an 8-springwas previously being run. In other words, the recessedarea of the flywheel (mounting bolt cavity) was toosmall for the 10-spring driven disc. Before you mountthe new clutch, consult the Eaton Installation Instructions (packaged with each Eaton Fuller Clutch) concerning “potential damper interference”. A driver complaint,resulting from the above failure, can be:a.The clutch does not releaseb.The clutch is noisy during operation
Clutch Disc AssemblyFailure - Burnt DiscsPossible CausesThe failures shown in Figures 53-56 and 58 are the result of excessive heat due to prolonged slippage. Figures 53, 54, and 58show discs that became so hot (due to slippage) that the ceramicmaterial began to flow and eventually separate from the disc. Figures 55 and 56 show how the organic material separates fromthe disc due
This permits the clutch "itself" to be readjusted while it is in the vehicle. Details of the clutch adjustment are covered in the Eaton Fuller Installation Instructions packaged with each clutch assembly. When drivers and mechanics are properly trained, there are still certain problems that may occur. The following failure analysis