Transcription
NetVanta 2000 Series Technical NoteHow to Open SMTP, IMAP or POP3 traffic toan Email Server behind the NetVanta 2000Series (Enhanced OS)This document is applicable to NetVanta 2600 series, 2700 series, and 2800 series units.Feature/Application:Manually opening Ports to allow Email traffic (SMTP, IMAP or POP3) from Internet to a server behind theNetVanta 2000 Series unit in the Enhanced OS involves the following steps:Step 1: Creating the necessary Address ObjectsStep 2: Create a Service GroupStep 2: Defining the appropriate NAT Policies (Inbound, Outbound and Loopback)Step 3: Creating the necessary WAN Zone Access Rules for public accessRecommendation: The Public Server Wizard quickly configure your NetVanta 2000 Series unit toprovide public access to an internal server. The Public Server Wizard is the most ambitious and functionalwizard developed to date. It simplifies the complex process of creating a publicly and internally accessibleserver resource by automating above mentioned steps.Scenario:The following example covers allowing Email traffic (SMTP, IMAP or POP3) service from the Internet toa server on the LAN with private IP address as 192.168.1.100. Once the configuration is complete,Internet users can Send emails to the Email Server behind the NetVanta 2000 Series UTM appliancethrough the WAN (Public) IP address 1.1.1.1.If you want to Open ports for OWA (Outlook Web Access), which is accessible on HTTP orHTTPS port then refer to ADTRAN Knowledge Base Article 3478.Copyright 2011 ADTRAN, Inc.1
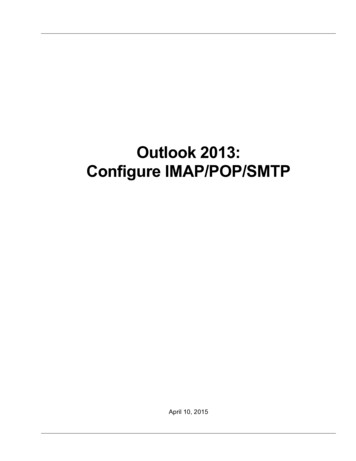
Procedure:Procedure:In this example we have chosen to demonstrate using SMTP service, however the following steps apply toany service you wish to use (like HTTPS, SMTP, FTP, Terminal Services, SSH, etc).Step 1: Creating the necessary Address Objects1. Select Network Address Objects.2. Click the Add a new address object button and create two address objects one for Server IP on LANand another for Public IP of the server:2Copyright 2011 ADTRAN, Inc.
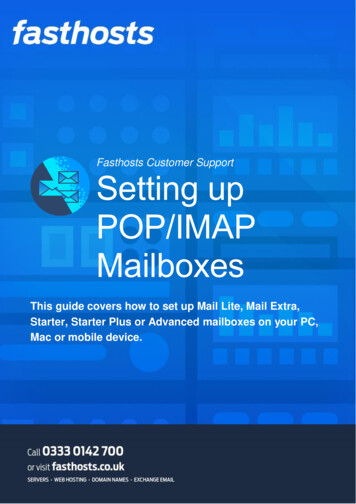
Procedure:Address Object for Serveron LANName: MailServer PrivateZone Assignment: LANType: HostIP Address: 192.168.1.100Address Object for Server'sPublic IPName: MailServer PublicZone Assignment: WANType: HostIP Address: 1.1.1.13. Click the OK button to complete creation of the new address objects.Step 2: Create a Service Group1. The Services page can be accessed either from Firewall Services or Network Services.2. Click Add Group.3. Select individual services from the list in the left column. Click - to add the services to the group.Copyright 2011 ADTRAN, Inc.3
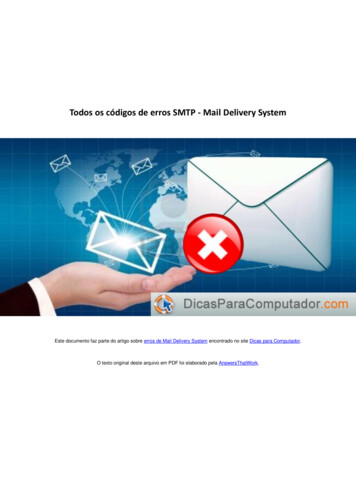
Procedure:4. To remove services from the group, select individual services from the list in right column. Click - toremove the services.5. When you are finished, click OK to add the group to Custom Services Groups.Step 3: Defining the appropriate NAT Policies1. Select Network NAT Policies.2. Click the Add a new NAT Policy button and choose the following settings from the drop-down menu:4Copyright 2011 ADTRAN, Inc.
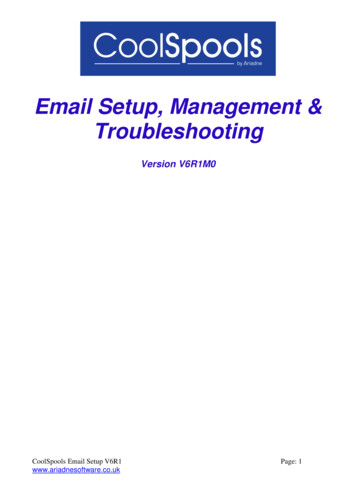
Procedure:Understanding how to use NAT policies starts with the construction of an IP packet. Every packet containsaddressing information that allows the packet to get to its destination, and for the destination to respond tothe original requester. The packet contains (among other things) the requester’s IP address, the protocolinformation of the requestor, and the destination’s IP address. The NAT Policies engine in SonicOSEnhanced can inspect the relevant portions of the packet and can dynamically rewrite the information inspecified fields for incoming, as well as outgoing traffic.Adding appropriate NATPoliciesOriginal Source: AnyTranslated Source: OriginalOriginal Destination:MailServer PublicTranslated Destination:MailServer PrivateOriginal Service: MailServerServicesTranslated Service: OriginalInbound Interface: AnyOutbound Interface: AnyComment: Webserver behindNetVanta 2000 Series.Enable NAT Policy: CheckedCreate a reflexive policy:CheckedCreate a reflective policy: When you check this box, a mirror outbound or inbound NATpolicy for the NAT policy you defined in the Add NAT Policy window is automaticallycreated.Copyright 2011 ADTRAN, Inc.5
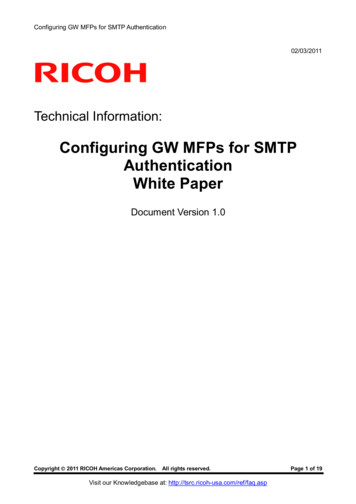
Procedure:3. Click the Add button.Loopback Policy:If you wish to access this server from other internal zones using the Public IP address 1.1.1.1 considercreating a Loopback NAT Policy else go to next step: Original Source: Firewalled SubnetsTranslated Source: MailServer PublicOriginal Destination: MailServer PublicTranslated Destination: MailServer PrivateOriginal Service: MailServer ServicesTranslated Service: OriginalInbound Interface: AnyOutbound Interface: AnyComment: Loopback policyEnable NAT Policy: CheckedCreate a reflexive policy: unchecked4. Upon completion under Network Nat Policies tab the above Inbound and Outbound NAT policieswill be created.Step 3: Creating Firewall Access Rules1. Click Firewall Access Rules tab.2. Select the type of view in the View Style section and go to WAN to LAN access rules.3. Click Add a new entry and create the rule by entering the following into the fields:The ability to define network access rules is a very powerful tool. Using custom accessrules can disable firewall protection or block all access to the Internet. Use caution whencreating or deleting network access rules.6Copyright 2011 ADTRAN, Inc.
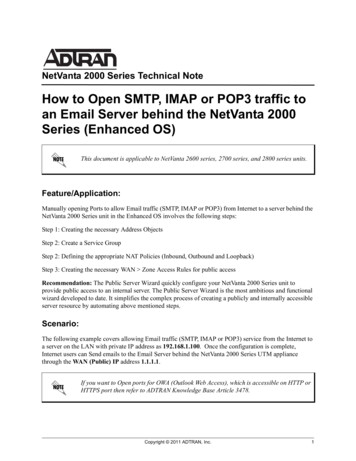
How to Test:Action: AllowFrom Zone: WANTo Zone: LANService: MailServer ServicesSource: AnyDestination: MailServerPublicUsers Allowed: AllSchedule: Always onEnable Logging: checkedAllow Fragmented Packets:checked5. Click OK.How to Test: Testing from within the private network: Ensure that the Email Server is working fromwithin the private network itself.Testing from the Internet: Go to www.mxtoolbox.com and enter your Email Server's PublicIP address in the Domain Name field i.e 1.1.1.1Copyright 2011 ADTRAN, Inc.7
Troubleshooting:Troubleshooting: Ensure that the EmailServer's Default Gateway IP address is the NetVanta 2000 Series LANIP address.Ensure that the Email Server is able to access the Internet.Try to reduce the MTU value on your the NetVanta 2000 Series appliance.Displaying Access Rule Traffic Statistics:1. Click Firewall Access Rules tab.2. Select the type of view in the View Style section and go to WAN to LAN access rules.3. Move your mouse pointer over the Graph icon to display the following access rule receive (Rx)and transmit (Tx) traffic statistics: Rx Bytes Rx Packets Tx Bytes Tx Packets 8Ensure you do not have duplicate NAT Policies and Firewall Access Rules for your EmailServer.For further troubleshooting go to the NetVanta 2000 Series Logs under Log View page andcheck for Alerts, Denied IP's, Dropped messages, etc.Copyright 2011 ADTRAN, Inc.
The following example covers allowing Email traffic (SMTP, IMAP or POP3) service from the Internet to a server on the LAN with private IP address as . 192.168.1.100. Once the configuration is complete, Internet users can Send emails to the Email Server behind the NetVanta 2000 Series UTM appliance through the . WAN (Public) IP. address . 1.1.1.1.