Transcription
USER MANUALEnglishFrançaisEspañol
English.68 Caliber Electronic Paintball MarkerTABLE OF CONTENTSIMPORTANT SAFETY GUIDELINES1OPERATION GUIDE / START UP2CO2 / COMPRESSED AIR TANK WARNINGS3INSTALLING A CO2 / COMPRESSED AIR TANK4PROPER USE OF BARREL BLOCKING DEVICE4BATTERY INSTALLATION / OPTIONAL ACCESSORY CHARGING INSTRUCTIONS5-6LEAP CIRCUIT BOARD w/CAMD SETTINGS7VELOCITY ADJUSTMENT8TRIGGER ADJUSTMENT8DISASSEMBLE / REASSEMBLE AND CLEANING OF REAR INTERNALS9-10A JAMMED PAINTBALL10ANTI CHOP EYES / CHANGING BALL STOPPERS11CUP SEAL REMOVAL12TROUBLESHOOTING13AIR LEAKS14PILOT w/Eye PARTS LIST15PILOT w/Eye SCHEMATIC16WARRANTY STATEMENT17
EnglishIMPORTANT SAFETY GUIDELINESOPERATION GUIDE / START UPWARNING: Always keep the marker powered OFF or on SAFE until you are ready to fire.WARNING This paintball marker is NOT a toy. It can cause serious injury or death. Kingman recommends that the customer be at least 18 years of age to purchase this product. Read this manual and air tank warnings before using this product. Any modifications or tampering of original factory parts will void all warranties and liabilities1.2.3.from Kingman. Kingman recommends using a barrel blocking device when the marker is not in operation. To ensure proper adjustment of velocity Feet Per Second (fps), Kingman strongly recommendsusing a chronograph for paintball use located at most paintball stores and paintball fields. Before / after use of the marker, make sure to fasten all screws. Screws may become loose due tovibration. Loose screws can be dangerous and cause injury. Kingman STRONGLY recommends that any person using this product or within range of thisproduct while it is in use MUST wear EYE/FACE PROTECTION designed specifically for the sport4.5.6.7.8.of paintball. This includes, but is not limited to, performing a maintenance check and during targetpractice. Kingman reminds the user that it is YOUR RESPONSIBILITY to protect your eyes/face at9.all times, and will not be held liable for injuries sustained when failing to wear the appropriateprotection. Never shoot or point your marker at a person that is not in a designated paintball facility and10.11.12.without proper paintball EYE/FACE PROTECTION. Treat every paintball marker as if it were loaded. Never look down the barrel of a loaded or unloaded marker. Always keep the paintball marker in SAFE or OFF mode until ready to operate. Always remove the gas and all paintballs before disassembly. Fire only 0.68 caliber paintballs with this product. Always make certain the bolt is in the un-cocked position when marker is not in use. Using a paintball marker outside of a non designated paintball field can be illegal, and issubject to law enforcement penalties if property damage is caused by the user. Never point or shoot your marker at an animal. Transfer this instruction manual upon change of marker ownership.13.Always attach a barrel blocking device over the tip of the barrel for safety precautions when the marker is not in use.Install and charge the battery see pages (See Battery Installation / Charging).Attach a CO2 / Compressed Air Tank to the C/A Adapter. HELPFUL TIP: Make sure to have the CO2 /Compressed Air Tank filled before attaching to the marker. Hand tighten the tank clockwise in the markersC/A adapter until it is snug. If an air leak occurs between the tank and the C/A adapter, replace the urethaneO-ring. NOTE: O-rings in the markers parts kit are not supplied to attach with a CO2 / Compressed Air Tank.IMPORTANT: You should never need to use any hand tool to attach a CO2 / Compressed Air Tank to the C/Aadapter.Attach an electronic paintball loader and elbow to the markers Feed Neck. Only use .68 caliber paintballsthrough the electronic loader. NOTE: Kingman recommends that you use a force feed / high speed electronicloader to reach optimum performance.Turn Power On for the electronic trigger frame (See LEAP Circuit Board w/CAMD Settings).Cocking the marker. Pull the Top Cocking Knob rearward until the Delrin Bolt latches. CAUTION: Should youlet go of the Top Cocking Knob before it latches, your marker may fire.Remove the barrel blocking device. CAUTION: With the power switch turned ON the marker is LIVE. Pulling thetrigger will fire a paintball. IMPORTANT: Only test your marker in a safe direction or in a designated playing field.Performing a velocity (fps) check. Turning the velocity adjuster & spring guide clockwise will increase thevelocity (fps) while turning counter-clockwise will decrease the velocity (fps). NOTE: Your marker is intendedto be used in a paintball facility with the proper paintball protection. IMPORTANT: Kingman recommends usinga chronograph to ensure that the maker’s velocity is under 300 (fps).When finished playing, remove all paintballs from the paintball loader before detaching from the markers feedneck. CAUTION: There may be paintballs in the marker’s breach; take a couple of shots in a safe direction tomake sure the barrel and receiver are empty.Place the barrel blocking device over the barrel tip. This will help avoid any accidental discharge.Kingman recommends having the marker in the “SAFE or OFF” position after use.Unscrew the CO2 / Compressed Air Tank from the marker’s C/A adapter. Firmly hand loosen the tank counterclockwise to detach it from the marker’s C/A adapter. CAUTION: Never expose any skin underneath the C/Aadapters bleed hole when removing the tank. This can run the risk of getting skin burn from the releasing ofthe GAS. IMPORTANT: You should never need to use any hand tool to detach a CO2 / Compressed Air Tank.Store the marker in a paintball bag or in a safe place. WARNING: Before / after use of the marker, make sureto fasten all screws. Screws can become loose due to vibration. Loose screws can be dangerous and causeinjury. HELPFUL TIP: It’s a good practice to lubricate your marker before and after each use, especially whenstoring the marker for an extended period of time. Add a few drops of paintball gun oil on the Striker O-ring(see Disassemble / Reassemble). Before storing the marker, make sure the marker is in the un-cocked position.This will help the main spring maintain its tension.IMPORTANT Firing velocity may vary according to altitude and climate conditions. Before using your marker in play, you must always first perform a “SAFE VELOCITY TEST”. This can only beaccomplished by using a testing device called a “Velocity Chronograph“ and can be performed at a paintballdealership or local playing field. NOTE: This product is intended to be used at a velocity no greater than 300feet per second (fps). Paintball markers are not intended to shoot any person less then 25 feet away withoutEYE/FACE PROTECTION. This paintball marker may have excess gas after the removal of the CO2 / Compressed Air Tank. Pleaseremove all paintballs and discharge the remaining gas safely.Never store a CO2 / Compressed Air Tank attached on the marker while not supervised.
EnglishCO2 / COMPRESSED AIR TANK WARNINGSINSTALLING A CO2 / COMPRESSED AIR TANKFirmly hand tighten the CO2 / Compressed Air Tank clockwise into the markers C/A adapter. HELPFUL TIP: Beforeinstalling a CO2 / Compressed Air Tank, make sure that the tank is full and that it has a urethane bottle o-ring on thetop of the valve to prevent air leaks.IMPORTANT: You should never need to use any hand tool to attach a CO2 / Compressed Air Tank to the C/A adapter.REMOVING A CO2 / COMPRESSED AIR TANKSAFEWARNING:UNSAFEDA N G E RThe CO2 or Compressed Air Tank can fly off with enough force to cause seriousinjury or death if the Valve unscrews from the cylinder head. LOOK at the Valvewhen removing the cylinder from the marker. Be sure that the valve is turningwith the cylinder rather than remaining stationary with the marker. STOP if theValve starts to unscrew from the cylinder. If in doubt, screw the cylinder backonto the marker and contact a trained person for repair.CO2 / COMPRESSED AIR TANK WARNINGS All valves must only be installed or removed by a qualified airsmith.See CO2 / Compressed Air tank labels for retest dates. Cylinder tanks must be retested periodically.Improper use, filling, storage or disposal of all air cylinders may result in death, personal injury and/or propertydamage.Always keep cylinders out of reach from children or any inexperienced person(s).Only properly trained personnel in accordance with CGA Pamphlets P.1 and G-6.3 must fill all air cylinders.Pamphlets are available from the Compressed Gas Association or www.CGANET.com.Never alter the cylinder in any way.DO NOT expose pressurized cylinders to temperatures in excess of 130 F (54 C).Cylinders heated to an excess of 250 F (121 C) must be condemned or requalified in accordance with testdefined in CFR-49.The valve should NEVER be detached from the canister. Please seek immediate assistance from a trainedairsmith should this occur.Any tank packed with the product is intended for paintball use only.Confirm that there is an attached urethane O-ring on the CO2 / Compressed Air tank valve before attachingthe tank to the marker. The tank will leak air as soon as it is secured to the marker, if the O-ring is missing fromthe valve.A urethane O-ring is highly recommended before attaching any air supply to the marker.NEVER over pressurize a CO2 / Compressed Air cylinder.Avoid any direct skin exposure to the escaping gas, when installing or removing any air supply.Never expose cylinders to corrosive materials or clean with any caustic cleaners.With a firm grip holding the CO2 / Compressed Air Tank remove the cylinder by hand turn counter-clockwise untilit comes out of the C/A adapter. HELPFUL TIP: After firing the marker, you should ALWAYS remove the CO2 /Compressed Air Tank before storing. When the tank is being removed, excess air will release from the C/A adapter.CAUTION: Never expose any skin to the C/A adapters bleed hole when removing the tank. This is to avoid the risk ofgetting skin burn from the escaping GAS.IMPORTANT: You should never need to use any hand tool to detach a CO2 / Compressed Air Tank from the C/Aadapter. If you cannot remove a tank by hand please see a certified airsmith for assistance.PROPER USE OF YOUR BARREL BLOCKING DEVICEA Barrel Blocking Device or “BBD” is an essential part of your paintball safety equipment. The Barrel BlockingDevice is designed to stop a paintball from exiting a paintball marker accidentally. Improper use of the BarrelBlocking Device will render this device useless.BARREL SOCK/BAG TYPE DEVICEPlace the bag/sock part of the Barrel Blocking Device over the end of your barrel and wrap the elastic cord aroundthe back end of your marker.Adjust the length of the elastic cord to make sure your Barrel Blocking Device fits securely over your markers barrel.NOTE: If the elastic cord is too long you can tie a couple of knots around the cord to shorten its length.BARREL PLUG TYPE DEVICEInsert the barrel plug securely into the end of your markers barrel before proceeding to load paintballs and screwingin your tank to your marker.The barrel plug should fit firmly into the barrel with a significant amount of resistance. NOTE: The barrel plug shouldnot be easy to remove and always inspect the O-rings to make sure they are not worn or cut.Remove the Barrel Blocking Device only when you are getting ready to begin play or have been instructed to do soby a field safety official.Always keep your Barrel Blocking Device on your marker after you have finished playing. Keep it in place even afteryou have emptied all paintballs and removed your air tank from your paintball marker.WARNINGInspect your Barrel Blocking Device regularly for wear and any tear if it is worn, replace it immediately.Always have your Barrel Blocking Device in place on your markers barrel to insure safety and prevent accidents thatmay cause permanent injury or even death.
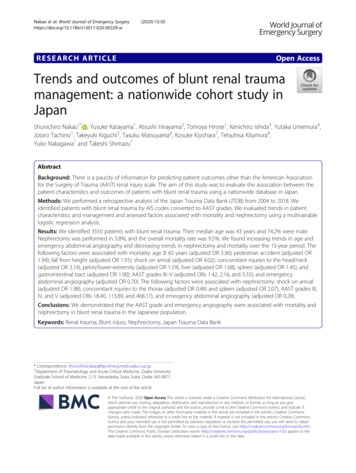
EnglishBATTERY INSTALLATIONCHARGING INSTRUCTIONSSpyder 9.6volt Battery (US LED) optional accessoryTo charge a Spyder 9.6 NiMH battery, the circuit board must be in the OFF position. Spyder batteries (JE1015) are notfully charged when purchased. Using the supplied Spyder LED A/C Charger (JE1029), plug the charger into the chargerport located at the rear of the trigger frame. For a complete charge, Kingman recommends a charging time of 6-8 hours.SCR002WRH002GRP005STEP 1 Plug the Spyder LED A/C charger into a power outlet.STEP 2 Connect the Spyder A/C charger cord to the rear of the markers trigger frame’s charging port.STEP 3 The LED indicator on the Spyder LED A/C charger will display RED when the battery is charging.STEP 4 The LED indicator on the Spyder LED A/C charger will display GREEN when the battery is fully charged.STEP 5 Unplug the Spyder LED A/C charger cord from the rear of the markers trigger frame’s charging port aftercharging.STEP 6 Remove the Spyder LED A/C charger from the power outlet.IMPORTANT: Never charge the battery for over 24 hours, as you will risk damaging the battery and/or electronics.HELPFUL TIP: It is recommended that the battery be charged prior to use in order to ensure maximum performance,especially if the battery has not been used in over a week. NOTE: A fully charged Spyder battery will last about5000-6000 shots, depending on your firing methods or firing mode in use. Under normal use and chargingconditions the expected life of the Spyder battery is approximately 700-1000 charging cycles.SCR002To avoid any risks of having the Battery explode or the Circuit Board burned: charge only Spyder 9.6volt NiMHBatteries in Spyder electronic frames.Part Names and Numbers describe in this section:Dual Texture Grip Panel (#GRP005)M4 x 8 Screw (A) (#SCR002)Battery Harness (#WRH002)IMPORTANT DO NOT attempt to recharge any Alkaline or any other type of battery in the Spyder electronic frame. DO NOT try to recharge batteries that are rusted, corroded, damaged or leaking. FAILURE to follow any of the instructions will VOID ALL WARRANTIES AND LIABILTIES
PILOT w/Eye PARTS LIST 15 PILOT w/Eye SCHEMATIC 16 WARRANTY STATEMENT 17.68 Caliber Electronic Paintball Marker English. 1 2 IMPORTANT SAFETY GUIDELINES WARNING This paintball marker is NOT a toy. It can cause serious injury or death. Kingman recommends that the customer be at least 18 years of age to purchase this product. Read this manual and air tank warnings before using