Transcription
Basic directions for working with daily OPAC log files using Microsoft Access.To work with the daily OPAC log files, your computer needs to have both Microsoft Access and software tool forunzipping .gz files, such as 7-zip for Windows computers.Downloading, Saving, and Unzipping OPAC log files1. Visit https://www.carli.illinois.edu/logs/ and choose which log file you wish to download to your computer. Notethat there are both VuFind and WebVoyage log files available for each date; the data from each OPAC isformatted differently (and needs different queries applied to interpret them).2. Click on the file name for the log; a window should open prompting you to Open or Save the file. Choose to Savethe file, and click OK. Browse to the location where you’d like to save the file on your computer. Your setup may vary, but Google Chrome may automatically save the file when selected to the defaultdownload location on your computer, without prompting.3. You now need to unzip the .gz file. If using 7-zip, right click on the file, and select 7-zip from the menu, and then “Extract Here” to unzip thefile in the same location on your computer where the .gz file was saved. If you are using a different program, follow its direction for unzipping files.4. It may take several minutes for the file to extract; the files are VERY large.5. The extracted file will be named without a file extension; the log “date” will appear to be the extension. For example: access log.20170123Right click on the file, and choose to rename it. Add the file extension .txt at the end of the name and removethe period before the date. For example: VuFindlog20170123.txt or WebVoyagelog20170123.txtYou will receive the error message, “If you change a file name extension, the file might become unusable. Areyou sure you want to change it?” Choose Yes. The file is now ready to import into Microsoft Access.6. Create a new, blank desktop database. Save it to your computer with a name that designates the log file’s date.You can import both a WebVoyage and a VuFind log file into the same desktop database, but you will need tocreate separate tables for importing each set of data, and query them separately. (these directions follow).7. Close the default Table 1 that is created with your database; you do not need it. Once you close it, it willdisappear.Note that the maximum Microsoft Access database size is 2G; files larger than 2G become unusable.You will not be able to import/save multiple days’ worth of full log files into the same database at the same time.Since the log files are large, you have a few options:1) Create a separate database file for each day you wish to investigate; save that day’s log files (both VuFind andWebVoyage) into the date-named database file.2) Work with one day’s log files, export all needed data into Excel (or other format), delete the log file tables fromAccess and start again with new imported log files.3) Use one database file to use for your data importing and cleanup work, and a second database forquerying/analysis. You’ll then use Access’s data import/export functionality to transfer the cleaned data (limitedto your library’s transactions) from the first database into the second database, so that you can reuse the firstdatabase for importing/cleaning a new set of logs.Please let us know any questions about these options.
Importing VuFind Logs into Microsoft Access1. To import, select the External Data tab Text File option.2. Browse for the location where the VuFind log file is saved on your computer, make sure the radio button is setto “Import the source data into a new table in the current database” and then click OK.3. The Import Text Wizard will open.4. On the first screen, select “Delimited” and click Next.5. On the second screen, switch the delimiter character to “Space” and click Next.6. The third screen should list 11 fields. Scroll to see them all.7.8.9.10.Select each field in turn, and adjust it as such: Field1: rename field AccessMethod Field 2: check the “Do not import field (Skip)” checkbox Field 3: check the “Do not import field (Skip)” checkbox Field 4: check the “Do not import field (Skip)” checkbox Field 5: rename field DateTime Field 6: check the “Do not import field (Skip)” checkbox Field 7: rename field SearchURL, and set the Data Type as “Long Text” (or “Memo”) Field 8: check the “Do not import field (Skip)” checkbox Field 9: check the “Do not import field (Skip)” checkbox Field 10: check the “Do not import field (Skip)” checkbox Field 11: rename field BrowserClick next.The fourth screen, select “Let Access add primary key”, click Next.Enter an appropriate table name in the “Import to Table” box. Example table name would beVuFindLogYYYYMMDD, or simply VuFindLog if you’re reusing your database and queries. Click Finish. Note that it may take several (10 ) minutes for the data to import into Access. An average file containsover a million data rows.A confirmation screen will notify you that your data was imported.You may receive an additional “Import Errors” table that contains a number of “Unparsable Records”. You candelete this table.
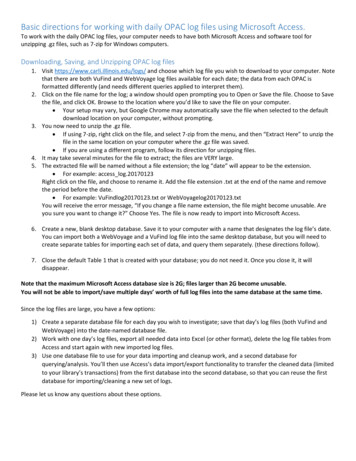
Narrowing the VuFind Log dataset for only your library’s results (deleting the other library’s data)When VuFind knows the patron’s library affiliation, the SearchURL field will contain the letters vf-xxx, where xxx is yourlibrary’s 3 letter code in lowercase. If desired, you can delete the results that are not specific to your library by using textfilters. Steps below.1. Open your VuFind Access Log table.2. For the SearchURL column, left-click the down arrow once, and wait for the menu to open (it may take a fewminutes).3. Select “Text Filters” from the menu.4. Select “Does Not Contain” from the Text Filters menu.5. The Custom Filter window will open, with the prompt, “SearchURL does not contain”6. Enter the text vf-xxx, where the xxx is replaced with your library’s 3 letter code in lowercase.Example for Kishwaukee College, where their three letter code is KIS:
7. It may take several minutes for Access to filter your results. Scan through the results to double-check that yourlibrary’s data is not included.8. Click the “Last Result” button, to view the last row in the dataset. This may take several minutes.9. Click to highlight the last row in the filtered data set.10. With the last row selected, use the scroll bar on the right side of the table view to scroll up to the first row in thedata set. Hold down the Shift key while clicking to select the first row of data. All rows in this filtered view arenow selected. While still holding down the Shift key, right click on the data. Select Delete Record to delete theserows.11. After a moment, Access will give the warning: “You won’t be able to undo this Delete operation.” Click Yes.It will take several minutes for the data to be deleted. This is a good time to get a snack and a fresh cup ofcoffee/tea. (If your computer freezes up too much when deleting this many records simultaneously, you canbreak the deletion set into smaller chunks.)12. With the records not matching your filter deleted, again click the down arrow for the SearchURL column.13. Select “Clear filter from SearchURL”.14. The remaining results should all include vf-xxx, designating action by someone either searching directly in yourlocal VuFind OPAC, or in the I-Share catalog after beginning with your local catalog.15. Go to File tab, select Save to retain your changes.
Importing WebVoyage Logs into Microsoft Access1. To import, select the External Data tab Text File option.2. Browse for the location where the WebVoyage log file is saved on your computer, make sure the radio button isset to “Import the source data into a new table in the current database” and then click OK.3. The Import Text Wizard will open.4. On the first screen, select “Delimited” and click Next.5. On the second screen, switch the delimiter character to “Space” and click Next.6. The third screen should list up to 30 fields (depending on how the Browser information is parsed). Scroll to seethem all.Select each field in turn, and adjust it as such: Field1: rename field AccessMethod Field 2: check the “Do not import field (Skip)” checkbox Field 3: check the “Do not import field (Skip)” checkbox Field 4: check the “Do not import field (Skip)” checkbox Field 5: check the “Do not import field (Skip)” checkbox Field 6: rename field DateTime Field 7: check the “Do not import field (Skip)” checkbox Field 8: check the “Do not import field (Skip)” checkbox Field 9: rename field SearchURL, and set the Data Type as “Long Text” Field 10: check the “Do not import field (Skip)” checkbox Field 11: check the “Do not import field (Skip)” checkbox Field 12: check the “Do not import field (Skip)” checkbox Field 13: check the “Do not import field (Skip)” checkbox Field 14: rename field Browser Fields 15-30: If you wish to keep this additional web browser data, which was parsed into separate fieldsfor your queries, you can rename each field with an incrementing Browser number. For example, Field15 Browser2, Field 16 Browser3, Field 17 Browser4, etc. If you do not need the Browser data, youcan check the “Do not import field (Skip)” checkboxes for them.Click next.7. The fourth screen, select “Let Access add primary key”, click Next.
8. Enter an appropriate table name in the “Import to Table” box. Example table name would beWebVoyageLogYYYYMMDD, or simply WebVoyageLog if you’re reusing your database and queries. Click Finish. Note that it may take several (10 ) minutes for the data to import into Access. An average file contains 200,000 data rows.9. You may receive an additional Import Errors table that contains a number of “Unparsable Records”. You candelete this table.
Narrowing the WebVoyage Log dataset for only your library’s results (deleting the other library’s data)When WebVoyage knows the patron’s library affiliation, the SearchURL field will contain the letters /xxx, where xxx isyour library’s 3 letter code in lowercase. If desired, you can delete the results that are not specific to your library byusing text filters. Steps below.1. Open your WebVoyage Access Log table.2. For the SearchURL column, left-click the down arrow once, and wait for the menu to open (it may take a fewminutes).3. Select “Text Filters” from the menu.4. Select “Does Not Contain” from the Text Filters menu.5. The Custom Filter window will open, with the prompt, “SearchURL does not contain”
6. Enter the text /xxx, where the xxx is replaced with your library’s 3 letter code in lowercase.Example for Kishwaukee College, where their three letter code is KIS:7. It may take several minutes for Access to filter your results. Scan through the results to double-check that yourlibrary’s data is not included.8. Click the “Last Result” button, to view the last row in the dataset. This may take several minutes.9. Click to highlight the last row in the filtered data set.10. With the last row selected, use the scroll bar on the right side of the table view to scroll up to the first row in thedata set. Hold down the Shift key while clicking to select the first row of data. All rows in this filtered view arenow selected. While still holding down the Shift key, right click on the data. Select Delete Record to delete theserows.11. After a moment, Access will give the warning: “You won’t be able to undo this Delete operation.” Click Yes.It will take several minutes for the data to be deleted. This is a good time to get a snack and a fresh cup ofcoffee/tea. (If your computer freezes up too much when deleting this many records simultaneously, you canbreak the deletion set into smaller chunks.)12. With the records not matching your filter deleted, again click the down arrow for the SearchURL column.13. Select “Clear filter from SearchURL”.14. The remaining results should all include vf-xxx, designating action by someone either searching directly in yourlocal WebVoyage OPAC.15. Go to File tab, select Save to retain your changes.
Queries for finding patron searches.Since the VuFind and WebVoyage data is formatted differently, a query criteria to limit to “searches” is below for bothdatasets. Without a limiting query, the data includes such other actions as calls for images, CSS formatting, and exitcommands.Please be aware that with WebVoyage searches, at this time, I’m not sure how to determine whether each row is a newsearch, or may be a patron clicking through multiple pages of results from a single search. With VuFind searches, the(And Not Like "*&page *") portion of the query criteria listed below helps remove the extra page views.VuFind Query criteria for the SearchURL field:(Like "*Search/Home?lookfor*" Or Like "*Search/Home?type*" Or (Like "*Search/Home?start over 1" & "&" &"lookfor*")) And Not Like "*&page *"WebVoyage Query criteria for the SearchURL field:(Like "*/cgi-bin/Pwebrecon.cgi?*") And (Not Like ("*cgi-bin/Pwebrecon.cgi?DB local" & "&" & "PAGE*")) And (Not Like"*cgi-bin/Pwebrecon.cgi?PAGE*")
Working with the data in Excel, initial tipsTip 1) If you export the VuFind results into Excel, and you set up your query output (or re-arrange within the Excel file)so that the SearchURL column is the column on the far right, you can use the Excel Data tab Text to Columnsfunctionality using the ampersand (&) as a delimiter to split the search terms and other applied criteria into separatecolumns.From this:To this:
Tip 2) For WebVoyage SearchURL, follow the directions for Tip 1, still using ampersand (&) as the delimiter.From this:To this:Please note that after tips 1 & 2 on using the “Text to Columns functionality”, you’ll need to analyze and sort yourdata before performing additional cleanup steps. For example, while the patron’s keyword search terms may end upin column B after applying “Text to Columns” using the ampersand delimiter to the SearchURL column, the ISBNnumber search data may end up in column D, while OCLC numbers may end up in column E, etc The column-sortresults will be different between VuFind logs and WebVoyage logs as well.
Tip 3) You can move the important search terms (keyword, subject, OCLC, ISBN, etc) data to the far right column again,and re-perform the Text To Columns using the equal sign ( ) as the delimiter. This may involve some manual analysis, asexplained above- moving the data from keywords, OCLC numbers, ISBN numbers, etc from different original colulmns.From this:To this:
Tip 4) You can use Find & Replace in Excel to clean up symbols that aren’t helpful to eye-reading.HTML URL encoding: https://www.w3schools.com/tags/ref urlencode.aspReplace plus sign ( ) with spaceReplace %20 with spaceReplace %27s with apostrophe s (‘s)From this:To this:Remember, data can be re-imported into Access to take advantage of additional queries, and/or the groupingfunctions.
Basic directions for working with daily OPAC log files using Microsoft Access. To work with the daily OPAC log files, your computer needs to have both Microsoft Access and software toolfor unzipping .gz files, such as 7-zip for Windows computers. Downloading, Saving, and Unzipping OPAC log files 1.